Learning how to carve a turkey is the final skill between you and a Thanksgiving table that looks as good as it tastes. After hours of brining, roasting, and basting, the carving board is where beautiful birds become beautiful platters — or become a shredded pile that no longer resembles the gorgeous roast that left the oven. The difference is not talent; it is sequence. Carving follows a specific order (legs first, then breast), uses long smooth strokes instead of sawing, and respects the bird’s anatomy rather than fighting it.
This step-by-step guide covers the tools you actually need, how to set up your station, the complete carving sequence with anatomical landmarks, how to handle each part (drumsticks, thighs, wings, breast), professional presentation and platter tips, and fixes for common carving disasters. It pairs with every cooking method in our collection — whether you roasted classic-style (roast turkey guide), spatchcocked (spatchcock recipe), or fried (deep-fry guide), the carving sequence is the same. Let us break down the bird properly.
Before You Cut: Tools and Setup
The Right Knife
You need one good knife, not a drawer full of options. A long, sharp carving or slicing knife — 10 to 12 inches, with a thin blade — is ideal: the length lets you slice breast meat in single smooth strokes, and the thin profile glides rather than tears. A chef’s knife works in a pinch but its shorter, thicker blade makes even slices harder. An electric knife, beloved of many traditionalists, genuinely excels at producing uniform thin slices with minimal effort — if your family owns one, Thanksgiving is its moment. Whatever you use, sharpen it before the holiday. A dull knife shreds meat, slips dangerously, and turns carving into a wrestling match; a sharp knife makes you look skilled regardless of experience.
Supporting Tools
- Carving fork: A long-tined fork for steadying the bird without piercing the meat repeatedly (every puncture leaks juice).
- Large cutting board with a juice groove: Big enough to hold the whole bird plus accumulating slices. The groove catches runoff that would otherwise flood your counter.
- Kitchen shears: For snipping joints, trimming the backbone area, and cutting twine.
- Warm serving platter: Rinse it with hot water and dry it, or warm it in a low oven. Cold platters chill sliced meat fast.
- Foil and paper towels: For tenting and for wiping the knife between cuts (clean blade = clean slices).
- A separate board or plate for bones: Keep the carving board clear as you work.
Rest the Bird First — Non-Negotiable
Carving too early is the most common carving mistake, and it happens before the knife even moves. A turkey straight from the oven has its juices driven toward the surface by heat; cut now and they flood the board. Rest the bird 20 to 30 minutes tented loosely with foil: juices redistribute through the meat, the internal temperature coasts up about 5°F to its final safe 165°F (74°C), and the meat firms slightly for cleaner slicing. Use the rest to warm your platter, finish the gravy, and pour yourself something — you have earned it.
The Carving Sequence: Legs First
Always remove the legs before touching the breast. The legs block access to the breast’s base, and detaching them first opens up the bird’s geometry for everything that follows. Position the rested turkey breast-side up, legs facing you.
- Steady the bird with the carving fork pressed into the breast — firm pressure, minimal piercing.
- Slice through the skin between the leg and breast. Pull the drumstick gently away from the body with your fork (or a clean hand on a paper towel) to expose the joint connecting thigh to body.
- Cut through the hip joint. Angle your knife into the visible joint and cut through it — you will feel the knife find the gap between the bones. Do not saw through bone; the joint separates cleanly if you find it. A gentle pop as the joint releases tells you it is done.
- Repeat on the other side. Set each leg quarter (drumstick + thigh attached) aside on your platter or board.
- Separate drumstick from thigh: Lay the leg quarter skin-side down, find the joint between drumstick and thigh (bend it to see where it hinges), and cut through. You now have four pieces: two drumsticks, two thighs.
- Slice the thigh meat: Thighs have bones running through them at angles. The easiest approach: cut the meat away from the bone in chunks, then slice those chunks across the grain. Alternatively, locate the thigh bone, slice along one side of it, flip, and slice along the other — then cut the freed meat into slices. Dark meat is forgiving; neatness matters less here because it is naturally juicy.
- Drumsticks: Serve whole for the traditionalists (many guests love a whole drumstick), or slice the meat off the bone parallel to it for easier eating. Remove the tough tendons if slicing.
Removing the Wings
Pull each wing away from the body to expose the shoulder joint, then cut through it just as you did the legs. Wings are mostly skin and bone with modest meat — serve them whole as cook’s treats or arrange them on the platter for abundance. They are excellent the next day, too.
Carving the Breast: The Main Event
With legs and wings removed, the breast sits fully exposed — this is where technique shows. The goal: long, even, intact slices cut across the grain.
- Find the keel bone: Run your finger down the center of the breast to locate the breastbone ridge dividing left from right. You will carve one side completely, then the other.
- Make the base cut: Starting at the front (neck end) of one breast half, cut horizontally along the base where the breast meets the ribcage, angling slightly upward — a long cut parallel to the board, about 1 inch above the bone. This frees the bottom of each slice as you cut down.
- Slice downward in smooth strokes: Beginning at the outer edge near the keel bone, cut downward through the breast in slices 1/4 to 1/2 inch thick, using the full length of the blade in long, smooth strokes. Let the knife do the work — pressing down shreds; gliding slices. Each slice should fall free thanks to your base cut.
- Work from center outward: Continue slicing toward the outer edge of the breast half. Keep slices uniform; consistent thickness looks professional and serves evenly.
- Release the breast half (optional pro move): Alternatively, cut the entire breast half off the ribcage in one piece (slice along the keel bone, then sweep the knife under the breast along the ribs), lay it flat, and slice across the grain. This restaurant technique produces the most uniform slices of all — and it is easier than it sounds.
- Repeat on the second side.
Finding the Grain
Turkey breast fibers run roughly front-to-back along the bird. Slicing “across the grain” means your knife cuts perpendicular to those fibers — for a standard breast carve, your downward slices naturally cross the grain, which is why they stay tender. If slices seem stringy, you are cutting with the grain; rotate your angle 90 degrees. The bone-in breast roast carves identically, just on a smaller scale.
Presentation: Building a Platter Worth Photographing
The Arrangement
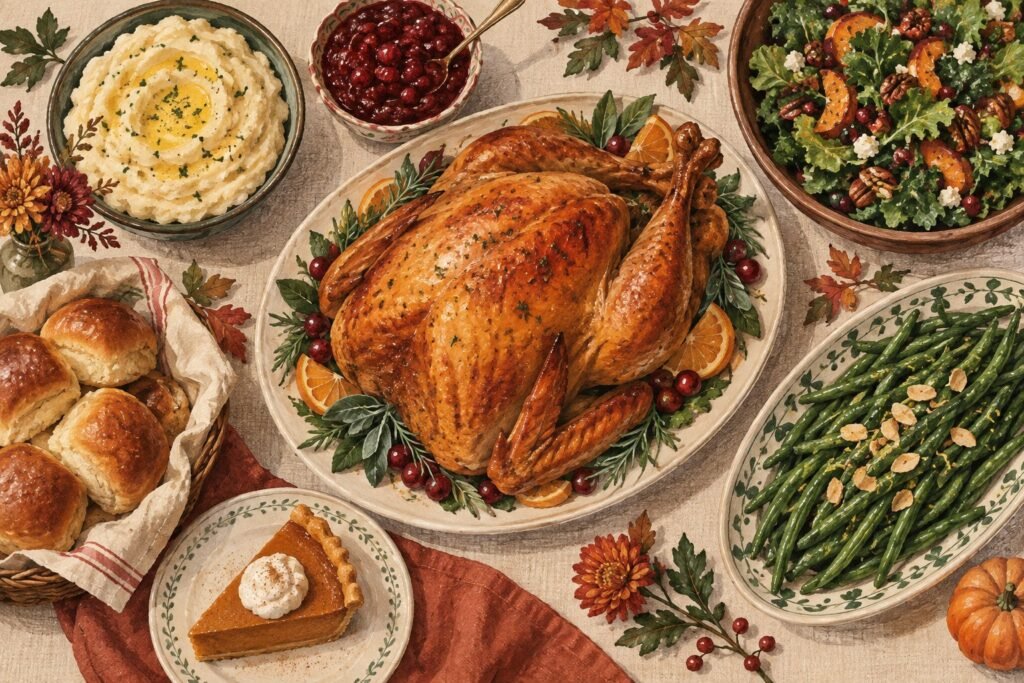
Do not pile — compose. Lay breast slices overlapping in shingled rows down the center of the warm platter, skin-side up so the golden edges show. Arrange thigh meat and drumsticks at the ends, wings tucked at the corners. The platter should look abundant but organized, with the best slices (even, intact, golden-edged) on top where eyes land first.
Garnish Simply
Fresh herbs (thyme sprigs, rosemary, sage leaves), clusters of grapes, sliced figs, kumquats, or pomegranate arils add color without competing. A few roasted vegetables from the pan — caramelized onions, whole roasted garlic heads — look intentional and taste great. Avoid anything that wilts or weeps onto the meat.
The Gravy Question
Serve gravy in a warmed boat or pitcher alongside — never poured over the platter. Guests control their own ratio, the crispy skin stays crisp, and the platter photographs beautifully. Spoon a little of the carving board’s collected juices over the sliced breast just before serving; those juices are pure flavor.
Carving at the Table vs. in the Kitchen
Tableside carving is theater — wonderful if you are confident, stressful if you are not. Kitchen carving is calmer, cleaner, and produces a better platter, since you work with space and good light. Honest recommendation: carve in the kitchen, present the composed platter at the table with flourish. You get the applause without the performance anxiety, and the meat stays warmer because you worked faster.
Carving for Different Cooking Methods
Spatchcocked Turkey
The easiest carve of all: the flattened bird’s legs pull away with almost no knife work, and each breast half lifts off the flat ribcage cleanly for slicing. See our spatchcock recipe — if carving intimidates you, spatchcocking is the cheat code.
Smoked Turkey
Same sequence, one note: smoked meat’s exterior bark can crumble under a dull knife, so sharpness matters even more. Slice slightly thicker (1/2 inch) to keep the bark attached to each slice. Our smoked turkey breast guide covers the cook.
Deep-Fried Turkey
Rest fried turkey the full 30 minutes — the crust sets as it cools slightly, and cutting too early shatters it messily. Use a gentle sawing motion through the crisp skin, then smooth strokes through the meat. Details in our deep-fry guide.
Turkey Roulade
Remove all twine, then slice the roll crosswise into 1-inch rounds with a sharp thin knife, wiping the blade between cuts. The spiral cross-section is the presentation — arrange rounds slightly overlapping. Full technique in our turkey roulade guide.
Troubleshooting Carving Problems
The Meat Is Shredding Instead of Slicing
Three possible causes: the knife is dull (most common), you are sawing instead of stroking, or the bird did not rest long enough. Sharpen or switch knives, use long gliding strokes with minimal downward pressure, and if the bird rested less than 15 minutes, tent it and wait — it is not too late.
You Cannot Find the Leg Joint
Wiggle the leg to feel where it hinges — the joint is where movement happens. Cut there, not where you think it should be. If you hit bone, you are slightly off; shift the blade a fraction and try again. Shears can snip through stubborn connective tissue around the joint.
Breast Slices Are Uneven
Slow down and use the full blade length. Mark your thickness on the first slice and match it. The remove-the-whole-breast-half technique (above) eliminates this problem almost entirely — try it on the second side if the first side went raggedly.
The Bird Is Dry Despite Good Carving
Carving cannot fix overcooking, but it can hide it: slice thin (1/4 inch), shingle the slices, and spoon warm gravy or board juices over just before serving. Thin slices with gravy read as juicy. Next year, pull at 160°F (71°C) and trust the rest — see our roast guide for temperature discipline.
Juice Flooded the Board
The bird was cut too soon. Tent what remains and let it rest 10 more minutes before continuing — and pour the collected juice into your gravy or drizzle it over the platter. Nothing is wasted.
After Carving: Bones, Leftovers, and Cleanup
Strip remaining meat from the carcass within two hours and refrigerate in shallow containers (3 to 4 days). The carcass itself is liquid gold: simmer it with the neck, vegetable trimmings, and herbs for 3 to 4 hours into a stock that makes soup, risotto, and next-day gravy extraordinary. Freeze stock in portions for up to 6 months. Wipe knives clean and dry before storing — acidic turkey juices pit blades left dirty. For leftover inspiration beyond sandwiches, our Thanksgiving menu guide includes leftover strategies worth planning for.
Carving Knife Buyer’s Guide
If this guide has convinced you to upgrade from the chef’s knife, here is what to look for:
Carving/Slicing Knife (The Right Tool)
Look for a 10- to 12-inch blade, thin and slightly flexible, with a pointed or round tip — the classic carving profile. A Granton edge (the small hollows ground along the blade) reduces drag and keeps slices from sticking. Expect to pay $40–$100 for a quality knife from a reputable maker; it will also handle roasts, hams, and briskets year-round. Hone it with a steel before each use and have it properly sharpened once or twice a year.
Electric Knife (The Traditionalist’s Secret)
Do not dismiss it as a gadget — electric knives produce the most uniform thin slices of any option, with almost no skill required. The reciprocating blades glide through breast meat without tearing, making them ideal for nervous first-time carvers. Downsides: they are noisy, less precise around joints, and useless for anything but slicing. If your family already owns one, Thanksgiving is its championship game.
What Not to Buy
Serrated bread knives tear poultry rather than slicing it — the sawing action shreds the grain. Cleavers are for bones, not carving; you should never need to chop through bone if you find the joints. And novelty “turkey carver” sets with short blades force you into short strokes — the exact motion that produces ragged slices. One long, sharp, thin blade beats a 12-piece set every time.
Speed Carving for a Crowd
When twenty hungry people are waiting, efficiency matters. Prep the station before the bird arrives: warm platter ready, gravy boat filled, garnishes within reach, bone bowl positioned. Remove both breast halves whole (the restaurant technique above) — slicing two flat breast halves on the board is dramatically faster than slicing on the bone. Delegate: have someone else arrange the platter while you slice, and someone else carry it to the table. Slice dark meat rustic: thighs do not need pretty slices; chunk them and pile them at the platter’s ends while the breast gets the beauty treatment. A practiced carver breaks down a 16-pound bird in under 10 minutes — and with the breast-half technique, even a beginner manages 15.
Carving Smaller Birds and Breasts
A bone-in turkey breast carves in two minutes: rest, then slice across the grain from the thick end, running the knife along the ribcage when you reach bone. A turkey roulade slices into 1-inch rounds after the twine comes off — wipe the blade between cuts for clean spirals. Cornish hens split straight down the breastbone into halves. The universal principles never change: rest first, sharp knife, slice across the grain, warm platter. Master the sequence on a small roast and the whole bird holds no fear.
Caring for Your Carving Knife
A good carving knife lasts decades with basic care. Hand-wash and dry immediately — dishwasher heat and detergent dull edges and can crack handles. Hone before each use with a honing steel: 5–6 strokes per side at roughly 20 degrees realigns the edge. Sharpen when honing stops helping — if the knife slides across a tomato skin instead of biting, it needs stones or a professional sharpening, not more steeling. Store in a sheath, block, or magnetic strip — never loose in a drawer where the edge bangs against other tools. And never use it on bones, frozen food, or as a pry bar; the thin blade that glides through turkey is not built for abuse. Treat it well and it will carve every Thanksgiving for the rest of your life.
Plating for Photos: Quick Food-Styling Tips
If the carved platter is destined for the family photo (and it is), a few styling tricks help. Shoot in natural light — carry the platter near a window rather than relying on yellow overhead bulbs. Garnish with intent: odd numbers of herb sprigs, a deliberate swoosh of cranberry sauce in a small bowl beside the platter, and a few roasted vegetables with caramelized edges read as abundant, not cluttered. Brush the slices lightly with warm melted butter or collected board juices just before the photo — the sheen makes the meat look juicy and catches the light. Clear the background of dish soap, paper towels, and the thermometer; a simple linen napkin under the platter elevates everything. Take the photo fast — you have about 5 minutes before the meat’s surface starts to look dry — then serve immediately while it is at its best.
In Pictures: Carving a Turkey
Great carving is half technique, half confidence: sharp knife, rested bird, legs first. The sequence, step by step, on the cutting board.
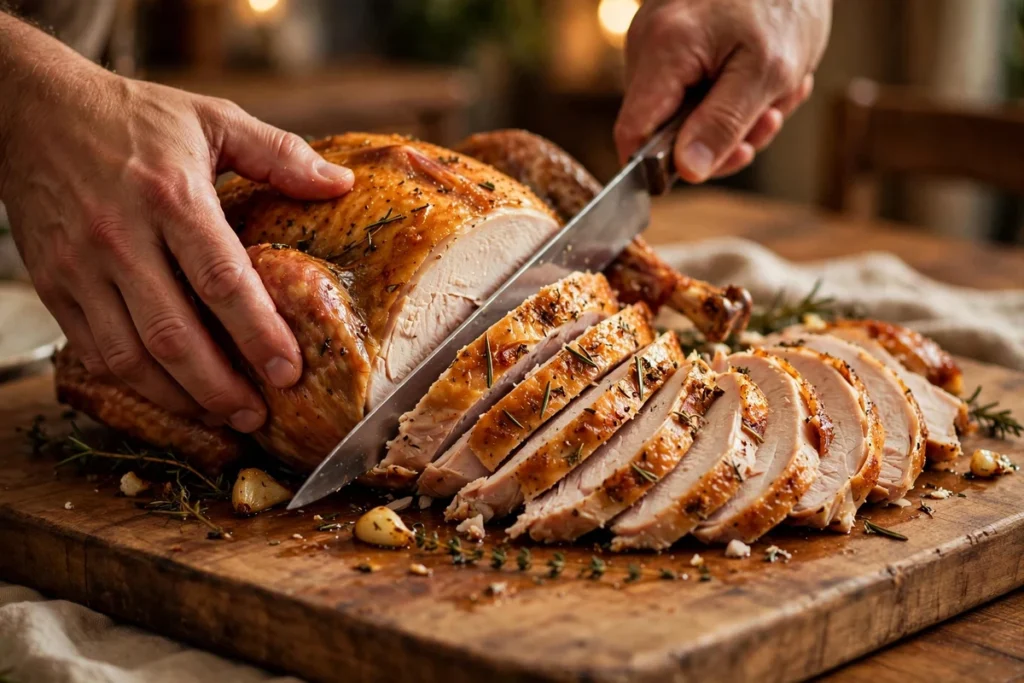
A rested roast turkey on a carving board with a chef’s knife, ready to be carved for the table.
Watch: Carving a Turkey
Cook’s Illustrated demonstrates their pro carving sequence — legs and wings off first, breast sliced off the bone on a bias, and the whole messy job done in the kitchen before plating.
At a Glance: Carving a Turkey
The carving sequence, from the guide.
| Step | What to do |
|---|---|
| Rest first — non-negotiable | Rest the bird about 45 minutes so it is cool enough to handle and juices redistribute |
| The right knife | A long, sharp chef’s knife does the job; supporting tools include a carving fork and a big board with a groove |
| Legs first | Slice through the skin between breast and leg, pop the joint, and cut through |
| Wings next | Pull each wing away from the breast until the joint shows, then cut through |
| The breast | Run the knife along the breastbone, remove each breast whole, then slice crosswise on a bias |
| Serve smart | Carve in the kitchen and transfer to a pretty platter — it is a messy job |
Frequently Asked Questions
How long should a turkey rest before carving?
Twenty to 30 minutes, tented loosely with foil. This redistributes juices, lets carryover cooking finish the job (breast pulled at 160°F coasts to the safe 165°F/74°C), and firms the meat for cleaner slices. Do not skip or shorten it.
What is the correct order to carve a turkey?
Legs first (separate drumsticks from thighs, slice thigh meat), then wings, then breast (one side at a time, sliced across the grain). Removing the legs first opens access to the breast and follows the bird’s natural joints.
What knife is best for carving turkey?
A long (10–12 inch), thin, very sharp carving or slicing knife. An electric knife also works excellently for uniform slices. Whatever you choose, sharpen it before the holiday — sharpness matters more than knife style.
Should I carve the turkey at the table?
Only if you enjoy performance. Kitchen carving is faster, cleaner, better lit, and produces a more beautiful platter. Carve in the kitchen, present the composed platter at the table — you get the applause either way.
How do I keep carved turkey warm before serving?
Arrange slices on a warmed platter, tent loosely with foil, and hold in a warm (not hot) spot for up to 20 minutes. Tenting tightly or holding longer steams the crispy skin soft. Time your carving so the platter hits the table promptly.
How thick should turkey slices be?
One-quarter to one-half inch for breast meat — thin enough to be tender, thick enough to hold together. Thinner slices also rescue slightly overcooked breast, since they take gravy beautifully.
Conclusion
Carving a turkey is anatomy plus patience: rest 20 to 30 minutes, remove the legs at the joints, slice the breast across the grain in smooth strokes with a sharp knife, and compose the platter instead of piling it. That is the entire skill, and it is learnable in a single Thanksgiving. The bird you worked all day on deserves a finale as good as its preparation — sharp knife, warm platter, confident strokes, and a table full of people about to be very happy.