If you are researching how to deep fry a turkey, you have probably heard the two things everyone says about it: it produces the juiciest, crispiest-skinned bird of any cooking method, and it demands complete respect for the process. Both are true. Deep frying cooks a turkey in under an hour by submerging it in hot oil, and the result — shattering golden skin over remarkably moist meat — converts skeptics every Thanksgiving. But hot oil and an open flame are unforgiving of shortcuts, so this guide puts safety first and technique second, in that order.
This is a complete, step-by-step walkthrough for first-timers and a refresher for experienced fryers. You will learn which turkeys fry well (and which do not), how much oil you actually need, how to measure it without guessing, the exact temperatures and timing per pound, how to lower the bird without a boilover, and how to troubleshoot the most common problems. Follow the safety rules here and deep frying is no more dangerous than grilling — skip them, and you become a cautionary tale. Let us do this the right way.
Why Deep-Fried Turkey Tastes So Good
To understand why fried turkey converts even lifelong oven-roasters, it helps to know what hot oil does to a bird. An oven roasts with hot air, which transfers heat relatively slowly — that is why a 14-pound turkey needs three-plus hours at 325°F (163°C). Oil transfers heat far more efficiently than air, so the turkey cooks in roughly 45 minutes, and that speed changes the eating experience in two important ways.
Speed Keeps the Meat Juicy
The longer a turkey spends in heat, the more moisture its muscle fibers squeeze out. A bird that roasts for four hours has hours to lose juices; a bird that fries for 45 minutes simply has less time to dry out. The intense heat also sets the proteins on the surface quickly, and while the old idea that this “seals in juices” is an oversimplification, the practical result is real: fried turkey breast — the part most prone to dryness — comes out noticeably moister than oven-roasted breast. The classic roast turkey method is wonderful, but if dry breast meat is your annual complaint, frying solves it better than almost any other technique.
Maximum Crispness, All Over
Submersion is the other advantage. In an oven, the parts of the turkey touching the roasting pan steam instead of crisping, and the underside never quite matches the top. In a fryer, every square inch of skin is in direct contact with 350°F (177°C) oil, so the entire bird emerges evenly golden and crackling. There is no pale bottom, no soggy patches — just uniform, deep-amber crispness. That textural contrast between the shattering skin and the juicy meat underneath is what people remember a year later.
Deep-Fryer Safety: The Rules That Matter Most
Every year, fire departments respond to Thanksgiving fryer fires, and nearly all of them trace back to the same handful of preventable mistakes. Read this section twice. Nothing in this guide matters more.
Only Ever Fry Outdoors, on a Flat Hard Surface
Turkey fryers use an open propane flame beneath a tall pot of oil. That combination belongs outdoors — never in a garage, under a carport, on a wooden deck, or inside any structure. Set the fryer on a level concrete or dirt surface at least 10 feet from your house, fences, trees, and anything flammable. Wind matters too: position the fryer where gusts will not blow the flame out sideways or tip the pot. If the ground is uneven, the pot of oil is a tipping hazard, so take the time to find truly flat ground. Many experienced fryers set the rig in the middle of a driveway — boring, flat, and far from anything that burns.
Never Fry a Frozen or Partially Frozen Turkey
This is the rule behind most fryer disasters. Water and 350°F oil are violent enemies: when ice crystals or trapped water hit hot oil, they flash to steam instantly, expanding to roughly 1,700 times their liquid volume. That eruption throws burning oil out of the pot and onto the open flame. Your turkey must be 100 percent thawed — not “mostly thawed,” not “thawed except the cavity.” Check by feeling inside both the main cavity and the neck cavity for any ice crystals, and confirm the bird is flexible rather than stiff. If you are unsure about timing, read our full guide on how long to thaw a turkey and start earlier than you think you need to. When in doubt, thaw another day.
Measure Your Oil Level Before You Heat Anything
Overfilled pots cause boilovers; underfilled pots leave the breast exposed. The foolproof method: place the thawed, unwrapped turkey in the cold, empty pot, fill with water until the bird is covered by about an inch, then remove the turkey and mark the water line. That line is your oil fill line — it accounts for the exact displacement of your specific bird in your specific pot. Dry the pot completely afterward (water left in the pot is the same hazard as a frozen bird). Never guess the oil level, and never fill past that mark once the oil is hot.
Dress for the Job and Keep People Back
Wear long sleeves, long pants, closed-toe shoes, and heat-resistant gloves — the long cuff kind, not thin kitchen mitts. Safety glasses are smart; a few spatters at 350°F can do real damage. Establish a kid-and-pet-free zone of at least 10 feet around the fryer and enforce it. Assign one sober adult to watch the fryer at all times while the burner is lit; this is not the moment to run inside for something you forgot. Most accidents happen during distraction, not during the planned steps.
Have the Right Fire Extinguisher Within Reach
Keep a multi-purpose dry-chemical (ABC) fire extinguisher or a Class K extinguisher right next to your setup — not in the garage, not “somewhere inside.” Never use water on an oil fire. Water sinks beneath burning oil, flashes to steam, and ejects flaming oil outward — it makes everything catastrophically worse. If a fire starts and the extinguisher does not knock it down immediately, step back and call emergency services. Also keep a lid or sheet pan nearby that can cover the pot to smother small flare-ups by cutting off oxygen.
Equipment Checklist
You do not need professional gear, but you do need the right gear. A dedicated turkey fryer kit — widely available at hardware and outdoor stores each fall — bundles most of this together, and it is the simplest option for a first attempt. If you are assembling your own setup, here is everything required:
- Turkey fryer pot with basket or lifting hook (30+ quart capacity): The pot must be tall enough to submerge the turkey with several inches of clearance. Most kits include a perforated basket or a sturdy hook/stand that lets you lower and lift the bird smoothly — this is not optional equipment.
- Outdoor propane burner with regulator: The burner that comes with fryer kits is sized for the job. Do not substitute a kitchen stove or an underpowered camp burner; you need sustained, controllable high output.
- Propane tank, full: A standard 20-pound tank is plenty, but start with a full one. Running out of fuel mid-fry with a half-cooked bird in cooling oil is a miserable situation.
- Deep-fry or candy thermometer (up to at least 400°F/204°C): Clip it to the pot so you can read oil temperature continuously. Guessing oil temperature is how turkeys burn outside and stay raw inside.
- Instant-read meat thermometer: The only reliable way to confirm doneness. Poultry must reach 165°F (74°C) in the thickest part of the breast and thigh, per USDA guidance — color and timing are not substitutes.
- Long-handled hook or tongs, heat-resistant gloves, and safety glasses: Your hands and face stay as far from the oil as possible at every step.
- Paper towels — lots of them: Surface moisture is the enemy. You will pat the turkey dry more than once.
- A rimmed sheet pan or large tray: For resting the cooked bird and catching drips during transport.
- Fire extinguisher (dry chemical) and a pot lid or sheet pan: As covered above — non-negotiable.
- A marinade injector (optional but recommended): Fried turkeys cook fast, so surface seasoning alone does not penetrate deeply. Injecting flavor the night before makes a noticeable difference — see our turkey injection marinade recipes for options built for the fryer.
Choosing the Right Turkey for Frying
Not every turkey belongs in a fryer. Size is the first filter: most home fryer kits safely handle birds between 8 and 14 pounds. Above 14 pounds, the bird may not submerge fully, the oil displacement gets risky, and the fryer basket struggles with the weight. If you are feeding a crowd that needs a 20-pounder, fry two smaller birds or roast the big one — do not force an oversized turkey into an undersized pot. A 12-pound turkey is the sweet spot for most kits: manageable to lower, fully submergible, and it feeds 8 to 10 people.
Fresh or fully thawed frozen both work. If buying frozen — and most of us do — the thawing timeline is the single most common planning failure. A 12-pound turkey needs about three days in the refrigerator (roughly 24 hours per 4 to 5 pounds). Build in a buffer day; a turkey that finishes thawing early simply waits safely in the fridge, while a turkey that is still icy on fry day ruins the plan. Our turkey thawing guide covers every method and timing in detail.
Skip pre-brined, kosher, or “enhanced” turkeys that already contain a salt solution — frying concentrates saltiness, and a bird that is 8 percent salt solution by weight can come out noticeably over-salted after a fast fry. Check the label: if it lists salt, broth, or sodium phosphate in the ingredients, choose a natural, minimally processed bird instead. Also remove the giblets and neck from both cavities before frying day (save them for turkey gravy from drippings — fried turkeys produce fewer drippings, but the neck and giblets still make excellent stock).
On the day, unwrap the turkey and pat it dry inside and out with paper towels, then pat it again. Then let it sit at room temperature for 30 to 45 minutes while you set up — this takes the deep chill off so the oil temperature drops less on entry, and the resting time lets surface moisture evaporate. Right before frying, give it one final pat-down. You cannot over-dry the skin; every drop of water you remove is a splatter you prevent.
The Best Oil for Deep Frying a Turkey
Oil choice affects flavor, safety margin, and cost. Here is how the common options compare.
Peanut Oil: The Gold Standard
Refined peanut oil is the classic frying oil for good reasons: a high smoke point around 450°F (232°C), which gives you a comfortable margin above your 350°F (177°C) frying temperature, and a clean, neutral flavor that lets the turkey taste like turkey. It is the most expensive option — a 12-pound bird typically needs 3 to 5 gallons — but for a once-a-year centerpiece, the cost is worth it. Note that highly refined peanut oil is generally considered safe for most people with peanut allergies because the allergenic proteins are removed during refining, but if anyone at your table has a severe peanut allergy, do not take chances — ask them first or choose another oil.
Acceptable Alternatives
Refined canola oil and refined safflower oil both have smoke points above 400°F (204°C) and neutral flavors, and they cost less than peanut oil. They are perfectly serviceable. Avoid unrefined oils and olive oil — their smoke points sit too close to frying temperature, which means smoking, off-flavors, and a narrower safety margin. Never use butter, margarine, or animal fats for deep frying; they burn and foam.
How Much Oil You Need: The Water Displacement Method
Do this the day before, with everything cold. Set the thawed, unwrapped turkey (on its rack or in the basket) into the empty pot. Add water — not oil — until the water sits about an inch above the bird. Lift the turkey out and mark the water level on the outside of the pot with tape or a marker. Pour the water out and dry the pot thoroughly. On fry day, fill with oil to that mark and not a drop more. This method automatically accounts for your exact bird and your exact pot, which is why it beats any “gallons per pound” rule of thumb. As a sanity check, most 12-pound turkeys in standard kits need 3 to 4 gallons — if your displacement test suggests far more or less, re-check your pot size and turkey weight.
Reusing Frying Oil
Good peanut oil can be reused several times. After the fry, let the oil cool completely — this takes hours, so plan for it — then strain it through cheesecloth or a fine-mesh strainer into its original containers or clean jugs. Store in a cool, dark place. Discard the oil if it smells rancid, looks dark and thick, or foams excessively when reheated. Never pour used oil down the drain; most municipalities accept it at recycling or household-waste collection points.
Step-by-Step: How to Deep Fry a Turkey
Do your seasoning the night before (inject marinades or apply dry rub, then refrigerate uncovered so the skin dries further), and do the water-displacement oil measurement the day before too. Fry day itself should be pure execution. Here is the full sequence:
- Set up outdoors on level ground. Position the burner on flat concrete at least 10 feet from structures. Assemble the pot, basket or hook, thermometer clipped to the pot’s side, gloves, extinguisher, and resting tray within arm’s reach. Confirm the propane tank is full and the regulator connects snugly with no gas smell.
- Prep the turkey. Remove the thawed bird from the fridge 30 to 45 minutes before frying. Confirm both cavities are free of giblets, neck, and any ice. Pat the entire bird dry inside and out — twice. Tie the legs together with kitchen twine and tuck the wing tips behind the breast so nothing snags or sticks out during lowering.
- Fill the pot with oil to your marked line. Pour in the oil you measured the day before. Double-check the level against your mark: at or below the line, never above.
- Heat the oil to 375°F (190°C). Light the burner and bring the oil up to 375°F. This is intentionally above your 350°F (177°C) frying target, because the cold turkey will pull the temperature down on entry. Do not walk away during heat-up; oil climbs fast once it gets going.
- Turn off the burner before lowering. This is a pro move that prevents flare-ups: with the flame off, there is no ignition source if a little oil splashes over the rim. You will relight once the bird is fully submerged.
- Lower the turkey very slowly. Wearing gloves and glasses, hook the bird and ease it into the oil over 60 to 90 seconds, pausing if bubbling surges. Slow lowering lets steam escape gradually instead of erupting. Never drop or plunge the bird.
- Relight the burner and stabilize at 350°F (177°C). Adjust the flame to hold the oil as close to 350°F as you can. Some fluctuation is normal; avoid chasing the needle with big flame changes. If the temperature climbs toward 400°F, back the flame off — overheated oil smokes, burns the skin, and narrows your safety margin.
- Fry 3 to 3.5 minutes per pound. A 12-pound turkey needs roughly 36 to 42 minutes; a 14-pounder needs 42 to 49. Start checking early rather than late. Keep the lid off and stay with the fryer the entire time.
- Verify 165°F (74°C) internal temperature. Lift the bird, let oil drip back for a minute, and check the thickest part of the breast and the inner thigh with your instant-read thermometer. Both must read at least 165°F. If the breast is done but the thigh lags, lower the bird for a few more minutes and re-check. Do not serve based on color or time alone.
- Rest 20 to 30 minutes before carving. Transfer the turkey to your rimmed tray, tent loosely with foil, and rest. The internal temperature will rise a few degrees and the juices will redistribute — carving too early floods the cutting board. While it rests, see our guide on how to carve a turkey so the presentation matches the cooking.
Seasoning a Turkey for the Fryer
Because frying is fast, seasoning strategy differs from roasting. Surface rubs contribute mainly to the skin — delicious, but the meat beneath stays mild unless you season deeper.
Dry Rubs
A simple salt-pepper-garlic-paprika rub applied 12 to 24 hours ahead seasons the skin beautifully and helps it dry for extra crispness. Apply the rub, then refrigerate the bird uncovered on a rack — the cold dry air is a secret weapon for crackling skin. Our best dry rub for turkey guide has blends formulated for high-heat cooking. Keep sugary rubs light: sugar burns faster in 350°F oil, so favor savory, herb-forward blends over sweet ones.
Injection Marinades
Injecting is the single biggest flavor upgrade for fried turkey. A Cajun butter or garlic-herb injection distributed through the breast and thighs means every slice is seasoned, not just the skin. Inject 12 to 24 hours before frying, distributing small amounts across many sites rather than big pools in a few spots, and wipe any surface leaks before the bird goes near oil. Full recipes and technique are in our turkey injection marinade recipes guide.
Troubleshooting Common Deep-Frying Problems
The Oil Bubbled Over the Rim
Cause: too much oil, turkey lowered too fast, or moisture on the bird. Prevention is everything here — the displacement measurement, slow lowering, and thorough drying covered above. If a small amount spills during lowering, keep lowering slowly and steadily; stopping mid-lower with a half-submerged bird is worse. If oil is flowing over the rim continuously, something is wrong with your fill level — do not proceed. For next time, re-measure with the water method.
The Skin Is Dark but the Inside Is Undercooked
Cause: oil temperature ran too hot, cooking the exterior before heat penetrated. Keep the oil at 350°F (177°C), not 375°F+, during the actual fry. If you catch it early — dark skin but low internal temp — you can finish the bird in a 325°F oven, tented with foil to stop further browning, until the thermometer reads 165°F. The skin will not be quite as shattering, but the turkey will be safe and delicious.
The Skin Is Pale and Greasy
Cause: oil temperature dropped too low, usually from an oversized or very cold bird, or from overcrowding the pot. Below about 325°F (163°C), the turkey absorbs oil instead of crisping in it. Maintain temperature discipline, let the bird temper at room temperature before frying, and respect the 14-pound ceiling. A pale fried turkey is still safe if it hit 165°F internally — it is just less crisp.
The Oil Smokes Heavily
Cause: temperature too high, degraded reused oil, or food particles burning. Back the flame down immediately. If reused oil smokes well below its normal smoke point, it is spent — finish the fry if the bird is nearly done, but replace the oil next time. Skim out any floating debris between uses.
Storing and Reheating Leftover Fried Turkey
Carve leftover meat off the bone within two hours of cooking and refrigerate in shallow, covered containers — fried turkey follows the same food-safety rules as any cooked poultry: refrigerate promptly, keep for 3 to 4 days, and reheat to 165°F (74°C). The skin will not stay crisp in the fridge no matter what you do, so plan leftovers around the meat: it is superb sliced cold for sandwiches, diced into Thanksgiving dinner leftover casseroles, or crisped in a hot skillet or air fryer to revive some texture. For reheating slices, a 350°F oven with a splash of broth in a covered dish keeps the meat moist far better than a microwave, which turns fried turkey rubbery. Freeze leftovers you will not eat within four days; they keep well for 2 to 3 months in airtight packaging.
In Pictures: Deep-Frying a Turkey
A deep-fried turkey is legendary for good reason: shatteringly crisp skin and juicy meat in under an hour. Here is a closer look at the setup and the finished bird.
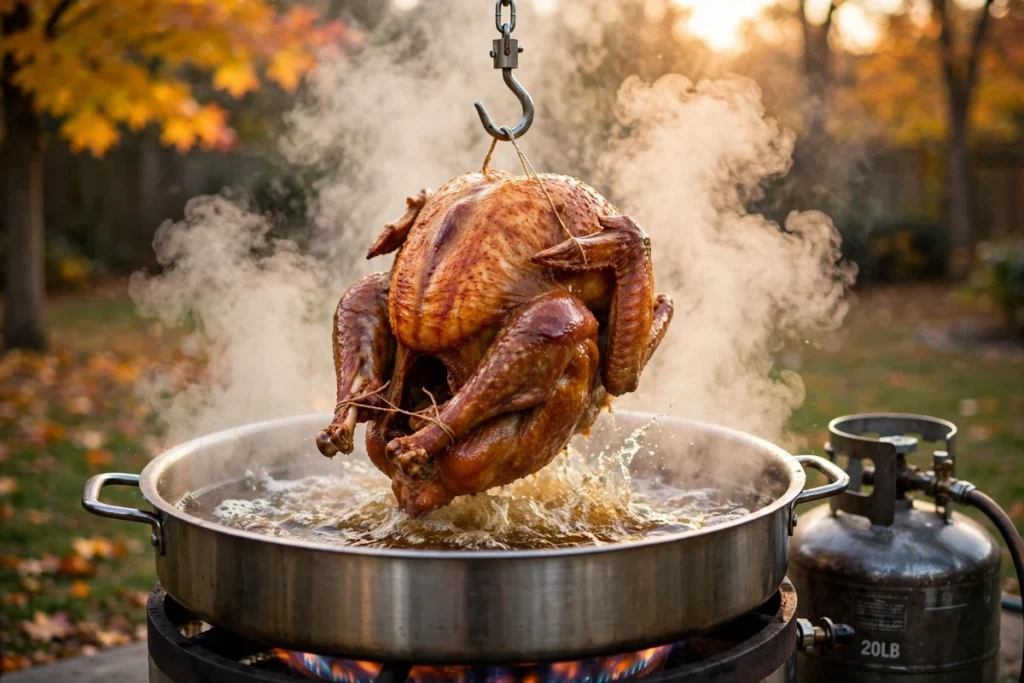
A golden deep-fried turkey resting on a platter, its skin crisp and glistening after coming out of the fryer.
Watch: Deep-Frying a Turkey
Deep-frying a turkey is equal parts technique and safety drill, so watching it done right is worth ten minutes. This Chef Capon tutorial walks through a full three-day brine-and-fry process for a crisp, golden bird.
At a Glance: Deep-Frying a Turkey
The numbers that matter for a safe, successful fry, distilled from the guide above.
| Rule | Detail |
|---|---|
| Where to fry | Outdoors only, on a flat, hard, non-wooden surface — never in a garage or under cover |
| Turkey condition | Fully thawed and patted completely dry — ice or water in hot oil causes violent flare-ups |
| Oil level | Measure with the water-displacement method before heating: bird in, fill with water, mark the line |
| Oil temperature | Typically around 350°F while frying; overheating risks boil-over |
| Keep people back | Dress for the job (long sleeves, closed shoes, gloves) and keep kids and pets at a distance |
| Rest before carving | Let the bird rest about 20–30 minutes so juices redistribute |
Frequently Asked Questions
How long does it take to deep fry a turkey?
Plan on 3 to 3.5 minutes per pound at 350°F (177°C) oil temperature. A 10-pound turkey takes about 30 to 35 minutes, a 12-pounder about 36 to 42 minutes, and a 14-pounder about 42 to 49 minutes. Always confirm doneness with a meat thermometer reading 165°F (74°C) in the breast and thigh — time is an estimate, temperature is the rule.
Can I deep fry a frozen turkey?
No — never. A frozen or partially frozen turkey dropped into hot oil causes a violent steam eruption that throws burning oil out of the pot. The turkey must be completely thawed, with no ice crystals in either cavity, and patted fully dry. This is the most important safety rule in deep frying.
What is the best oil for deep frying a turkey?
Refined peanut oil is the top choice for its high smoke point (around 450°F/232°C) and neutral flavor. Refined canola or safflower oil are good budget-friendly alternatives. Avoid olive oil and unrefined oils — their smoke points are too low for safe deep frying.
Can I deep fry a turkey on a wooden deck or in the garage?
No. Fry only outdoors on a flat, hard, non-flammable surface like concrete, at least 10 feet from your house, deck, fences, and trees. Garages, carports, covered patios, and wooden decks are all off-limits because of the open propane flame and the risk of oil spillover.
How do I know how much oil to use?
Use the water displacement method: put the thawed turkey in the cold empty pot, cover with water by an inch, remove the bird, and mark the water line. Fill with oil to that line on fry day. This accounts for your exact turkey and pot — never guess.
Is deep-fried turkey greasy?
Not when done correctly. At a proper 350°F (177°C), the intense heat drives moisture outward as steam, which actually prevents oil from soaking in — correctly fried turkey is less greasy than many pan-fried foods. Greasiness is a symptom of oil that dropped too cool during cooking.
Conclusion
Deep frying a turkey is genuinely the fastest route to a spectacular Thanksgiving bird — crackling skin, juicy meat, and the oven freed up for Thanksgiving side dishes and pies. The method rewards preparation and punishes improvisation: thaw completely, measure your oil with water, fry outdoors on level ground, hold 350°F, and verify 165°F with a thermometer. Do those five things and you will understand why fried-turkey devotees never go back to the oven. Stay safe, stay with your fryer, and enjoy the best-textured turkey you have ever served.