Film Cameras for Beginners: Your First 35mm Camera and Roll
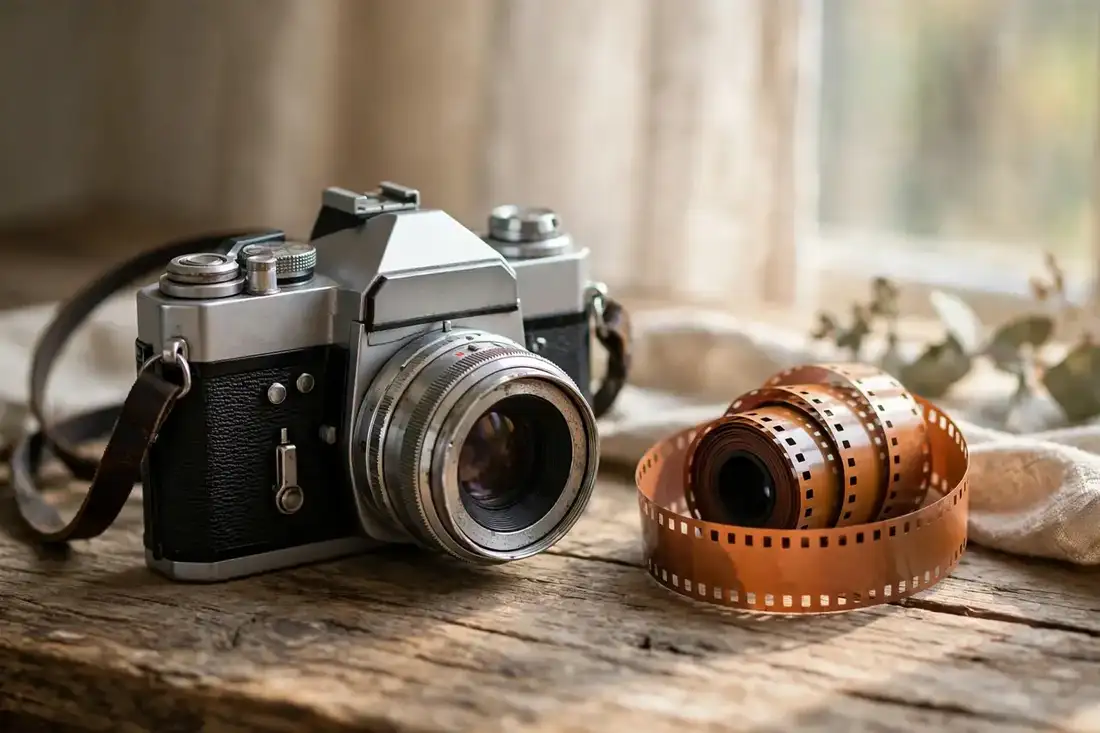
Somewhere in your parents’ closet there is probably a camera that still works perfectly — a hunk of metal and glass from the 1980s that needs no battery to fire its shutter, no firmware updates, and no subscription. That camera, and millions like it selling for pocket change on the used market, is your ticket into film photography: the slow, deliberate, deeply satisfying hobby that has captured a new generation tired of shooting ten thousand phone photos and feeling nothing.
This guide is your complete starting point: why film is worth shooting in the first place, which 35mm cameras are actually good for beginners (and which to avoid), how film stocks differ, how to load, meter, and shoot your first roll without wasting it, what developing costs and where it happens, and how to scan your negatives into shareable digital files. By the end, you will be ready to buy with confidence and shoot your first roll this weekend.
Film photography teaches what digital rarely does: intention. With 36 exposures and real cost per frame, you slow down, you compose, you wait for the light. Beginners are often shocked at how fast this discipline improves their photography — including their phone photography. The constraint is the teacher.
Why Shoot Film in the First Place
The film revival is not nostalgia cosplay — it is a response to real shortcomings of digital shooting. First, the look: film’s grain, color rendition, and highlight rolloff remain genuinely difficult to fake convincingly, which is why “film look” presets are a billion-dollar industry chasing what a $50 camera does naturally. Second, the process: the delay between shooting and seeing builds anticipation that makes every good frame feel earned, and holding negatives feels like holding something real in an age of cloud ephemera.
Third, the economics of attention. A roll of 36 forces curation at capture rather than in an editing backlog you will never clear. Beginners routinely report that their keeper rate — the fraction of shots worth keeping — multiplies on film, because each press of the shutter passes through a moment of “is this worth a dollar?” That question, asked 36 times per roll, is a complete photography education.
Fourth, the gear itself. Mechanical film cameras are marvels: all-metal, repairable, functional after decades in a drawer. A $75 Pentax K1000 will outlive every digital camera on the market today. There is profound satisfaction in using a precision instrument built before planned obsolescence — the same satisfaction that draws people to mirrorless camera deals in reverse: instead of chasing the newest sensor, you are inheriting the best of the old craft.
Choosing Your First Film Camera
The Beginner Sweet Spot: Manual 35mm SLRs
For learning, nothing beats a manual-focus 35mm SLR from the 1970s–90s: full control, bright viewfinders, dirt cheap, and nearly indestructible. The canonical beginner cameras:
- Pentax K1000 — the student camera for 40 years; fully manual, metered, nearly indestructible. $60–$120 with a 50mm lens.
- Canon AE-1 / AE-1 Program — shutter-priority auto plus manual; huge lens ecosystem. $80–$150.
- Nikon FM / FM2 — Nikon’s mechanical classics; the FM2’s 1/4000 shutter is genuinely pro-grade. $120–$250.
- Minolta X-700 — excellent metering, aperture-priority auto; often the best value on the used market. $60–$120.
- Olympus OM-1 — tiny, beautiful, all-mechanical; a jewel of a camera. $100–$180.
Point-and-Shoots: Fun but Pricey Now
Compact automatics (Olympus Stylus/Mju, Canon Sure Shot, Yashica T4) are delightful — pocketable, sharp, automatic everything. But the “film TikTok” hype has inflated prices absurdly; cameras that were $10 thrift finds now sell for $150–$400. They are also electronic and unrepairable when they die. Buy one for fun if the price is sane, not as your learning camera.
What to Avoid as a First Camera
- Untested “as-is” bodies — unless you want a repair project, pay the premium for tested/working.
- Exotic or rare models — parts, manuals, and repair knowledge dry up fast.
- Medium format as a first camera — gorgeous but expensive per shot; learn on 35mm.
- Cameras needing odd batteries — mercury cells are banned; check that modern equivalents exist (most do via adapters).
- The absolute cheapest body — a $20 camera with a dead meter and sticky shutter teaches frustration, not photography.
Where to Buy
| Source | Price Range | Risk Level | Notes |
|---|---|---|---|
| eBay (tested sellers) | $60–$200 | Low–medium | Check shutter/meter tested, return policy |
| Local camera shops | $80–$250 | Low | Often serviced with warranty; best for beginners |
| Estate sales / thrift | $5–$40 | High | Amazing finds, but assume it needs a CLA service |
| Photography forums/marketplaces | $60–$180 | Low | Enthusiast sellers describe honestly |
| Family closet | Free | Medium | Best value ever — get it serviced ($75–$150 CLA) |
Whatever you buy used, budget for a CLA (clean, lube, adjust) service if it has sat for years — $75–$150 at a repair shop, and it returns a 40-year-old camera to factory-fresh function. It is the best money in film photography.
Film Stocks: What to Buy First
Film choice is half the art. Start with these forgiving, affordable stocks before exploring the exotic stuff.
- Kodak Gold 200 — warm, nostalgic color; the classic “family photo” look. Cheap and cheerful.
- Kodak Portra 400 — the professional portrait standard; gorgeous skin tones, huge exposure latitude. Pricier, worth it.
- Fujifilm 200 / 400 — clean, versatile color negative films for everyday shooting.
- Ilford HP5 Plus 400 — the beginner B&W standard; forgiving, beautiful grain, pushes well.
- Kentmere 400 — Ilford’s budget B&W line; the cheapest way to learn the craft.
- Cinestill 800T — tungsten-balanced motion-picture film; halation glow for night shooting (advanced fun).
Buy fresh film from photo retailers and store it cool — the fridge for stock you will shoot within months, the freezer for long-term hoards. Heat is film’s enemy; a roll baked in a hot car all summer will show it. For your first rolls, shoot the cheap stuff without preciousness: the learning is in the volume.
Shooting Your First Roll: The Essentials
Loading Film
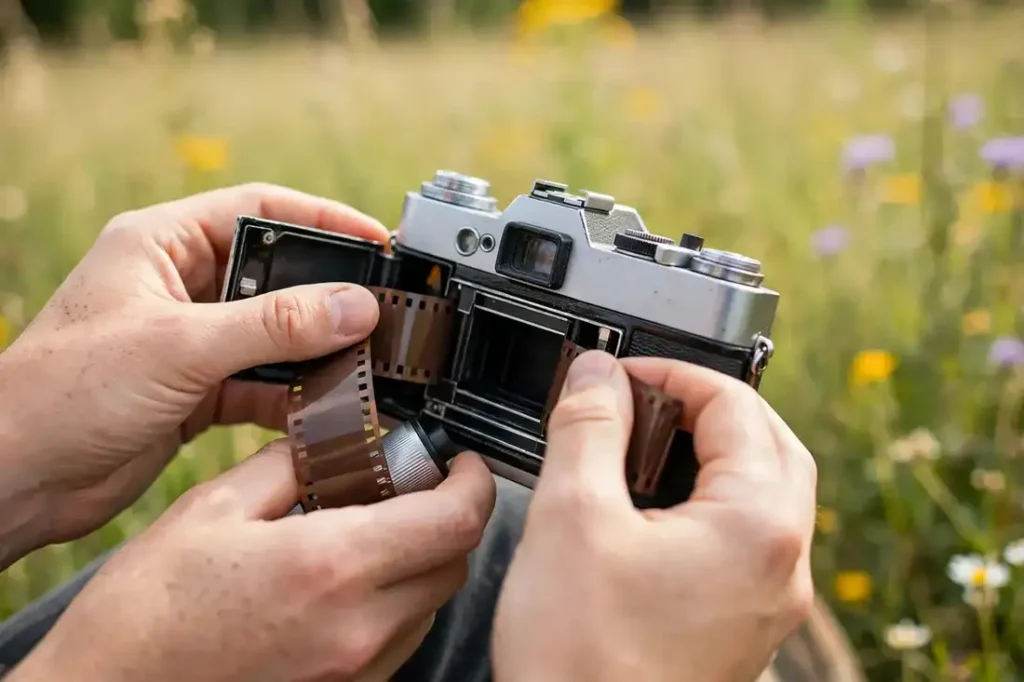
Every camera loads slightly differently, but the universal steps: open the back, seat the cassette, pull the leader across to the take-up spool, ensure the sprocket holes engage the teeth, close the back, and fire-and-advance twice to get past the exposed leader. Watch the rewind knob — if it turns as you advance, the film is actually moving. If it does not, open up and reseat: the classic beginner disaster is shooting 36 frames on a film that never advanced.
Metering: Getting Exposure Right
Your camera’s built-in meter (if working) is a fine starting point: match the needle or center the LED. But learn the Sunny 16 rule as backup and as education — on a sunny day, set aperture to f/16 and shutter to 1/ISO (so 1/200 for ISO 200 film). It works shockingly well and teaches the exposure triangle intuitively. When in doubt, overexpose color negative film slightly — it forgives overexposure gracefully and punishes underexposure with muddy shadows. (Slide film is the opposite; you are not shooting slide yet.)
Composing With Intent
- Slow down — check the edges of the frame, not just the center; film rewards deliberate composition.
- Get closer — beginners shoot everything too far away; fill the frame with your subject.
- Watch the light — side light and backlight create drama; harsh noon sun flattens everything.
- One subject per frame — 36 exposures teach you to decide what the photo is about before shooting.
- Note your settings — a phone note per shot (“f/8, 1/125, shade”) turns the developed roll into a textbook.
- Finish the roll — film keeps fine for weeks; shoot the last frames on everyday beauty so you can develop promptly.
Developing and Scanning: From Roll to Images
You have shot the roll. Now what? Three paths, in order of commitment.
Option 1: Full-Service Lab
Mail-in or local labs develop and scan for $15–$25 per roll. This is the zero-hassle path and the right choice while learning — your job is shooting, theirs is chemistry. Turnaround ranges from days (local) to weeks (popular mail-ins). Our companion guide on how to capture your proposal on camera covers working with pros for once-in-a-lifetime shots; for everyday rolls, a good lab relationship is simpler.
Option 2: Develop at Home, Scan at Home
Home developing (B&W especially) costs $2–$4 per roll after a ~$120 kit — the guide to birdwatching for beginners is about patience too, and home developing rewards the same temperament. Pair it with a flatbed scanner or a digital-camera scanning setup for total independence from labs.
Option 3: Hybrid
Develop at home, send negatives to a lab for high-quality scans — or vice versa. Many serious hobbyists land here: home developing for economy and control, pro scans for the keepers.
| Path | Cost per Roll | Effort | Best For |
|---|---|---|---|
| Full-service lab | $15–$25 | Mail it, wait | Beginners, low volume |
| Home develop + home scan | $2–$5 | 1–2 hours per roll | Regular shooters, the committed |
| Hybrid | $8–$15 | Developing only | Quality scans without full lab prices |
Common Beginner Mistakes
- Film not loaded properly — the rewind knob must turn when you advance; check it every roll.
- Shooting expired mystery film first — learn on fresh film so mistakes are yours, not the film’s.
- Underexposing color negative film — when uncertain, give it more light; overexposure is forgiving.
- Forgetting the lens cap in the bag shot — the classic black-roll heartbreak; develop the habit of checking.
- Opening the back mid-roll — “just to check” fogs the film; the frame counter is the check.
- Letting exposed rolls bake — develop promptly; heat and time degrade latent images.
- Comparing frame 1 to digital — judge film on its own terms: grain, tone, and feeling over pixel perfection.
Beyond 35mm: Medium Format and Other Film Worlds
Once 35mm clicks, curiosity pulls photographers toward larger negatives. Each format has a distinct character — and the used market makes experimenting affordable.
Medium Format (120 Film): The Big Step Up
Medium format negatives are 3–4x larger than 35mm, delivering staggering detail, creamy tonality, and shallow depth of field that’s hard to match. The classic entry cameras:
- Twin-lens reflex (TLR) — Yashica Mat, Rolleicord; waist-level viewing, quiet, affordable ($100–$300). The gentlest medium-format entry.
- Hasselblad-style SLRs — Bronica SQ, Mamiya 645; modular, professional, $300–$800 for kits. The serious step up.
- Folding cameras — vintage folders ($50–$150) are pocketable medium format; quirky, charming, capable.
- Costs — 120 film runs $8–$14 per roll for 12–16 frames; developing $12–$20. Each frame costs real money — which makes you careful, in the best way.
- The look — portraits on medium format have a dimensionality that stops viewers; it’s the format’s superpower.
Large Format (4×5 and Up): The Deep End
Sheet film, bellows, ground-glass focusing under a dark cloth — large format is photography as meditation. Used field cameras start around $300–$500; each sheet costs $5–$10 all-in. Nobody “needs” large format, but everyone who tries it describes the experience as transformative: the slowness, the movements (tilt/shift for infinite depth of field), the 4×5 negative’s impossible detail. Try it at a workshop before buying.
Other Formats Worth Knowing
- Half-frame (35mm, 72 exposures) — Olympus Pen cameras; diptych storytelling, double the frames per roll. Cult favorite.
- 110 and 126 — tiny vintage formats; Lomography still makes 110 film. Toy-camera fun, not serious tools.
- Instant film — Polaroid and Instax; the social, immediate branch of analog. Different pleasure entirely.
- Motion picture film — Vision3 stocks respooled for still cameras (Cinestill); unique halation and color science.
Caring for Your Film Camera: Maintenance That Lasts Decades
Mechanical cameras are durable but not immortal. Basic maintenance keeps a 40-year-old camera shooting for another 40.
Routine Care
- Exercise the shutter — fire all speeds monthly; dormant shutters get sluggish. This single habit prevents most issues.
- Light seals — foam seals decay into black goo after 20–30 years; replacement kits cost $10 and take an hour. If your camera is “new to you” and old, assume seals are dead.
- Battery care — remove batteries for long storage; leaking batteries destroy electronics. Use correct modern equivalents (no mercury cells).
- Lens care — blower first, then lens pen; never breathe-and-wipe (acid etches coatings over time). UV filters as sacrificial protection.
- Storage — cool, dry, dark; silica gel in the camera bag; never attics (heat) or basements (humidity/fungus).
- Fungus watch — white web-like growth inside lenses in humid climates; early-stage is cleanable, advanced etches glass permanently.
When to Get a CLA
- Sticky or inaccurate shutter — speeds sound wrong, or slow speeds hang; the classic CLA trigger.
- New-to-you cameras — unknown service history means a baseline CLA ($75–$150) is cheap insurance.
- Every 5–10 years — for cameras in regular use; lubricants dry out on that timescale.
- Find a specialist — camera repair is a shrinking trade; the good ones have waitlists. Ask film communities for recommendations.
- DIY limits — light seals and basic cleaning are DIY-friendly; shutter overhauls are not. Know the line.
Traveling With Film
- Always carry on — checked-baggage X-rays fog film; carry-on scanners are safe for ISO 800 and below.
- Request hand-checks — your right in most countries for high-ISO or precious film; be polite and early.
- Lead bags are obsolete — they just trigger stronger scans; skip them.
- Buy at destination — for long trips, buy film locally and mail exposed rolls home; less to carry, less to risk.
- Heat discipline — never leave film in hot cars; hotel fridges work for storage.
Camera care is the quiet companion skill to shooting — the same long-view thinking behind where to develop film-style archival habits: today’s maintenance is tomorrow’s reliability, and the negatives you protect today are the ones you’ll print in twenty years.
Shooting Film in Low Light and at Night
Film’s reputation as a daylight medium is outdated — modern emulsions handle darkness beautifully, and night film photography has a character digital can’t fake. The techniques differ from digital night shooting in important ways.
Films for the Dark
- Cinestill 800T — tungsten-balanced, halation-prone, made for night; the cinematic look straight out of the camera. The night film.
- Kodak Portra 800 — the professional’s low-light color film; fine grain for its speed, beautiful skin tones under artificial light.
- Ilford Delta 3200 / Kodak T-Max P3200 — ultra-high-speed B&W; grainy, moody, perfect for concerts and street nights.
- Lomography 800 — punchy, contrasty color; the fun option for night experiments.
- Pushing HP5 to 1600–3200 — the economical night film; one stock, endless nights.
Night Techniques
- Embrace the grain — night film is grainy; fight it and you lose, embrace it and it’s the aesthetic.
- Meter for the shadows, let highlights glow — night scenes have enormous contrast; expose for what matters.
- Reciprocity failure — beyond ~1 second, film needs extra exposure (each film’s datasheet gives the correction); the analog quirk digital shooters never meet.
- Tripod discipline — cable release, mirror lockup, sturdy legs; the how to photograph northern lights tripod gospel applies to all night film work.
- Neon and tungsten — city lights are film’s natural habitat; tungsten-balanced films render them neutrally, daylight films warmly.
- Bracket important shots — night exposure is guesswork; ±1 stop brackets cost frames and save keepers.
- Flash with film — direct flash on film has a beloved raw aesthetic; the point-and-shoot night look is a whole genre.
Concerts and Indoor Events
- Fast film + fast lens — f/1.8 or faster glass with 800+ speed film; the only combination that works in dark venues.
- Zone focus — prefocus to the stage distance; autofocus hunts hopelessly in concert lighting.
- Shoot the light, not the band — expose for the lit faces, let the rest fall to black; drama over detail.
- B&W for chaos — mixed color stage lighting turns to mud on color film; B&W renders it as pure drama.
- Know the venue’s policy — many venues ban “professional” cameras; point-and-shoots and compact rangefinders usually pass.
10 Film Photography Pro Tips
The habits that separate photographers who love film from those who fight it — learned the expensive way so you don’t have to.
- Always carry a second roll — the roll ends at the worst moment; the spare in your pocket is the difference between the shot and the story about the shot.
- Note your settings — a phone note per frame (aperture, shutter, light) turns every developed roll into a personalized textbook. You’ll learn faster than any other method.
- Finish rolls promptly — latent images degrade over months; shoot the last frames on everyday beauty and develop. The roll in your camera for a year is a roll at risk.
- Learn one film stock deeply — shoot 20 rolls of the same film before branching out; knowing exactly how Portra 400 behaves beats vague familiarity with ten stocks.
- Overexpose color negative slightly — rate Portra 400 at 200, Gold 200 at 100; the shadows clean up beautifully and highlights survive. The most useful exposure tip in film.
- Trust the Sunny 16 — on bright days, f/16 at 1/ISO; it’s shockingly accurate and frees you from meter anxiety. Dead batteries become non-events.
- Protect the leader — when rewinding, leave the leader out (stop at the resistance change); labs and home developers both thank you.
- Store exposed rolls cool — a fridge bag for exposed rolls on trips; heat fogs latent images faster than you’d think.
- Inspect used cameras carefully — shutter speeds (listen for the 1-second accuracy), light seals (black goo = replacement needed), meter vs. phone app. Ten minutes of checks saves $150 in CLA surprises.
- Print your favorites — scans on a screen are half the medium; a real print of your best frame, even 4×6, completes the analog circle and reminds you why you shoot film.
Resources to Keep Learning
The film community is generous and deep. These resources will carry you from first roll to seasoned shooter.
- “The Film Photography Handbook” (Chris Marquardt & Monika Andrae) — the modern bible; covers cameras, film, developing, and scanning with current products. Start here.
- Matt Day / Grainydays / Analog Revival (YouTube) — working photographers sharing real workflows; the fastest way to absorb technique visually.
- r/AnalogCommunity (Reddit) — 2M+ members; gear advice, lab reviews, and inspiration. Search before asking — everything’s been answered.
- EMULSIVE.org — interviews, reviews, and the 5 Frames series; the thoughtful corner of film internet.
- Local camera shops — the ones that still sell film; staff knowledge, used gear, and community. Become a regular.
- A light meter app — Luxi or similar; free backup metering that teaches you to read light without the camera.
The pattern of every lasting film photographer: one good book, two YouTube teachers, one community, and a local shop. The gear matters less than the guidance — and the guidance has never been more available.
Frequently Asked Questions
How much does it cost to shoot film?
Roughly $1–$1.50 per frame all-in: $8–$15 for the roll plus $15–$25 for developing and scanning, divided by 36 exposures. Home developing cuts this roughly in half. It is the hobby’s defining constraint — and, devotees argue, its defining teacher.
What is the best film camera for a total beginner?
The Pentax K1000: fully manual so you learn exposure properly, nearly indestructible, cheap ($60–$120 with lens), and with a huge lens ecosystem. The Canon AE-1 and Minolta X-700 are excellent alternatives if you want some automation. Any of these will serve for years.
Is expired film worth buying?
For fun experiments, yes — at steep discounts. For learning, no: expired film adds unpredictable color shifts and fog that mask your own mistakes. Learn on fresh film, then play with expired stocks once you can tell the difference between your error and the film’s character.
Can I still get film developed?
Absolutely. Mail-in labs serve the whole country, many cities retain local labs, and some drugstores still handle it (check current services). The infrastructure shrank but stabilized — and home developing means you never depend on it at all.
How do I digitize my negatives?
Three tiers: lab scans (easiest, $5–$15 extra per roll), a flatbed scanner like the Epson V600 (~$230, good quality, slow), or camera-scanning with a digital camera, macro lens, and light table (fastest, highest quality, higher startup cost). Start with lab scans; upgrade when volume justifies it.
Do I need a light meter?
Not initially. Your camera’s built-in meter (verify it works against a phone light-meter app) plus the Sunny 16 rule covers nearly everything. A handheld incident meter is a lovely upgrade later for precise portrait and studio work, but it is not a beginner requirement.
Watch and Learn: Starting Film Photography
Hearing “everything I wish I knew” from someone who learned the hard way saves you months of trial and error. This beginner guide covers the essentials before your first roll:
Your 7-Day Quick-Start Challenge
Reading is step zero; doing is the hobby. This one-week plan takes you from curious to committed in 20–30 minutes a day:
- Day 1: Buy the camera: tested Pentax K1000 (or Canon AE-1) with 50mm lens.
- Day 2: Load a roll of Kodak Gold; verify the rewind knob turns when advancing.
- Day 3: Shoot all 36 frames deliberately; note settings for 6 key shots.
- Day 4: Send the roll to a reputable mail-in lab; note the turnaround.
- Day 5: Study the scans against your notes; identify what worked.
- Day 6: Load roll two (Portra 400); apply the lessons.
- Day 7: Print your favorite frame; feel the complete analog circle close.
Load Your First Roll This Weekend
The barrier to film photography has never been lower: $100 buys a great camera, $10 buys a roll of Gold, and the lab down the street (or the mailbox) handles the rest. The only thing standing between you and the hobby is the decision to start — and the willingness to wait a week to see what you made.
Buy the Pentax, load the Gold, and go shoot 36 deliberate frames of your actual life. When the scans come back, some will be terrible and a few will be magic — grainy, glowing, imperfect in ways no phone photo ever is. Those few are why film survived the digital apocalypse. They are why you will load roll number two.