Astrophotography for Beginners: Capture the Night Sky
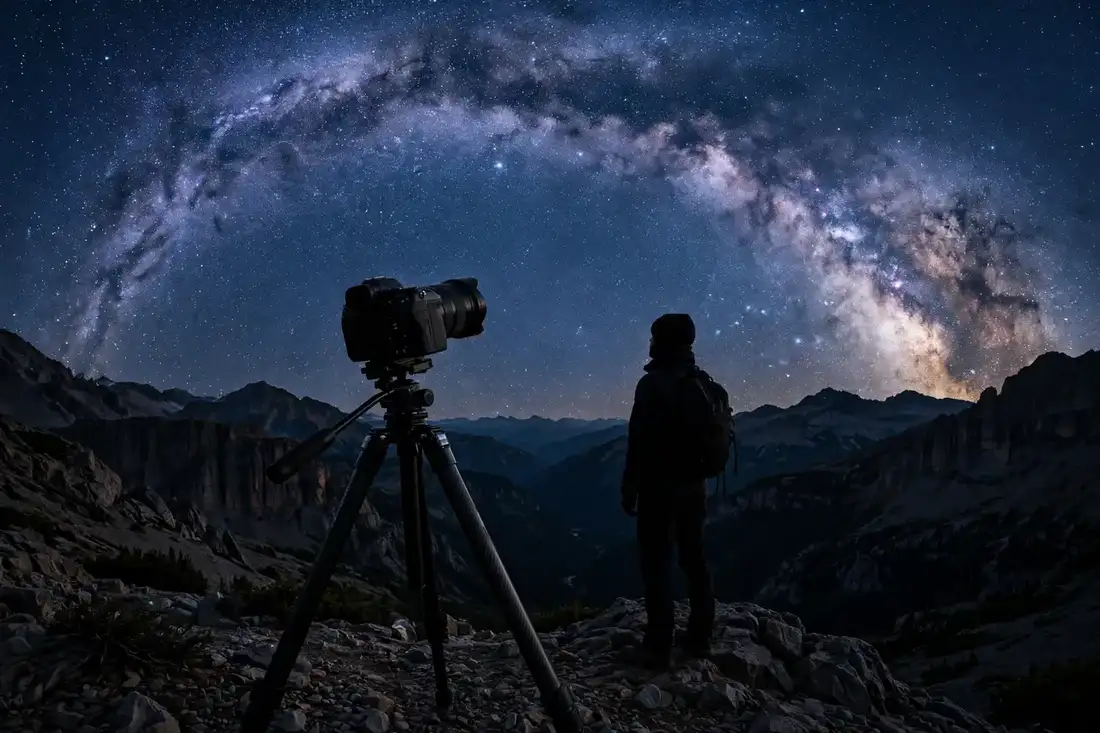
Astrophotography — photographing the night sky — is more accessible than it looks. You don’t need a telescope or a $5,000 camera: a basic DSLR or mirrorless camera, a sturdy tripod, and dark skies are enough for jaw-dropping Milky Way shots. The techniques are learnable in a weekend; the limiting factor is usually light pollution, not gear.
The progression is natural: start with wide-field Milky Way and constellation shots (simplest, most rewarding), try star trails (easy technique, dramatic results), photograph the moon (bright and forgiving), then graduate to deep-sky objects with a star tracker. Each step builds skills for the next. This guide starts you at step one with exactly what works.
One honest note: astrophotography demands patience and night-owl hours. But standing under dark skies while your camera drinks in ancient starlight is an experience that converts casual photographers into devoted night-sky chasers. Let’s get your first keeper.
Essential Gear to Start
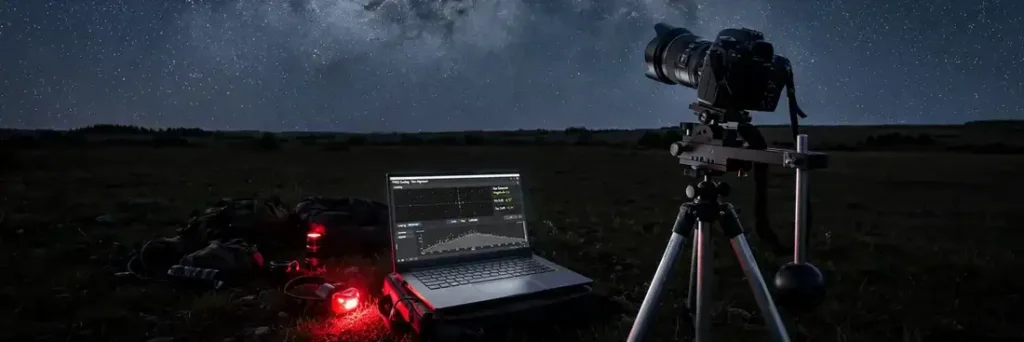
The minimum kit: an interchangeable-lens camera with manual mode (even entry-level DSLRs work), a wide-angle lens with a fast aperture (f/2.8 or faster ideal; f/3.5 kit lenses can work with higher ISO), and a sturdy tripod (non-negotiable — exposures run 15–30 seconds). A remote shutter release or 2-second timer prevents shake; a headlamp with red mode preserves night vision.
Nice-to-haves for later: a star tracker (compensates Earth’s rotation for longer exposures), faster/wider lenses, spare batteries (cold drains them fast), and dew heaters (dew on lenses ruins nights). Start minimal — master the basics before buying trackers. Many stunning Milky Way images were shot on crop-sensor cameras with kit lenses; technique and dark skies matter more than gear.
- Manual camera: Entry-level DSLR/mirrorless suffices to start.
- Fast wide lens: f/2.8 ideal; kit lenses work with higher ISO.
- Sturdy tripod: Non-negotiable for 15–30 second exposures.
- Red headlamp: Preserves night vision while working.
- Start minimal: Technique and dark skies beat expensive gear.
Related reading: Valentine’s Day Stargazing Date: How to Plan One.
Finding Dark Skies
Light pollution is astrophotography’s true enemy — driving one hour from the city transforms results more than any gear upgrade. Use dark-sky maps (light pollution map websites and apps) to find Bortle 4 or darker skies; Bortle 1–3 (truly dark) reveals the Milky Way in breathtaking detail. State parks, rural pullouts, and designated dark-sky preserves are prime locations.
Scout in daylight: check access, parking, safety, foreground interest (trees, mountains, structures silhouette beautifully against the sky), and cell service. Check the moon phase — new moon weeks are prime; a bright moon washes out faint detail (though moonlight beautifully illuminates landscapes). Clear, moonless, dark skies are the trifecta; plan around them.
- Dark-sky maps: Find Bortle 4 or darker; 1–3 is transformative.
- Drive from cities: One hour out beats any gear upgrade.
- Scout daylight: Access, safety, foregrounds; plan compositions early.
- Moon phase: New moon weeks prime; bright moon washes faint detail.
- Foregrounds: Silhouetted trees and mountains elevate compositions.
Related reading: Stargazing with Kids Guide.
Milky Way Camera Settings
The classic starting recipe: manual mode, widest aperture (f/2.8 or your lens’s max), ISO 3200–6400, shutter per the ‘500 rule’ (500 divided by focal length = max seconds before stars trail; 24mm → ~20 seconds; use the NPF rule for precision). Manual focus on a bright star using live view zoomed in — autofocus can’t see in the dark. Shoot RAW always.
Refine from there: expose to the right (bright but not clipped histogram), take test shots and adjust, and bracket when unsure. White balance around 3800–4500K (adjust in post; RAW makes it flexible). The 500 rule is conservative for high-resolution sensors — when printing large, halve it. These settings get you 90% of the way; the last 10% is practice and post-processing.
- Widest aperture: Maximum light gathering; f/2.8 or lens max.
- ISO 3200–6400: Modern sensors handle it; noise reduced in post.
- 500 rule: 500 ÷ focal length = max untrailed seconds.
- Manual star focus: Live view zoomed on a bright star.
- Shoot RAW: Essential for white balance and noise control.
Related reading: Concert Photography Tips.
Focusing in the Dark
Focus is the beginner’s biggest frustration — and entirely solvable. Method one: live view, zoom to 10x on the brightest star, manually adjust until it’s the smallest point. Method two: focus on a distant light (horizon glow, far building) then don’t touch the focus ring — tape it in place. Method three: pre-focus in daylight on infinity and mark the position.
Verify with test shots zoomed in on the camera screen. Lenses’ infinity marks are unreliable (temperature shifts them), so always confirm visually. Once focused, switch to manual focus lock and avoid bumping the ring. Nailing focus transforms images from mushy to razor-sharp; it’s worth five patient minutes at every session’s start.
- Live view zoom: 10x on brightest star; smallest point wins.
- Distant light method: Focus on horizon glow, then tape the ring.
- Verify on screen: Zoom test shots; confirm before committing.
- Infinity marks lie: Temperature shifts them; always verify visually.
- Lock it: Manual focus + tape; don’t bump the ring.
Related reading: Birdwatching for Beginners: The Complete Starter Guide.
Star Trails Technique
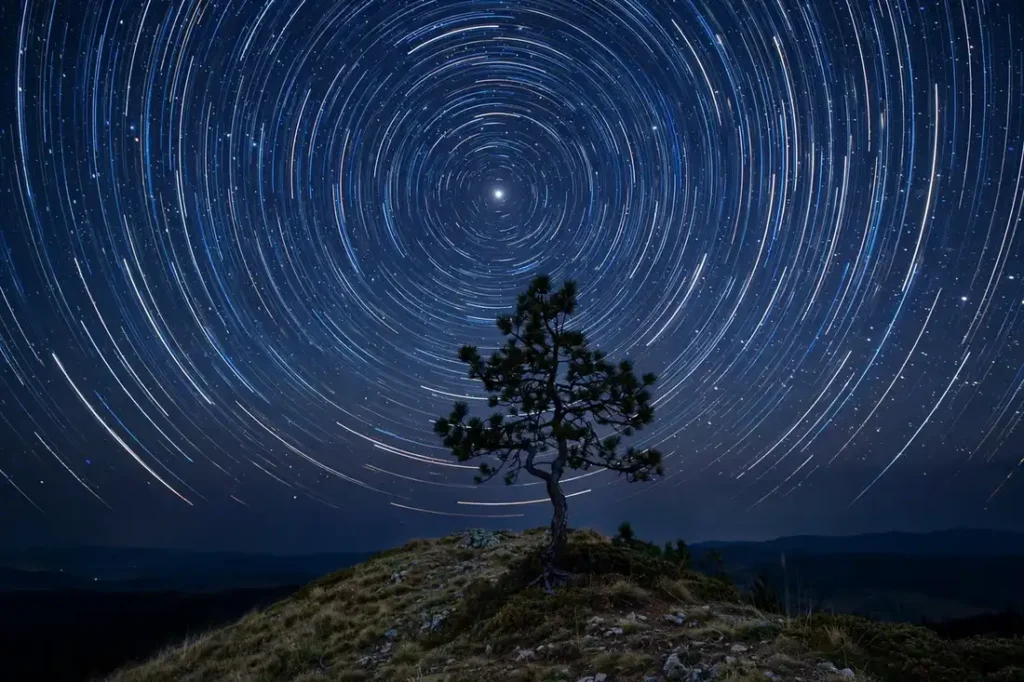
Star trails — concentric star arcs circling Polaris — are the easiest dramatic astrophoto. Method: compose with Polaris in frame (Northern Hemisphere), set interval shooting (30-second exposures back-to-back for 1–3 hours), then stack in free software (StarStaX). Hundreds of frames merge into seamless trails; gaps from missed intervals show, so use an intervalometer and full battery.
Single-exposure trails (bulb mode, 10+ minutes) work but accumulate noise and risk ruined frames; stacking is superior and forgiving (one bad frame just drops out). Include foreground interest — trails over a lone tree or cabin are iconic. Light-paint the foreground subtly during one frame. Star trails teach patience and interval technique that serves all night photography.
- Polaris composition: Trails circle the pole star; include it.
- Interval shooting: 30-second frames for 1–3 hours; stack later.
- StarStaX stacking: Free software merges frames into trails.
- Foreground interest: Trees and cabins under trails; iconic.
- Full battery: Long sessions drain power; start charged.
Photographing the Moon
The moon is bright, detailed, and forgiving — perfect practice. Settings surprise beginners: the moon is sunlit, so expose like daylight (ISO 100–200, f/8–f/11, 1/125–1/250s) — night-sky settings wildly overexpose it. Use your longest lens (200mm+ ideal; crop sensors help), tripod, and timer; manual focus on the terminator (the day-night line) where shadows reveal crater detail.
Creative moon work: crescent moons with earthshine (the ‘old moon in the new moon’s arms’), moonrise over landscapes (plan with moonrise apps), and composite images (properly exposed moon blended into a night landscape — disclose composites honestly). Full moons are actually the least interesting (flat light); quarter and crescent phases show dramatic crater shadows. The moon is astrophotography’s reliable subject, always available for practice.
- Daylight exposure: Sunlit moon: ISO 100–200, f/8, 1/125s area.
- Longest lens: 200mm+ ideal; crop sensors add reach.
- Terminator focus: Day-night line shows crater shadows best.
- Crescents beat full: Quarter phases reveal dramatic detail.
- Plan moonrises: Apps predict rise times and positions.
Basic Post-Processing Workflow
RAW files need processing to shine: in Lightroom/Camera Raw, set white balance (3800–4500K starting point), lift shadows carefully, reduce highlights, add clarity and dehaze judiciously (overdoing creates halos), reduce luminance noise (not too much — detail matters), and adjust the tone curve for contrast. The goal is natural enhancement, not neon fantasy — restraint separates quality work.
Stacking for noise reduction: take 10–20 identical frames and stack in Sequator or DeepSkyStacker (free); stacking averages out random noise, dramatically cleaning high-ISO images. Foreground blending: process sky and foreground separately, mask together. Learn one workflow deeply before chasing advanced techniques; consistent basic processing beats sporadic advanced attempts.
- White balance first: 3800–4500K starting point; RAW flexibility.
- Restraint: Natural enhancement beats neon fantasy.
- Stack for noise: 10–20 frames in Sequator; huge noise reduction.
- Separate processing: Sky and foreground masked together.
- One workflow: Master basics before advanced techniques.
Planning With Apps
Modern apps remove guesswork. Essential: a planetarium app (Stellarium, Sky Guide — point your phone at the sky to identify everything), a Milky Way planner (PhotoPills shows galactic core rise/set times and positions overlaid on your location), a weather app with cloud cover detail (Clear Outside is built for astronomers), and a moon phase calendar.
Plan sessions: check galactic core visibility season (best spring through early fall in the Northern Hemisphere), confirm new-moon timing, verify clear skies, and pre-compose using PhotoPills’ augmented reality. The photographers getting stunning shots aren’t luckier — they’re better planners. An hour of app planning saves wasted drives to cloudy skies.
- Planetarium apps: Identify everything by pointing your phone.
- PhotoPills: Milky Way position planning overlaid on location.
- Clear Outside: Astronomer-grade cloud forecasts.
- Core season: Spring through early fall; Northern Hemisphere.
- Plan first: An hour of planning saves wasted drives.
Staying Safe and Comfortable
Night photography has practical demands: dress warmer than the forecast suggests (standing still in the dark chills fast — layers, warm boots, gloves that allow camera operation), bring more battery power than you think (cold drains batteries; keep spares in warm pockets), and carry a red headlamp plus a white backup light.
Safety: tell someone your location and return time, scout sites in daylight (cliffs and private property are invisible at night), carry a phone with offline maps, and be wildlife-aware in rural areas. Comfort extends sessions: a reclining chair for waiting out long star-trail sequences, thermos of hot drinks, snacks. The photographers who stay comfortable stay out longer — and longer sessions get the shots.
- Overdress: Standing still chills; layers and warm boots.
- Battery warmth: Spares in warm pockets; cold drains fast.
- Tell someone: Location and return time; night safety basics.
- Scout daylight: Hazards invisible at night; check by day.
- Comfort gear: Chair, thermos, snacks; longer sessions, better shots.
Next Steps: Trackers and Deep Sky
When wide-field Milky Way shots feel routine, the star tracker is the next frontier: a motorized mount aligning to Polaris that counter-rotates with Earth, enabling 1–4 minute exposures without trailing. Trackers ($300–$500) unlock dramatically cleaner, more detailed Milky Way images and make deep-sky targets (nebulae, galaxies) reachable with camera lenses.
Deep-sky imaging proper (telescopes, cooled cameras, hours of integration) is a deep rabbit hole — rewarding but gear-intensive. Most hobbyists find the sweet spot at tracked wide-field and short telephoto work: stunning, portable, and affordable. Progress at your own pace; the night sky isn’t going anywhere, and every skill level has its own beautiful images waiting.
- Star trackers: $300–$500; counter Earth’s rotation for long exposures.
- Cleaner images: Minutes-long exposures; dramatically less noise.
- Deep-sky reachable: Nebulae and galaxies with camera lenses.
- Sweet spot: Tracked wide-field; stunning, portable, affordable.
- Your pace: Every level has beautiful images waiting.
Deep-Sky Imaging Introduction
Deep-sky imaging (nebulae, galaxies, clusters beyond the solar system) is astrophotography’s deep end — and more accessible than its reputation suggests. The starter path: a star tracker ($300–$500) + DSLR + 100–200mm lens can capture the Andromeda Galaxy, Orion Nebula, and bright nebulae beautifully. The technique: many long exposures (30–120 seconds each) stacked in free software (DeepSkyStacker, Sequator) to reveal faint detail.
The workflow: polar align the tracker (point at Polaris; apps guide precision), frame the target (planetarium apps show positions), shoot 1–3 hours of exposures (plus calibration frames: darks, flats, bias — they remove sensor artifacts), stack (software aligns and averages; noise melts away), and process (stretch the faint data gently; restraint preserves natural look). First-timers are stunned when the Orion Nebula’s colors emerge from ’empty’ sky.
Start with bright targets: Orion Nebula (winter; bright, forgiving), Andromeda Galaxy (fall; huge, bright core), Pleiades (fall/winter; blue reflection nebulosity), and the Lagoon/Trifid (summer; colorful). These succeed with modest gear and teach the complete workflow. Deep-sky imaging is slow photography — hours per image — and the results feel like discovering hidden universes.
- Tracker + DSLR: $300–$500 tracker; 100–200mm lens starts.
- Stack exposures: Dozens of frames; noise averages away.
- Calibration frames: Darks, flats, bias; remove artifacts.
- Bright targets first: Orion, Andromeda, Pleiades; forgiving.
- Polar align: Precision pointing; apps guide.
- Gentle processing: Stretch faint data; restraint preserves.
- Hours per image: Slow photography; hidden universes revealed.
- Free software: DeepSkyStacker, Sequator; no cost.
Milky Way Panoramas
Single frames can’t capture the Milky Way’s full arch — panoramas can. The technique: shoot overlapping frames (30–50% overlap) across the sky’s arc, then stitch in panorama software (PTGui, or Photoshop’s Photomerge). The result: the complete galactic arch over landscapes — among the most dramatic images in night photography.
Execution details: manual everything (exposure, focus, white balance locked — consistency is stitchable), level the tripod (or use a panoramic head), shoot rows (multi-row panoramas capture arch + foreground), and work efficiently (the sky moves; complete the sequence in 5–10 minutes). Plan with PhotoPills (it shows the arch’s position and timing).
Processing: stitch first (before heavy edits), blend exposures evenly, then process the panorama as one image. Common pitfalls: moving clouds (shoot on clear nights), inconsistent exposure (lock everything), and foreground alignment (distant foregrounds stitch easier). A well-executed Milky Way panorama is a portfolio centerpiece — worth the planning.
- 30–50% overlap: Frames stitch seamlessly.
- Lock everything: Manual exposure, focus, WB; consistency.
- Multi-row: Arch + foreground; complete scenes.
- 5–10 minutes: Beat the sky’s rotation.
- PhotoPills planning: Arch position and timing.
- Stitch before edits: Then process as one image.
- Clear nights: Clouds ruin sequences.
- Portfolio piece: The dramatic night-sky image.
Night Sky Timelapses
Timelapses compress hours of sky motion into seconds of wonder: Milky Way wheeling overhead, clouds racing moonlit landscapes, auroras dancing. Setup: intervalometer (built into most cameras now), 20–30 second exposures with 1–2 second gaps, 300+ frames minimum (10 seconds of video at 30fps), sturdy tripod (any movement ruins sequences), and full batteries + large cards.
Technique: expose for the sky (same as stills), keep settings constant (flicker comes from auto adjustments), consider holy-grail transitions (day-to-night ramps; advanced), and stabilize in post (software smooths minor shakes). Assemble in DaVinci Resolve (free) or LRTimelapse (the gold standard; paid).
Creative approaches: static wide shots (sky does the work), subtle motion (slider or pan head; adds cinema), and foreground interest (tents, trees, people silhouetted). Timelapses teach patience and planning — and the results mesmerize audiences like nothing else in night photography. Start with a simple 2-hour Milky Way sequence.
- 300+ frames: 10 seconds of video minimum.
- Constant settings: Auto adjustments cause flicker.
- Full batteries: Long sequences drain power.
- Sturdy tripod: Any movement ruins it.
- DaVinci free: Assembly; LRTimelapse for advanced.
- Foregrounds: Silhouettes add scale and story.
- 2-hour start: Simple Milky Way sequence first.
- Patience medium: Planning + waiting = wonder.
Light Pollution Filters
Light pollution filters selectively block the wavelengths of artificial lighting (sodium, mercury vapor) while passing the sky’s natural emissions — they don’t create dark skies, but they help significantly in suburban locations. Types: clip-in (camera-specific; convenient), screw-on (lens-mounted; versatile), and the newer broadband/narrowband options (targeting specific pollution types).
Honest assessment: filters help most with emission nebulae (their light concentrates in passed wavelengths) and least with broadband targets (galaxies, reflection nebulae — their light spans blocked ranges too). In Bortle 7–8 skies, a good filter + tracker produces images impossible otherwise; in Bortle 4-, skip filters and drive darker. They’re tools, not miracles.
LED streetlights complicate filtering (broadband white LEDs resist selective filtering — the growing challenge). Strategy: filter for suburban emission targets, travel for broadband objects, and advocate for dark skies locally (shielded lighting helps everyone). Filters extend what’s possible from home; they don’t replace dark-sky trips.
- Block artificial: Sodium/mercury wavelengths filtered.
- Emission nebulae: Benefit most; concentrated wavelengths.
- Broadband less: Galaxies span blocked ranges too.
- Bortle 7–8 help: Suburban imaging made possible.
- LED challenge: White LEDs resist filtering.
- Clip-in convenient: Camera-specific; easy use.
- Tools not miracles: Extend home imaging; travel still wins.
- Advocate dark: Shielded lighting helps everyone.
Star Tracker Guide
Star trackers (Sky-Watcher Star Adventurer, iOptron SkyGuider — $300–$500) are the deep-sky gateway: motorized mounts that counter Earth’s rotation, enabling 1–5 minute exposures with camera lenses. Setup: polar align (point the mount’s axis at Polaris using the built-in scope; apps refine accuracy), mount camera + lens (ball head or declination bracket), balance roughly, and shoot.
What trackers unlock: dramatically cleaner Milky Way (minutes vs. seconds of exposure), deep-sky with telephoto lenses (200–400mm reveals nebulae and galaxies), and tracked panoramas (cleaner, more detailed). Limits: payload capacity (keep camera + lens under ~5kg for small trackers), periodic error (guiding fixes for long focal lengths; advanced), and polar alignment precision (wider lenses forgive; telephotos demand accuracy).
Growing with trackers: start wide-field (50–100mm; forgiving, stunning), progress to 200mm (nebulae emerge), add autoguiding later (for 300mm+ precision). The tracker is the best $400 in astrophotography — it multiplies every lens you own. Master it, and the deep sky opens.
- $300–$500: Counter rotation; minutes-long exposures.
- Polar align: Point at Polaris; precision matters.
- Payload limits: ~5kg; respect capacity.
- Start wide: 50–100mm; forgiving and stunning.
- Telephoto later: 200mm+; nebulae and galaxies.
- Best $400: Multiplies every lens you own.
- Autoguiding: Advanced precision for long lenses.
- Alignment precision: Wide forgives; telephoto demands.
Planning Tools for Night Shoots
Planning separates luck from results: PhotoPills (the planner; the AR; the essential), Stellarium (the sky; the free; the desktop), Clear Outside (the clouds; the seeing; the go), and the Moon (the phase; the calendar; the critical). The workflow: target (the what; the season), moon (the when; the dark), weather (the clear; the check), and the location (the dark; the scouted).
The details: Milky Way season (the months; the hemisphere), galactic center (the south; the timing), blue hour (the foreground; the blend), and the tides (the coast; the access). The apps: alerts (the clear; the wake), maps (the dark; the Bortle), and the share (the plans; the buddy).
The scouting: daytime (the compositions; the safe), the foregrounds (the interesting; the silhouette), hazards (the cliffs; the water; the aware), and the permissions (the land; the ask). The backup: the plan B (the clouds; the nearby), the flexibility (the nights; the window), and the patience (the season; the return). Plan thoroughly; the sky rewards preparation.
The checklist: gear (the charged; the packed), warm (the layers; the survival), food (the thermos; the morale), and the leave (the plan; the told). The planned shoot succeeds; the spontaneous hopes. Preparation is the astrophotographer’s superpower.
- PhotoPills: Planner; AR; essential.
- Stellarium free: Sky; the desktop.
- Clear Outside: Clouds; the go/no-go.
- Moon calendar: Phase; the critical.
- Scout daytime: Compositions; the safe.
- Plan B: Clouds; the nearby.
- Checklist: Charged; warm; fed.
- Preparation power: Rewards; the planned.
The Astrophotography Processing Workflow
Processing reveals: the RAW (the data; the flat), calibration (the darks; the flats; the clean), stacking (the average; the signal), stretching (the faint; the careful), and the color (the balance; the natural). The software: Sequator (the free; the landscape), DeepSkyStacker (the free; the deep), Starry Landscape Stacker (the Mac; the excellent), and Photoshop (the finish; the polish).
The steps: cull (the best; the sharp), calibrate (the frames; the subtract), align (the stars; the register), stack (the median; the noise), stretch (the levels; the gentle), color (the white; the natural), contrast (the local; the careful), and the denoise (the last; the subtle). The restraint: natural (the goal; the believable), the black (the sky; the not-clipped), and the stars (the color; the varied).
The learning: tutorials (the YouTube; the free), practice (the data; the reprocess), the before-after (the study; the inspire), and the community (the feedback; the grow). The mistakes: over-stretch (the noise; the harsh), over-saturate (the neon; the fake), clipped blacks (the dead; the detail), and the hurry (the rest; the fresh). Processing is half the craft; the data deserves patience.
The archiving: masters (the TIFF; the keep), the RAW (the original; the store), versions (the v1; the compare), and the backup (the 3-2-1; the precious). The processed image is the performance; the data is the score. Perform beautifully; the sky composed it.
- Stack: Average; the signal.
- Stretch gentle: Faint; the careful.
- Calibrate: Darks/flats; the clean.
- Natural goal: Believable; the restraint.
- Don’t clip blacks: Detail; the sky.
- Reprocess: Practice; the data.
- Archive TIFF: Masters; the keep.
- Patience: Half the craft.
Dark-Sky Trips and Star Parties
Dark sites transform: Bortle 1–2 (the pristine; the pilgrimage), the travel (the planned; the worth), star parties (the community; the telescopes), and the etiquette (the red; the quiet; the respect). The famous: Cherry Springs (the east; the gold), Big Bend (the Texas; the vast), Death Valley (the west; the stark), and the local (the club; the near).
The trip: new moon (the dark; the plan), the season (the Milky Way; the comfort), gear (the packed; the checklist), and the buddy (the safety; the share). At the site: setup (the daylight; the familiar), the dark adapt (the 30 min; the patience), observe (the eyes; the first), then image (the camera; the planned).
Star party etiquette: red lights (the only; the dim), no white (the ruin; the adapt), quiet (the night; the respect), ask (the eyepiece; the welcome), and the share (the views; the joy). The community: the knowledge (the generous; the experts), the telescopes (the look; the wow), and the friendships (the night; the bonded).
The experience: the Milky Way (the shadow; the bright), the tears (the common; the moved), the perspective (the vast; the humble), and the return (the annual; the pilgrimage). Dark skies change people; the universe is the destination. Go dark; the sky awaits.
- Bortle 1–2: Pristine; the pilgrimage.
- Cherry Springs: East; the gold.
- New moon: Dark; the plan.
- Red only: Etiquette; the dim.
- Ask eyepiece: Welcome; the share.
- Observe first: Eyes; then camera.
- Buddy safety: Share; the night.
- Go dark: Changed; the universe.
Astrophotography for Beginners: Quick Comparison
| Target | Difficulty | Gear needed | Best season |
|---|---|---|---|
| Milky Way wide-field | Easy | Camera + tripod | Spring–fall |
| Star trails | Easy | Camera + tripod + intervalometer | Year-round |
| Moon detail | Easy | Long lens + tripod | Year-round |
| Constellations | Easy | Camera + tripod | Year-round |
| Deep sky (tracked) | Medium | Star tracker + telephoto | Varies by target |
Frequently Asked Questions
Can I do astrophotography with a phone?
Modern phones have night modes that capture decent Milky Way shots on tripods, but dedicated cameras with manual control produce dramatically better results. Phones are great for learning composition.
What is the 500 rule?
Divide 500 by your focal length to get the maximum exposure seconds before stars visibly trail (24mm → ~20s). It’s conservative; halve it for large prints on high-res sensors.
Do I need a star tracker to start?
No — wide-field Milky Way, star trails, and moon shots need only camera and tripod. Add a tracker when you’re ready for longer exposures and deep-sky targets.
How do I focus on stars?
Live view zoomed 10x on the brightest star, manually adjusted to the smallest point. Verify with test shots; tape the focus ring once set.
When is the best time to photograph the Milky Way?
Spring through early fall in the Northern Hemisphere, during new-moon weeks, from dark skies. The galactic core’s position varies; planning apps show exact times.
Why are my star photos noisy?
High ISO plus underexposure. Expose brighter (without clipping), shoot RAW, reduce noise in post, and stack multiple frames for the cleanest results.
Watch: Astrophotography for Beginners: Capture the Night Sky Video Guide
Astrophotography begins with a camera, a tripod, and dark skies — everything else is refinement. Your first sharp Milky Way frame will feel like magic, and it’s repeatable: same settings, same planning, ever-better results. Start with wide-field shots, learn the processing basics, and let the night sky pull you deeper at your own pace. The universe is putting on a show every clear night; now you can keep souvenirs.