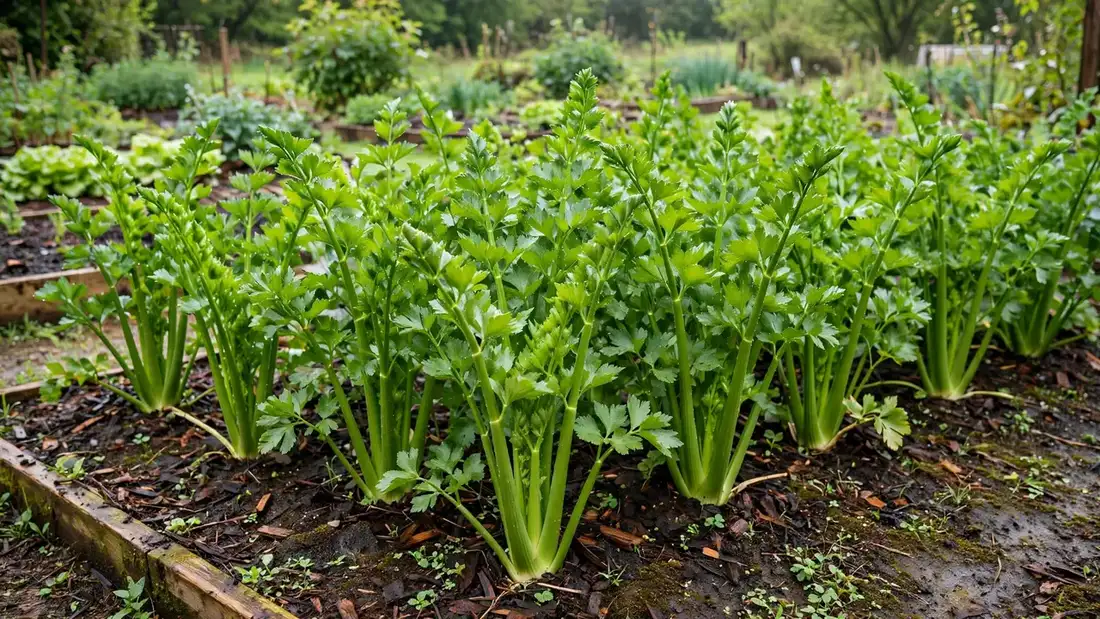
Ask seasoned gardeners about their most satisfying crop and Celery comes up constantly.
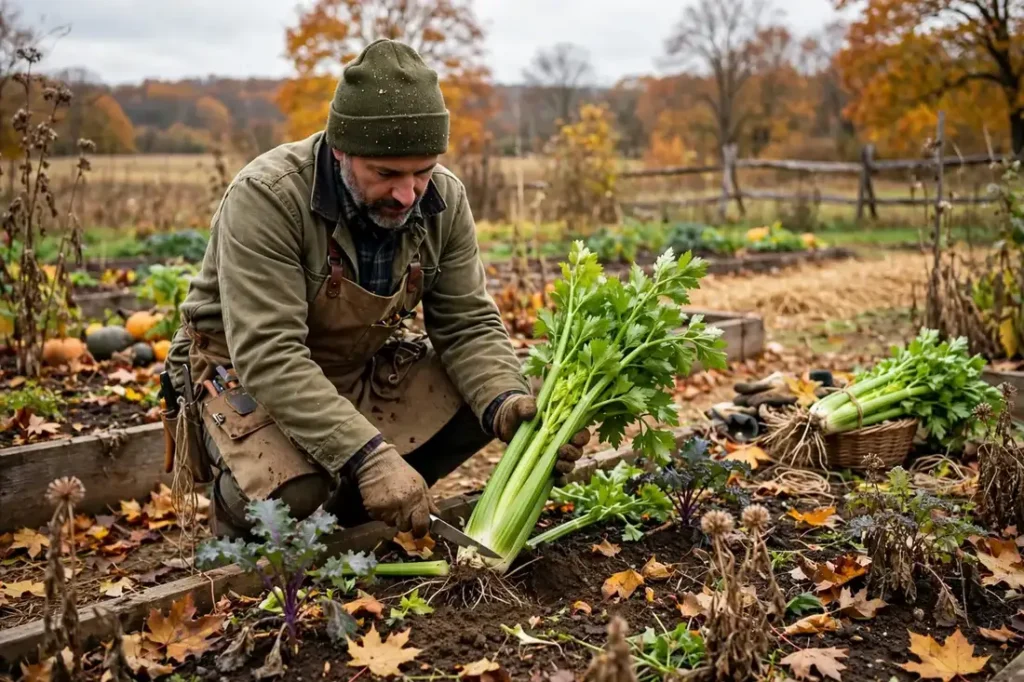
Celery is the garden's diva: slow to germinate, slow to grow, thirsty, and hungry, but homegrown stalks are intensely flavored compared to store bunches. It needs a long, cool season with never-drying soil. Start seeds indoors very early, transplant into rich moist ground, mulch heavily, and blanch stalks for tenderness if you like them mild.
Homegrown produce also wins on freshness in a way no supply chain can match. Vegetables start losing nutrients and flavor the moment they are picked; the shortest possible farm-to-table distance is your own backyard. A tomato eaten warm from the vine is a different food from one shipped green and gassed red.
This guide walks through the whole process step by step, with the practical details most overviews skip. By the end, you will know exactly what to do, when to do it, and what to watch out for.
This guide is written for real home gardeners: no expensive equipment required, no jargon without explanation, and every recommendation tested in ordinary backyards. Let’s get growing.
Quick Facts
| Factor | Details |
|---|---|
| Sun Requirements | Full sun to part shade |
| Soil pH | 6.0-7.0 |
| Spacing | 8 inches apart |
| Planting Depth | 1/8 inch (needs light to germinate) |
| Germination | 14-21 |
| Days to Maturity | 100-130 |
| Hardiness Zones | All zones (long cool season) |
| Water Needs | Constant moisture; celery is the thirstiest garden vegetable |
| Season | Cool season: long growing window |
| Common Pests | Slugs, aphids, carrot rust fly |
| Good Companions | Onions, cabbage family, and bush beans |
Why Grow Celery?
Celery is the garden's diva: slow to germinate, slow to grow, thirsty, and hungry, but homegrown stalks are intensely flavored compared to store bunches. There is also the simple economics. A packet of seeds costing a few dollars can produce tens of dollars of organic produce. Even accounting for soil and water, the home garden wins on value, and that is before counting the exercise, stress relief, and satisfaction.
Beyond the obvious harvest, growing your own means control: no mystery sprays, picked at peak ripeness, varieties chosen for flavor rather than shipping durability. The flavor gap between homegrown and store-bought is real and immediate, especially for crops eaten fresh.
And honestly, it is fun. Watching a seed you planted become food on your table never gets old, no matter how many seasons you have gardened. Kids who grow vegetables eat vegetables; reluctant gardeners become converts after one perfect homegrown tomato.
What You'll Need
Having everything on hand before day one is the difference between a fun project and a frustrating one. Here is the complete list.
- Quality seeds or healthy transplants
- Finished compost (1-2 cubic feet per bed)
- Balanced organic fertilizer
- Mulch: straw or shredded leaves
- Watering can or hose with a gentle nozzle
- Hand trowel, garden fork, and hoe
- Floating row cover for pest protection
Step-by-Step: Growing Celery
Follow these steps in order; each one builds on the last. Adjust timing to your local frost dates.
- Start seeds indoors 10-12 weeks before last frost; they need light to germinate. Start seeds indoors 10-12 weeks before last frost; they need light to germinate. Take your time here; rushing this step causes most of the problems gardeners blame on weather or pests later. When in doubt, choose the gentler option; you can always do more later, but you cannot undo overdoing it.
- Sow on the soil surface, press in, and keep at 70F; expect 2-3 weeks. Sow on the soil surface, press in, and keep at 70F; expect 2-3 weeks. Pay attention to your specific conditions as you go; gardens reward observation far more than rigid rule-following. Consistency matters more than perfection here; plants respond to steady care, not occasional heroics.
- Harden off and transplant 8 inches apart after frost danger passes. Harden off and transplant 8 inches apart after frost danger passes. Experienced gardeners do this almost automatically; beginners should slow down and be deliberate until it becomes habit. Consistency matters more than perfection here; plants respond to steady care, not occasional heroics.
- Work heavy compost into the bed; celery feeds greedily. Work heavy compost into the bed; celery feeds greedily. Write down what you did and the date; next year's version of you will be grateful for the record. If something looks off afterward, revisit this step first; nine times out of ten the answer is hiding here.
- Mulch 3 inches deep and water so soil never dries. Mulch 3 inches deep and water so soil never dries. Take your time here; rushing this step causes most of the problems gardeners blame on weather or pests later. This is the step beginners most often skip, and skipping it is the difference between thriving plants and struggling ones.
- Side-dress with nitrogen monthly through the season. Side-dress with nitrogen monthly through the season. Pay attention to your specific conditions as you go; gardens reward observation far more than rigid rule-following. This step sets up everything that follows, so give it your full attention even though it feels basic.
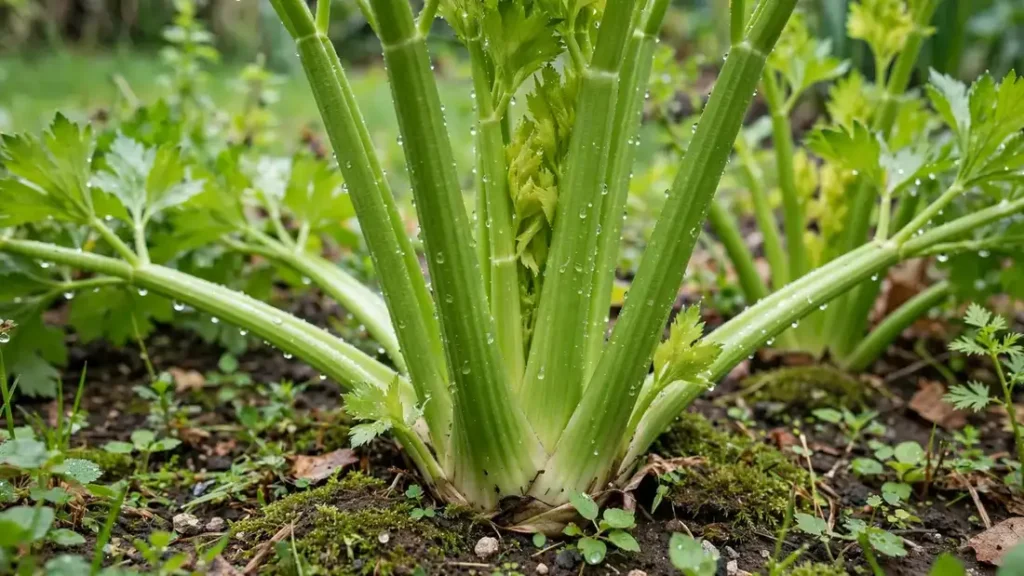
- Blanch by wrapping stalks with newspaper or mounding soil 2 weeks before harvest. Blanch by wrapping stalks with newspaper or mounding soil 2 weeks before harvest. Take your time here; rushing this step causes most of the problems gardeners blame on weather or pests later. When in doubt, choose the gentler option; you can always do more later, but you cannot undo overdoing it.
- Harvest whole plants or outer stalks as needed before hard freeze. Harvest whole plants or outer stalks as needed before hard freeze. This is the step beginners most often skip, and skipping it is the difference between thriving plants and struggling ones. Do not overthink it; done imperfectly today beats done perfectly next month after the ideal window has passed.
Soil, Sun, and Water Requirements
Get these three right and Celery largely takes care of itself: give it full sun to part shade; aim for soil pH 6.0-7.0; plan on constant moisture; celery is the thirstiest garden vegetable. Double-digging is overkill for most gardeners, but the first preparation of a new bed matters enormously. Strip or smother the existing grass, loosen the top 8 to 10 inches with a fork, and work in 3 to 4 inches of compost. That single investment pays off for years, because you will never again need to dig that deep; annual top-dressing maintains it. For instant results on terrible ground, build a raised bed and fill it with a proven mix instead of fighting what you have.
Drainage deserves more attention than most beginners give it. Roots need oxygen as much as water, and waterlogged soil suffocates them within days. The classic percolation test: dig a 12-inch hole, fill it with water, and time the drain. One to three inches per hour is ideal. Slower means you need raised beds or mounding; faster means heavy mulching and extra compost to hold moisture. Either diagnosis beats watching plants drown or desiccate while you guess.
Organic matter is the universal fixer, and 5 percent is the target most soil scientists cite for vegetable ground. Finished compost, shredded leaves, and aged manure all build it. But fresh wood chips or sawdust mixed into soil will tie up nitrogen as they decompose, yellowing your plants; use woody materials as surface mulch only, or compost them first. Top-dress beds each season and let the worms incorporate it.
Seedbeds play by opposite rules from established plantings: the surface must stay consistently moist until germination, which for slow crops like carrots and parsnips means up to three weeks of vigilance. A light covering of vermiculite, a floating row cover, or even a board laid over the row holds that critical surface moisture. Mist gently; a hard hose blast buries tiny seeds or washes them into clumps.
Clay soil and sandy soil need opposite watering rhythms. Clay absorbs slowly, so water in short cycles with soak-in breaks to prevent runoff; once wet, it holds moisture for days. Sand drinks instantly but holds little, so water more often in smaller amounts and mulch heavily. Matching your technique to your soil type can halve your water bill and double your results. When in doubt, dig down and look; the soil tells the truth.
Feeding and Fertilizing
Fertilizer labels are simpler than they look: the three numbers are nitrogen (N), phosphorus (P), and potassium (K), always in that order. Nitrogen drives leafy growth, phosphorus drives roots and flowers, potassium drives overall vigor and disease resistance. A balanced 10-10-10 suits most vegetables when a soil test shows no specific deficiency. But the real pros fertilize by crop: leafy greens get extra nitrogen, fruiting crops get extra phosphorus and potassium once they bloom.
Container plants live in a leaky system: every watering flushes nutrients out the drainage holes. That is why pots need feeding every two to three weeks in summer while in-ground plants might need one side-dressing. A balanced liquid fertilizer at half strength, applied regularly, beats monthly full-strength blasts that stress roots. Slow-release granules mixed into the potting mix at planting time provide the baseline; liquids handle the peak demand.
Manure is powerful and deserves respect. Fresh manure burns plants and can harbor pathogens; only apply composted or aged manure, ideally 6 months or older, and never within 120 days of harvesting crops eaten raw. Aged manure is black, crumbly, and earthy-smelling. For root crops like carrots, even aged manure can cause forking if over-applied; compost is the safer choice there.
Pests, Diseases, and Organic Solutions
The pests most likely to bother Celery are slugs, aphids, carrot rust fly. Disease prevention beats disease treatment every time, because most plant diseases cannot be cured, only prevented. Water the soil, not the leaves. Space plants for airflow. Mulch to stop soil splashing onto foliage, which is how blights and wilts spread. Rotate plant families so soil-borne pathogens starve. And choose resistant varieties; the letters after a tomato’s name (VFN) are decades of breeding working for you.
Learn to identify before you act, because the vast majority of insects are harmless or actively helpful. Ladybug larvae look like tiny orange alligators and eat hundreds of aphids; many gardeners have sprayed their own allies. A $20 hand lens and a free insect ID app turn panic into precision. When you do treat, target the actual pest: Bt kills caterpillars and essentially nothing else, making it one of the safest interventions ever developed.
Traps and barriers often outperform sprays for specific pests. Cutworm collars, cardboard tubes around transplants, stop cutworms completely. Yellow sticky traps monitor whiteflies and fungus gnats while catching some. Pheromone traps for codling moths and squash vine borers tell you exactly when to act. Physical exclusion is precise, residue-free, and never harms pollinators.
Companion Planting and Garden Layout
The classic Three Sisters planting, corn, beans, and squash together, demonstrates companion principles perfectly: beans fix nitrogen the corn devours, corn stalks trellis the beans, and squash leaves shade out weeds. You do not need the full trio to benefit; even pairing tall crops with shade-tolerant lettuce underneath doubles a bed’s productivity.
Companion planting is not magic, but the well-documented pairings genuinely help. Aromatic herbs like basil, dill, and cilantro confuse pest insects searching by scent; interplant them through beds rather than segregating them in a herb corner. Flowers do the same work: marigolds suppress root-knot nematodes, nasturtiums act as trap crops for aphids, and sweet alyssum feeds the tiny parasitic wasps that control caterpillars.
Seasonal Calendar and Timing
Spring success is decided in late winter. Start seeds indoors on schedule, counting back from your last frost date, not from your enthusiasm date. Harden off transplants for 7 to 10 days before planting out; unhardened seedlings stall for weeks. Direct sow peas, spinach, and radishes as soon as soil can be worked; wait for 60-degree soil for beans and corn. And resist planting warm crops early; one cold night can stunt peppers and tomatoes for a month.
Summer gardening is triage gardening: water deeply, mulch everything, and harvest constantly. Pick beans, cucumbers, and zucchini every other day; overlooked fruit signals plants to stop producing. Watch for pests weekly, checking leaf undersides. Start fall crops indoors in midsummer, even while summer harvests peak; the fall garden is planned in July, not September. Shade cloth over lettuce and spinach extends their season by weeks.
Troubleshooting Common Problems
Yellow leaves are the most common complaint and the least specific symptom. Uniform yellowing of older leaves usually means nitrogen shortage or natural aging. Yellow between green veins points to iron deficiency, often from high pH rather than missing iron. Yellow, wilted plants in wet soil mean root rot from overwatering. Match the pattern to the cause; fertilizing a drowning plant only hurries its end.
Yellow leaves are the most common complaint and the least specific symptom. Uniform yellowing of older leaves usually means nitrogen shortage or natural aging. Yellow between green veins points to iron deficiency, often from high pH rather than missing iron. Yellow, wilted plants in wet soil mean root rot from overwatering. Match the pattern to the cause; fertilizing a drowning plant only hurries its end.
When plants look wrong, diagnose systematically instead of guessing. First check the basics: Is the soil moist or soggy two inches down? How many hours of direct sun does the spot actually get? Was it planted at the right time for your zone? Most problems trace to water, light, or timing, not exotic diseases. Fix the environment before reaching for any product.
Choosing the Right Varieties
Save the variety names that work. Memory fades by spring, but a garden journal entry saying which tomato out-produced the rest is priceless. Over a few seasons you will assemble a personal list of champions perfectly tuned to your soil and microclimate. That list becomes one of your most valuable gardening possessions.
Save the variety names that work. Memory fades by spring, but a garden journal entry saying which tomato out-produced the rest is priceless. Over a few seasons you will assemble a personal list of champions perfectly tuned to your soil and microclimate. That list becomes one of your most valuable gardening possessions.
Do not plant just one variety, especially with something new. Trial two or three side by side and keep notes; your garden will tell you which to repeat. Seed swaps and local gardening groups are goldmines for proven local performers. The variety that thrives for a gardener ten miles away will probably thrive for you.
Common Mistakes to Avoid
Planting without a plan for pests means discovering cabbage worms at harvest time. Walk your garden weekly, look under leaves, and learn what is normal. Row cover at planting prevents most insect problems before they start. Waiting until infestation to act means fighting an established enemy; catching the first aphids means a jet of water solves it.
Crowding is the second great beginner error, and seed packets enable it: those tiny seeds become big plants. Crowded plants compete for light, water, and nutrients, producing less than properly spaced ones while inviting disease through poor airflow. Thin ruthlessly; it feels wasteful for about a week, then the remaining plants explode. Follow spacing guidance, not optimism.
Skipping soil preparation is the mistake that taxes you all season. Plants in unimproved, compacted soil struggle from day one, and no amount of mid-season fertilizer fully compensates. Spend your energy in spring: compost, loosen, test, and amend. An hour of bed prep in April saves ten hours of troubleshooting in July.
- Soak seeds overnight to speed the notoriously slow germination. This one trick alone can double your success rate with finicky crops.
- Inconsistent water makes stringy, bitter stalks; drip irrigation shines here. File this under lessons most gardeners learn the hard way; now you get to skip the hard way.
- Self-blanching varieties skip the wrapping step. Old-timers swear by this, and modern gardening science keeps confirming they were right.
- Celery tolerates light frost, which sweetens stalks. This one trick alone can double your success rate with finicky crops.
- Save the leaves; they are potent flavoring for soups and stocks. Small effort, outsized payoff; this is exactly the kind of detail that separates good gardens from great ones.
Extending Your Season
The real secret of season extension is timing, not equipment. Fall crops must be planted in summer while the garden looks abundant; spring crops go in while it is still winter. Work backwards from your frost dates, add buffer weeks, and plant on schedule even when it feels absurdly early. The gardeners harvesting in November started planning in July.
Cold frames and low tunnels are the next step up, buying a full month or more on each shoulder season. A cold frame, essentially a box with a glass lid, creates a microclimate dramatically warmer than outside air. Low tunnels, hoops plus greenhouse plastic, cover whole beds. Both let you harvest salads in months your neighbors consider winter, and both cost little to build.
Seasonal Task Calendar
Gardening runs on rhythm more than effort. Follow this seasonal cadence and the garden largely manages itself.
| When | Tasks |
|---|---|
| Early Spring | Start seeds indoors; work compost into beds; test soil |
| Spring | Transplant after frost; mulch; install supports and row cover |
| Summer | Water deeply; harvest every 2-3 days; scout for pests weekly |
| Fall | Sow cool-season succession; plant garlic; clean up debris |
| Winter | Plan rotation; order seeds; sharpen and oil tools |
Harvesting and Storage
Storage turns a glut into months of food. Onions and garlic need curing: two to three weeks in dry, airy shade until necks tighten and skins rustle. Root crops like carrots and beets store for months in damp sand in a cool cellar. Winter squash cures in the sun for ten days, then keeps at 50 to 60 degrees. Tomatoes, famously, should never see the refrigerator; cold kills their flavor compounds irreversibly.
Preserving extends the harvest further. Freezing is the easiest: blanch vegetables briefly, ice-bath them, and freeze flat in bags. Tomatoes freeze beautifully whole for sauce. Herbs freeze in oil in ice cube trays or dry hung in bundles. Fermentation turns cabbage into sauerkraut with nothing but salt and time. Start with freezing; it needs no special equipment and preserves flavor best.
Storage turns a glut into months of food. Onions and garlic need curing: two to three weeks in dry, airy shade until necks tighten and skins rustle. Root crops like carrots and beets store for months in damp sand in a cool cellar. Winter squash cures in the sun for ten days, then keeps at 50 to 60 degrees. Tomatoes, famously, should never see the refrigerator; cold kills their flavor compounds irreversibly.
Saving Seeds and Planning Next Year
Saving your own seeds closes the loop and quietly improves your garden every year. Plants grown from your saved seed are one generation more adapted to your exact soil, pests, and climate. Save from open-pollinated and heirloom varieties only; hybrid seeds do not come true. Let the best specimens fully mature, even past eating stage, since seed maturity and eating maturity differ.
Saving your own seeds closes the loop and quietly improves your garden every year. Plants grown from your saved seed are one generation more adapted to your exact soil, pests, and climate. Save from open-pollinated and heirloom varieties only; hybrid seeds do not come true. Let the best specimens fully mature, even past eating stage, since seed maturity and eating maturity differ.
Key Takeaways
- Success with Celery comes mostly from timing, soil preparation, and consistency.
- Start with the steps in this guide in order; do not skip the setup.
- Observe your plants weekly and catch problems early when they are easy to fix.
- Keep notes so next season builds on this one.
- Share your harvest and your lessons; gardening is better together.
- Start this weekend; the best time to begin was last season, and the second-best time is now.
Watch and Learn
Sometimes seeing it done beats reading about it. This hands-on video walkthrough covers the key techniques for Celery clearly:
Frequently Asked Questions
Why is my celery bitter and stringy?
Usually underwatering or heat stress. Celery needs constantly moist, cool soil for tender stalks. Experience is the best teacher here, so start simple and observe closely.
Can I regrow celery from the base?
Yes, the cut base will resprout in water or soil, giving you a small second harvest of stalks. Small adjustments beat big overhauls; change one thing at a time.
Can I grow it organically?
Absolutely. Build healthy soil with compost, rotate crops, use row cover against insects, and invite beneficial predators. Most home gardeners find organic methods easier, not harder, once the system is running. Small adjustments beat big overhauls; change one thing at a time.
Should I start from seed or buy transplants?
Direct sow fast crops and root vegetables; buy or start transplants for long-season heat-lovers. Seeds cost pennies and offer far more variety, while transplants buy you weeks of head start. Keep notes on what you try; patterns emerge over a season or two.
Why are my plants growing slowly?
The usual suspects are cold soil, insufficient sun, compacted ground, or nutrient shortage, in that order. Check soil temperature and sunlight hours first; those two explain most slow starts. Small adjustments beat big overhauls; change one thing at a time.
How often should I water?
Check the top two inches of soil; water deeply when dry. Most vegetables want about an inch per week, more in heat waves and less in cool, rainy spells. Mulch heavily to even out moisture swings. Keep notes on what you try; patterns emerge over a season or two.
Keep Growing: More from DayZora
If you enjoyed this guide, you will love these reader favorites:
- Different Rose Colors and Their Meaning
- Outdoor Proposal Ideas for Couples
- Rose Day Dinner Recipes for Two
- How to Make Clay Diyas at Home: DIY Lamp Guide
Every expert was once a beginner staring at a seed packet. The difference is simply seasons in the ground. Plant your Celery, tend it with attention, learn from what happens, and enjoy one of the most satisfying hobbies on earth. Happy growing.