
How to Make Clay Diyas at Home: DIY Lamp Guide for Diwali
There is something deeply satisfying about lighting a diya you made with your own hands. Store-bought diyas are convenient, but handmade clay diyas carry a different energy — each one slightly unique, each one shaped by your fingers, each flame a small personal offering. Making diyas at home is also wonderfully practical: a bag of terracotta clay costs less than a single fancy candle, yields dozens of diyas, and the whole family — kids included — can join in. It is the perfect Diwali weekend project.
This DIY lamp guide for Diwali walks you through everything: choosing the right clay, preparing it properly, two shaping methods (hand-shaping for the purist, moulding for speed), drying and firing options for every home (no kiln required), painting and decorating ideas, and the mistakes that crack diyas before they ever see a flame. By the end, you will have a tray of beautiful handmade diyas ready for Lakshmi Puja — and the know-how to make them a yearly tradition. Once they are ready, our Diwali festival of lights guide shows you the best oils and placement.

Materials and Tools You Need
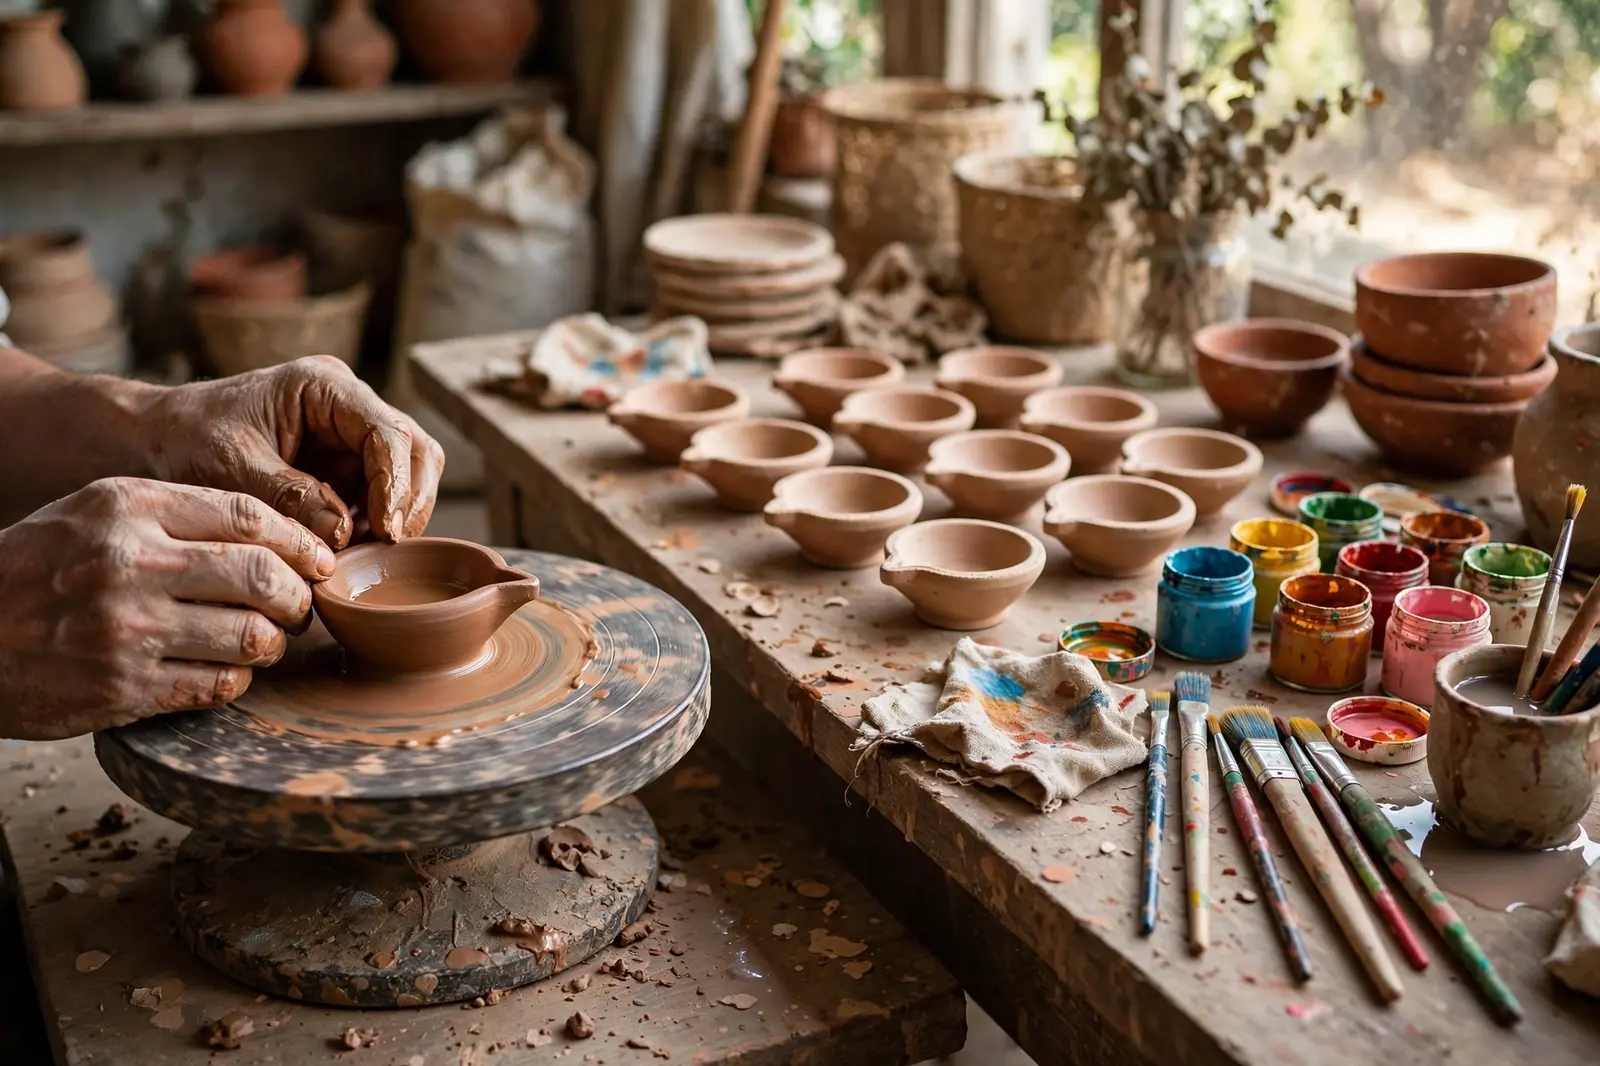
The shopping list is refreshingly short. You need: terracotta clay (air-dry terracotta clay from a craft store works perfectly; natural potter’s clay from a kumhar is even better and cheaper — about 2 kg makes 25–30 medium diyas), a large bowl of water for wetting your hands and the clay, a flat work surface covered with an old cotton cloth or plastic sheet, a wooden rolling pin or smooth bottle, a blunt knife or clay tool for trimming, fine sandpaper (150-grit) for smoothing dried diyas, and newspaper for drying. For decorating: acrylic paints, fine brushes, glitter, small mirrors (shisha), and a clear varnish or Mod Podge for sealing. Optional: round cookie cutters or steel bowls to use as moulds, and cotton wicks and oil for the test lighting.
Total cost for a first batch of 30 diyas: roughly the price of two café coffees. The paints and brushes are a one-time investment you will reuse every Diwali.
Preparing the Clay: The Step Everyone Skips
Good diyas start before you shape a single lamp. If your clay is too dry, it cracks; too wet, it slumps. Here is the preparation routine:
Step 1 — Wedge the clay: knead each lump like bread dough for 5–7 minutes, pressing and folding to squeeze out air bubbles. Trapped air is the number one cause of diyas exploding or cracking during drying and firing. The clay is ready when it is smooth, uniform, and holds a fingerprint cleanly. Step 2 — Test the moisture: roll a coil as thick as your finger and bend it into a ring. If it bends without cracking, the moisture is perfect. If it cracks, knead in water a teaspoon at a time. If it is sticky and slumps, let it rest uncovered for 20 minutes. Step 3 — Portion it: divide the clay into lemon-sized balls (about 60–70 grams each for a standard diya), cover the ones you are not using with a damp cloth so they do not dry out while you work.
Method 1: Hand-Shaping Diyas (The Traditional Way)
Hand-shaped diyas have the lovely irregularity of truly handmade things. There are two hand techniques — learn both, then use whichever feels natural.
The pinch method (easiest)
Step 1: Roll a clay ball smooth between your palms — no cracks on the surface. Step 2: Press your thumb into the center, about two-thirds deep, keeping the walls even. Step 3: Pinch and rotate: with your thumb inside and fingers outside, gently pinch the walls upward and outward, rotating the ball as you go, until you have a bowl about 2.5 inches wide and 1.25 inches deep. Step 4: Pinch one edge of the rim into a small spout — this is the classic diya shape, and it is where the wick rests. Step 5: Smooth the outside with wet fingers and tap the base flat on the table so the diya sits without wobbling. A wobble-free base is essential — a tipping diya spills burning oil.
The coil method (sturdiest)
Step 1: Roll a flat disc for the base, about 3 inches across and half an inch thick. Step 2: Roll long coils as thick as your little finger. Step 3: Score the edge of the base (scratch crosshatches with a knife) and dab water on it, then lay the first coil around the edge, pinching it to the base. Step 4: Add a second coil on top for height, blending each coil into the one below with wet fingers — inside and out. Step 5: Shape the rim, pinch the spout, and smooth everything. Coil-built diyas have thicker, stronger walls and survive handling by enthusiastic children far better than pinched ones.
Method 2: Moulding Diyas (Fast and Uniform)
Need 50 identical diyas for a party or for gifting? Moulding is your method. Step 1: Find a mould — a small steel katori (bowl), a round cookie cutter pressed into a clay slab, or even an existing diya you like. Step 2: Dust the mould lightly with dry clay powder or cornstarch so the clay releases. Step 3: Press a flattened clay disc firmly into the mould, building up even walls with your thumbs. Step 4: Trim the rim with a knife for a clean edge, pinch the spout, and gently flex the mould to release the diya. Step 5: Set it on newspaper to firm up for an hour before handling. With a good mould and an assembly line (one person pressing, one trimming), two people can produce 40–50 diyas in an afternoon — perfect for a pre-Diwali crafting party with friends.

Drying and Firing: From Soft Clay to Sturdy Lamp
A diya that is not fully dry will crack, leak oil, or crumble when lit. Drying is not glamorous, but it is the most important stage.
Air-drying (the standard method)
Place shaped diyas on newspaper in a shaded, breezy spot — never in direct harsh sun, which dries the outside faster than the inside and causes cracking. Turn each diya once a day so the base dries too. Drying takes 3–5 days in normal weather, up to a week in humid conditions. The diya is ready when it is uniformly pale, feels room-temperature (damp clay feels cool), and makes a light ringing sound when tapped. Be patient: 90 percent of homemade diya failures are just impatience at this stage.
Oven-drying (the shortcut)
If Diwali is three days away and your diyas are still soft, the oven rescues you. Place fully air-dried-for-24-hours diyas on a baking tray and heat at the oven’s lowest setting (80–100°C / 175–200°F) for 2–3 hours with the door slightly ajar. Let them cool inside the oven. This works for air-dry craft clay and natural terracotta for decorative and light use — but note that true vitrification needs a kiln, so oven-dried diyas remain somewhat porous. That is fine: soak them in water before oiling (as with store-bought clay diyas) and they will hold oil perfectly well for an evening’s burning.
The water test (non-negotiable)
Before painting or lighting, fill each dried diya with water and wait 30 minutes. If the water level holds, the diya is sound. If it seeps through the walls, the clay is too porous — reserve that diya for decoration only (or seal it heavily, below). If it leaks from a visible crack, discard it or repurpose it as a planter. Test every single diya you intend to light; a leaking diya on a wooden table is a fire hazard, not a decoration.
Painting and Decorating Your Diyas
Plain terracotta diyas are beautiful, but painted diyas are the ones guests ask about. Paint only diyas that passed the water test, and always paint before the first lighting — heat and oil ruin fresh paint.
Classic painted designs
Two-tone dip: paint the outside a rich color (maroon, teal, royal blue) and leave the inside natural terracotta — elegant and fast. Gold rim: paint the whole diya one color, then add a metallic gold band around the rim with a flat brush. Mirror work: glue tiny shisha mirrors in a ring around the outside with craft glue — they catch candlelight spectacularly. Dot mandala: using the back of a paintbrush handle, dot concentric rings of contrasting colors around the diya — no artistic skill needed, stunning results. Glitter gradient: paint the base color, then while wet, dust the rim with fine gold glitter. Traditional motifs: for the confident, paint tiny paisleys, lotus buds, or peacock feathers with a liner brush.
Sealing for durability
Acrylic paint alone chips when diyas are stacked or handled. After the paint dries fully (24 hours), apply one thin coat of clear varnish or Mod Podge to the outside only — never inside the oil bowl, where heat and oil will break it down. Sealed diyas survive storage in a box until next Diwali without scratching. Important safety note: painted and varnished diyas should be lit only with the flame well above the rim and never left unattended; treat heavily decorated diyas as semi-decorative and keep a few plain ones for all-night burning.
Decorating with kids
Diya painting is the ultimate Diwali kids’ activity. Set up a washable station: newspaper, smocks, chunky brushes, and just three paint colors plus gold (limiting colors keeps the results harmonious). Let kids do dot mandalas and glitter rims — both are foolproof. Their imperfect, joyful diyas make the most treasured gifts for grandparents. For more on the festival’s meaning to share while you paint, our Diwali festival of lights guide is a good read-aloud.

Diya Styles: What to Make for Each Use
| Diya Style | Difficulty | Drying Time | Best Use |
|---|---|---|---|
| Plain pinched diya | Easy | 3–4 days | Bulk lighting: steps, pathways, windows |
| Coil-built diya | Easy–Medium | 4–5 days | Sturdy everyday lamps, kids’ handling |
| Moulded diya | Easy | 3–4 days | Uniform sets for gifting and parties |
| Painted two-tone diya | Easy | 4–5 days + paint | Table centerpieces, gifting |
| Mirror-work diya | Medium | 5 days + decoration | Statement pieces, entrance display |
| Dot-mandala diya | Easy | 4–5 days + paint | Kids’ craft, colorful table settings |
| Large urli diya (floating) | Medium | 5–7 days | Floating in urli bowls with flowers |
| Brass-finish painted diya | Medium | 5 days + paint | Puja altar accent lamps |
Tips for Perfect Homemade Diyas
Wedge out every air bubble: trapped air causes cracks and, rarely, small pops during firing — knead thoroughly. Keep walls even: thin spots burn through and leak; aim for uniform half-inch walls. Work assembly-line: shape all diyas first, then trim all, then smooth all — it is twice as fast as finishing one at a time. Label your batches: if experimenting with clay mixes, scratch a mark on the base so you know which recipe worked. Store clay properly: wrap unused clay airtight; dried-out clay can be revived by wrapping in a wet towel overnight. Make extras: a 20 percent loss rate to cracks and wobbles is normal for beginners — plan for it. Gift them thoughtfully: a set of six painted diyas in a small box with a card is a Diwali gift people genuinely keep; pair the idea with wishes from our Happy Diwali quotes. Start early: begin shaping two weekends before Diwali so drying never feels rushed.
Diya Traditions Across India: Inspiration for Your Designs
India does not light diyas one way — every region has its own lamp traditions, and borrowing them makes your handmade collection richer. In Tamil Nadu, the kuthuvilakku — tall brass standing lamps — anchor the kolam-decorated doorway; try shaping tall, stemmed diyas in clay as an homage. Bengal’s Diwali (Kali Puja) favors rows of small earthen pradips along every ledge — make yours extra small and numerous. Gujarat loves decorative, painted diyas in bright bandhani colors — the mirror-work diya from this guide fits right in. Maharashtra places diyas in the aakash kandil (lantern) tradition alongside lamps — pair your diyas with paper lanterns. In Uttar Pradesh and Bihar, the emphasis is on sheer numbers: hundreds of plain diyas outlining rooftops and courtyards — the pinch method at scale. And in Kerala, the nilavilakku’s elegant profile inspires tall, graceful clay lamps. Borrow one regional idea each year and your Diwali display tells a new story every time. For how these traditions fit the festival calendar, see our Diwali festival of lights guide.
Troubleshooting: Why Homemade Diyas Fail
Cracking while drying: dried too fast (move to shade), walls too thin in spots (keep them even), or air bubbles (wedge longer). Small surface cracks can be filled with wet clay slip and smoothed before they harden. Leaking oil: the clay is too porous — soak longer before use, or brush the inside with a thin coat of natural clay slip and re-dry. Diyas that fail the water test badly should become planters or decoration only. Wobbling: the base was never flattened — tap every diya on the table while the clay is still soft, and re-check after drying (sand the base lightly with sandpaper if needed). Paint peeling: painted before fully dry, or sealed too soon — always wait the full drying time plus 24 hours after painting. Uneven burning: the spout is malformed or the wick sits too deep — pinch a clean, defined spout and rest the wick on its edge, not in the oil pool. Breaking in storage: stack with parchment between layers, never nest painted diyas tightly, and store in a rigid box — a year’s work deserves a good box.
Gifting Your Handmade Diyas: Packaging Ideas
A set of handmade diyas is a Diwali gift with soul — but presentation decides whether it reads as “craft project” or “treasure.” The classic box: six painted diyas nestled in shredded paper inside a rigid gift box, with a card explaining they are handmade. The puja kit: four plain diyas plus cotton wicks, a small bottle of sesame oil, kumkum, and rice in a brass thali — a complete Lakshmi Puja starter. The pair: two mirror-work diyas in a small organza pouch — simple, elegant, perfect for colleagues. The advent-style set: five numbered diyas, one for each day of Diwali, in a long box. Add a handwritten note with the story — “shaped on Sunday, painted on Tuesday, dried all week” — and pair it with wishes from our Happy Diwali quotes collection. Handmade gifts carry the giver’s time, which is exactly what makes them unforgettable.
Eco-Friendly Diyas: Clay vs the Alternatives
Handmade clay diyas are already among the most eco-friendly Diwali choices — natural earth, biodegradable, zero plastic. But it is worth comparing honestly. Clay diyas return to the earth; even broken ones can be crushed into garden soil. Beeswax and soy candles burn cleaner than paraffin but come in containers. LED diyas eliminate fire risk and last for years, but they are electronic waste eventually and lack the living flame. Paraffin tea lights are the worst option — petroleum-based, smoky, and wrapped in aluminum and plastic. The greenest Diwali lighting plan: handmade clay diyas with natural oils (sesame, coconut) for the main displays, beeswax candles indoors, and a few quality LED diyas for spots where flames are unsafe. After the festival, compost your marigold garlands, crush failed diyas into plant pots for drainage, and store the good diyas for next year — a handmade diya that lights three Diwalis is the ultimate sustainable decoration.
Making Diya-Making a Yearly Family Ritual
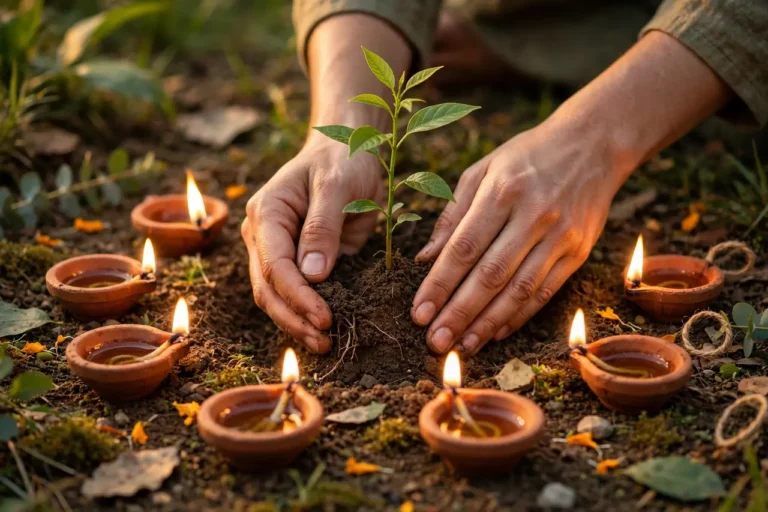
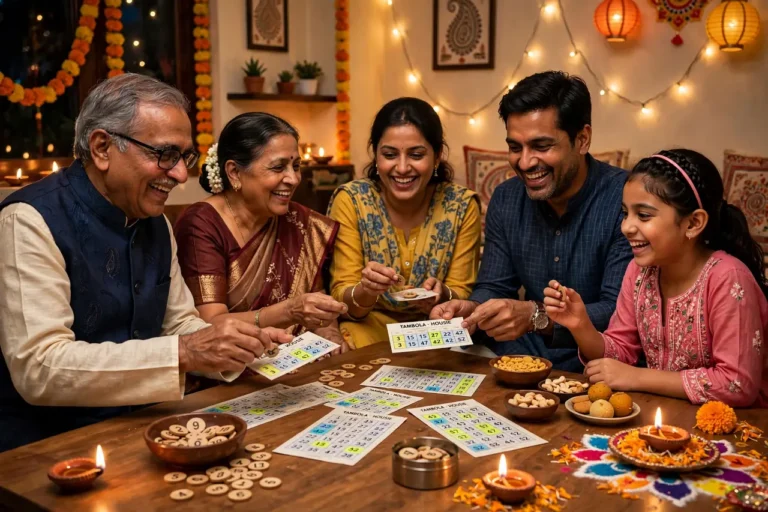
The first year you make diyas, it is a project. The third year, it is a tradition — and traditions are what children remember. Fix a date: the weekend before Dhanteras becomes “diya weekend,” as fixed as the festival itself. Assign roles: grandparents wedge clay, parents shape, kids paint — everyone has a job, and the jobs grow with the children. Keep a diary: note which clay, which paint, what worked — next year’s batch starts smarter. Grow the collection: each family member makes one special “signature diya” per year; after a decade, you own a museum of your family’s Diwalis. Teach someone: invite a neighbor’s kids, a friend new to the festival — diya-making is Diwali’s most welcoming doorway. Photograph the hands, not just the diyas: floury small fingers shaping clay are the pictures you will treasure when the children are grown. And when the lamps are lit on Diwali night, take a moment to remember that every flame in the house started as a lump of earth in your hands — there is no better summary of what the festival means.
Where to Source Clay and Supplies
Local potters (kumhars) are the best source for natural terracotta clay — cheap, authentic, and you support a traditional craft; ask at local markets in the weeks before Diwali. Craft stores stock air-dry terracotta clay year-round, plus acrylic paints, brushes, mirrors, and varnish in one trip. Online works for specialty items: shisha mirrors, metallic paints, and diya moulds are all easily ordered. What to avoid: “clay” from toy aisles (often plastic-based modeling compound that melts near heat) and unlabeled bulk powders. Buy clay a week before you plan to shape — it keeps indefinitely wrapped airtight, but a last-minute dry bag from the store shelf is harder to wedge. For paints, student-grade acrylics are perfectly fine for diyas; reserve artist-grade tubes for detail work.
How Many Diyas Should You Make?
Plan by display, not by guesswork. A small apartment needs 20–30 handmade diyas: a dozen for the entrance and balcony, six for the puja altar, and a few for the dining table. A family home needs 50–80: entrance steps, all windowsills, the puja room, and a garden or terrace border. Gifting adds 6–12 per gift box. Since beginners lose about 20 percent to cracks and wobbles, shape 25 percent more than your target — for 60 finished diyas, start with 75 balls of clay. Two weekends of relaxed crafting comfortably produces 60–80 diyas, and the rhythm of wedging, shaping, and painting becomes genuinely meditative by the second session.
Watch: DIY Diya Stand for Your Handmade Lamps
Once your diyas are shaped, dried, and painted, display them beautifully. This video shows how to make a decorative diya stand — a lovely way to present the lamps you made following this guide:
Frequently Asked Questions About Making Clay Diyas
What kind of clay is best for making diyas at home?
Natural terracotta potter’s clay is ideal — cheap, authentic, and fires to the classic orange-brown. Air-dry terracotta craft clay from art stores is the easiest option for beginners since it needs no kiln. Avoid polymer clay (it melts near flames) and unfired plaster. Whatever you use, the diya must pass the water test before lighting.
How long do homemade clay diyas take to dry?
Plan 3–5 days of air-drying in shade, turning daily, plus 24 hours after painting before sealing. In humid weather, allow a full week. The oven shortcut (lowest setting, 2–3 hours) works only after at least 24 hours of air-drying — putting wet clay straight into heat guarantees cracks.
Why do my diyas crack while drying?
The three usual culprits: drying too fast (direct sun or wind), uneven wall thickness (thin spots shrink faster), and trapped air bubbles (insufficient wedging). Dry in shade, keep walls even, wedge thoroughly — and remember that small hairline cracks on the outside can be smoothed with wet clay slip before they set.
Can I use homemade diyas with ghee and oil safely?
Yes, provided the diya passed the water test and has a stable, wobble-free base. Soak the diya in water for two hours before first use (like store-bought clay diyas), fill with your chosen oil, and place it on a brass tray or ceramic plate — never directly on wood or cloth. See our Diwali festival of lights guide for oil comparisons.
How do I paint diyas so the paint does not peel?
Paint only fully dry diyas, use acrylic paints (not watercolor or poster paint), let each coat dry 24 hours, and seal the outside with clear varnish. Do not paint the inside oil bowl. Even sealed, painted diyas are best for shorter burns — keep plain diyas for all-night lamps.
Can children make clay diyas safely?
Absolutely — shaping and painting are perfect kids’ activities with washable materials and supervision. Keep children away from the oven-drying step and from trimming with sharp tools, and let adults handle the first lighting. Coil-built diyas are the most forgiving for small hands.
The Bottom Line
Making clay diyas at home turns Diwali preparation from a shopping errand into a family ritual. Wedge your clay well, shape with patience, dry without rushing, test every lamp with water, and decorate with joy. Your first batch will not be perfect — the walls will be a little uneven, the spouts a little quirky — and that is exactly the point. When those handmade flames flicker to life on Diwali night, no store-bought diya will ever feel the same again. For the traditions these little lamps carry, explore our complete Diwali festival guide, and have a luminous, handmade Diwali 2026.
Keep exploring: see how the festival fits into the wider calendar in our guide to New Year traditions in India.