If you are baking for a guest who cannot eat gluten this Thanksgiving, you have probably heard the same anxious question: “Can I really make gluten free thanksgiving desserts that taste like the real thing?” The answer is an emphatic yes — and not the polite yes people give about rice cakes. Modern gluten-free flours and a few technique adjustments produce pumpkin pies with shatteringly flaky crusts, pecan bars with buttery shortbread bases, and cheesecakes nobody would ever identify as “alternative.” This guide is a complete recipe deep-dive: the flour science, one master crust recipe that works for everything, full tested recipes, troubleshooting, and a make-ahead plan.
Whether your guest has celiac disease, a wheat allergy, or simply feels better avoiding gluten, the goal is the same: a dessert table where they do not have to ask what is safe, because so much of it is. If you are planning the whole holiday menu around dietary needs, our gluten-free Thanksgiving menu covers the savory side too. And if you are new to gluten-free baking generally, everything below starts from zero — no prior knowledge assumed.
Gluten-Free Baking Science for Holiday Desserts
Understanding what gluten does is the fastest route to replacing it well. In wheat flour, gluten is the protein network that gives dough elasticity and structure — it is what makes pie crust flaky-tender rather than crumbly, and what lets a cake hold its crumb. Gluten-free baking succeeds when you replace that structure with other binders: the starches and gums in modern flour blends, plus eggs, and sometimes a little xanthan gum.
Choosing Your Flour: The Three Tiers
Tier 1 — 1:1 gluten-free baking blends (such as King Arthur Gluten Free Measure for Measure or Bob’s Red Mill 1-to-1) are the easiest path. They contain rice flour, starches, and xanthan gum already balanced, and they substitute cup-for-cup in most recipes. For Thanksgiving desserts, this is what we recommend. Tier 2 — single-ingredient flours like almond flour, oat flour, or coconut flour each have distinct behaviors: almond flour makes rich, tender crusts but browns fast; oat flour gives a lovely flavor but needs extra binder; coconut flour absorbs enormous liquid and is not a 1:1 swap. Tier 3 — DIY blends (typically 60% whole-grain flour like sorghum or brown rice, 30% starch like tapioca or potato, 10% protein like almond) give the best results in experienced hands but are overkill for a holiday when a good commercial blend performs beautifully.
The Xanthan Gum Question
Most 1:1 blends already include xanthan gum, so do not add more — doubling it makes gummy textures. If your blend lacks it (check the label), add 1/2 teaspoon per cup of flour for cookies and bars, 3/4 teaspoon per cup for pie crust, and 1 teaspoon per cup for yeast-free cakes. Too much xanthan is the single most common cause of the “gummy gluten-free” stereotype, so measure carefully.
Cross-Contamination: When It Really Matters
For guests with celiac disease, trace gluten matters. Use certified gluten-free flours and oats, wash mixing bowls and utensils thoroughly (or use dedicated ones), line baking sheets with fresh parchment, and avoid wooden spoons and sifters that have touched wheat flour — porous tools hold residue. Butter, sugar, and spices from shared containers can carry crumbs; when in doubt, use fresh. These steps take ten extra minutes and make your dessert genuinely safe rather than merely gluten-free in name. For the full holiday kitchen protocol, see our Thanksgiving food safety tips.
The Master Recipe: Flaky Gluten-Free Pie Crust
This is the foundation everything else builds on. It rolls, crimps, and browns like a wheat crust, and it works for pumpkin, pecan, apple, and custard pies alike. The secrets are cold everything, a rest in the fridge, and rolling between parchment.
Ingredients
- 1 1/2 cups (180g) 1:1 gluten-free flour blend (with xanthan gum)
- 1 tablespoon granulated sugar
- 1/2 teaspoon fine salt
- 1/2 cup (115g) unsalted butter, cut into 1/2-inch cubes and frozen 15 minutes
- 1/4 cup (50g) vegetable shortening or additional butter, chilled
- 4–6 tablespoons ice water, plus 1 teaspoon apple cider vinegar
Method
- Whisk the flour, sugar, and salt in a large bowl. Add the frozen butter and chilled shortening; cut in with a pastry blender or your fingertips until pea-sized pieces remain, with a few larger flat shards — those shards become flakes.
- Sprinkle 4 tablespoons of the ice water-vinegar mixture over the top. Toss with a fork, adding more water a tablespoon at a time, until the dough just holds together when squeezed. Gluten-free dough will look slightly shaggier than wheat dough; that is normal.
- Gather into a disc, wrap tightly, and refrigerate at least 1 hour (or up to 2 days). This rest hydrates the starches and firms the fat — skip it and the crust will be crumbly.
- Roll between two sheets of parchment to a 12-inch round, about 1/8 inch thick. If cracks form at the edges, press them back together — gluten-free dough patches seamlessly. Peel off the top parchment, invert into a 9-inch pie plate, and peel off the second sheet. Crimp as desired.
- For custard pies (pumpkin, pecan): fill and bake per the pie recipe. For double-crust pies: chill the lined shell 15 minutes while you roll the top.
Why This Works
Freezing the butter keeps fat pieces distinct so they steam into layers. The vinegar tenderizes without affecting flavor. Resting hydrates rice flour and starches, which absorb liquid more slowly than wheat — the number one reason gluten-free crusts crack is under-hydration from skipping the rest. Rolling between parchment eliminates the sticking that makes gluten-free dough infamous.
Recipe 1: Classic Gluten-Free Pumpkin Pie
The centerpiece. This pie has converted skeptics at real Thanksgiving tables: a spiced, silky custard in the master crust above, with no one guessing it is gluten-free.
Ingredients
- 1 unbaked 9-inch gluten-free pie crust (master recipe above)
- 1 can (15 oz / 425g) pumpkin puree (not pumpkin pie filling)
- 3/4 cup (150g) packed brown sugar
- 2 large eggs plus 1 yolk, room temperature
- 1 cup (240ml) evaporated milk or full-fat coconut milk
- 2 teaspoons pumpkin pie spice (or 1 tsp cinnamon, 1/2 tsp ginger, 1/4 tsp nutmeg, 1/4 tsp cloves)
- 1/2 teaspoon salt
- 1 teaspoon vanilla extract
Method
- Position a rack in the lower third of the oven and preheat to 425°F (220°C).
- Whisk the pumpkin, brown sugar, eggs and yolk, evaporated milk, spices, salt, and vanilla until completely smooth. Do not over-whisk — excess air causes puffing and cracking.
- Pour into the chilled crust. Bake 15 minutes at 425°F, then reduce to 350°F (175°C) and bake 35–45 minutes more, until the edges are set and the center still wobbles slightly when nudged. It will finish setting as it cools.
- Cool on a wire rack at least 2 hours, then refrigerate. Serve chilled or at room temperature with whipped cream.
Make-Ahead & Storage
Bake the pie up to 2 days ahead and refrigerate uncovered until cool, then cover. The flavor deepens overnight. Do not freeze the baked pie — custard fillings weep on thawing. You can, however, freeze the unbaked crust disc for a month.
Recipe 2: Gluten-Free Pecan Pie Bars
Bars are easier than pie — no rolling, no crimping, one pan — and they feed a crowd. The shortbread base is naturally forgiving in gluten-free form.
Ingredients
- Crust: 1 1/2 cups 1:1 GF flour, 1/2 cup powdered sugar, 3/4 cup cold butter cubed, 1/4 tsp salt
- Filling: 3 eggs, 1 cup light corn syrup or brown rice syrup, 3/4 cup brown sugar, 1/4 cup melted butter, 1 tsp vanilla, 1/4 tsp salt, 2 cups pecan halves
Method
- Preheat to 350°F (175°C). Line a 9×13 pan with parchment, leaving overhang for lifting.
- Rub the crust ingredients together until crumbly, press firmly and evenly into the pan, and bake 18–20 minutes until lightly golden.
- Whisk the filling ingredients (except pecans), stir in the pecans, and pour over the hot crust.
- Bake 25–30 minutes until the filling is set at the edges and just jiggles in the center. Cool completely — at least 3 hours — then lift out and cut into 24 bars. Chilling makes the cleanest cuts.
These keep 5 days refrigerated and freeze beautifully for a month, which makes them the best candidate for baking the weekend before Thanksgiving. A sprinkle of flaky sea salt before serving cuts the sweetness.
Recipe 3: Flourless Chocolate Torte with Raspberry Coulis
When you want a showstopper that happens to be gluten-free by design rather than by substitution, this is it. Six ingredients, one bowl, and a texture somewhere between fudge and mousse.
Ingredients
- 12 oz (340g) bittersweet chocolate, chopped
- 3/4 cup (170g) unsalted butter
- 6 large eggs, room temperature
- 3/4 cup (150g) granulated sugar
- 1/4 teaspoon salt
- 1 teaspoon vanilla extract
- Powdered sugar and fresh raspberries, to serve
Method
- Preheat to 325°F (165°C). Line the bottom of a 9-inch springform pan with parchment and butter the sides.
- Melt the chocolate and butter together until smooth; cool slightly.
- Beat the eggs, sugar, and salt on high for 5 full minutes until thick, pale, and tripled in volume — this aeration is the torte’s only leavening, so do not shortcut it.
- Fold the chocolate mixture and vanilla gently into the eggs in three additions, keeping as much air as possible.
- Pour into the pan and bake 35–40 minutes until the edges are set and the center still looks slightly underdone. Cool completely in the pan — it will sink in the middle, which is correct and creates a natural well for berries.
- Chill at least 4 hours. Dust with powdered sugar and serve with raspberries or a quick raspberry coulis (frozen raspberries simmered with sugar, strained).
Recipe 4: Gluten-Free Apple Crisp for a Crowd
An apple crisp sidesteps pastry entirely — the topping is the star — which makes it the lowest-stress gluten-free dessert on this list. It also serves beautifully warm, straight from the baking dish.
Ingredients
- Filling: 3 lbs mixed apples (Honeycrisp, Granny Smith, Braeburn), peeled and sliced; 1/3 cup brown sugar; 1 tsp cinnamon; 1 tbsp lemon juice; 2 tbsp cornstarch (certified GF)
- Topping: 1 cup certified GF rolled oats; 3/4 cup 1:1 GF flour; 3/4 cup brown sugar; 1 tsp cinnamon; 1/2 tsp salt; 1/2 cup cold butter, cubed; 1/2 cup chopped pecans (optional)
Method
- Preheat to 375°F (190°C). Toss the filling ingredients in a 9×13 baking dish.
- Rub the topping ingredients together until clumpy, scatter over the apples.
- Bake 40–45 minutes until bubbling and golden. Rest 15 minutes before serving with vanilla ice cream.
Use certified gluten-free oats — regular oats are almost always cross-contaminated in processing. The crisp can be assembled a day ahead and refrigerated unbaked; add 10 minutes to the bake time from cold.
Recipe 5: Mini Cheesecakes with Gingersnap Crust
Individual cheesecakes are portion-controlled, travel-proof, and endlessly garnishable — and the filling is naturally gluten-free. The only swap is the crust.
Ingredients
- 1 1/2 cups GF gingersnap crumbs (about 24 cookies), 1/4 cup melted butter
- 16 oz cream cheese, room temperature; 1/2 cup sugar; 2 eggs; 1/2 cup sour cream; 1 tsp vanilla; pinch of salt
Method
- Preheat to 325°F (165°C). Line a 12-cup muffin tin with paper liners.
- Mix crumbs and butter, press 1 heaping tablespoon into each liner, and bake 5 minutes.
- Beat the cream cheese and sugar smooth, add eggs one at a time, then sour cream, vanilla, and salt. Fill liners nearly full.
- Bake 18–20 minutes until the centers barely tremble. Cool in the pan, then chill at least 4 hours or overnight.
- Top with cranberry compote, caramel, or spiced whipped cream before serving.
These are a natural fit for our mini Thanksgiving desserts spread — make a double batch and watch them disappear first.
Troubleshooting: Fixing Common Gluten-Free Failures
Crumbly, Cracking Pie Crust
Cause: under-hydrated flour or too-warm fat. Fix: rest the dough a full hour (or overnight), add water a teaspoon at a time until it holds when squeezed, and patch cracks by pressing dough back together — gluten-free dough has no gluten to overwork, so patching is safe. Rolling between parchment prevents 90% of cracking.
Gummy or Dense Texture
Cause: too much xanthan gum, or measuring flour by volume with a packed cup. Fix: spoon flour into the measuring cup and level it, or better, weigh it (120g per cup for most blends). Check your blend’s label — if it already contains xanthan, add none. Also verify your oven temperature with a thermometer; a cool oven under-bakes the center while the edges look done.
Gritty Mouthfeel
Cause: rice-flour-heavy blends need more hydration time. Fix: let batters and doughs rest 20–30 minutes before baking — the starches hydrate and the grit disappears. This single rest transforms cookies, pancakes, and quick breads. Finer-milled blends (superfine rice flour) also help.
Spreads Too Much / Won’t Hold Shape
Cause: warm dough or too little structure. Fix: chill shaped cookies 20 minutes before baking, and make sure you are using a blend with xanthan or adding it. For cut-out cookies, roll thicker (1/4 inch) and bake on parchment.
Bland Flavor
Cause: gluten-free flours are milder than wheat and need seasoning support. Fix: be generous with salt (1/2 tsp per cup of flour in crusts), vanilla, brown sugar instead of white, and browned butter. Toasting nut flours for 5 minutes at 350°F deepens their flavor dramatically.
More Gluten-Free Thanksgiving Dessert Ideas
Beyond the five full recipes, keep these in your back pocket:
- Pavlova with cranberry curd — a naturally gluten-free meringue shell filled with tart cranberry curd and whipped cream. Crisp, chewy, and stunning.
- Chocolate-dipped stuffed dates — Medjool dates with almond butter and a pecan, dipped in dark chocolate. Naturally GF and no baking at all.
- Pumpkin panna cotta — gelatin-set cream with pumpkin and spice in little glasses. Elegant and make-ahead friendly.
- Meringue cookies — naturally gluten-free, endlessly flavorable with cocoa or peppermint, and they keep for two weeks.
- Rice pudding with spiced pear compote — comfort in a bowl; use arborio rice and whole milk for the creamiest result.
- Almond flour thumbprints with cranberry jam — buttery, tender, and the jam jewel makes them holiday-ready.
- Baked custard cups — eggs, milk, sugar, nutmeg; the simplest dessert in this guide and completely safe.
For the chocolate lovers at your table, our chocolate pecan pie adapts beautifully with the master GF crust above — just swap the pastry and keep everything else identical.
Building a Safe, Abundant Dessert Table
Label Everything
Small tent cards that say “Gluten-Free Pumpkin Pie” and “Contains Nuts” are not fussy — they are hospitality. Guests with celiac disease have learned to distrust unlabeled buffet tables, and clear labels let them relax and enjoy. List major allergens (nuts, dairy, eggs) alongside the gluten-free note.
Prevent Cross-Contact at the Table
Give gluten-free desserts their own serving utensils, and place them at one end of the table rather than interleaved with wheat desserts — crumbs travel. If you are serving both GF and regular versions of something (like dinner rolls), plate them separately and serve the GF ones first, before hands and knives have touched everything.
Quantity Planning
When one or two guests are gluten-free, you do not need a fully GF table — but make at least two GF desserts so they have a real choice, not a consolation prize. A good minimum spread: one GF pie or tart, one naturally GF option (torte, panna cotta, or dates), and labeled everything. Our Thanksgiving quantity guide helps with the savory math; for dessert, plan 2–3 servings per guest across all varieties.
In Pictures: Gluten-Free Thanksgiving Desserts
Gluten-free holiday desserts have come a long way. This spread shows how abundant a wheat-free dessert table can look.

A gluten-free Thanksgiving dessert spread with almond-flour crumble, flourless brownies and coconut panna cotta cups.
Watch: Gluten-Free Thanksgiving Desserts
Cathy Diep's gluten-free and dairy-free pumpkin pie proves the holiday classic can work without wheat or dairy.
At a Glance: Gluten-Free Thanksgiving Desserts
The essentials for gluten-free holiday baking that still tastes like the real thing.
| Detail | What to know |
|---|---|
| Flour swaps | Almond flour, oat flour and 1:1 gluten-free blends are the common picks |
| Binding | A little xanthan gum — often around 1 tsp per cup of flour — helps structure |
| Crusts | Nut-based or oat crumb crusts skip gluten entirely |
| Cross-contact | Use clean tools and surfaces when baking for celiac guests |
| Label check | Baking powder and spice blends are usually gluten-free, but check labels |
| Make-ahead | Most gluten-free desserts hold 2–3 days chilled |
Frequently Asked Questions
Can I use a gluten-free flour blend 1:1 in any Thanksgiving dessert recipe?
In most cases, yes — that is what 1:1 blends are designed for. Cookies, bars, quick breads, and pie crusts swap directly. The exceptions are yeast breads and recipes where gluten provides critical chew (like bagels), which need specialized formulas. For everything in this guide, a cup-for-cup swap works; just check that your blend includes xanthan gum and do not add extra.
Are oats gluten-free?
Oats are naturally gluten-free but are almost always contaminated with wheat during growing and processing. Anyone with celiac disease should use oats labeled “certified gluten-free.” For the apple crisp above and any oat topping, this distinction is the difference between safe and not safe — do not skip it.
How far ahead can I make gluten-free Thanksgiving desserts?
The timelines match regular baking: pie crust dough freezes a month; baked bars freeze a month; cookies bake 3–4 days ahead; cheesecakes and panna cotta assemble 1–2 days ahead; pumpkin pie bakes 2 days ahead and refrigerates. Gluten-free baked goods actually stale slightly faster at room temperature, so refrigerate or freeze anything you are not serving within 2 days.
Why did my gluten-free pie crust fall apart?
Almost always under-hydration or skipping the rest. Gluten-free flours absorb liquid slowly — the dough needs a full hour in the fridge (overnight is even better) for the starches to hydrate. If it still cracks, the dough is too dry: work in ice water a teaspoon at a time. And roll between parchment, patching cracks by pressing — the dough forgives everything except impatience.
What is the best store-bought gluten-free pie crust?
Several national brands make solid frozen GF pie shells that work in a pinch, but quality varies by region and year, so we recommend the homemade master crust above for the best texture. If you must buy, choose one labeled for 9-inch pies, thaw it in the fridge (not the microwave), and do not pre-bake it for custard pies — fill and bake from the thawed state per the pie recipe’s temperature.
Can I make these dairy-free as well?
Many adapt well: use vegan butter sticks (not tub margarine) in crusts and bars, full-fat coconut milk in place of evaporated milk in pumpkin pie, and coconut cream in panna cotta. The flourless torte relies on butter for flavor, so it is the hardest to convert — our dairy-free Thanksgiving guide has more tested swaps for the full menu.
Conclusion
Gluten free thanksgiving desserts do not need to be a separate, lesser table off to the side. With a reliable flour blend, a master crust recipe, and the techniques in this guide, you can serve pumpkin pie, pecan bars, chocolate torte, apple crisp, and cheesecakes that stand proudly next to — or in place of — their wheat-based counterparts. Your gluten-free guests will notice the effort, and everyone else will simply notice great dessert.
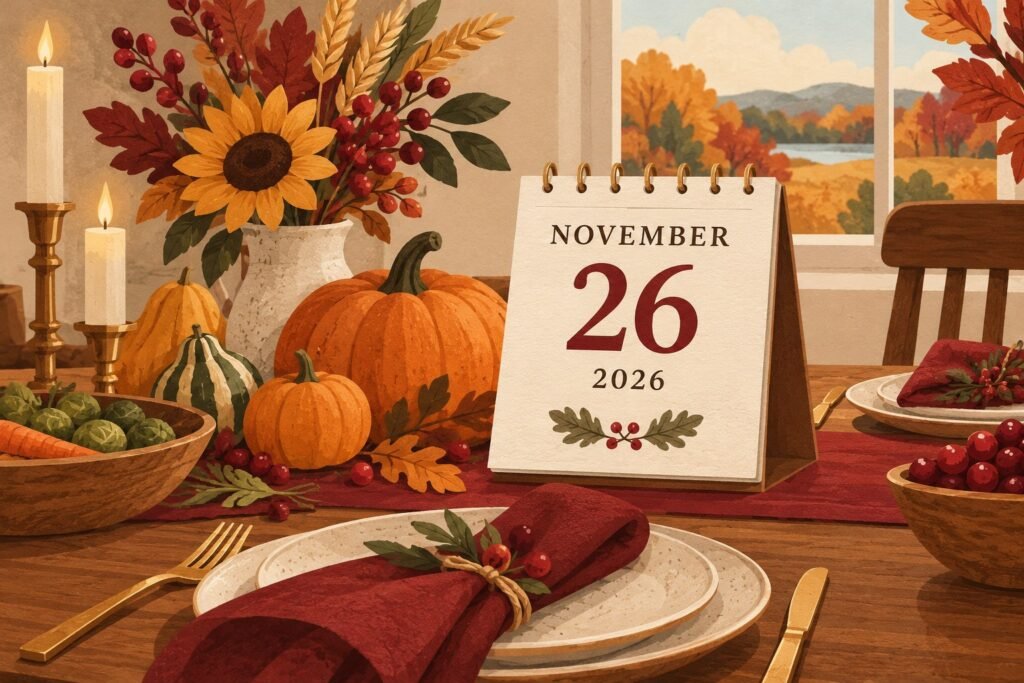
Start with the crust this weekend, bake the bars ahead, and assemble the creamy things on Tuesday. By the time Thanksgiving 2026 arrives on November 26, dessert will be the calmest part of your day. For the rest of the holiday — the bird, the sides, the schedule that ties it all together — our Thanksgiving Day cooking schedule and dinner timeline have you covered from morning prep to the last slice of pie.