
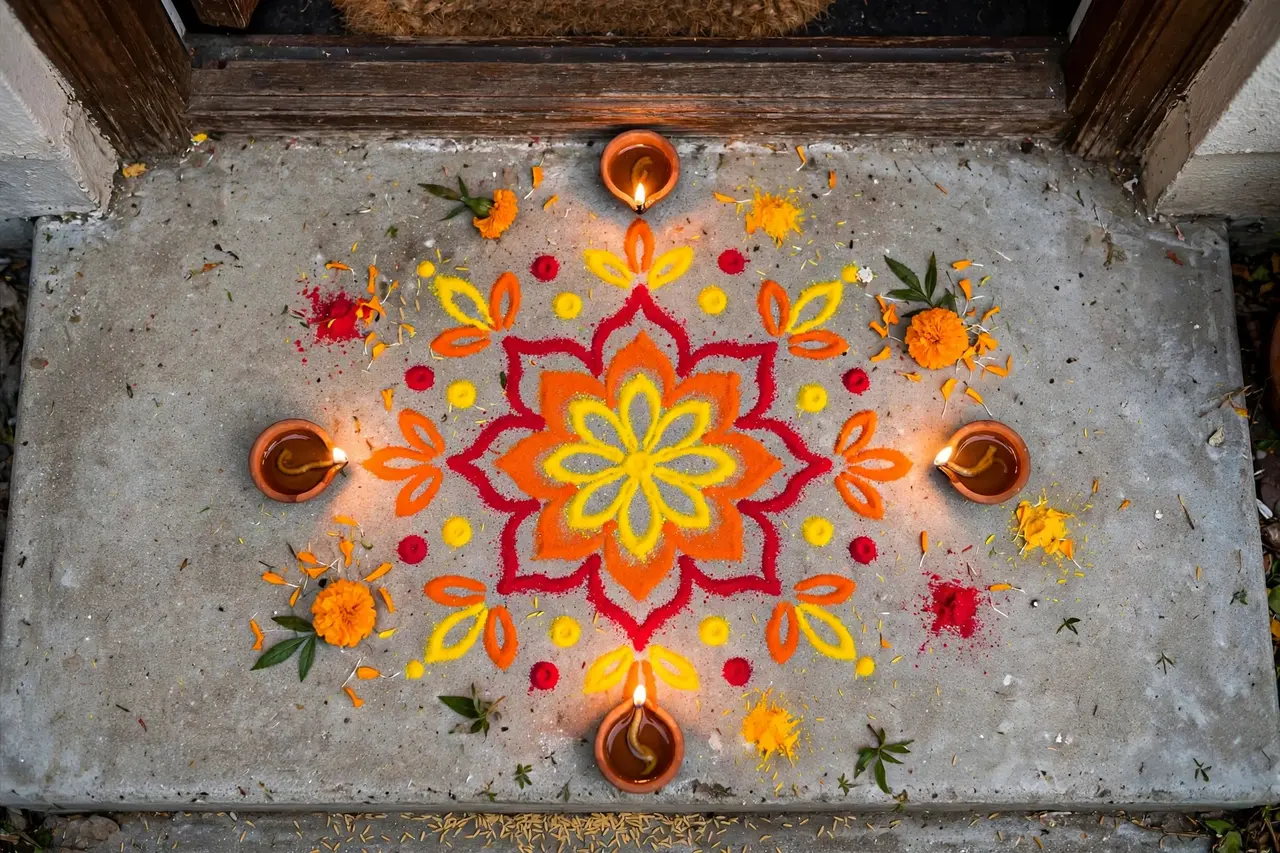
Rangoli, the art of creating colorful patterns on the floor with powders, petals, rice, or sand, is one of Diwali’s most beautiful traditions. These intricate designs welcome guests, honor deities, and bring color to doorsteps during the festival of lights. If you have always admired rangolis but assumed they were too difficult, this guide to rangoli designs for beginners will change your mind. You will learn what rangoli is and why it matters, the materials and tools you need, four beginner-friendly techniques (including dot grids and stencils), ten specific designs with step-by-step instructions, a color combination guide, and how to avoid common mistakes. No artistic background required: if you can connect dots and sprinkle powder, you can make a rangoli your family will love.
What Is Rangoli and Why Do We Make It?
Rangoli (also called kolam in Tamil Nadu, muggu in Andhra Pradesh and Telangana, and alpona in Bengal) is the traditional Indian art of decorating floors with geometric patterns, floral motifs, and auspicious symbols. Made fresh each day during Diwali, rangolis are believed to welcome Goddess Lakshmi, ward off evil, and bring good fortune to the household. The designs are traditionally created at the entrance of the home, in courtyards, or before the puja altar, using materials that were historically offerings to nature: rice flour (which feeds ants and birds), colored powders, flower petals, and grains. This is why many families still prefer natural materials; the rangoli nourishes small creatures even as it beautifies the home. Beyond spirituality, rangoli is a daily creative practice for millions of women, a meditation in symmetry and color. As a beginner, you are joining a living tradition, not just making a pretty pattern. For the festival context of this art, see our guide to Diwali and the Hindu New Year.
Materials and Tools for Beginners
Start simple. You need surprisingly little to make a beautiful beginner rangoli.
| Material/Tool | What It Does | Beginner Tips |
|---|---|---|
| White rangoli powder or rice flour | Outlines and base designs | The foundation of most rangolis; buy fine, smooth powder |
| Colored rangoli powders | Filling designs with color | Start with 5-6 colors: red, yellow, orange, green, blue, pink |
| Chalk or white crayon | Drawing the initial outline | Draw lightly; the powder will cover it |
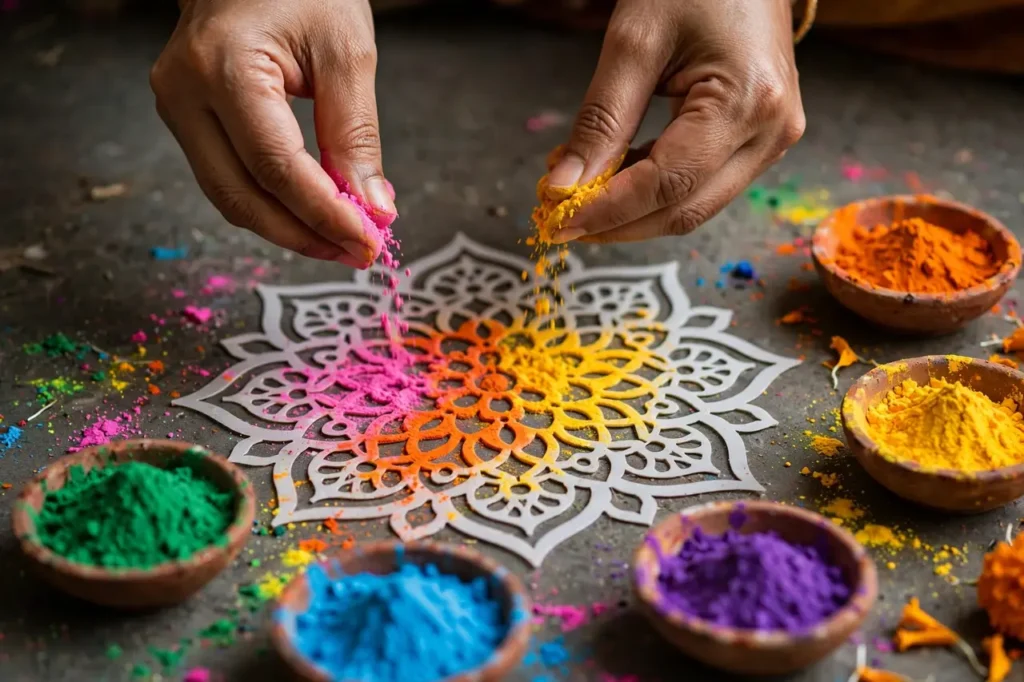
| Rangoli stencils | Instant patterns | The easiest beginner method; available in countless designs |
| Strainer or sieve | Even powder distribution | Tap gently for controlled sprinkling |
| Small bowls or cones | Holding and pouring colors | Paper cones (like mehndi cones) give fine control |
| Flower petals (marigold, rose) | Natural color and texture | Use fresh on Diwali day; combine with powders |
| Diyas and tea lights | Illuminating the finished rangoli | Place around the border after the design is done |
| Wet cloth and newspaper | Cleanup and practice | Practice designs on newspaper before the floor |
| Stencils, stickers, or tape | Clean edges and borders | Tape boundaries for crisp geometric designs |
Total starter cost is minimal: a basic set of rangoli powders, a stencil or two, and chalk will serve you for years. Natural color options include turmeric (yellow), kumkum (red), rice flour (white), dried henna or matcha (green), and crushed flower petals for every hue.
Four Beginner Techniques, Easiest First
Technique 1: Stencils (Difficulty: Very Easy)
Place a rangoli stencil flat on a clean, dry floor. Spoon colored powder over the cut-out areas, tapping gently for even coverage. Lift the stencil straight up, slowly and carefully. Add diyas or petals around the finished design. Stencils produce professional-looking results on the very first try and are perfect for anyone nervous about freehand work. Layer two stencils, one large base and one small center, for a more complex look.
Technique 2: Dot Grids (Difficulty: Easy)
The traditional kolam method: mark a grid of dots on the floor with chalk (start with 5×5 or 7×7), then connect the dots with lines, curves, or loops to form patterns, and fill the shapes with color. Dot grids guarantee symmetry, which is the secret behind beautiful rangolis. Beginners should start with straight-line patterns (squares, diamonds, stars) before attempting curved pulli kolam loops. Count your dots carefully; an asymmetric grid is the most common beginner mistake.
Technique 3: Freehand with Chalk Guide (Difficulty: Medium)
Draw your design first with chalk, then trace over it with white rangoli powder using your thumb and forefinger, and finally fill sections with colors. The chalk guide removes the fear of the blank floor. Simple motifs, flowers, diyas, paisleys, are ideal first freehand subjects. Keep designs small (two to three feet across) until your confidence grows.
Technique 4: Petal Rangoli (Difficulty: Easy)
Skip powders entirely and arrange flower petals in patterns: concentric circles of marigolds, petal outlines of diyas, or scattered designs. Petal rangolis are forgiving (petals can be repositioned), fragrant, and stunning. They are also the fastest option for Diwali morning when time is short. Combine petals with a powder border for the best of both worlds.
10 Beginner Rangoli Designs, Step by Step
Each design includes the technique, approximate size, time needed, and steps. Start with designs 1-3, then progress as you gain confidence.
Design 1: Simple Diya Rangoli (Stencil, 2 feet, 15 minutes)
Place a diya-shaped stencil (or draw a large diya outline in chalk) at the center of your entrance. Fill the diya shape with orange and yellow powder, the flame with red and yellow. Add a white powder border around the whole shape. Place real diyas along the border. This is the quintessential Diwali rangoli and the perfect first project.
Design 2: Flower Medallion (Dot grid 5×5, 2.5 feet, 25 minutes)
Mark a 5×5 dot grid. Connect the dots to form an eight-petaled flower: draw petals from the center dot to the outer dots. Fill alternate petals with red and yellow powder. Add a green dot at the center and white dots between petals. Outline everything in white. The symmetry of the grid makes this look far more skilled than it is.
Design 3: Petal Circle (Petals, 3 feet, 20 minutes)
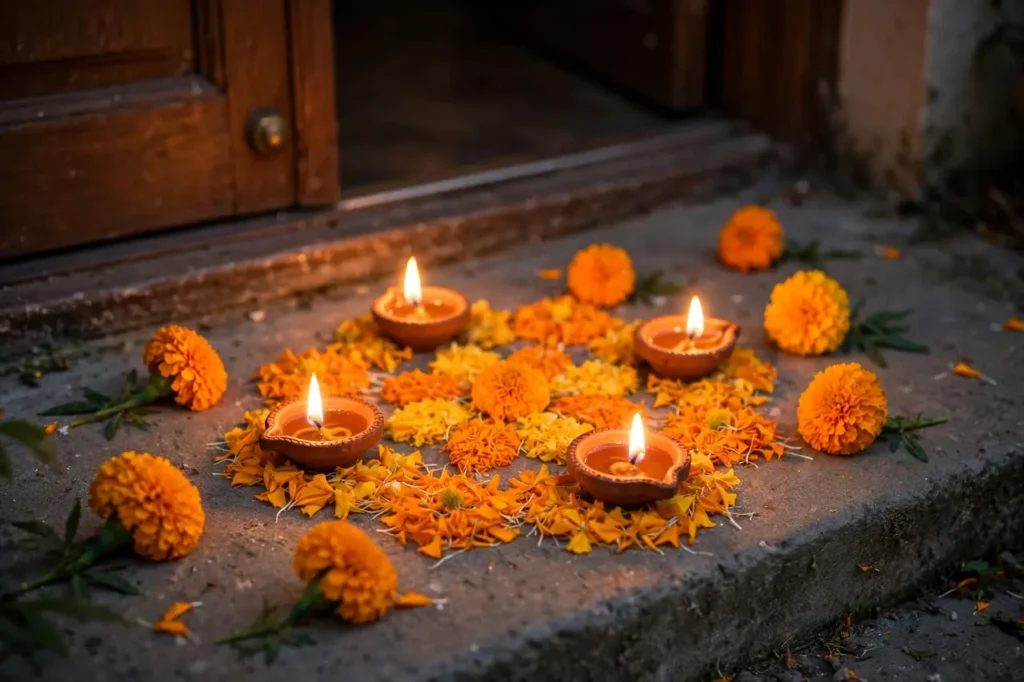
Draw a large circle in chalk. Place a ring of orange marigold heads along the circle. Inside, make a smaller circle of yellow marigolds. Fill the center with red rose petals. Add four diyas at the compass points outside the circle. No powder skills needed, and the result is lush and festive.
Design 4: Corner Border Rangoli (Freehand, variable, 20 minutes)
Instead of a centerpiece, decorate the corners of your entrance or room. Draw a simple quarter-circle fan pattern in each corner with chalk, fill with two alternating colors, and add white dots along the arcs. Corner rangolis frame a space beautifully and are less intimidating than large center designs.
Design 5: Star and Diamond Grid (Dot grid 7×7, 3 feet, 35 minutes)
Mark a 7×7 dot grid. Connect dots to form a large eight-pointed star in the center. Fill alternating star points with different colors. Add small diamonds in the corners of the grid. Outline in white and add diyas at the star points. This geometric design looks impressive and the grid keeps every line straight.
Design 6: Paisley Pair (Chalk guide, 2.5 feet, 30 minutes)
Draw two large paisley (mango) shapes facing each other with chalk. Fill one with red powder and the other with orange. Add white dots and small flower motifs inside each paisley. Connect them with a curved vine of green dots. Paisleys are auspicious and elegant; this design suits entrances and puja areas.
Design 7: Floating Diya Circle (Mixed, 3 feet, 25 minutes)
Draw concentric circles in white powder: three rings. Fill the middle ring with alternating red and yellow segments like a color wheel. Place small diyas (or LED tea lights) in the center circle. Scatter petals between the rings. Light the diyas at dusk for a magical glowing rangoli.
Design 8: Footprint Trail (Stencil or chalk, variable, 20 minutes)
Create small Lakshmi footprint shapes (or use a stencil) leading from your entrance toward the puja area, symbolizing the goddess’s arrival. Fill footprints with red powder and outline in white. Add small flowers between footprints. This charming tradition delights children and guests.
Design 9: Square Mandala (Dot grid, 3 feet, 40 minutes)
Mark dots in concentric squares. Fill each square band with a different color, working from outside in. Add dot details and small petal shapes in each band. Finish with a flower or diya motif at the center. The structured bands make color planning easy and the result is mesmerizing.
Design 10: Grand Welcome Arch (Freehand, 4 feet, 45 minutes)
Draw a large semi-circular arch (like a doorway toran in rangoli form) with chalk. Fill the arch band with alternating marigold-orange and leaf-green segments. Inside the arch, place a diya motif or “Shubh Diwali” written in powder. Flank with petal piles. This is your graduation piece: impressive, welcoming, and built from all the skills you have learned.
Color Combinations That Always Work
Choosing colors is half the battle. These combinations are foolproof for beginners.
| Palette Name | Colors | Mood | Best For |
|---|---|---|---|
| Classic Festive | Red, yellow, orange, white | Warm and traditional | Entrance rangolis on Diwali night |
| Royal | Deep blue, gold/yellow, white, magenta | Rich and elegant | Puja areas and formal spaces |
| Garden Fresh | Green, yellow, white, orange | Natural and cheerful | Daytime and outdoor rangolis |
| Sunset | Pink, orange, purple, white | Modern and vibrant | Contemporary homes |
| Monochrome Magic | White powder on dark floor (or vice versa) | Striking and sophisticated | Minimalist decor |
| Pastel Dream | Light pink, mint, lavender, cream | Soft and delicate | Indoor and kids’ rooms |
General rules: always include white for outlines and contrast; limit yourself to four or five colors per design; and place complementary colors (red-green, blue-orange) adjacent for maximum vibrancy. When in doubt, the classic red-yellow-orange-white combination never fails.
Common Beginner Mistakes and How to Fix Them
Every beginner makes these mistakes; knowing them in advance saves frustration. Mistake one: working on a damp or dusty floor, which makes powder clump; always sweep and ensure the floor is dry. Mistake two: pouring too much powder at once, creating blobs; use small amounts and build up gradually. Mistake three: an asymmetric dot grid; count dots twice before connecting. Mistake four: choosing too large a design for a first attempt; start under three feet. Mistake five: working in a high-traffic area where the rangoli gets stepped on; choose a spot people can walk around, or make the rangoli after foot traffic subsides. Mistake six: using windy outdoor spots where powder blows away; work in sheltered areas or switch to petals outdoors. Mistake seven: skipping the chalk guide for freehand designs; the guide is not cheating, it is smart. If you make an error mid-design, do not panic: gently sweep up the section with a soft brush and redo it. Rangoli is impermanent by nature; even imperfect rangolis are beautiful because they are made with devotion.
Preserving and Photographing Your Rangoli
Rangolis are ephemeral, but you can extend their life and capture them beautifully. To preserve, place the rangoli where foot traffic is minimal, avoid ceiling fans blowing directly on it (they scatter powder), and surround it with diyas rather than walking through it. A light mist of water from a spray bottle can slightly set powder designs, though this dulls colors a touch. For photographs, shoot in the soft light of early morning or at dusk with diyas lit; overhead midday sun washes out colors. Get low and shoot at a slight angle to capture texture, and take one straight top-down shot to show the full symmetry. Photograph before placing diyas and after lighting them for two different moods. Share your creations; the rangoli community online is encouraging and full of ideas for your next design.
Rangoli for Different Spaces
Where you place your rangoli changes how you should design it. Each space has its own constraints and opportunities.
Entrance and Doorstep
The entrance rangoli is the most visible and the most stepped-on. Choose a design slightly to one side of the walking path rather than dead center, or make it after foot traffic subsides. Stencil designs work well here because they are quick to refresh if scuffed. Medium sizes (three to four feet) have the most impact; tiny entrance rangolis get lost. Always pair with diyas on both sides of the door for the classic welcoming look.
Puja Room or Altar
Rangolis before the altar should be smaller (one to two feet) and more intricate, since viewers see them up close during the puja. Traditional motifs, lotus, Om, swastik (the ancient auspicious symbol), and footprints of Lakshmi, are most appropriate here. Use fine powders and take your time; this rangoli is part of the sacred space. Avoid designs that will be disturbed when people sit for the puja; place it where it can be admired without being crossed.
Living Room Center
A large central rangoli (four to six feet) makes a stunning focal point for gatherings, but only if the room layout allows people to walk around it. Use bold, high-contrast colors that read well from standing height. Protect it with a ring of diyas or flower garlands that signal “look, don’t step.” For parties, consider making this rangoli a group activity earlier in the day.
Balcony and Outdoor Areas
Outdoor rangolis face wind, moisture, and uneven surfaces. Use heavier materials: petals, grains, and colored sand rather than fine powder. Tape or weigh down stencil edges. Work in the morning when air is calmest, and accept that outdoor rangolis are the most ephemeral; photograph them promptly. The payoff is a design visible to the whole neighborhood.
Office and Classroom
For workplace or school Diwali celebrations, choose quick stencil designs or collaborative petal rangolis that a group can complete in thirty minutes. Keep colors contained with trays underneath to avoid staining floors, and check with facilities about powder use. A small, neat rangoli in the lobby spreads festive cheer without disrupting work.
Leveling Up: From Beginner to Confident
Once you have mastered the ten beginner designs, these steps will take your rangoli skills to the next level. First, practice freehand lines daily for two weeks before Diwali: draw straight lines, curves, and spirals in powder on newspaper until your hand is steady. Consistency matters more than complexity; a simple design executed cleanly beats an ambitious one done messily. Second, learn one new motif each year: this year the paisley, next year the lotus, then the peacock feather. Building a repertoire gradually is sustainable. Third, study symmetry: fold paper to understand mirror patterns, and practice drawing one half of a design and mirroring it. Fourth, experiment with shading by layering two tones of the same color, darker at edges, lighter in centers, for a three-dimensional effect. Fifth, try pulli kolam, the Tamil art of looping a single continuous line around dots; start with a 3×3 grid and follow video tutorials slowly. Sixth, join the community: share your rangolis online, follow rangoli artists, and participate in a local competition. Feedback accelerates learning enormously. Most importantly, make rangoli regularly, not just at Diwali; many practitioners draw small daily kolams, and the skill compounds beautifully. Within a year of regular practice, designs that once seemed impossible will feel natural.
Rangoli, Vastu, and Placement Beliefs
Traditional beliefs around rangoli placement add meaning for families who observe them. The entrance is considered the most auspicious location, as the rangoli welcomes positive energy and Goddess Lakshmi into the home. Designs are traditionally made fresh each morning during the festival, with yesterday’s rangoli respectfully swept away; the daily renewal symbolizes fresh blessings. Auspicious motifs include the lotus (purity), the diya (light), the paisley (fertility and growth), footprints (divine arrival), and geometric patterns representing cosmic order. The swastik, an ancient symbol of auspiciousness used in India for millennia, appears in many traditional rangolis; note that its meaning in the Indian context is entirely positive and predates other uses by thousands of years. Colors carry symbolism too: red for purity and festivity, yellow for knowledge and learning, green for nature and growth, white for peace. Whether or not you follow these beliefs literally, understanding them deepens your appreciation of the art. Many modern practitioners blend traditional motifs with contemporary designs, honoring the past while expressing their own creativity.
Rangoli Competitions: Participating and Judging
Housing societies, schools, and offices often hold rangoli competitions during Diwali, and they are fantastic motivators for beginners. If participating, check the rules first: time limits, size restrictions, allowed materials (some require only natural materials), and whether stencils are permitted. Choose a design you have practiced, not an ambitious new one; competition nerves make everything harder. Arrive early to claim a good spot with even flooring and good light. Bring extra materials, including cleanup supplies. If you are asked to judge, evaluate fairly on creativity, neatness, color harmony, theme relevance, and difficulty level; remember that a clean simple design often deserves more credit than a messy complex one. Competitions are ultimately community celebrations; the real prize is the street or lobby transformed by dozens of colorful creations.
Quick Rangoli Ideas for Busy Days
Not every day allows a forty-minute rangoli session. For busy mornings during the five days of Diwali, keep these five-minute options in your back pocket. A simple diya outline in white powder with a yellow-filled flame takes three minutes and reads instantly as festive. A circle of marigold heads around your existing entrance diyas needs no powder at all. A straight line of alternating colored dots leading from the door to the puja room creates a welcoming trail in minutes. A small stencil rangoli on a tray can be made the night before and carried to the entrance in the morning. And the simplest of all: scatter mixed flower petals in a loose, organic pattern around your diyas; nature does the designing for you. The tradition values daily renewal over daily perfection; a small fresh rangoli honors the practice just as sincerely as an elaborate one.
Watch: Easy Diwali Rangoli for Beginners
Watch this step-by-step tutorial for a beautiful beginner-friendly Diwali rangoli with real diyas, perfect for following along on your first attempt.
Frequently Asked Questions
What is the easiest rangoli design for a complete beginner?
A stencil-based diya or flower design is the easiest: place the stencil, sprinkle powder, lift, and add diyas. It takes fifteen minutes and looks professional. Alternatively, a petal circle made of marigold heads requires no powder skills at all.
What materials do I need to start making rangoli?
White and colored rangoli powders, chalk for outlines, a stencil or two, small bowls, and diyas for decoration. Flower petals are a great natural alternative or addition. The materials table in this guide covers everything in detail.
How do I make rangoli powder at home?
Mix rice flour with a few drops of food coloring for pastel shades, or use turmeric for yellow, kumkum for red, and dried, crushed flower petals for vibrant hues. Homemade colors are eco-friendly and safe around kids and pets.
How long does a rangoli last?
A powder rangoli lasts one to three days indoors in a low-traffic spot; outdoors, wind and foot traffic shorten this to hours. Petal rangolis last a day before wilting. Plan to make the main Diwali rangoli on the day itself for maximum freshness.
Can I make rangoli on carpet or grass?
Powder rangoli needs a hard, smooth surface like tile, marble, or concrete. On carpet, use a large tray or board as your base. On grass, petal rangolis work beautifully; anchor petals so wind does not scatter them.
What is the difference between rangoli and kolam?
They are regional names for the same art: rangoli in North India, kolam in Tamil Nadu, muggu in Telugu states. Kolam traditionally uses rice flour and geometric dot-grid patterns drawn fresh each morning; rangoli often uses colored powders and more freeform designs.
How do I fix a mistake in my rangoli?
Gently sweep up the affected section with a soft brush or cloth and redo it. For small smudges, cover with white powder outline or a strategically placed flower petal. Remember that rangoli is impermanent; small imperfections are part of its charm.
Is rangoli eco-friendly?
It can be. Use natural colors (turmeric, rice flour, petals, kumkum), rice flour bases that feed insects and birds, and avoid synthetic chemical powders. Sweep up and compost the remains rather than washing chemicals into drains.
When should I make the Diwali rangoli?
Make the main rangoli on Diwali day itself, ideally in the morning or afternoon, so it is fresh for the evening. If you are hosting, finish at least two hours before guests arrive. Choti Diwali is a good day for a practice run.
Can kids make rangoli?
Absolutely. Kids love stencil rangolis, petal arrangements, and sprinkling colors inside chalk outlines drawn by an adult. It is a wonderful family activity; our guide to Christmas crafts for kids has similar group craft ideas that work for any festival.
Keep Exploring Festival Ideas
For more festive creativity, explore our Christmas decoration ideas for seasonal styling, our Diwali and the Hindu New Year guide for festival traditions, and our Christmas crafts for kids for family-friendly craft projects.