There is a particular magic in a Christmas decoration a child made themselves — the lopsided paper star hung with enormous pride, the handprint reindeer grandparents treasure for decades. Christmas crafts for kids are about far more than keeping little hands busy in December: they build fine motor skills, teach patience and planning, create keepsakes families keep forever, and give children a genuine role in the holiday. The best easy Christmas crafts use simple materials, finish in under an hour, and produce something a child is proud to display or gift.
This guide collects ten classroom-tested, parent-approved Christmas crafts for kids, each with a complete materials list, step-by-step instructions, age guidance, and tips for success. They are organized from simplest to most involved, use inexpensive supplies available worldwide, and include variations for toddlers through tweens. You will also find setup advice for mess-free crafting, ideas for displaying and gifting finished crafts, and suggestions for turning craft time into full family Christmas activities. For grown-up handmade decor to complement the kids’ creations, see our DIY Christmas ornaments.
Craft-Time Setup: The Mess-Free Commandments
Successful kids’ crafting is 80 percent preparation. Cover the work surface with a washable tablecloth, newspaper, or a cut-open trash bag — taped down so it does not slide. Dress children in smocks or old shirts, and tie back long hair. Pour glitter, paint, and glue into small containers rather than handing over full bottles; a muffin tin makes an excellent paint palette. Keep baby wipes and a damp cloth within arm’s reach for immediate cleanups. For toddlers and preschoolers, prep the fiddly steps in advance (cut shapes, pre-thread needles) so the session is about creating, not waiting. Work in small batches of steps with breaks — young children’s focus lasts roughly 10–15 minutes per stretch. And embrace imperfection: the goal is a joyful hour and a handmade treasure, not a Pinterest-perfect replica. Photograph the process, not just the product — those photos become the real keepsakes.
Essential supplies to stock
A basic Christmas craft kit covers nearly every project below: construction paper and cardstock in Christmas colors, child-safe scissors, glue sticks and white school glue, washable tempera or acrylic paints, paintbrushes and sponges, cotton balls and pom-poms, pipe cleaners, googly eyes, glitter (or eco glitter), ribbon and yarn, paper plates, cupcake liners, popsicle sticks, and a hole punch. Add salt, flour, and cinnamon from the kitchen for dough ornaments, and pinecones and twigs from the garden for nature crafts. Buy in bulk if crafting with a classroom — the per-child cost drops to very little.
1. Handprint Reindeer Cards (Ages 1–4)
The quintessential toddler Christmas craft: simple, adorable, and a guaranteed grandparent-pleaser.
You will need: brown washable paint, white cardstock folded into cards, red pom-poms or red paint, googly eyes, glue, a damp cloth for cleanup.
Steps: (1) Paint the child’s hand (palm and fingers, not the thumb) with brown paint — a sponge brush gives even coverage. (2) Press the hand firmly onto the cardstock with fingers spread: the palm becomes the reindeer’s face, the fingers its antlers. Toddlers may need a gentle hand-over-hand press. (3) Lift straight up and let dry completely. (4) Glue a red pom-pom at the base of the palm for Rudolph’s nose. (5) Glue on two googly eyes, or draw eyes with marker for older toddlers. (6) Write the child’s name and year on the back — future you will be grateful.
Tips: Do a practice print on scrap paper first. Have the damp cloth ready before you start painting — painted toddlers touch everything. For a classroom, set up an assembly line: paint, print, wash, dry, decorate. Variations: green handprints become Christmas trees (add fingerprint ornaments), white handprints on dark paper become snowmen.
2. Paper Plate Christmas Trees (Ages 2–5)
A classic preschool craft that teaches cutting, gluing, and decorating in one satisfying project.
You will need: green paper plates (or white plates plus green paint), child-safe scissors, glue, stickers, pom-poms, sequins, star stickers or cut-out stars, ribbon for hanging.
Steps: (1) If using white plates, paint them green and let dry — or skip painting with pre-colored plates. (2) Help the child cut the plate into a triangle (for young preschoolers, pre-cut and let them do the decorating). (3) Cut a small brown rectangle for the trunk and glue it to the triangle’s base. (4) Decorate freely: sticker ornaments, glued pom-poms, sequin garlands drawn with glue lines. (5) Glue a star to the top. (6) Tape ribbon to the back for hanging.
Tips: This is an excellent first-scissors project — cutting paper plates builds hand strength. Display the finished trees as a garland by stringing them on yarn, or stand them up as table decorations. For toddlers, skip cutting entirely and provide pre-cut shapes to arrange and glue.
3. Popsicle Stick Snowflakes (Ages 3–7)
Geometry meets glitter: children build real six-sided snowflakes while learning about symmetry.
You will need: popsicle sticks (6 per snowflake), white and light-blue paint, glue (a low-temp glue gun for adult assembly, or white glue with patience), glitter, sequins, ribbon.
Steps: (1) Paint the popsicle sticks white or pale blue and let dry. (2) Lay three sticks in a star/asterisk shape — each crossing the center at 60-degree angles — and glue at the center. An adult with a low-temp glue gun makes this instant; with white glue, clip and wait. (3) Once the frame is solid, decorate: brush glue along the sticks and sprinkle glitter, or glue sequins and tiny pom-poms at the intersections. (4) Tie ribbon through one point for hanging.
Tips: Talk about real snowflakes while crafting — all have six sides, no two alike. For older kids, add smaller stick “branches” glued at angles for intricate designs. These look stunning hung in windows where light catches the glitter, and a classroom set makes a beautiful hallway display.
4. Cotton Ball Santa Beards (Ages 2–6)
A face every child recognizes, built from the fluffiest material in the craft box.
You will need: paper plates, cotton balls, red paint or red paper, pink paper, googly eyes, glue, flesh-tone or white paper for the face.
Steps: (1) Cut a paper plate in half — one half is Santa’s face base. (2) Glue cotton balls all over the curved edge to make the beard, and a few along the straight top edge for the hat’s fur trim. (3) Cut a red triangle from paper for the hat and glue it above the fur trim; add a cotton-ball pom-pom at the tip. (4) Glue on googly eyes, a pink circle nose, and draw a smile. (5) Optional: glue the finished Santa to a popsicle stick for a puppet.
Tips: Pull cotton balls apart slightly before gluing for a fuller beard. This craft pairs wonderfully with reading a Santa story or writing letters to Santa afterward — the Santa they just made “receives” the letter. For a classroom, pre-cut the hats to keep the session moving.
5. Pinecone Christmas Trees (Ages 4–9)
A nature craft that brings the outdoors in — collect the pinecones on a family walk first for a full activity.
You will need: clean dry pinecones, green paint (or leave natural), small pom-poms, tiny beads or sequins, glue, a small wooden disc or bottle cap for the base, a star sticker or bead for the top, optional glitter.
Steps: (1) If painting, brush green paint over the pinecone and let dry — or embrace the natural brown for a rustic look. (2) Glue the pinecone upright onto its base. (3) Tuck tiny pom-poms between the scales as ornaments, securing each with a dot of glue — tweezers help small fingers. (4) Add micro-beads or sequins as garland sparkle. (5) Top with a star. (6) Optional: lightly brush the scale tips with white paint for a snow-dusted effect.
Tips: Bake collected pinecones at low heat (around 200°F/95°C for 30–45 minutes) before crafting to kill any insects and open the scales — let an adult handle this. A forest of these in different sizes makes a charming mantel display, and they double as place-card holders with a name tag tucked in. For an all-natural version, skip paint and glitter entirely.
6. Paper Chain Countdown Garlands (Ages 4–10)
Part craft, part advent calendar: children build the decoration, then tear off one link each day until Christmas.
You will need: red, green, and white construction paper cut into strips, glue sticks or tape, markers.
Steps: (1) Cut paper into strips roughly 1 inch by 8 inches — 24 strips for a Christmas Eve countdown. (2) On each strip, write or draw a small daily activity: “read a Christmas story,” “make hot cocoa,” “call grandma,” “do a kind deed.” Our advent calendar activities list is perfect inspiration. (3) Form the first strip into a loop and glue or tape the ends. (4) Thread the next strip through the loop before closing it, chaining links together. (5) Hang the finished chain where the child can reach it, and remove one link each day.
Tips: This is the rare craft that structures the whole season — the daily ritual matters more than the chain’s looks. Let children choose the activities; ownership keeps them engaged. Make two chains — one for home, one for the classroom — and compare countdown notes.
7. Salt Dough Ornaments (Ages 4–12)
The heirloom craft: ornaments that last for years and carry handprints through time.
You will need: 2 cups flour, 1 cup salt, 1 cup water (makes about 20 ornaments), cookie cutters, a straw, parchment paper, acrylic paints, ribbon, clear sealer (adult step).
Steps: (1) Mix flour and salt, then add water gradually, kneading into a smooth dough — about 5 minutes. If sticky, add flour; if crumbly, add water drops. (2) Roll to 1/4-inch thickness on a floured surface. (3) Cut shapes with cookie cutters, or press hands/feet for prints. (4) Poke a hanging hole in each with a straw before baking — this is the step everyone forgets. (5) Bake at 200°F (95°C) for 2–3 hours until hard, flipping once; or air-dry for 2–3 days. (6) Paint when completely cool, thread ribbon through holes, and seal with clear acrylic spray (adult only, outdoors).
Tips: Dated handprint ornaments become family treasures — write the year on the back. Keep dough covered with a damp cloth while working so it does not dry out. For a full ornament-making session including grown-up techniques, see our DIY Christmas ornaments guide. Unpainted salt dough ornaments can be scented with a drop of essential oil for fragrant tree decorations.
8. Cupcake Liner Christmas Trees (Ages 5–10)
An elegant-looking craft from the baking aisle: layered liners become dimensional mini trees.
You will need: green cupcake liners in 2–3 sizes, glue, a paper straw or stick for the trunk, small star stickers, sequins or mini pom-poms, a base (small pot, wooden disc, or upturned cup).
Steps: (1) Flatten the liners. (2) Starting with the largest, fold each liner in half, then in quarters, to make layered ruffles — or simply stack them graduated, largest at the bottom. (3) Glue the stack onto the straw trunk, largest liner at the base, smallest at the top, fanning each layer. (4) Decorate with tiny stickers, sequins, or pom-pom “ornaments.” (5) Top with a star sticker and mount on the base.
Tips: Alternate shades of green liners for depth, or use red-and-white striped liners for a candyland tree. A row of these in graduated sizes makes a delightful windowsill forest. Older kids can add battery tea lights underneath for a glowing effect (never real candles).
9. Reindeer Food and Giftable Treats (Ages 5–12)
Crafts children can give: the magic is in the making and the giving.
You will need (reindeer food): oats, eco-friendly glitter or colored sugar (never plastic glitter — it harms wildlife), small bags or jars, printable or handwritten gift tags. (Hot cocoa cones): clear piping bags or cellophane cones, cocoa mix, mini marshmallows, chocolate chips, ribbon.
Steps (reindeer food): (1) Mix oats with a spoonful of eco glitter in a bowl — children love this part. (2) Spoon into small bags. (3) Attach a tag with the “recipe” poem: sprinkle on the lawn Christmas Eve so the reindeer find their way. Steps (cocoa cones): (1) Layer cocoa mix, chocolate chips, and marshmallows in the cone. (2) Tie with ribbon and add a gift tag with instructions.
Tips: Emphasize the wildlife-safe rule for reindeer food — it is a genuine environmental lesson wrapped in magic. These make excellent classroom gifts and teacher presents. Pair gift-making with our Christmas gift wrapping ideas so children can wrap their creations beautifully.
10. 3D Paper Stars (Ages 8–12)
The showpiece craft for older kids: real dimension, real geometry, stunning results.
You will need: 6 squares of paper per star (gold, white, or red cardstock looks best), glue, ribbon, a ruler.
Steps: (1) Fold each square in half diagonally, then fold the two outer corners to the center fold to make a kite shape — these become the star’s points. (2) Glue two kite shapes back-to-back for one full 3D point; repeat to make 6 points. (3) Glue the points together at their bases in a circle, fanning into a star. (4) Before closing the final joint, thread a ribbon loop through for hanging. (5) Press and hold each joint until set.
Tips: This is a patience craft — perfect for a quiet afternoon, not a rushed classroom period. Demonstrate one full point slowly, then let kids work; the repetition becomes meditative. Hang finished stars in windows or from the tree, or string several into a garland. Vary paper sizes for a graduated star mobile.
Classroom Tips for Teachers
Crafting with twenty children requires choreography. Choose crafts with no drying-time bottlenecks (paper chains, popsicle snowflakes) or plan drying into the schedule (paint in the morning, assemble after lunch). Pre-cut everything for under-7s; set up supply stations rather than distributing full material sets to each desk. Assign roles — gluer, glitterer, holder — to keep everyone engaged during multi-step builds. Photograph each child with their finished craft for a display board parents will love. And always have a “finished early” extension: coloring sheets, extra decorating, or helping a classmate. Budget-wise, the ten crafts above average very little per child when supplies are bought in classroom packs — and many use recyclables and nature finds that cost nothing.
Displaying and Gifting Finished Crafts
Children’s crafts deserve pride of place. Dedicate a section of the tree to handmade ornaments — many families keep a “memory tree” or a special branch just for them. String paper chains across doorways, hang snowflakes in windows with suction cups, and line the mantel with pinecone forests. For gifting, children can wrap their creations using our gift wrapping ideas; a handmade ornament in a small box with the child’s name and year is a present grandparents genuinely treasure. Start a tradition: one new handmade ornament per child per year, stored in a labeled box — in a decade, the collection tells the story of their childhood.
In Pictures: Easy Christmas Crafts for Kids
Glue sticks, glitter and proud little hands: Christmas crafts are the season’s most joyful mess.
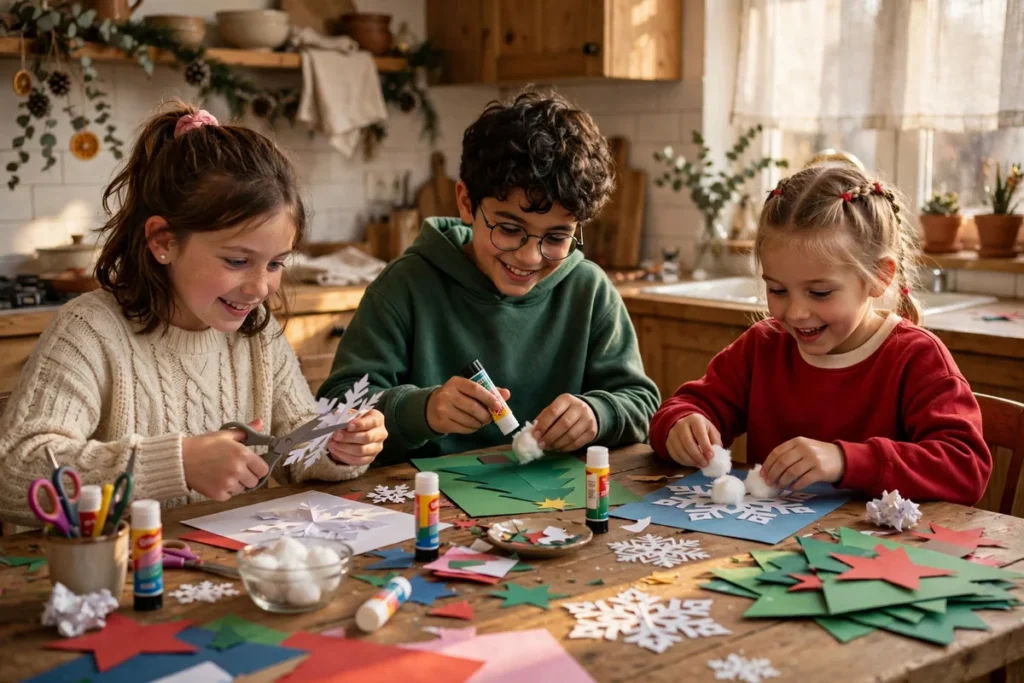
Kids making Christmas crafts at a table: painting ornaments, cutting paper snowflakes and stringing popcorn garlands together.
Watch: Easy Christmas Crafts for Kids
Living Porpoisefully shows how to make salt dough sea star ornaments — an easy Christmas craft kids can actually do.
At a Glance: Easy Christmas Crafts for Kids
Classic Christmas crafts and their roots.
| Craft | Era | Key detail |
|---|---|---|
| Paper chains | Victorian era | Cut-paper garlands were a parlor-craft staple |
| Popcorn garlands | 19th-century America | Stringing popcorn predates electric lights on trees |
| Salt dough ornaments | Folk craft | Flour-salt dough ornaments are an old European folk craft |
| Handprint art | Prehistoric | Handprints are among humanity’s oldest art forms — kids’ versions keep the tradition |
| Gingerbread decorating | 16th-century Germany | Cookie decorating grew from Lebkuchen traditions |
Frequently Asked Questions
What are the easiest Christmas crafts for toddlers?
Handprint and footprint art (reindeer, trees, snowmen), sticker decorating on pre-cut shapes, cotton-ball gluing (Santa beards, snowmen), and sensory play like Christmas-colored playdough with cookie cutters. The keys for toddlers: one or two steps, big materials, washable everything, and an adult handling all cutting. Process matters more than product at this age.
How do I do Christmas crafts with a large classroom?
Choose low-mess, low-drying-time crafts; pre-cut all shapes; set up supply stations; and use assembly-line steps. Paper chains, popsicle-stick snowflakes, and card decorating scale well to 20–30 children. Budget classroom packs of construction paper, glue sticks, and pom-poms to keep costs minimal, and always have an early-finisher activity ready.
What can kids make as Christmas gifts for parents?
Salt dough handprint ornaments (dated — instant heirlooms), decorated photo frames with a school photo, hand-painted mugs or plates (with adult help and proper sealing), reindeer food bags, hot cocoa cones, and handmade cards. The most treasured gifts combine the child’s handiwork with personalization: a name, a date, a photo.
Are salt dough ornaments safe for kids to make?
Yes — the dough is just flour, salt, and water, completely non-toxic (though too salty to eat). Adults should handle the oven and any spray sealer. Baked ornaments last for years if sealed and stored dry. Keep finished ornaments away from pets, as the high salt content is harmful if chewed.
How do I keep glitter from taking over my house?
Use it over a tray or box lid so spills are contained, pour from shakers rather than open jars, and consider eco glitter or alternatives (colored sugar, mica powder) for some projects. A lint roller picks up stray glitter from fabrics, and slightly damp paper towels lift it from hard surfaces. Or embrace it: veteran craft parents say December glitter is just seasonal decor.
What age can kids start using a glue gun?
Low-temperature glue guns are generally suitable from around age 8 with direct adult supervision; standard high-temp guns should remain adult-only tools until the early teens. For younger children, white school glue and glue sticks handle most Christmas crafts — they just need more drying time. When in doubt, the adult does the gluing while the child places the pieces.
Turning Crafts Into Traditions
The real value of Christmas crafts for kids compounds over years. Families who craft together every December report that children remember the sessions as vividly as the presents: the flour-dusted kitchen, the glitter that never quite left the carpet, the ornament hung a little crooked and loved all the more. Pick one anchor craft to repeat annually — salt dough handprints, a new paper chain, one painted ornament — and watch the collection become a timeline of childhood. Pair craft day with a Christmas movie, hot cocoa from our holiday recipe collection, and carols in the background, and it becomes the tradition children will one day recreate with their own families. That is the deepest purpose of every easy Christmas craft: not the object, but the hour.