Origami — the Japanese art of paper folding — turns the humblest material on earth into cranes, flowers, boxes, dragons, and geometric marvels. No cutting, no glue, no tools: just a square of paper and your hands. It is portable, nearly free, meditative, and capable of astonishing beauty. A thousand paper cranes is a wish; a single perfect crane is a small miracle.
What surprises beginners is how quickly origami delivers. Your first crane takes about twenty minutes with guidance; your tenth takes five. Each model teaches folds that unlock the next, so progress compounds visibly. And unlike many crafts, origami fits anywhere — a waiting room, an airplane, a lunch break become studios.
This complete beginner guide covers: choosing paper (it matters more than you think), the eight fundamental folds and bases, how to read origami diagrams, the classic models in learning order (crane, box, frog, flower), precision techniques that separate crisp models from sloppy ones, troubleshooting, and the path from following diagrams to designing. Crease your first fold — the paper is waiting.
Paper: The Material That Makes or Breaks Models
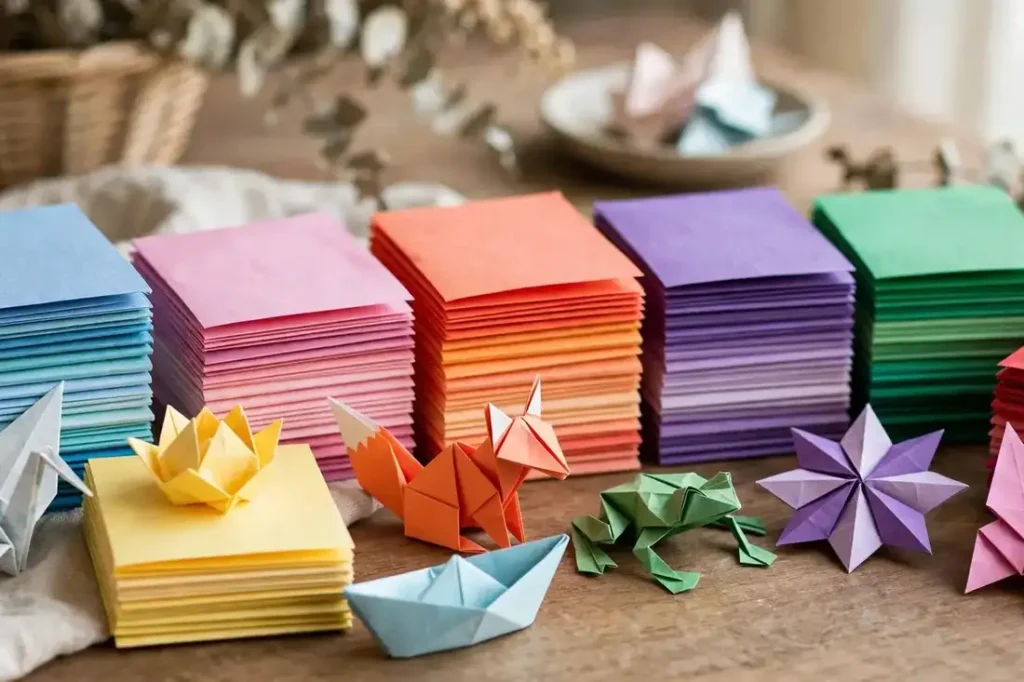
Real origami paper (“kami”) transforms the experience: thin, crisp, colorfully patterned, pre-cut to perfect squares, and engineered to hold creases sharply. A pack of 500 sheets in assorted colors costs under $10 and lasts months. For beginners, standard 6-inch (15cm) kami is ideal — large enough to handle, small enough to feel like real origami.
Avoid printer paper for learning: it is too thick for complex models, creases bluntly, and springs open. (It works for simple models and practice, but kami is so cheap there is little reason.) As you progress, explore tant paper (crisper, holds complex folds), duo paper (different colors each side — stunning for models showing both sides), and foil paper (holds shapes aggressively, great for display).
Paper size strategy: learn new models with larger paper (8-10 inches) where folds are forgiving, then fold display versions at standard 6 inches. Complex models sometimes demand tissue-foil or larger sheets — but that is intermediate territory. For now: a bulk pack of 6-inch kami in colors you love. That is the entire material investment.
- Buy: 6-inch kami origami paper, bulk pack (~500 sheets, <$10)
- Learn new models on larger paper (8-10″); fold display versions at 6″
- Avoid printer paper for real models — too thick, blunt creases
- Later explorations: tant (crisp), duo (two-color), foil (sculptural hold)
- Store flat and dry; curled or damp paper fights every fold
The 8 Fundamental Folds and Bases
All origami — from cranes to dragons — builds from a small vocabulary of folds. The valley fold (fold toward you, crease dips down) and mountain fold (fold away, crease rises) are the alphabet. The squash fold opens a flap and flattens it into a diamond. The petal fold narrows a point elegantly. The inside and outside reverse folds flip points inward or outward — the folds that make crane necks and frog legs.
These folds combine into “bases” — standard starting configurations. The preliminary base (a square of layered flaps) begins countless models. The bird base extends it for cranes and other birds. The frog base and fish base serve their respective families. Learning bases as units accelerates everything: recognizing “oh, this starts from a bird base” turns a 30-step diagram into familiar territory.
Practice method: fold each fundamental ten times on scrap paper until the motions are automatic. Precision matters enormously in origami — folds must align edge-to-edge and corner-to-corner, because tiny early errors compound into unrecognizable late stages. Slow, exact folding beats fast, sloppy folding by orders of magnitude. Your creases are your craftsmanship.
- Valley fold + mountain fold: the alphabet of everything
- Squash fold, petal fold: shaping flaps into diamonds and points
- Inside/outside reverse folds: crane necks, legs, beaks
- Bases: preliminary, bird, frog, fish — learn as standard units
- Precision rule: align edge-to-edge exactly; early errors compound
Reading Origami Diagrams
Origami diagrams are a universal visual language — learn it once, fold anything published anywhere. The core symbols: dashed lines for valley folds, dash-dot lines for mountain folds, arrows showing fold direction and motion, and shaded/colored sides distinguishing paper faces. “Fold and unfold” (pre-creasing) appears constantly — those creases become the structural lines for later collapses.
The critical diagram skill is 3D visualization: translating a flat sequence of symbols into the paper’s actual movement. When stuck, fold loosely and manipulate the paper — feel what the diagram describes. Video tutorials complement diagrams beautifully for beginners; watch the tricky step, then follow the diagram for the rest. Most folders use both.
Numbered steps sometimes hide repeated symmetry: “repeat on the other three flaps” or “repeat behind” compresses many steps into one instruction. Always check for these — missing a repeat is the top cause of models that “don’t look like the picture.” And when a step seems impossible, you have almost certainly misread an earlier step; back up three steps and re-examine rather than forcing forward.
- Dashed = valley fold; dash-dot = mountain fold; arrows = direction
- “Fold and unfold” pre-creases are structural — don’t skip them
- Watch for “repeat on remaining flaps/behind” — missing repeats breaks models
- Stuck? Back up 3 steps and re-read; forcing forward compounds errors
- Combine video (tricky steps) + diagrams (the rest) while learning
Classic Models in Learning Order
Fold in this sequence — each model teaches folds the next one needs. The paper crane (the iconic model, ~20 steps): teaches inside reverse folds, petal folds, and the bird base. It is the rite of passage; your first recognizable crane is a genuine milestone. Fold ten before moving on — repetition builds the precision later models demand.
The masu box (traditional square box): teaches clean right angles, pre-creasing discipline, and 3D collapse — plus it is genuinely useful. The jumping frog: introduces the frog base and springy reverse folds, and the finished frog actually jumps when pressed. The lily/iris flower: petal folds and curling techniques, beautiful with duo paper.
Then the graduation models: the flapping bird (a crane variant that flaps when you pull its tail — pure delight), the modular kusudama ball (twelve identical units assembled — teaches precision through repetition), and your first intermediate model of choice. By this point you read diagrams fluently, fold precisely, and — critically — you have learned how to learn origami: patience, precision, and backing up when lost.
- 1. Paper crane — the rite of passage; fold 10 for precision
- 2. Masu box — right angles, pre-creases, useful result
- 3. Jumping frog — frog base, actually jumps
- 4. Lily flower — petal folds, gorgeous in duo paper
- 5. Flapping bird → kusudama ball → first intermediate model
Precision Techniques: Crisp vs. Sloppy
What separates beautiful origami from disappointing origami is almost entirely precision, and precision is technique, not talent. Crease sharply: run a fingernail, bone folder, or the back of a spoon along every crease. Sharp creases make later steps align naturally; soft creases let everything drift. Pre-crease everything the diagram marks — those lines are load-bearing.
Fold on a hard, flat surface — tables, not laps or beds. Align edges and corners exactly before creasing; “close enough” at step 3 becomes “unrecognizable” at step 20. Work with clean, dry hands; oils and moisture spot paper and weaken creases. And slow down as models get complex — the final steps of intermediate models demand the most care, exactly when beginners rush from excitement.
Develop the habit of “reading ahead”: glance at the next two steps before folding the current one, so you understand where each fold leads. This prevents the common error of creasing firmly in a direction you will immediately reverse. Origami rewards the thoughtful folder more than the fast one — every time.
- Crease sharply every time — fingernail, bone folder, or spoon back
- Hard flat surface; align edges/corners exactly before creasing
- Clean dry hands; slow down on complex final steps
- Read 2 steps ahead — understand where each fold leads
- Precision is technique, not talent — and it is fully learnable
Troubleshooting and Beyond the Basics
Model will not lie flat or looks lopsided? Asymmetry in early folds — back up to the first asymmetric step and refold precisely. Paper tearing at creases? You are refolding the same crease too many times or using paper too thick for the model — switch to thinner paper or commit to creases the first time. Model will not hold its shape? Under-creased steps or wrong paper (kami is too soft for some 3D models; try tant or foil).
Flaps will not stay tucked? A tiny dot of glue is traditional and acceptable even in purist circles for display models — origami’s “no glue” rule is about the folding art, not about display pragmatism. Finished models looking dull? Try duo or patterned paper; color transforms the same folds dramatically.
Beyond basics, the hobby branches beautifully: modular origami (many identical units into geometric sculptures — meditative repetition), wet-folding (dampened heavy paper sculpted into organic animal forms), tessellations (geometric folded patterns — mathematical art), and eventually origami design (creating your own models — the black belt of the art). Local origami societies and conventions welcome beginners warmly; folders love teaching. The paper is infinite; so is the journey.
- Lopsided → early asymmetry; back up and refold precisely
- Tearing → too many refolds or too-thick paper; commit to creases first time
- Won’t hold shape → under-creasing or wrong paper weight; try tant/foil
- A dot of glue on display models is traditional and fine
- Next branches: modular, wet-folding, tessellations, original design
Modular Origami: Many Pieces, One Sculpture
Modular origami — assembling many identical folded units into geometric sculptures — is the perfect second discipline after single-sheet models. The classic entry is the kusudama ball: twelve identical units (often simple Sonobe units) locked together into a sphere. The folding is repetitive and meditative; the assembly is a 3D puzzle; the result looks impossibly complex for the skill required.
The Sonobe unit system deserves special mention: one simple unit design builds cubes, octahedra, icosahedra, and stellated forms just by changing the count and assembly pattern. Thirty Sonobe units make the beloved stellated icosahedron — an afternoon of folding, an hour of assembly, and a sculpture that draws gasps. Glue is optional (purists assemble glue-free; pragmatists dot glue for permanence).
Modular teaches what single-sheet cannot: precision through repetition (unit 25 must match unit 1 exactly, or assembly fails — the ultimate precision teacher), 3D spatial reasoning, and patience at scale. It is also wonderfully social — modular sessions with friends, each folding units for a shared sculpture, are a beloved origami tradition.
Beyond kusudama: modular stars, geometric mobiles, and tessellation-derived structures. The mathematics underlying modular origami connects to genuine geometry — many folders discover they are learning math by hand, which delights the analytically minded.
- Start: 12-unit kusudama ball (Sonobe units) — repetitive folding, puzzle assembly
- Sonobe system: one unit → cubes, icosahedra, stellated forms (change count/pattern)
- 30-unit stellated icosahedron: the showpiece — afternoon folding, gasp-inducing result
- Teaches: precision through repetition, 3D reasoning, patience at scale
- Social tradition: group folding sessions building shared sculptures
Origami in Daily Life: Gifts, Decor, and Mindfulness
Origami’s portability and zero cost make it the most shareable craft: leave cranes as tips, fold napkins into art at dinner parties, make modular ornaments for every holiday, create gift boxes (the masu box in pretty paper beats any store box), and fold place cards for gatherings. A practiced folder carries a small paper pack everywhere — five idle minutes become a crane for a delighted stranger.
For decor, origami scales stunningly: kusudama balls as hanging installations, crane garlands (the thousand-crane senbazuru tradition for weddings and wishes), tessellation wall art, and seasonal mobiles. Grouped multiples — twenty cranes on fishing line, a dozen modular stars — create installations from simple units through sheer repetition.
The mindfulness dimension is real and research-adjacent: the precise, sequential, absorbing nature of folding induces flow states reliably. Many folders describe origami as active meditation — the mind quiets because the hands and eyes are fully occupied. Folding groups in hospitals, schools, and senior centers use it deliberately for calm and focus.
Teaching origami multiplies its joy: children learn geometry by hand, seniors maintain dexterity, and everyone experiences the satisfaction of transforming flat paper into form. The folder who teaches ten people to fold cranes has started a quiet, paper chain of delight.
- Daily sharing: tip cranes, napkin art, gift boxes, place cards — carry paper everywhere
- Decor: kusudama installations, crane garlands, tessellation wall art, mobiles
- Grouped multiples create installations — repetition becomes grandeur
- Mindfulness: sequential precision induces flow — active meditation backed by experience
- Teaching multiplies joy: kids learn geometry, seniors keep dexterity, all delight
Teaching Origami to Kids: Sharing the Folds
Teaching children origami is one of the craft’s great joys — and a superb way to deepen your own understanding, because teaching forces precision. Start with the right models: fortune tellers (interactive, quick, endlessly customizable), paper boats (float them afterward — the payoff matters), simple boxes (useful immediately for treasures), and jumping frogs (the hopping finale delights every child). Save cranes for when they are hooked — cranes demand patience beginners may not have yet.
Teaching technique matters more than model choice: fold alongside them (not ahead — they follow your hands), use large paper (6-8 inches minimum — small paper frustrates small hands), narrate each step simply (“fold this corner to that corner, like closing a book”), and celebrate approximations (a lopsided boat that floats is a triumph, not a failure). Patience is the entire pedagogy.
The educational benefits are genuine and research-supported: spatial reasoning (mental rotation, symmetry), sequencing and following multi-step instructions, fine motor development, patience and frustration tolerance, and geometric intuition (fractions, angles, and symmetry learned by hand). Teachers use origami deliberately for math enrichment — and children experience it as play, not lessons.
Group settings: classrooms, birthday parties, scout troops, and library programs all suit origami. Prepare pre-creased starter sheets for very young children (they complete the folds), bring extra paper (mistakes are part of learning), and always have a “free folding” period after instruction (creativity needs unstructured time). The child who folds their first crane independently wears an expression you will remember.
For your own growth: teaching reveals gaps in your understanding (the step you cannot explain clearly is the step you do not fully understand), builds diagram-reading fluency (answering questions forces analysis), and connects you to the tradition — origami has always been passed hand to hand, generation to generation. Teaching is the craft’s oldest continuity.
- Start kids with: fortune tellers, boats, boxes, jumping frogs — save cranes for later
- Fold alongside (not ahead); large paper; simple narration; celebrate approximations
- Benefits: spatial reasoning, sequencing, fine motor skills, patience, geometric intuition
- Group tips: pre-creased sheets for young kids, extra paper, free-folding time after
- Teaching deepens YOUR skill: gaps revealed, fluency built, tradition continued
- A child’s first independent crane is an unforgettable teaching moment
Origami Paper Types for Beginners
Start with kami; explore the rest as your models demand more.
| Paper | Character | Best For | Beginner Notes |
|---|---|---|---|
| Kami | Thin, crisp, colorful, cheap | Learning all beginner models | The default — buy in bulk |
| Tant | Crisp, firm, solid colors | Models needing structure | Great second paper; holds complex folds |
| Duo | Different color each side | Flowers, cranes, display pieces | Stunning results from simple models |
| Foil | Metallic, holds any shape | Display models, sculptural work | Unforgiving of mistakes; crease once |
| Washi/chiyogami | Textured, patterned, beautiful | Special gifts, decorative models | Thicker; best for simple-mid models |
| Printer paper | Thick, plain, free | Practice folds, simple models | OK for practice; poor for real models |
Origami Learning Path
Follow this sequence — each stage builds the skills the next demands.
| Stage | Models | Skills Built | Timeline |
|---|---|---|---|
| First folds | Boat, fortune teller, masu box | Valley/mountain, precision basics | Week 1 |
| Classic | Crane ×10, frog, lily | Reverse folds, bird base, petal folds | Month 1 |
| Confident | Flapping bird, fox, turtle | Reading diagrams fluently | Months 2-3 |
| Modular | Kusudama, Sonobe solids | Repetition precision, 3D assembly | Months 3-6 |
| Intermediate | Dragons, insects, complex animals | Advanced bases, shaping | Months 6-12 |
| Advanced | Wet-folding, tessellations, design | Sculptural artistry | Year 2+ |
Origami for Beginners: Frequently Asked Questions
What is the easiest origami for beginners?
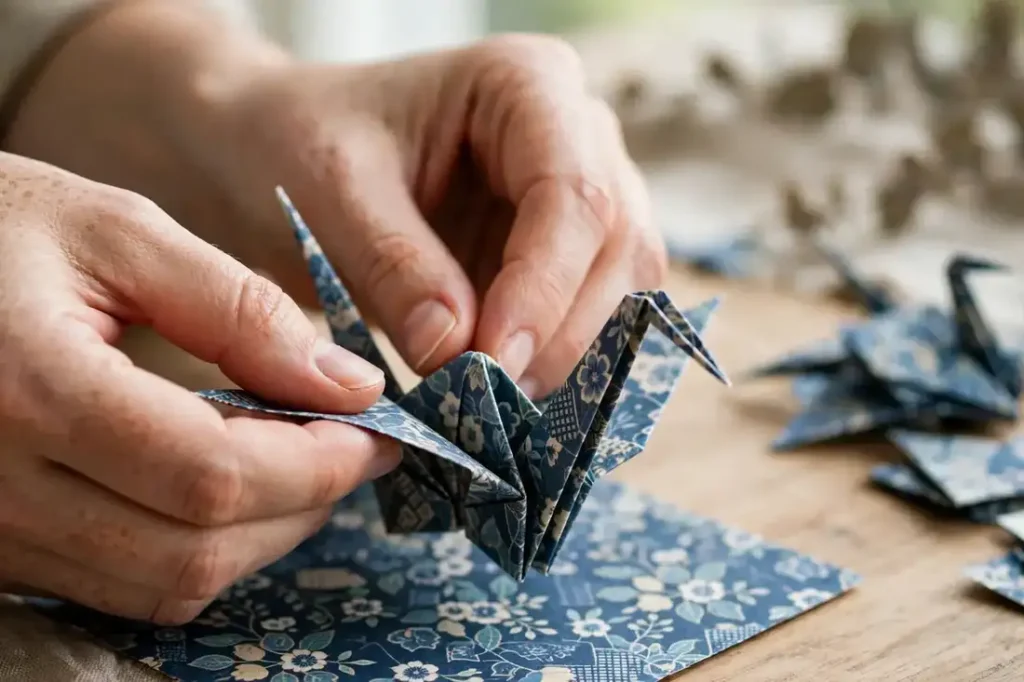
The paper crane is the classic first “real” model — about 20 steps, deeply satisfying. Even simpler starters: the paper airplane (yes, it counts), the masu box, and the fortune teller. Start simple, build precision, then tackle the crane. The fortune teller (cootie catcher) and paper boat are even simpler true-beginner models — perfect for young children; the crane remains the meaningful “first real model” milestone.
What kind of paper do I need for origami?
Standard 6-inch kami origami paper — thin, crisp, pre-cut squares, sold in bulk packs of 500 for under $10. It is engineered for folding and transforms the experience versus printer paper. Learn new models on larger sheets (8-10″) for forgiveness. Also essential: a bone folder ($5-8) for crisp creases and a self-healing cutting mat if you cut custom squares — the complete toolkit stays under $20 including paper.
How long does it take to learn origami?
Your first crane takes ~20 minutes with guidance; your tenth takes 5. Diagram reading clicks within a few weeks; crisp precision develops over 2-3 months. Like all crafts, basics are quick and mastery is a joyful long road. Add wet-folding exploration around month 6+ (dampened heavy paper sculpted organically) — it is a different art within origami, producing expressive animal forms impossible with dry folding.
Why doesn’t my origami look like the picture?
Almost always imprecise early folds — tiny misalignments compound through later steps. Slow down, align edges exactly, crease sharply, and back up three steps when lost rather than forcing forward. Precision, not speed, makes beautiful origami. Also: folding on too-soft surfaces (use a hard table), using paper with a strong curl (flatten under books first), and folding when tired — precision demands fresh attention, so fold when alert.
Is origami good for kids?
Wonderfully — it teaches geometry, sequencing, patience, and fine motor skills with zero mess and near-zero cost. Start kids with simple models (boxes, boats, fortune tellers) on larger paper, and fold alongside them. Many lifelong folders started as children. Origami is excellent for all ages: children build spatial reasoning and patience, adults find stress relief, seniors maintain fine motor skills — few activities span generations so gracefully.
Can I design my own origami models?
Eventually, yes — designing is the advanced art. It requires deep familiarity with bases and folding theory. Most designers spent years folding others’ models first. When you start seeing how models are constructed (not just following steps), you are approaching design readiness. Design resources exist (books on origami design theory) for the committed — but most designers agree: fold 200+ models first; design vocabulary comes from folding vocabulary.
Key Takeaways: Origami for Beginners
Everything that matters on one sheet — fold it into your memory:
- Paper: 6-inch kami in bulk (~$10/500 sheets); learn new models on larger paper
- Fundamentals: valley + mountain folds, squash, petal, inside/outside reverse folds
- Learn the bases as units: preliminary, bird, frog, fish — recognition accelerates diagrams
- Precision rule: align edge-to-edge exactly; early errors compound through later steps
- Diagram language: dashed = valley, dash-dot = mountain, arrows = motion, watch for repeats
- Model order: crane ×10 → masu box → frog → lily → flapping bird → kusudama
- Crease sharply every time; fold on hard surfaces; read two steps ahead
- Stuck? Back up three steps and re-read — forcing forward compounds errors
- Wet-folding (dampened heavy paper, sculpted organically) creates expressive animals — the advanced art within the art
- Tessellations: geometric folded patterns — mathematical art for the patient
- Join a local origami society — folders love teaching, and conventions inspire for years
Watch and Learn: Easy Origami Box for Beginners
Watch a classic beginner model folded in real time — following along with video builds diagram-reading confidence:
More Paper and Precision Crafts
Love working with your hands? These precise crafts pair beautifully with origami:
- DIY Kiss Day Gift Ideas: 15 Handmade Projects They’ll Love
- DIY First Birthday Decorations: 15 Step-by-Step Projects
- DIY First Date Anniversary Gift Ideas: 25 Handmade Projects Full of Heart
- Sweet 16 Candle Ceremony Ideas: Scripts, Order & Modern Twists
Origami teaches a quiet lesson: extraordinary things come from ordinary materials plus attention. A square of paper, twenty careful folds, and you hold a crane — the same crane folded for a thousand years, by millions of hands, including now yours.
Fold one crane today. Then nine more. Somewhere around the tenth, your hands will know the sequence without your brain’s help — and you will understand why this simple art has endured for centuries. The paper is waiting.
A thousand cranes begin with one fold — and the second crane is easier than the first, and the hundredth easier still. The paper is patient; be patient with yourself. Keep a small pack of kami in your bag, and let idle moments — waiting rooms, long calls, quiet evenings — become folding time. The crane you fold tomorrow will be better than the one you fold today, and that quiet, compounding improvement is the whole joy of the art.