There is a special pride in pointing at the balloon garland over the cake table and saying, “I made that.” DIY first birthday decorations are not just about saving money — although you will save a lot — they are about making a party that looks like your family, in your exact colors, with details no store-bought kit includes. And here is the part craft stores do not advertise: most impressive-looking first birthday decor is genuinely easy. If you can tie a knot, use scissors, and operate a glue gun, you can make everything on this list.
This guide is a workshop, not a gallery. Every project below includes a materials list, step-by-step instructions, the real cost, and the time it takes — tested against the reality of having a one-year-old in the house (which means most projects are designed to be done in 30-minute bursts during naps). You will also find a starter-kit shopping list, a project comparison table, professional-looking finishing tips, and answers to the most common DIY questions.
You do not need to make all fifteen projects. Pick five: one big statement piece (the garland or backdrop), the high chair decor, the cake topper, one table detail, and the milestone display. Those five create a complete, cohesive party. Everything else is bonus.
Your DIY Starter Kit: What to Buy First
Before any specific project, assemble this kit. It covers 90% of first birthday DIY and costs $25–$40 total — most of it from a dollar store or craft store:
| Supply | What For | Where to Buy Cheap | Approx. Cost |
|---|---|---|---|
| Balloon decorating strip + glue dots | Garlands, arches, clusters | Party supply aisle / online | $6–$10 |
| Electric balloon pump | Your lungs will thank you | Online | $12–$18 |
| Hot glue gun + sticks | Nearly everything | Craft store | $5–$8 |
| Cardstock in theme colors | Banners, toppers, signs | Craft store | $4–$6 |
| Crepe paper streamers | Ceiling, walls, backdrops | Dollar store | $3–$5 |
| Tissue paper (multi-pack) | Pom-poms, tassels, flowers | Dollar store | $3–$5 |
| Twine / ribbon | Hanging, tying, garlands | Craft store | $3–$5 |
| Painter’s tape + removable hooks | Hanging without wall damage | Hardware store | $6–$9 |
The electric balloon pump deserves special emphasis: inflating 50+ balloons by mouth is miserable and genuinely unsafe (balloon pieces + lightheadedness + a baby nearby). An $15 pump turns garland-building from a chore into a 20-minute task. It is the single best DIY investment on this list.
Project 1: Balloon Garland (The Statement Piece)
Cost: $12–$25 | Time: 45–90 minutes | Skill: Beginner
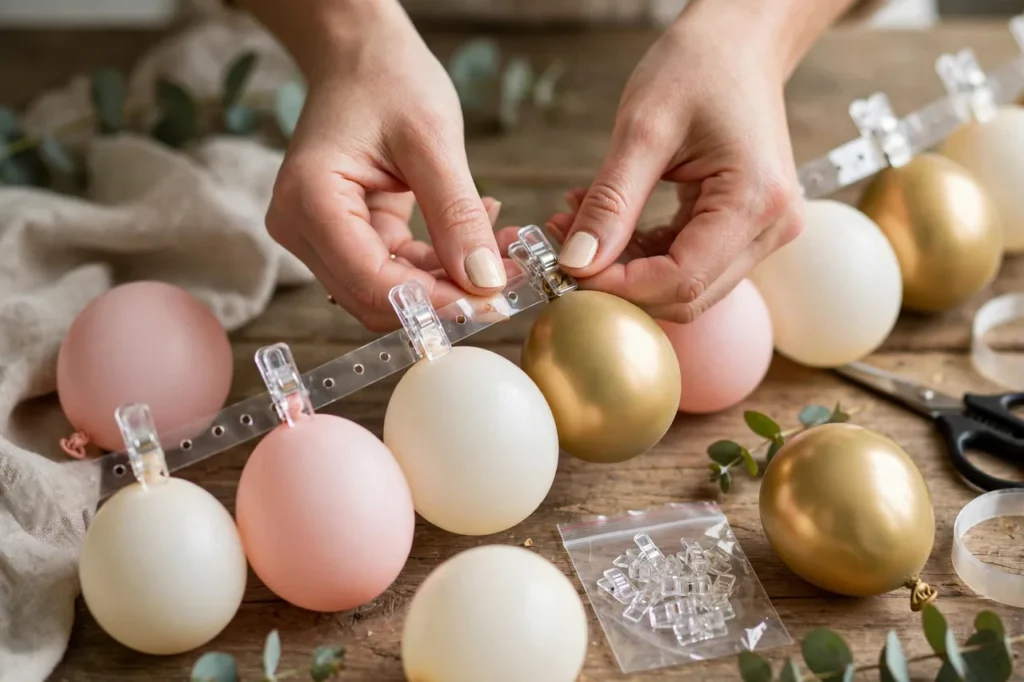
This is the project that makes people gasp, and it is mostly just inflating balloons and clipping them into a strip. Buy balloons in your three theme colors plus one metallic, in two sizes (12-inch and 5-inch — the small ones fill gaps and make it look professional). Inflate with the electric pump, varying sizes: some full, some at 70% for organic shape. Clip them into the decorating strip, alternating colors and sizes, pushing them close together. Once the strip is full, hang it with removable hooks and fill any thin spots with the 5-inch balloons attached via glue dots. Twist a few balloons into clusters of three for dimension. Pro move: add 2–3 foil star or number balloons for sparkle. The whole thing takes under 90 minutes your first time, under 45 once you have done it. Air-filled garlands look perfect for 2–3 days, so build it the day before the party.
Project 2: Paper Fan Backdrop Wall
Cost: $5–$10 | Time: 60 minutes | Skill: Beginner
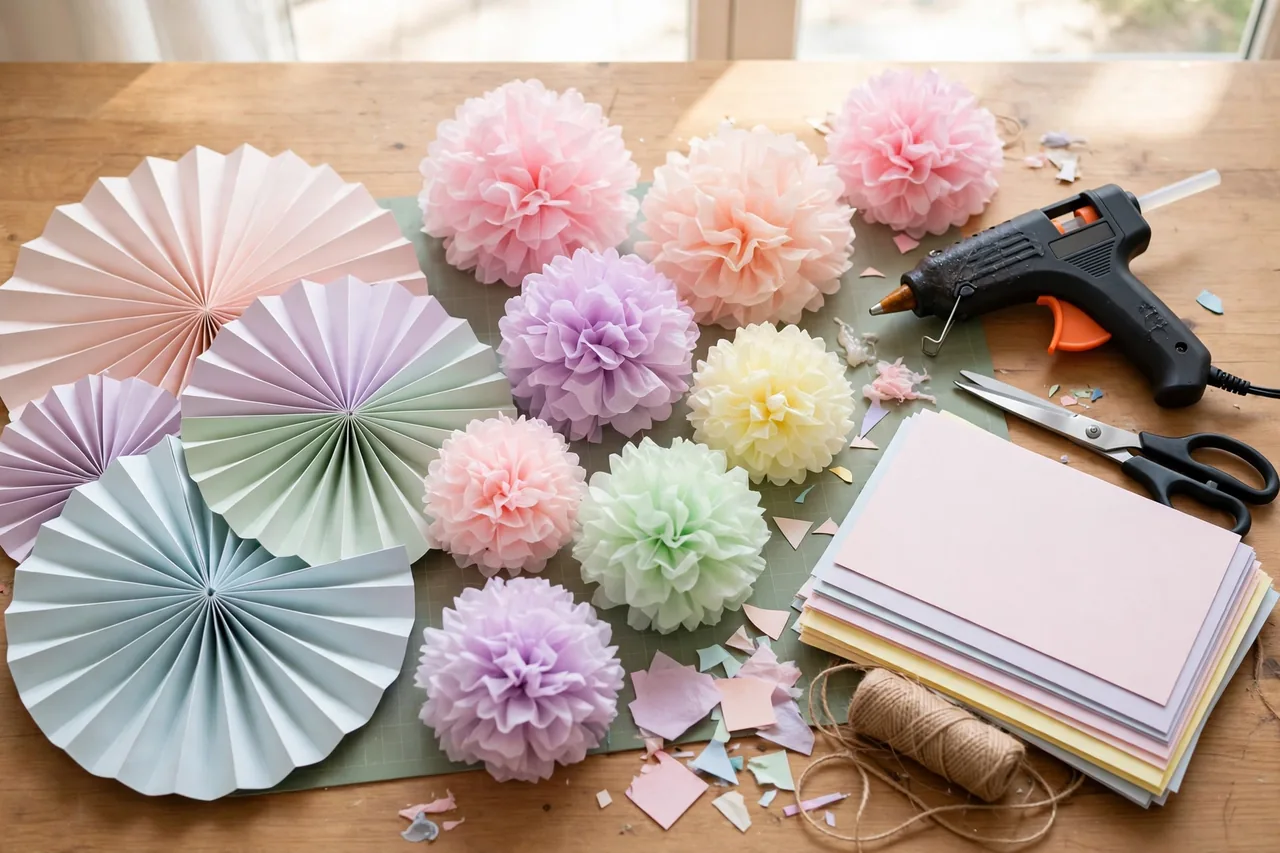
Paper fans (also called rosettes) create a stunning textured backdrop for almost nothing. Buy a multi-pack of paper fans in your theme colors, or make them: accordion-fold strips of cardstock or wrapping paper, fold in half, glue the ends together into a circle, and attach a string to the back. Arrange 9–15 fans of varying sizes on the wall behind the cake table in a loose cluster — start with the biggest in the center and work outward. Attach with painter’s tape loops or removable hooks. The layered, dimensional look photographs like a much more expensive installation. For extra polish, tuck small fairy lights behind a few fans so the backdrop glows.
Project 3: Giant “ONE” Letters
Cost: $3–$8 | Time: 45 minutes | Skill: Beginner
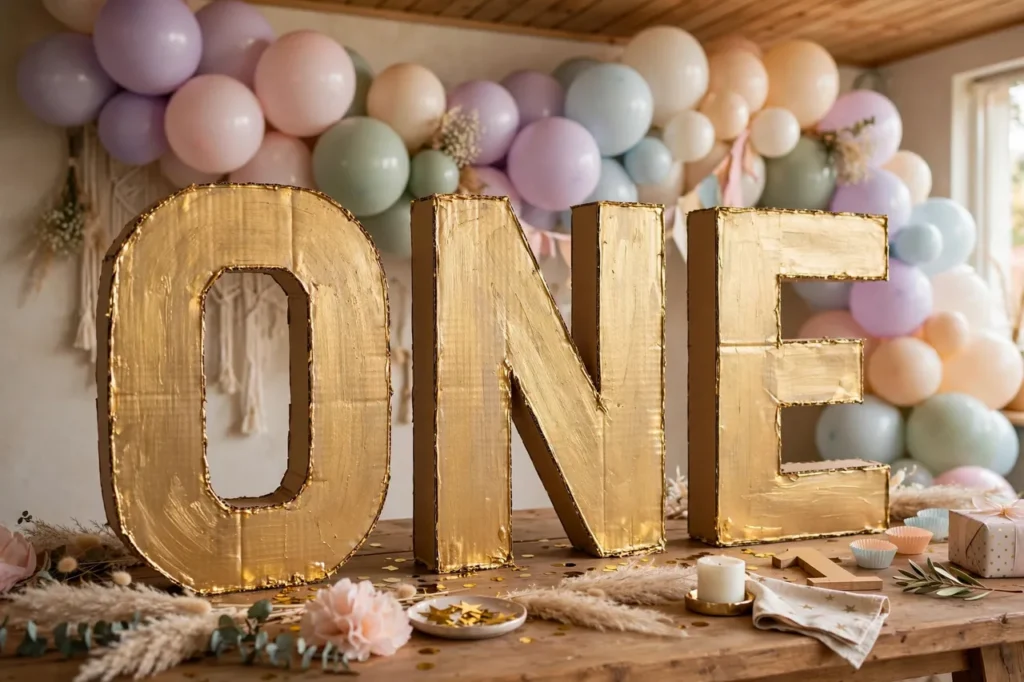
Those giant marquee-style letters cost $40+ to buy; you can make them from cardboard for almost nothing. Draw block letters O-N-E on cardboard boxes (about 12 inches tall), cut two of each, and glue strips of cardboard between them to create 3D depth. Cover with wrapping paper, tissue paper, or paint in your theme color. Options for the finish: wrap in fairy lights (poke small holes and push lights through — magical at dusk parties), cover in fresh or faux flowers for a garden theme, or keep it clean kraft-paper for boho. Place on the cake table, the floor beside the high chair, or the porch for arrival photos.
Project 4: High Chair Tutu & “ONE” Banner
Cost: $5–$10 | Time: 30 minutes | Skill: Beginner
The high chair is the throne of the party — it appears in the cake smash photos, so dress it up. For the tutu: cut tulle into 6-inch-wide strips, each about twice the desired length, and tie them in lark’s head knots around a ribbon or elastic band sized to the high chair tray. Fluff. For the banner: cut cardstock into pennant triangles, write O-N-E (one letter per pennant) with markers or stick-on letters, punch holes, and string on twine. Tie the banner across the front of the tray and the tutu around it. Total cost under $10, total time under 30 minutes, and it transforms every cake photo.
Project 5: Monthly Milestone Photo Garland
Cost: $3–$6 | Time: 30 minutes | Skill: Beginner
Print twelve photos — one from each month of the baby’s first year. (Phone-photo prints from a drugstore or online service cost pennies each.) Clip them in order to a long piece of twine with mini clothespins, and add small cardstock labels: “1 month,” “2 months,” and so on. Hang it where guests will see it: the entryway, along the food table, or as part of the backdrop. This is consistently the most emotional decoration at first birthdays — budget almost nothing, impact enormous. Tip: choose photos that show growth clearly (same pose or same blanket each month is gold).
Project 6: Tissue Paper Pom-Poms
Cost: $3–$5 | Time: 15 min per pom | Skill: Beginner
Stack 8–10 sheets of tissue paper, accordion-fold the stack in 1-inch folds, tie the center tightly with wire or string, trim the ends into rounded or pointed shapes, then gently pull each layer up toward the center, fluffing into a ball. Hang from the ceiling at varying heights with fishing line or ribbon. Make them in 2–3 sizes for a professional look. A dozen pom-poms fill a ceiling beautifully and cost less than one store-bought decoration. They also pack flat-ish for reuse — gently squash and store in a bag.
Project 7: Twisted Crepe-Paper Ceiling Streamers
Cost: $3–$5 | Time: 30 minutes | Skill: Beginner
Plain streamers look flat; twisted streamers look designed. Anchor one end of a crepe paper streamer to a ceiling hook or tape point, walk it to the opposite anchor point while twisting the roll — the paper naturally spirals into a candy-twist shape. Run 6–10 streamers radiating from a central ceiling point (a paper lantern or pom-pom) outward to the walls, and the whole ceiling becomes a canopy. Use two alternating theme colors. In rentals or homes where you cannot put holes in the ceiling, removable adhesive hooks hold streamers fine — they weigh almost nothing.
Project 8: Personalized Cake Topper
Cost: $2–$5 | Time: 20 minutes | Skill: Beginner
A custom topper makes even a grocery-store cake look bespoke. Cut “ONE” or the baby’s name from glitter cardstock (print the letters in a bold font, trace, cut), glue each letter to a wooden skewer or toothpick, and arrange at varying heights. Alternatives: a small bunting of mini pennants on two skewers with twine, a single large paper flower, or a printed photo of the baby mounted on cardstock. Keep toppers food-safe: do not let non-food materials touch the frosting directly — the skewers go into the cake, the decoration stays above it.
Project 9: DIY Photo Booth Props
Cost: $3–$6 | Time: 30 minutes | Skill: Beginner
Print prop shapes (mustaches, lips, crowns, speech bubbles saying “I’m ONE!”, “Cake Boss”, “Party Animal”) on cardstock, cut out, and hot-glue to wooden dowels or sturdy straws. Add a few theme-specific props: animal ears for a safari theme, star wands for a space theme. Put them in a jar or vase at the photo corner with a sign. Guests — especially grandparents — will use them all afternoon. Laminating the props (or covering with clear packing tape) makes them survive toddler handling.
Project 10: Confetti Table Scatter (That Doesn’t Look Cheap)
Cost: $2–$4 | Time: 15 minutes | Skill: Beginner
Store-bought confetti often looks plasticky; DIY looks intentional. Use a shaped hole punch (stars, hearts, circles) on cardstock in your theme colors and scatter generously on tables. For a deluxe version, mix in a few larger cutouts — tiny paper animals for a safari theme, mini rainbows for boho. Confetti is the fastest way to make plain tables look party-ready, and cleanup is one wipe. Avoid glitter — it will live in your carpet until the baby graduates.
Project 11: Fabric Chair Sashes
Cost: $5–$10 | Time: 20 minutes | Skill: Beginner (no sewing)
Cut inexpensive fabric (or even plastic tablecloths in theme colors) into wide strips and tie them in bows around the backs of dining chairs. It instantly makes everyday chairs look like event seating. For the birthday baby’s chair, add the “ONE” banner from Project 4. No sewing, no hemming — pinking shears or a simple straight cut is fine since the ends tuck into the bow. This one project makes a dining room feel like a party venue.
Project 12: Donut Wall
Cost: $8–$15 | Time: 45 minutes | Skill: Beginner
A pegboard (about $10 at a hardware store) or a foam board, painted in your theme color, with short wooden dowels glued or inserted in a grid. Slide donuts onto the dowels. That is the entire project — and it looks like a professional dessert installation. Label it “DONUT GROW UP” for the theme tie-in. The donuts are the decoration and the dessert, which is the most efficient decorating possible. Make sure the board is stable: lean it against a wall or support the back — a donut avalanche is funny but wasteful.
Project 13: Milestone Chalkboard Sign
Cost: $3–$8 | Time: 30 minutes | Skill: Beginner
A small chalkboard (dollar store) or a framed piece of black cardstock becomes the beloved “stats” sign: name, age, weight, height, favorite food, favorite word, number of teeth, nicknames. Write with chalk markers for a clean look. Display on an easel at the entryway or the gift table. Guests photograph these constantly, and it becomes a keepsake — take a photo of the baby next to it every birthday for a tradition.
Project 14: Hanging Stars & Moon Mobile
Cost: $3–$5 | Time: 30 minutes | Skill: Beginner
Cut stars (and one crescent moon) from gold and silver cardstock — or buy a pre-cut pack. String them at varying lengths from an embroidery hoop or a branch wrapped in ribbon, and hang over the cake table or in the photo corner. It creates a dreamy focal point that works for space themes, fairy themes, “twinkle twinkle” themes, or just as beautiful filler. Add battery fairy lights to the hoop for evening parties.
Project 15: Personalized Favor Bags
Cost: $5–$10 for 12 | Time: 30 minutes | Skill: Beginner
Plain kraft favor bags stamped with the baby’s initial (a $5 alphabet stamp set), tied with theme-color ribbon, and finished with a thank-you tag (“Thanks for celebrating [Name]’s FIRST trip around the sun!”). Fill with the $2 treasures: stickers, a bubble wand, crayons. The stamped initial elevates a 30-cent bag into something that looks custom-ordered. Stamp while watching TV the week before — it is meditative, not work.
Project Comparison Table
| Project | Cost | Time | Impact | Do It When |
|---|---|---|---|---|
| Balloon garland | $12–$25 | 45–90 min | ★★★★★ | Day before |
| Paper fan backdrop | $5–$10 | 60 min | ★★★★★ | Day before |
| Giant ONE letters | $3–$8 | 45 min | ★★★★☆ | Week before |
| High chair tutu + banner | $5–$10 | 30 min | ★★★★★ | Week before |
| Milestone photo garland | $3–$6 | 30 min | ★★★★★ | Week before |
| Tissue pom-poms | $3–$5 | 15 min each | ★★★★☆ | Week before |
| Twisted ceiling streamers | $3–$5 | 30 min | ★★★★☆ | Day before |
| Cake topper | $2–$5 | 20 min | ★★★★☆ | Week before |
| Photo booth props | $3–$6 | 30 min | ★★★☆☆ | Week before |
| Confetti scatter | $2–$4 | 15 min | ★★★☆☆ | Day of |
| Chair sashes | $5–$10 | 20 min | ★★★☆☆ | Day before |
| Donut wall | $8–$15 | 45 min | ★★★★★ | Day of (add donuts) |
| Chalkboard stats sign | $3–$8 | 30 min | ★★★★☆ | Week before |
| Stars & moon mobile | $3–$5 | 30 min | ★★★★☆ | Week before |
| Favor bags | $5–$10 | 30 min | ★★★☆☆ | Week before |
7 Secrets to Making DIY Look Professionally Done
1. Limit your palette ruthlessly. Three colors plus one metallic. Every project in the same palette looks like a designed collection; projects in random colors look like a craft explosion.
2. Repeat one shape. If you use stars on the mobile, use star confetti and a star cake topper. Repetition reads as “theme”; variety reads as “miscellaneous.”
3. Cluster, don’t scatter. A full balloon garland in one place beats ten balloons spread around the house. Density looks expensive; sparseness looks unfinished.
4. Hide the mechanics. Tape, strings, and hooks should be invisible in photos. Take a test photo and remove anything the camera sees.
5. Finish edges. The difference between homemade and handmade is finishing: trim frayed tulle, tuck in tape, straighten banners. Five minutes of tidying elevates everything.
6. Use real height variation. Put some decor high (ceiling), some at eye level (walls), some low (floor, tables). Three levels of decor make a room feel styled; one level feels flat.
7. Light it. Fairy lights woven through a garland or behind paper fans add a glow that no amount of paper can replicate. A $8 string of lights is the cheapest “expensive look” available.
Watch: DIY First Birthday Decorations at Home
See paper fans, banners, and 3D “ONE” letters being made step by step in this DIY tutorial:
8 DIY Mistakes That Make Decorations Look Cheap (and Easy Fixes)
1. Mixing too many patterns. Polka dots + stripes + chevron + character prints in one party looks chaotic. Fix: pick solids in your palette and allow exactly one pattern (gingham, dots, or stripes — not all three).
2. Visible tape everywhere. Shiny tape strips catch the light in photos and scream “homemade.” Fix: use matte painter’s tape, hide attachment points behind the decoration, and do the phone-photo test to catch strays.
3. Wrinkled tablecloths and backdrops. Wrinkles photograph terribly. Fix: toss fabric tablecloths in the dryer with a damp towel for 10 minutes, or steam them. For paper backdrops, roll — don’t fold — for storage.
4. Balloons at random heights. Lone balloons tied to random furniture look accidental. Fix: cluster balloons in odd numbers (3, 5, 7) at two heights — floor clusters and one elevated point. Odd numbers look intentional; even numbers look like leftovers.
5. Hand-lettering you are not proud of. Wobbly marker letters on the main banner undermine everything. Fix: print letters in a bold font, trace, and cut — or use stick-on letters. There is no shame in printed typography; professionals use it too.
6. Forgetting scale. Tiny decorations in a big room disappear; huge decorations in a small room overwhelm. Fix: in small spaces, go bold on one wall. In large rooms, repeat elements (three balloon clusters, not one) to fill the space.
7. Everything at the same height. All table-level decor with bare walls above feels unfinished. Fix: get something on the ceiling (streamers, pom-poms, lights) and something on the floor (floor balloons, the ONE letters). Three levels, always.
8. Crafting while exhausted. The night-before midnight craft session produces crooked, glue-stringy results. Fix: finish all crafting 48 hours before the party. The day before is for assembly and hanging only — fresh eyes catch mistakes tired eyes miss.
Where to Source DIY Materials (Without Overspending)
Dollar stores are your first stop: tissue paper, crepe streamers, tablecloths, basic balloons, favor bags, and chalkboards. Quality is perfectly fine for one-day decor. Craft stores (with their perpetual 40%-off coupons) are best for cardstock, tulle, ribbon, and glue gun supplies — never pay full price; there is always a coupon. Online marketplaces win for balloon garland kits, backdrop stands, and electric pumps, where bulk pricing beats retail. Your own home supplies the free stuff: cardboard boxes for letters, bedsheets for backdrops, stuffed animals for themed decor, mason jars for vases. Buy-nothing groups and parent swaps are goldmines — someone in your neighborhood has a balloon pump, backdrop stand, and high chair banner gathering dust. And after-season clearance is the long game: buy next year’s theme colors at 70% off in January.
Frequently Asked Questions
How much money can I really save with DIY first birthday decorations?
A lot. A professional decorator charges $300–$1,000+ for a first birthday setup; a pre-made decor kit runs $60–$150. The fifteen projects in this guide total roughly $70–$130 if you did all of them — and most families pick five or six projects for $30–$60 total. The biggest savings are the statement pieces: a DIY balloon garland ($12–$25) versus a professional one ($150+).
I am not crafty. Which DIY projects should I attempt?
Start with the milestone photo garland (printing + clothespins), the confetti scatter (hole punch + paper), and the twisted ceiling streamers (twist and tape). All three are nearly impossible to mess up and look great. The balloon garland looks intimidating but is genuinely just inflating and clipping — the electric pump does the hard part.
How far in advance should I start DIY decorations?
Start two weeks out with the projects that store well: banners, toppers, letters, pom-poms, favor bags, props. Do the balloon garland and anything hung the day before (air-filled balloons hold 2–3 days). Save table settings, confetti, and the donut wall for the morning of. Never craft past 9 p.m. the night before — tired hands make crooked garlands.
What tools do I absolutely need?
Scissors, a hot glue gun, painter’s tape, and an electric balloon pump cover nearly everything. Nice to have: a paper trimmer (straighter cuts, faster), shaped hole punches, and removable wall hooks. You do not need a Cricut or any cutting machine — hand-cutting is fine at party viewing distance.
How do I hang decorations without damaging walls?
Painter’s tape loops (for light items), removable adhesive hooks (for garlands and banners), and tension rods (for fabric backdrops in doorways). Avoid regular tape, nails, and thumbtacks in rentals. Test any adhesive in a hidden spot first — some “removable” products are optimistic about that claim.
Can I reuse DIY decorations for future birthdays?
Yes — design for reuse from the start. The backdrop stand, balloon pump, fairy lights, and “ONE” letters (save them for the annual photo tradition) all reuse beautifully. Paper fans and pom-poms survive if stored gently in bags. Banners with the baby’s name become keepsakes. Avoid glitter and anything that sheds — future-you will be grateful.
What is the easiest high-impact DIY for a small apartment?
The paper fan backdrop wall: 9–15 fans on one wall behind the cake table, costing $5–$10 and taking an hour. It concentrates all visual impact in one photogenic zone without filling the room. Pair it with the high chair tutu and you have a complete look in 90 minutes.
Should I DIY the cake too, or just the decorations?
Decorate the cake, don’t necessarily bake it. A grocery-store cake with your DIY topper, fresh flowers, or a simple frosting touch-up looks custom with 10 minutes of effort. Baking a smash cake from scratch is a separate project — wonderful if you enjoy it, unnecessary if you don’t. (See our smash cake recipe guide if you want to bake.)
How can I involve older siblings in the DIY decorations?
Give them ownership of one visible project: letting a 4- to 8-year-old be in charge of the confetti scatter, the sticker decorations on favor bags, or coloring the milestone sign makes them proud instead of sidelined. Older kids (8+) can genuinely help with balloon inflation (with the electric pump), cutting pennant triangles, or stringing garlands — with a quick safety talk about the hot glue gun, which stays adults-only. Take a photo of the sibling “craft crew” at work; it becomes part of the party story. Just build in extra time — kid-helped crafting runs about twice as long, and that is exactly as it should be.
More DIY & Budget Party Ideas
Keep the handmade momentum going with our easy DIY costume ideas on a budget, more decoration ideas at home, and celebration ideas on a budget. Now put the baby down for a nap, plug in the glue gun, and make something beautiful.