Lasagna Gardening Method: No-Dig Layers That Build Soil
Lasagna gardening — layering brown and green organic materials like a lasagna, directly on top of grass or weeds — builds a garden bed with no digging, no tilling, and no sod removal. Lay cardboard over the grass, stack leaves, straw, compost, and soil in layers, and plant into it. The layers smother weeds, feed earthworms, and decompose into rich soil.
It is the lowest-effort bed-building method that actually works: the cardboard kills the grass beneath, the layers compost in place, and by the second season you have deep, dark, worm-filled soil where lawn used to be. Perfect for converting grass to garden without a rototiller or a sore back.
This guide covers the layering recipe (greens and browns), building step by step, timing (fall-built is best), what to plant in year one, maintenance, and the honest limitations — because lasagna gardening is excellent, not magic.
How It Works
Each layer has a job: cardboard/newspaper smothers grass and weeds by blocking light; brown layers (leaves, straw, shredded paper) provide carbon; green layers (grass clippings, kitchen scraps, manure) provide nitrogen; compost and soil layers provide the immediate planting medium and microbial inoculation.
Decomposition happens in place: earthworms migrate up from the soil below, pulling organic matter down and aerating as they go; fungi and bacteria break the layers into humus; the whole stack settles and merges into living soil. You are composting in place, in the shape of a garden bed.
No digging means no destruction of soil structure, no weed seeds brought to the surface, and no back pain. The soil food web builds downward from your layers into the native soil, improving ground you never touched with a shovel.
The Layering Recipe
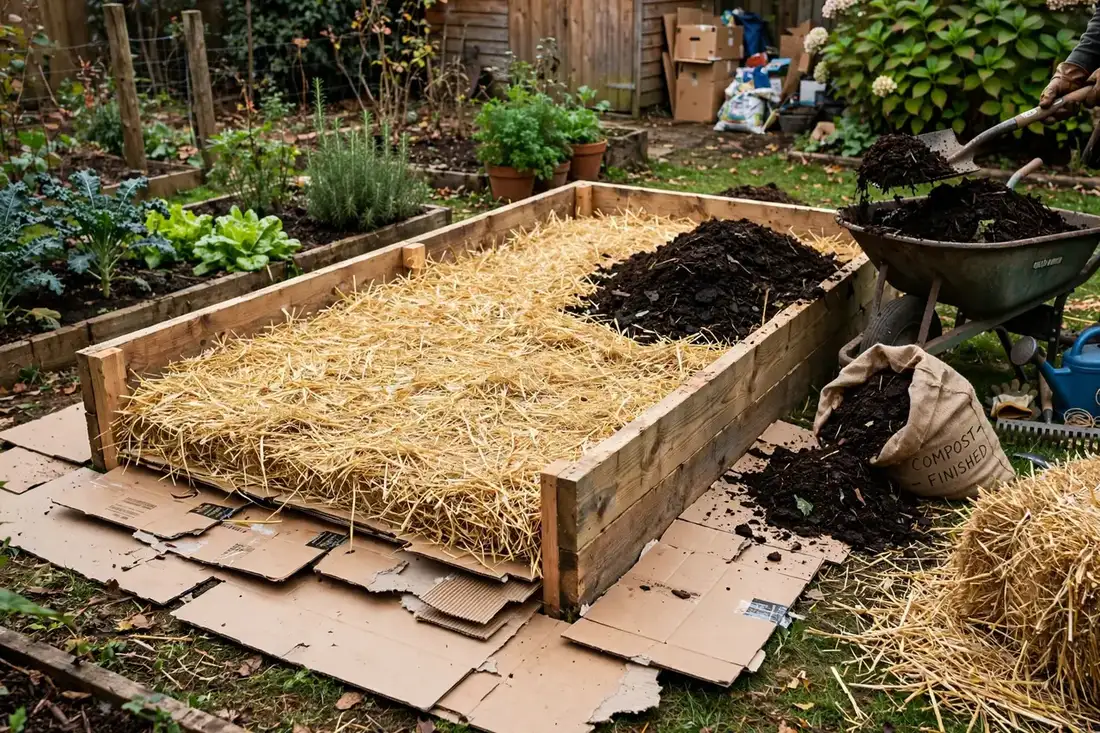
Base: overlap cardboard (tape removed) or 6–8 sheets of newspaper directly on mowed grass — extend 6 inches beyond the bed footprint. Wet it thoroughly; this is the weed barrier that makes the method work.
Then alternate, watering each layer: 2–3 inches of browns (straw, dry leaves, shredded newspaper), 1–2 inches of greens (grass clippings, kitchen scraps, coffee grounds, manure), repeating until the bed is 18–24 inches tall. It looks absurdly tall; it settles by half.
Top with 3–4 inches of compost, then 2–3 inches of topsoil or planting mix — this is what you plant into immediately. Finish with 2–3 inches of straw mulch. The bed is ready to plant the same day, though it improves for months.
The carbon-to-nitrogen balance matters loosely: roughly 2–3 parts browns to 1 part greens by volume. Too many greens goes slimy; too many browns stalls decomposition. When in doubt, add more browns — they are never wrong.
Building Step by Step
Mark the bed (4 feet wide max for reach), mow the grass short, and leave the clippings. Lay the cardboard base with generous overlaps — any gap is a grass highway — and soak it.
Stack your layers as above, watering each one. The bed will be 18–24 inches tall and look ridiculous. Good — it settles to 8–12 inches within weeks.
Top with compost and planting mix, mulch with straw, and plant immediately: pull mulch aside, poke through to the compost layer, and transplant or sow. For seeds, ensure 2–3 inches of fine planting mix on top.
Edge the bed (stones, boards, or a simple trench) to contain the layers and give it a finished look — unedged lasagna beds slump outward as they settle.
Timing: Fall Is Best
Build in fall for spring planting: winter rain and snow settle and decompose the layers, earthworms work all winter, and by spring you have a bed that is half soil already. Fall-built lasagna beds are the gold standard — minimal settling surprises, maximum decomposition.
Spring-built beds work too — plant into them immediately — but expect more settling (top up with compost mid-season) and slightly hungrier plants in year one as decomposition ramps up. Add extra compost in the planting holes to compensate.
Either way, the bed improves every season. Year two, the layers have merged into gorgeous soil; year three, you will forget it was ever lawn.
What to Plant in Year One
Transplants outperform seeds in fresh lasagna beds (the coarse layers are lumpy for fine seeds): tomatoes, peppers, brassicas, squash, and herbs all thrive. For direct sowing, ensure a 3-inch cap of fine planting mix and sow lettuce, beans, and radishes — they handle the texture.
Heavy feeders do well with the nitrogen-rich layers; root crops wait until year two when the bed has settled into uniform soil (fresh layers grow forked carrots). Potatoes are the exception — they love the loose layered texture immediately.
Plant densely: the rich layered fertility supports intensive planting, and dense planting shades the mulch, holds moisture, and outcompetes the few weeds that find their way in.
Maintenance and Limitations
Maintenance: top up with compost each spring (2 inches), refresh mulch, and plant — that is the whole program. Never till: tilling destroys the layered structure and brings weed seeds up. The bed is a no-dig permanent system.
Limitations, honestly: you need a lot of organic material (leaves, straw, compost — source it before building, not after); fresh beds settle dramatically (plan for it); slugs love the moist layered environment (iron phosphate bait, as with any mulched bed); and perennial weeds with deep roots (bindweed, Bermuda grass) can punch through cardboard — double-layer the base where they are present.
Also: lasagna beds are not instant deep soil. Year one is good; year two is great; year three is superb. It is a soil-building method with a time component — but so is every honest soil-building method.
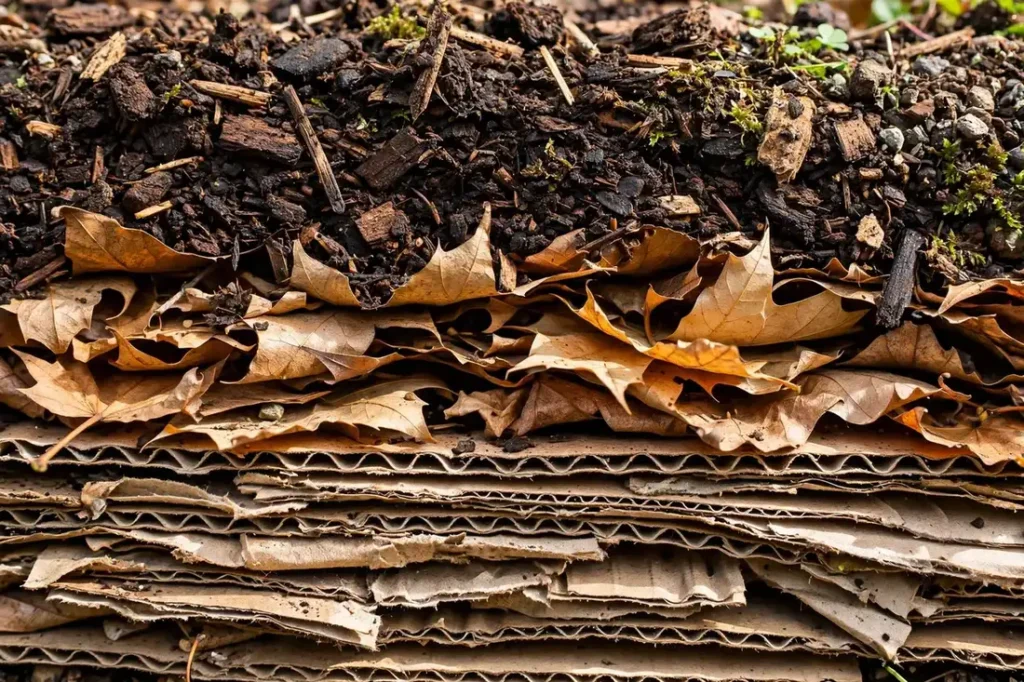
Lasagna layers from bottom to top
| Layer | Material | Depth | Purpose |
|---|---|---|---|
| Weed barrier | Cardboard / newspaper (overlapped, wetted) | Single layer | Smothers grass and weeds |
| Browns | Straw, dry leaves, shredded paper | 2–3 in | Carbon; structure |
| Greens | Grass clippings, scraps, manure, coffee grounds | 1–2 in | Nitrogen; fuels decomposition |
| Repeat | Alternate browns and greens | To 18–24 in total | The lasagna stack |
| Compost | Finished compost | 3–4 in | Planting medium; biology |
| Topsoil | Topsoil or planting mix | 2–3 in | Seed/transplant bed |
| Mulch | Straw | 2–3 in | Moisture; weed suppression |
Practical Tips
- Build in fall for spring planting — winter does half the work of decomposition and settling.
- Remove all tape from cardboard; overlap sheets generously — gaps become grass highways.
- Water each layer as you build; dry layers decompose slowly and settle unevenly.
- Source materials before building — you need more leaves, straw, and compost than you think.
- Plant transplants in year one; save fine-seeded crops for year two when texture improves.
- Edge the bed to contain settling layers and keep it tidy.
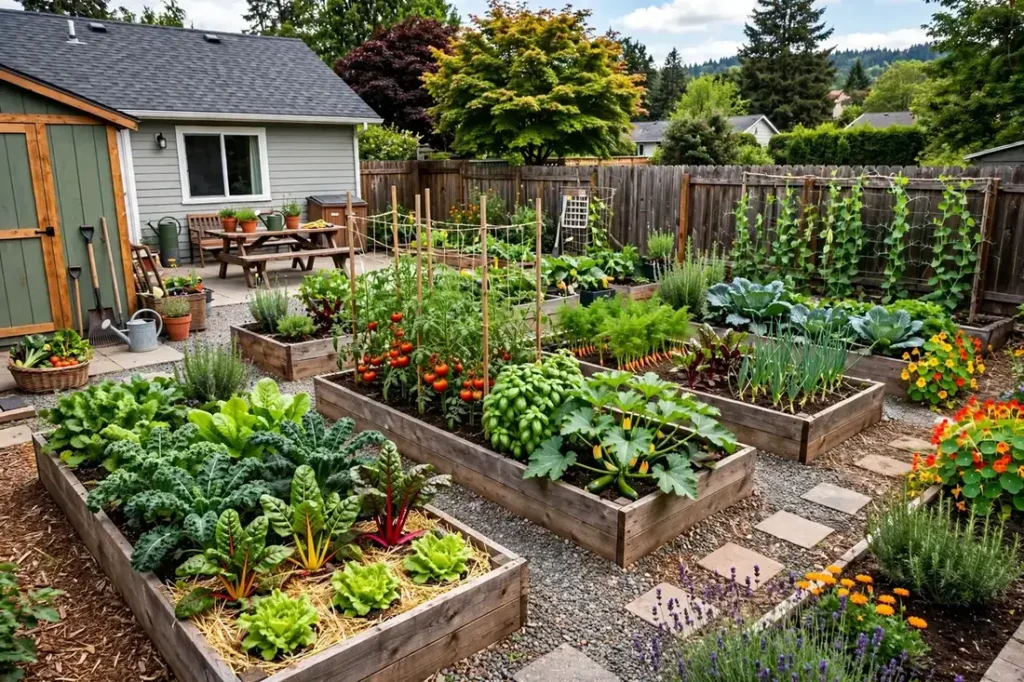
Tools and Supplies for Lasagna Gardening
You need less gear than you think to start with lasagna gardening — the essentials fit in a single tote. The non-negotiables: a sharp tool for the cutting tasks (bypass pruners for stems, a hori-hori knife for soil work), a watering can with a rose head for gentle watering, a soil thermometer if timing matters, and quality materials (potting mix, mulch, or seed, depending on the technique). Buy the best version of the tools you will use weekly; economize on the rest.
Nice-to-haves that earn their keep: a kneeling pad (your knees will thank you by the second season), nitrile-coated gloves (dexterity plus protection), a garden journal or phone app for records, and a small tarp for collecting debris. The pattern across decades of gardener surveys: comfort items get used, gimmick tools gather dust.
For lasagna gardening specifically, gather everything before you begin — mid-project supply runs break momentum and lead to improvisation that undermines results. Lay out tools, read the instructions once fully, then work steadily. Preparation is the invisible half of every technique done well.
Budget: What Does It Really Cost?
The honest economics of lasagna gardening: the startup cost is modest, the ongoing cost is mostly time, and the payoff compounds. A realistic first-year budget covers tools (many of which you may own), materials (soil, amendments, plants or seed), and optionally a reference book. Most gardeners spend $50–$200 to start a technique properly — far less than the cost of replacing failed attempts.
Where the money actually goes: quality soil and amendments (never skimp — everything grows from this), sharp tools (cheap pruners crush stems and cause disease; a $30 pair lasts a decade), and water (mulch aggressively to cut this cost). The expensive mistakes are all avoidable: wrong plants for the site, planting at the wrong time, and neglecting the first month’s aftercare.
Track costs against harvests or results for one season — most gardeners are pleasantly surprised. A $60 investment that yields $300 of produce (or a transformed garden bed) is a 5x return that also happens to be dinner. Even purely ornamental projects pay back in property enjoyment that no spreadsheet captures.
| Item | Typical Cost | Notes |
|---|---|---|
| Essential hand tools | $30–$60 | Pruners, trowel, gloves — buy once, buy well |
| Materials (soil/seed/plants) | $20–$80 | Quality inputs determine results |
| Mulch & amendments | $15–$40 | Compost and mulch pay for themselves |
| Optional upgrades | $0–$50 | Grow lights, row cover, timers as needed |
| Total first-year range | $50–$200 | Ongoing years cost far less |
When to Start: Seasonal Timing for Lasagna Gardening
Every technique has its season, and lasagna gardening is no exception. Spring suits most new projects — soil workable, rain reliable, the whole growing season ahead for establishment. Fall is the sleeper best season for anything involving perennials, soil building, or structural work: warm soil, cool air, and autumn rains do half the establishment work for you.
Avoid starting major projects in high summer (heat stress on you and the plants) or when the ground is frozen or waterlogged (working wet soil destroys its structure — the compaction lasts years). If enthusiasm strikes in the wrong season, use the time for planning, sourcing materials, and reading — the project will be better for the wait.
Within the right season, watch the weather window: a few days of mild, overcast weather after starting gives everything the gentlest possible launch. Gardeners who check the forecast before beginning have visibly better establishment rates than those who do not.
Scaling Up: From First Try to Mastery
Your first attempt at lasagna gardening teaches you the mechanics; the second teaches you the judgment. After one season, you will know which steps mattered most, what your site’s quirks demanded, and what you would do differently — write these observations down while fresh. The gardeners who improve fastest are the ones who debrief.
Scale deliberately: expand what worked before adding new techniques. A second bed, a larger planting, or a refined version of the same project consolidates skill; three new techniques at once scatters attention. Mastery in gardening is a stack of small, well-learned skills — each season adds a layer.
Teach someone else. Explaining lasagna gardening to a neighbor or friend forces you to articulate the why behind each step, which is where real understanding lives. Gardening knowledge has always traveled gardener-to-gardener; join the tradition.
Why It Matters: The Bigger Picture
Beyond the harvest or the improved garden, lasagna gardening connects to things larger than your yard. Home-scale growing reduces food miles to food feet, builds soil that sequesters carbon, and creates habitat in the fragmented urban landscape. A single garden will not change the world; a million of them change neighborhoods, waterways, and pollinator populations.
The personal returns compound too: gardeners consistently report lower stress, more physical activity, and deeper seasonal awareness than their non-gardening peers. The research on gardening and wellbeing is unusually consistent — time with hands in soil measurably improves mood, and the effect strengthens with years of practice.
Start where you are, with lasagna gardening, this season. The garden does not require perfection — it requires beginning, and then continuing. Everything else is refinement.
Adapting Lasagna Gardening for Small Spaces
No yard? Lasagna Gardening still works — nearly every gardening technique scales down to balconies, patios, and windowsills. The principles do not change; only the containers and the scale do. A 4×8 technique becomes a 2×2 version; a bed-based method becomes a container-based one. Start with the smallest viable version and expand only after it succeeds.
Small-space adaptations to keep in mind: choose compact or dwarf varieties bred for containers, use vertical space (trellises, wall planters, hanging baskets) to multiply square footage, and prefer lightweight materials (fabric pots, soilless mixes) where weight limits apply — wet soil is far heavier than beginners expect, and balconies have load limits.
The small-space advantage nobody mentions: control. A balcony gardener controls water, soil, light, and pests more precisely than a field grower, which often means healthier plants per square foot. Small space is not a handicap to overcome — it is a different medium with its own strengths.
Combining Lasagna Gardening with Other Techniques
Lasagna Gardening rarely lives alone in a well-designed garden — it stacks with complementary methods. Pair it with mulching (whatever the technique, mulch improves it), with composting (closing the fertility loop), and with pollinator plantings (more pollinators improve every fruiting crop). The techniques in this guide series are designed to combine; each one you add multiplies the others.
Think in systems: a rain barrel feeds drip irrigation; drip irrigation waters mulched beds; mulched beds feed compost with their trimmings; compost feeds the next planting. Each connection removes an input (purchased water, purchased fertilizer, purchased mulch) and adds resilience. The goal is a garden that increasingly runs on its own cycles.
When combining, introduce one technique per season. Lasagna Gardening deserves your full attention the first time — master it, then layer the next method on top of a solid foundation. Gardeners who adopt five techniques at once master none; gardeners who add one per season build genuinely integrated systems within a few years.
Involving Kids and Beginners
Lasagna Gardening is an excellent teaching technique because it shows results on a beginner’s timescale. Give kids or new gardeners ownership of a defined piece — their own container, their own row — rather than helper tasks on your project. Ownership creates the attention that makes plants thrive, and the pride of a personal harvest converts casual helpers into lifelong gardeners.
Calibrate the teaching: explain the why before the how (kids who understand that roots need air and water will water correctly without being told the schedule), let them make small mistakes (a wilted seedling teaches more than a prevented one), and celebrate harvests concretely — cooking and eating what you grew closes the loop that makes gardening meaningful.
For adult beginners, the same principles apply with less hand-holding: one technique, one season, one success. Recommend they start exactly where this guide starts, resist the urge to optimize prematurely, and keep notes. Every expert gardener was once a beginner who did not quit after the first failure.
Resources for Going Deeper
This guide covers lasagna gardening thoroughly, but gardening rewards continued learning. Your local cooperative extension service is the single best free resource — region-specific advice, soil testing, and master gardener hotlines staffed by trained volunteers. Find yours with a web search for your state plus ‘cooperative extension’.
Books worth owning: a general vegetable or gardening reference for your region (the one you will actually open), a pest and disease identification guide with photos, and a soil science primer if you catch the bug. Libraries carry most of these — preview before buying.
Online, prefer university extension publications (.edu) over random blogs for factual questions — extension articles are peer-reviewed and region-specific. Gardening forums and local gardening clubs supply the tacit knowledge (timing nuances, variety recommendations) that publications miss. And nothing replaces a neighboring gardener three streets over whose conditions match yours exactly.
Advanced Troubleshooting for Lasagna Gardening
When the basics are right but results disappoint, troubleshoot systematically instead of changing everything at once. The diagnostic order that solves most mysteries: timing (was it done at the right moment?), inputs (soil, water, light — measured, not guessed), technique execution (re-read the instructions — most ‘failures’ are skipped steps), and finally external factors (weather extremes, pests, contaminated materials).
Isolate variables: if one bed thrives and another fails with the same technique, the difference is in the bed (soil, drainage, light, history) — not the technique. If everything fails the same way, the technique or its timing is the suspect. This controlled-comparison thinking is the scientific method applied to gardening, and it resolves problems that years of random adjustments never will.
Keep a failure log for lasagna gardening: date, conditions, what you did, what resulted. Patterns invisible in the moment emerge across entries — the pest that always arrives the third week of June, the technique step that fails whenever the soil is wet. The log turns repeated mysteries into scheduled preventions.
Know when to call in expertise: your extension service’s diagnostic clinic (many accept emailed photos), master gardener hotlines, and local gardening clubs have collectively seen every failure you will encounter. Describe symptoms precisely (when it started, what you did, photos of the problem) and you will get precise answers. There is no prize for suffering through a solvable problem alone.
Lasagna Gardening Through the Seasons: A Maintenance Calendar
| Season | Focus | Key Tasks |
|---|---|---|
| Late winter | Planning | Order materials; review last year’s notes; set calendar dates |
| Early spring | Preparation | Prepare beds/soil; test equipment; start first plantings |
| Late spring | Establishment | Complete plantings; mulch; set up irrigation; monitor daily |
| Summer | Maintenance | Water deeply; scout pests weekly; harvest; succession plant |
| Fall | Extension & cleanup | Protect from frost; plant fall crops; compost spent plants |
| Winter | Rest & learn | Maintain tools; plan next year; study and order seeds |
The calendar’s real value is psychological: gardening has a rhythm, and working with it instead of against it reduces both labor and anxiety. Spring’s urgency, summer’s abundance, fall’s winding down, winter’s dreaming — each season has its tasks and its pleasures. The gardeners who last decades are the ones who found their rhythm, not the ones who sprinted.
Safety First: Lasagna Gardening Without the Regrets
Gardening is safe, but it is physical work with sharp tools — treat it with the respect it deserves. The rules that prevent nearly all garden injuries: cut away from your body (not toward), keep pruners sharp (dull blades slip and require force), wear gloves for thorny or irritating plants (rose thorns, fiberglass-like squash hairs, and compost all harbor bacteria), and lift with your legs — a bag of compost weighs 40 pounds and backs are not replaceable.
Sun and heat safety matter as much as tool safety: garden in the cooler morning and evening hours in summer, wear a hat and sunscreen, drink water before you feel thirsty, and recognize heat exhaustion (headache, nausea, dizziness) as the stop-immediately signal it is. More gardeners are felled by heat than by any tool.
Chemical safety rounds it out: even organic sprays (neem, pyrethrin, copper) require label directions, protective equipment, and keeping concentrates away from children and pets. Store all garden chemicals in their original labeled containers, locked away. Lasagna Gardening rewards the careful practitioner — and care starts with keeping yourself intact.
One final habit ties it all together: the end-of-session scan. Before heading inside, walk your work area — tools collected and stored (never left in the bed where a mower or foot finds them), hoses drained and coiled, gates latched, and hands washed. Five minutes of order prevents nearly all ‘how did that happen’ injuries and means your next session starts clean. Safe gardeners are not fearful gardeners; they are gardeners who built safety into the routine until it became invisible.
Common Mistakes to Avoid
- Skimping on the cardboard base — thin or gappy coverage lets grass through. Overlap generously.
- Too many greens — slimy anaerobic mess. Keep the 2–3:1 brown-to-green ratio.
- Planting carrots in year one — forked roots in lumpy layers. Wait for year two’s settled soil.
- Building in spring and expecting no settling — top up with compost mid-season; plan for the sink.
- Tilling it later — destroys the structure and brings up weed seeds. No-dig means no-dig.
Watch: Lasagna Gardening in Action
See these techniques demonstrated step by step:
Frequently Asked Questions About Lasagna Gardening
What is lasagna gardening?
Building a no-dig bed by layering cardboard, browns (leaves, straw), greens (clippings, scraps, manure), compost, and soil directly over grass. The layers smother weeds and decompose into rich soil — no digging, no sod removal.
Can I plant immediately in a lasagna bed?
Yes — plant transplants into the top compost/soil layers the same day. For seeds, ensure 2–3 inches of fine planting mix on top. The bed improves for months after building.
When should I build a lasagna garden?
Fall is ideal — winter settles and decomposes the layers for spring planting. Spring-built beds work too but settle more and need extra compost in planting holes.
Will the cardboard kill the grass?
Yes — overlapped, wetted cardboard blocks light completely and smothers grass and most weeds within weeks. Double-layer where aggressive perennial weeds (bindweed, Bermuda grass) are present.
How deep should the layers be?
18–24 inches total at build time — it settles to 8–12 inches. The dramatic initial height is normal and necessary; shallow builds do not generate enough decomposition.
Do I ever need to till a lasagna bed?
No — that is the point. Tilling destroys the layered structure and brings weed seeds to the surface. Top-dress with compost annually and let the worms do the tilling.
Keep Reading on DayZora
The Bottom Line
Lasagna Gardening is one of those gardening skills that pays back far beyond the effort of learning it. Start with the fundamentals in this guide, apply them this season, and refine from experience — gardening rewards the doing far more than the reading. Your garden will show the difference within weeks.