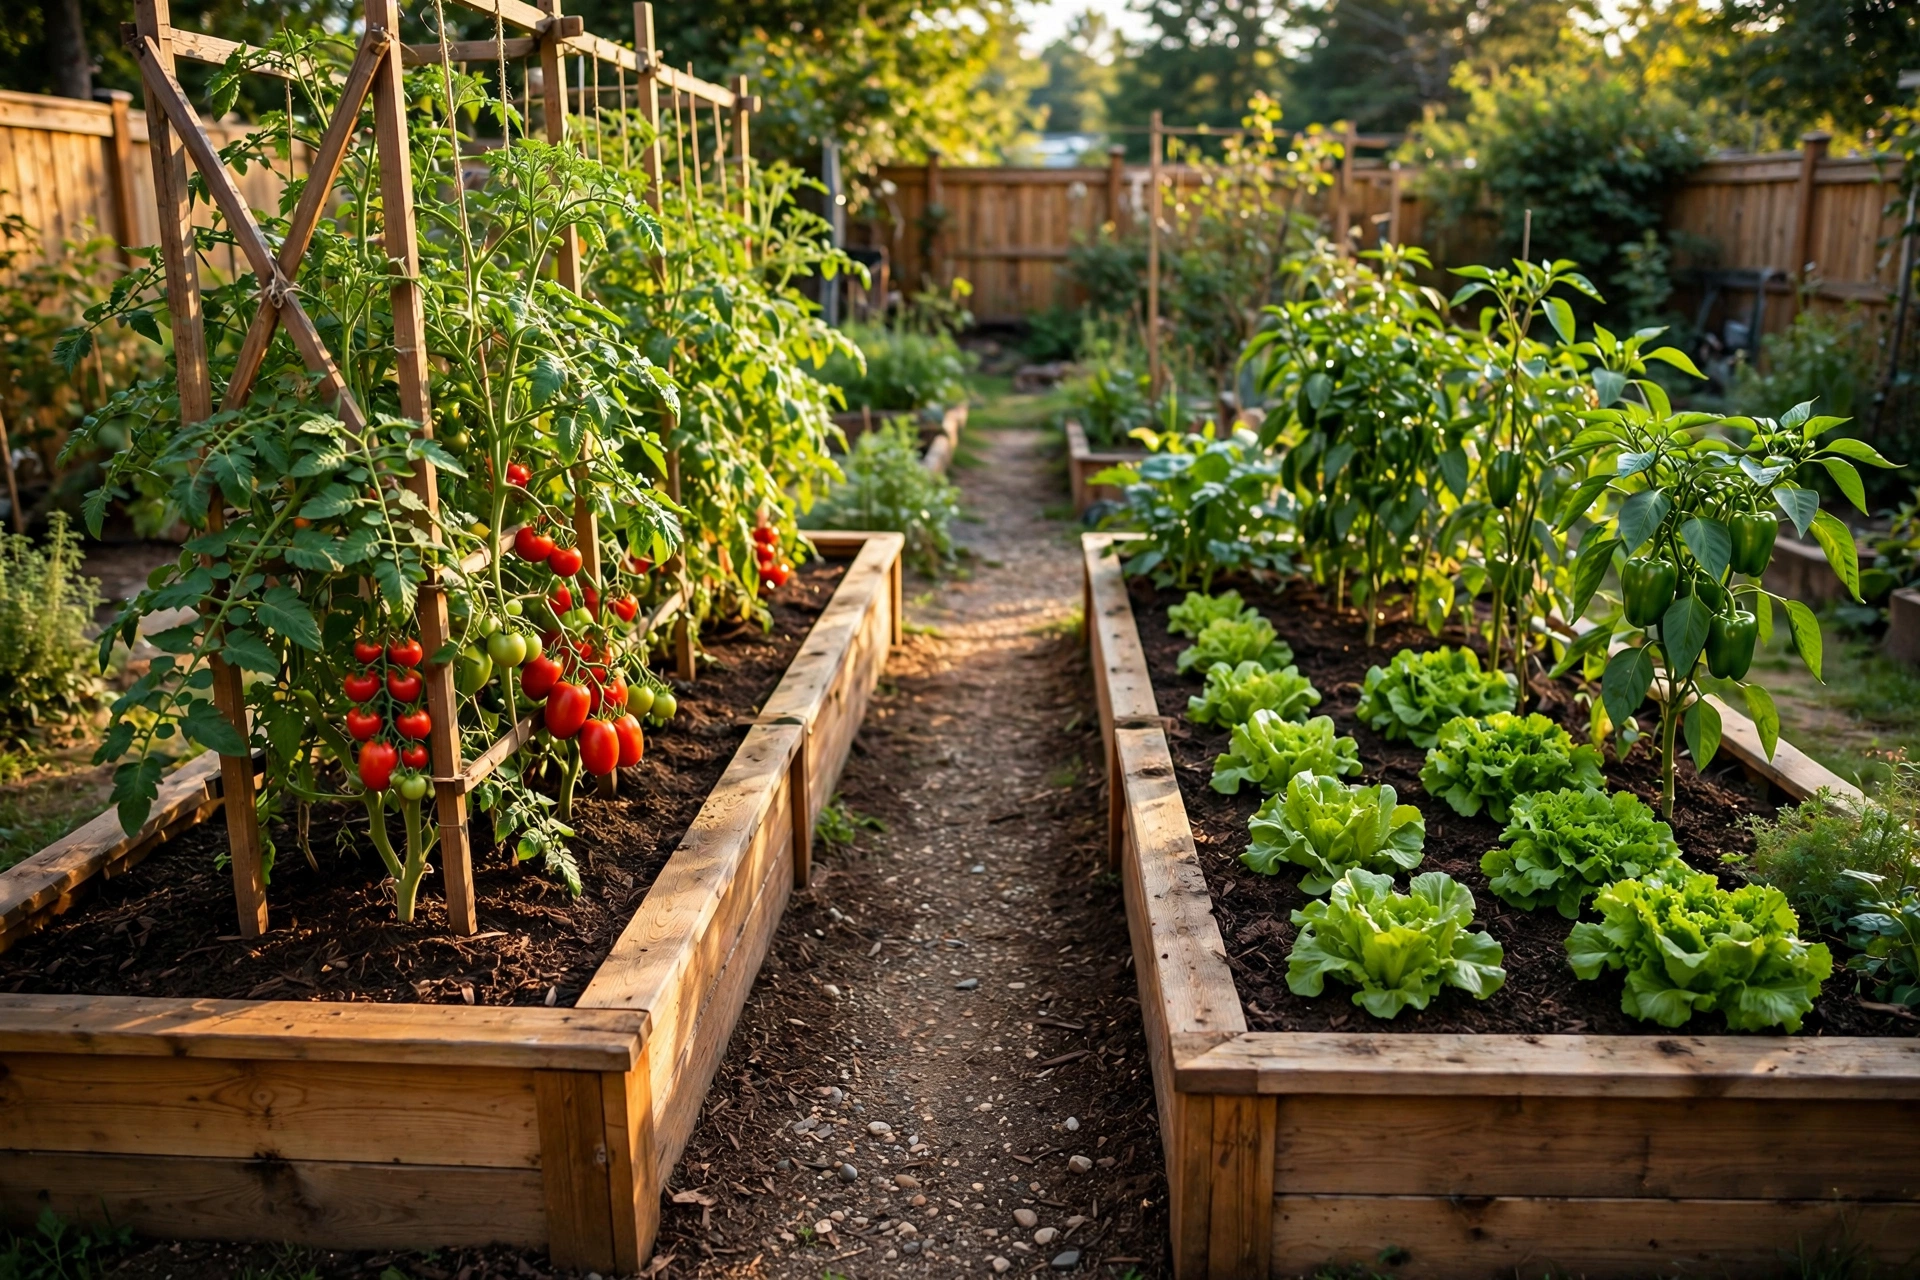
If you want better harvests with less backache, a raised garden bed guide is the best place to start. Raised beds warm up earlier in spring, drain better than flat ground, let you control your soil completely, and bring the growing surface up to a comfortable working height. This guide covers everything: choosing the right size and height, comparing materials (wood, metal, stone, composite), building a bed step by step, filling it with the right soil mix, and planting it for maximum yield. By the end, you will know exactly which bed to build and how to fill it for a thriving first season.
Raised beds are not just for bad soil — even gardeners with decent ground choose them for the ergonomics, the tidy look, and the head start on spring planting. But they do cost more upfront than in-ground gardening and dry out faster in summer, so this guide is honest about the trade-offs and shows how to manage them.
Why Raised Beds Work So Well
- Perfect soil from day one — fill with a quality mix instead of fighting clay, sand, or contaminated urban soil.
- Earlier spring planting — raised soil warms and drains faster, often buying you two to three weeks.
- Better drainage — excess water escapes out the sides and bottom instead of pooling around roots.
- Less compaction — you never walk on the growing area, so soil stays loose and root-friendly.
- Fewer weeds — fresh fill starts weed-free, and the defined edges make maintenance easy.
- Ergonomics — less bending, kneeling, and back strain, especially with taller beds.
- Pest and critter control — easier to fence, net, or cover than open ground.
The honest downsides: materials and soil cost real money (a 4×8 bed can run $100–$300 to build and fill), beds dry out faster than ground soil in heat, and very tall beds need a lot of fill. All manageable — and this guide shows how.
Choosing the Right Size
Width: the 4-foot rule
The golden rule of raised bed width: you must reach the center comfortably from either side without stepping in. For most adults, that means 4 feet wide maximum (3 feet if you have shorter arms or the bed sits against a wall or fence, where you only access one side). Beds wider than 4 feet defeat the purpose — you will end up stepping in and compacting the soil you paid to keep loose.
Length: whatever fits
Length is flexible — 8 feet is the classic because lumber comes in 8-foot lengths with no waste, but 6, 10, or 12 feet all work. Longer beds need a center brace on the long sides to prevent bowing outward under soil pressure. Leave 2 to 3 feet of path between beds: enough for a wheelbarrow and comfortable kneeling.
Height: match it to your needs
- 6 inches — the minimum for most vegetables; fine over decent existing soil where roots can go deeper.
- 10–12 inches — the sweet spot: deep enough for carrots, tomatoes, and most crops; moderate fill cost.
- 18–24 inches — waist-friendly for bad backs and knees; great over concrete, rubble, or contaminated soil; needs much more fill.
- 30+ inches — true waist-height gardening; wonderful ergonomics but expensive to fill (use the hugelkultur layering trick below to cut costs).
Material Comparison: Wood vs. Metal vs. Stone vs. Composite
| Material | Lifespan | Cost | Pros | Cons |
|---|---|---|---|---|
| Cedar / redwood | 10–15 years | $$$ | Beautiful, naturally rot-resistant, no chemical concerns | Most expensive wood; eventually rots |
| Pressure-treated pine | 8–12 years | $ | Cheapest, widely available, easy to work | Some gardeners avoid it for edibles; less attractive |
| Douglas fir / pine (untreated) | 3–5 years | $ | Cheap and easy; fine for short-term beds | Rots fast in contact with soil |
| Galvanized steel | 15–20+ years | $$ | Long-lived, modern look, no rot | Heats up in hot climates; sharp edges on cheap kits |
| Stone / brick | Decades | $$$–$$$$ | Permanent, beautiful, great thermal mass | Expensive, labor-intensive, permanent |
| Composite lumber | 20+ years | $$$ | Never rots, low maintenance | Pricey; can look plasticky; check heat behavior |
| Stock tanks | 15–20 years | $$ | Instant bed, great height, farmhouse look | Must drill drainage holes; heats up |
For most beginners, cedar is the best balance of longevity, looks, and safety for food growing — but pressure-treated lumber rated for ground contact is the budget champion, and modern treatments (alkaline copper quaternary and similar) are considered safe for vegetable gardens by US regulators. If you remain uneasy, line the interior with heavy plastic sheeting (leaving the bottom open for drainage) as a barrier.
How to Build a 4×8 Raised Bed: Step by Step
What you need
- Two 2×10 or 2×12 boards, 8 feet long (long sides)
- Two 2×10 or 2×12 boards, cut to 4 feet minus board thickness for the ends (or buy 8-footers and cut)
- 3-inch exterior-rated screws (deck screws or structural screws)
- Drill/driver, tape measure, level, saw (or have the lumberyard cut)
- Cardboard (for the bottom weed barrier), hardware cloth if burrowing pests are an issue
The build
- Pick the spot. Six to eight hours of sun, reasonably level ground, near a water source. Mark the 4×8 footprint.
- Prep the ground. Mow grass short inside the footprint; no need to dig it out. Lay cardboard overlapping generously — it smothers grass and decomposes within a season.
- Cut the boards. Two at 8 feet, two at 45 inches (for true 2× lumber, which is 1.5 inches thick, this yields a 4-foot outside dimension). Sand rough edges.
- Assemble the rectangle. Pre-drill pilot holes to prevent splitting, then drive two or three 3-inch screws per corner. Check square by measuring corner to corner — equal diagonals mean square.
- Set and level. Place the frame on the cardboard, check level in both directions, and shim low spots with soil or pavers. An unlevel bed shows and drains unevenly.
- Add pest protection (optional). Staple half-inch hardware cloth across the bottom before filling if moles or voles are a problem in your area.
- Brace long beds. For beds over 8 feet, screw a cross-brace or stake the middle of each long side to prevent bowing.
Total build time: two to four hours for a first-timer. The most common mistake is skipping the level check — a bed that looks fine empty looks crooked once filled and planted.
Filling the Bed: The Soil Mix That Matters
Do not fill a raised bed with bagged “topsoil” alone — it compacts into a dense mass. The proven mix is roughly:
- 60% high-quality topsoil or raised-bed mix — the bulk and mineral base
- 30% finished compost — nutrients, biology, and structure (use two or three different compost sources if possible for diversity)
- 10% aeration — coarse perlite, pumice, or rice hulls to keep the mix open and draining
A 4×8 bed at 12 inches deep needs about 32 cubic feet — just over a cubic yard. Buying in bulk from a landscape supplier is far cheaper than bags for this volume; many suppliers sell a pre-mixed “raised bed blend” that is ready to use. Water the mix thoroughly after filling — it will settle several inches — then top off before planting.
The hugelkultur shortcut for tall beds
Filling a 24-inch-tall bed entirely with purchased mix is expensive. Instead, layer the bottom half with logs, branches, wood chips, and leaves (hugelkultur-style), then put your quality mix in the top 10–12 inches where roots actually grow. The woody base decomposes slowly, feeding the soil for years, and you buy half the mix. Avoid black walnut wood (toxic to many plants) and keep fresh wood chips out of the top growing layer, where they temporarily tie up nitrogen.
Planting Your Raised Bed for Maximum Yield
Intensive spacing
Raised beds shine with intensive planting — but “intensive” still respects mature plant sizes. Use square-foot gardening spacing as a starting framework: one tomato per 2–4 square feet, 4 lettuces per square foot, 9 spinach per square foot, 16 radishes per square foot. The rich, loose soil supports closer spacing than poor ground, but overcrowding still invites disease — airflow matters.
Succession planting
Do not plant the whole bed at once in spring. Plant cool-season crops (lettuce, radishes, peas) early, then replace them with warm-season crops (tomatoes, peppers, basil) after the last frost, then sow fall crops (kale, spinach, garlic) in late summer where early crops finish. One bed can produce three waves of harvests per year with succession planning.
Vertical growing
Train cucumbers, pole beans, peas, and indeterminate tomatoes up trellises on the north side of the bed so they do not shade shorter crops. A simple cattle-panel arch or string trellis doubles or triples a bed’s productive area. This is the single biggest yield multiplier in small-space raised bed gardening.
What to plant together
Companion planting has mixed scientific support, but a few pairings are solid: basil near tomatoes (some pest confusion, and they harvest together), lettuce under tall crops (shade delays bolting), and flowers like marigolds and alyssum at bed corners (attract pollinators and beneficial insects). Avoid planting fennel near most vegetables — it inhibits many of them.
Raised Bed Maintenance Through the Season
- Water deeply. Beds dry faster than ground soil — check moisture with a finger test and water to 6 inches deep. Drip irrigation or soaker hoses on a timer are ideal.
- Mulch the surface. Two to three inches of straw or shredded leaves retains moisture and suppresses weeds.
- Feed as needed. The initial compost carries plants for weeks; side-dress heavy feeders with compost or organic fertilizer mid-season.
- Top off annually. Soil settles and decomposes — add an inch or two of compost each spring before planting.
- Rotate crops. Do not plant tomatoes (or their relatives: peppers, potatoes, eggplant) in the same spot year after year; rotation disrupts soil-borne disease cycles.
- Protect the wood. Linseed oil on exterior faces extends wood life; never use creosote or old motor oil near food beds.
Raised Bed vs. In-Ground: Honest Comparison
| Factor | Raised Bed | In-Ground |
|---|---|---|
| Startup cost | $100–$300 per 4×8 bed | Near zero |
| Soil quality control | Total control from day one | Must amend existing soil over time |
| Spring planting | 2–3 weeks earlier (warmer, drier soil) | Waits for ground to warm and dry |
| Watering needs | Higher — dries faster | Lower — ground moisture reservoir |
| Weed pressure | Low initially | Higher, depends on history |
| Ergonomics | Excellent, especially tall beds | Maximum bending and kneeling |
| Scalability | Expensive to scale large | Cheap to expand |
| Best for | Beginners, bad soil, small spaces, bad backs | Large gardens, tight budgets, experienced growers |
Frequently Asked Questions
How deep should a raised garden bed be?
Ten to twelve inches suits most vegetables. Six inches works over good existing soil where roots can continue downward. Go 18 to 24 inches for root crops like carrots in poor underlying soil, or for ergonomic gardening — just budget for the extra fill using the hugelkultur layering method.
Do raised beds need a bottom?
No solid bottom — beds must drain freely into the ground. Use cardboard directly on grass to smother it, and add half-inch hardware cloth underneath only if burrowing pests (moles, voles, gophers) are a problem. Landscape fabric under beds is generally not recommended since it impedes drainage and earthworm movement.
Is pressure-treated wood safe for vegetable gardens?
Modern pressure-treated lumber uses copper-based preservatives (not the old arsenic-based CCA), and US regulators consider it safe for garden use — studies show minimal migration into soil, mostly right at the wood surface. If you prefer zero doubt, use cedar, or line treated-wood beds with plastic sheeting on the interior sides.
How often do I replace the soil in a raised bed?
Essentially never — you rejuvenate it. Top-dress with an inch or two of compost each spring, and the soil improves year after year. Only replace soil if it becomes contaminated or severely diseased, which proper rotation and compost prevent.
Can I put a raised bed on concrete?
Yes, with conditions: use a bed at least 12 inches deep (18 is better), ensure drainage holes or gaps at the bottom so water escapes, and expect to water more often since there is no ground moisture below. Line the bottom with landscape fabric to keep soil in while letting water out.
A raised garden bed guide can only take you so far — the real learning happens with soil under your nails. Build one 4×8 bed this season, fill it with the mix above, plant what you love to eat, and trellis upward. If you catch the growing bug, our seasonal produce guides will help you plan what to grow next, and succession planting will keep that single bed producing from spring to fall. Start with one bed; the second one always follows.
The Best Plants for Raised Beds
Raised beds suit almost everything, but some crops especially love the warm, loose, deep soil:
- Root crops — carrots, beets, radishes, and parsnips thrive in the deep, stone-free mix; choose shorter carrot varieties for 10-inch beds.
- Tomatoes — the warm soil and excellent drainage produce earlier, healthier plants; give each 2 to 4 square feet and sturdy support.
- Peppers and eggplant — heat-lovers that appreciate the early warm-up; they sulk in cold, wet spring ground.
- Salad greens — lettuce, spinach, and arugula germinate fast in loose mix; succession-sow every two weeks.
- Beans and peas — fix their own nitrogen and love the loose soil; trellis pole varieties on the north side.
- Herbs — basil, parsley, cilantro, and dill flourish; give mint its own container (it invades beds aggressively).
- Garlic and onions — plant garlic in fall for summer harvest; the defined bed makes spacing and mulching easy.
Crops to think twice about: sprawling winter squash and pumpkins (they escape any bed — give them their own ground-level patch), corn (needs a block for pollination, which eats a whole bed), and perennial asparagus or rhubarb (they occupy the bed permanently — fine if you dedicate one bed to them).
Common Raised Bed Problems — And Fixes
| Problem | Cause | Fix |
|---|---|---|
| Soil dries out constantly | Fast drainage + heat + wind exposure | Mulch 3 inches deep; add drip irrigation; mix in more compost |
| Bed sides bowing outward | Soil pressure on long spans | Add mid-span cross-braces or stakes; use thicker lumber next build |
| Wood rotting in 2–3 years | Untreated softwood in soil contact | Rebuild with cedar or treated lumber; oil exterior faces annually |
| Soil level drops every year | Normal decomposition and settling | Top-dress with 2 inches of compost each spring — this is maintenance, not failure |
| Poor growth despite good mix | Often pH or overwatering | Test soil pH; check drainage; ease off fertilizer — new mixes rarely need feeding |
| Ants nesting in bed walls | Dry, undisturbed wood crevices | Disturb nests regularly; keep bed watered; diatomaceous earth at entry points |
| Grass invading from below | Cardboard barrier decomposed; aggressive runners | Re-lay cardboard when rebuilding; trench a 6-inch edge barrier around beds |
Extending the Season With Your Raised Bed
The defined rectangle of a raised bed makes season extension simple. Bend half-inch PVC or metal conduit into hoops over the bed and cover with floating row cover for frost protection (extends both ends of the season by weeks) or with clear plastic for a mini-greenhouse effect in early spring. In summer heat, the same hoops hold shade cloth over lettuce and spinach to delay bolting. Cold frames — essentially bottomless boxes with a transparent lid — sit right on top of a 4×8 bed and turn it into a winter salad garden in mild climates. Because the bed is already the perfect shape, every cover fits without custom engineering.
Frequently Asked Questions (Continued)
How many raised beds do I need?
Start with one 4×8 bed — it grows a surprising amount: roughly 8 tomato plants, or 32 pepper plants, or over 100 heads of lettuce in succession. Most families find two to three beds cover their summer vegetable needs. Expand only after a season teaches you what you actually eat and how much time tending takes.
Should I line my raised bed with plastic?
Line the interior sides with plastic if you are using treated lumber and want a barrier, or to slow moisture-driven rot of any wood — but always leave the bottom open for drainage. Do not wrap the entire bed like a bathtub; trapped water at the bottom rots roots and wood alike.