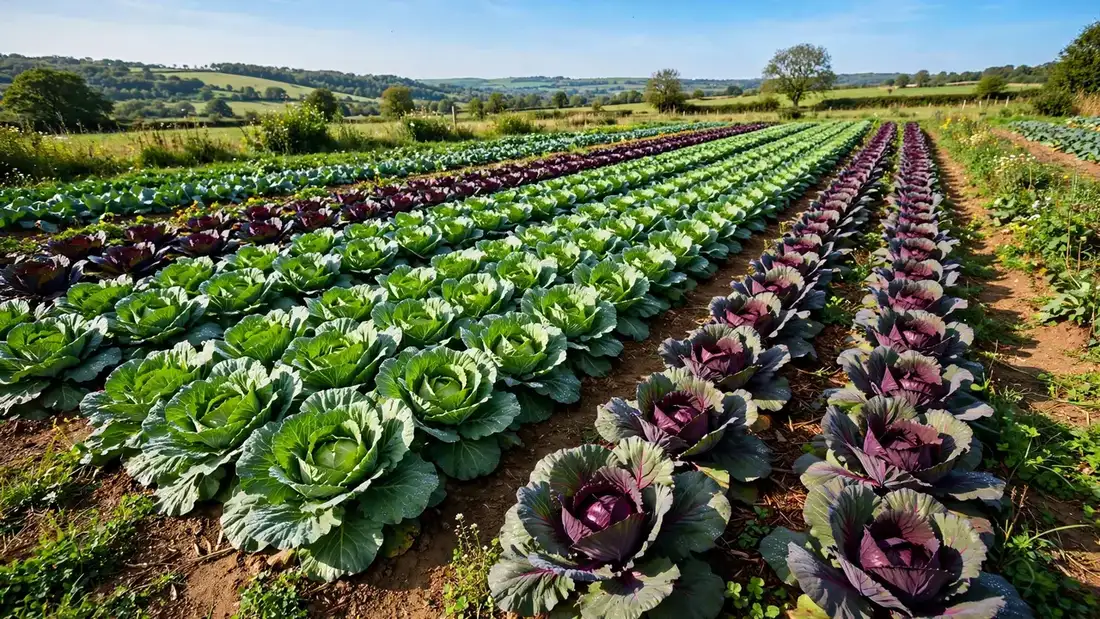
Few garden projects pay back like growing Cabbage at home.
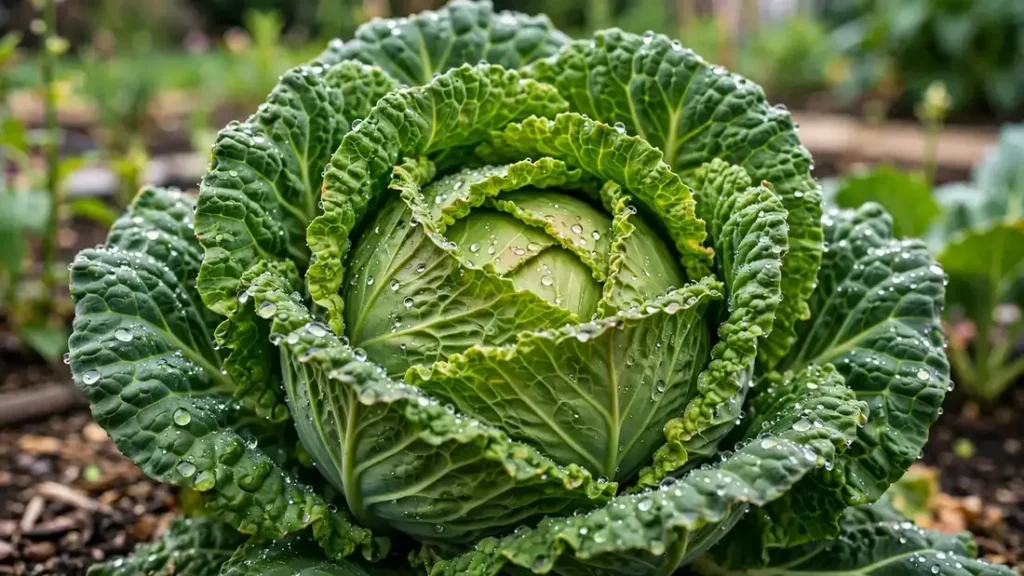
Cabbage is the heavyweight of the cool-season garden: dense, storable heads from a plant that asks mainly for steady water and rich soil. The classic rookie mistake is uneven watering, which splits mature heads open. Plant for spring or fall, mulch well, cover against cabbage moths, and you will harvest crisp heads that store for months.
Homegrown produce also wins on freshness in a way no supply chain can match. Vegetables start losing nutrients and flavor the moment they are picked; the shortest possible farm-to-table distance is your own backyard. A tomato eaten warm from the vine is a different food from one shipped green and gassed red.
This guide walks through the whole process step by step, with the practical details most overviews skip. By the end, you will know exactly what to do, when to do it, and what to watch out for.
This guide is written for real home gardeners: no expensive equipment required, no jargon without explanation, and every recommendation tested in ordinary backyards. Let’s get growing.
Quick Facts
| Factor | Details |
|---|---|
| Sun Requirements | Full sun (6+ hours) |
| Soil pH | 6.0-7.5 |
| Spacing | 12-18 inches apart |
| Planting Depth | 1/2 inch |
| Germination | 7-14 |
| Days to Maturity | 60-100 |
| Hardiness Zones | All zones (cool-season annual) |
| Water Needs | 1-1.5 inches per week; keep even to prevent splitting |
| Season | Cool season: spring and fall |
| Common Pests | Cabbage worms, cabbage loopers, slugs, cutworms |
| Good Companions | Dill, chamomile, onions; avoid nearby tomatoes and pole beans |
Why Grow Cabbage?
Cabbage is the heavyweight of the cool-season garden: dense, storable heads from a plant that asks mainly for steady water and rich soil. There is also the simple economics. A packet of seeds costing a few dollars can produce tens of dollars of organic produce. Even accounting for soil and water, the home garden wins on value, and that is before counting the exercise, stress relief, and satisfaction.
Beyond the obvious harvest, growing your own means control: no mystery sprays, picked at peak ripeness, varieties chosen for flavor rather than shipping durability. The flavor gap between homegrown and store-bought is real and immediate, especially for crops eaten fresh.
And honestly, it is fun. Watching a seed you planted become food on your table never gets old, no matter how many seasons you have gardened. Kids who grow vegetables eat vegetables; reluctant gardeners become converts after one perfect homegrown tomato.
What You'll Need
You do not need a fully stocked shed. This short list covers everything the guide below calls for, and most items serve your whole garden.
- Quality seeds or healthy transplants
- Finished compost (1-2 cubic feet per bed)
- Balanced organic fertilizer
- Mulch: straw or shredded leaves
- Watering can or hose with a gentle nozzle
- Hand trowel, garden fork, and hoe
- Floating row cover for pest protection
Step-by-Step: Growing Cabbage
Do not skip ahead. The early steps look basic, but they determine most of your results.
- Start indoors 6-8 weeks before last frost or direct sow 3 weeks before. Start indoors 6-8 weeks before last frost or direct sow 3 weeks before. Take your time here; rushing this step causes most of the problems gardeners blame on weather or pests later. Do not overthink it; done imperfectly today beats done perfectly next month after the ideal window has passed.
- Transplant or thin to 12-18 inches apart depending on variety size. Transplant or thin to 12-18 inches apart depending on variety size. Check your work the next day; small corrections now prevent big disappointments in six weeks. When in doubt, choose the gentler option; you can always do more later, but you cannot undo overdoing it.
- Enrich soil with compost; cabbage is a heavy feeder. Enrich soil with compost; cabbage is a heavy feeder. Do not overthink it; done imperfectly today beats done perfectly next month after the ideal window has passed. This step sets up everything that follows, so give it your full attention even though it feels basic.
- Apply floating row cover to exclude cabbage moths from day one. Apply floating row cover to exclude cabbage moths from day one. Take your time here; rushing this step causes most of the problems gardeners blame on weather or pests later. When in doubt, choose the gentler option; you can always do more later, but you cannot undo overdoing it.
- Water deeply and evenly; mulch 2-3 inches to hold moisture. Water deeply and evenly; mulch 2-3 inches to hold moisture. Check your work the next day; small corrections now prevent big disappointments in six weeks. This step sets up everything that follows, so give it your full attention even though it feels basic.
- Side-dress with nitrogen when heads begin to form. Side-dress with nitrogen when heads begin to form. Do not overthink it; done imperfectly today beats done perfectly next month after the ideal window has passed. Check your work the next day; small corrections now prevent big disappointments in six weeks.
- Harvest when heads feel solid; cut with a sharp knife leaving outer leaves. Harvest when heads feel solid; cut with a sharp knife leaving outer leaves. This step sets up everything that follows, so give it your full attention even though it feels basic. Every garden is a little different, so treat guidance as a starting point and adjust to what you observe.
- For split-prone varieties, twist the plant slightly to slow water uptake before heavy rain. For split-prone varieties, twist the plant slightly to slow water uptake before heavy rain. When in doubt, choose the gentler option; you can always do more later, but you cannot undo overdoing it. Consistency matters more than perfection here; plants respond to steady care, not occasional heroics.
Soil, Sun, and Water Requirements
Get these three right and Cabbage largely takes care of itself: give it full sun (6+ hours); aim for soil pH 6.0-7.5; plan on 1-1.5 inches per week; keep even to prevent splitting. Great gardening starts below the surface. Most vegetables and flowers want loam: soil that holds together loosely when squeezed but crumbles apart easily. If your soil forms a slick ribbon, you have heavy clay; if it falls apart instantly, it is sandy. Both extremes are fixable, and both are dramatically improved by the same amendment: compost. A yearly 2-inch top-dressing of finished compost feeds earthworms and microbes that do the tilling for you, building the crumbly structure roots love.
Mulch is soil’s protective blanket and arguably the highest-return chore in gardening. A 3-inch layer of straw, shredded leaves, or wood chips moderates soil temperature, holds moisture, smothers weeds, and feeds soil life as it breaks down. Keep mulch a couple of inches away from plant stems to prevent rot and deny slugs a hiding place. In vegetable beds, apply after the soil warms in spring; mulching cold soil keeps it cold.
Soil pH quietly controls everything. Most vegetables absorb nutrients best between pH 6.0 and 7.0. Below that, phosphorus and calcium lock up; above it, iron and manganese become unavailable, yellowing leaves despite plenty of fertilizer. A $15 test every two to three years prevents years of mystery deficiencies. Raise pH with garden lime, lower it with elemental sulfur, and always retest rather than guessing at amounts.
Water deeply and less often, not shallowly and daily. Deep watering drives roots downward where soil stays cool and moist; daily sprinkles keep roots at the surface, where they fry at the first hot spell. For most vegetables, the target is about an inch of water per week from rain or irrigation, applied in one or two deep soakings. Push a trowel into the soil after watering; moisture should reach 6 to 8 inches down.
Clay soil and sandy soil need opposite watering rhythms. Clay absorbs slowly, so water in short cycles with soak-in breaks to prevent runoff; once wet, it holds moisture for days. Sand drinks instantly but holds little, so water more often in smaller amounts and mulch heavily. Matching your technique to your soil type can halve your water bill and double your results. When in doubt, dig down and look; the soil tells the truth.
Feeding and Fertilizing
Side-dressing, feeding established plants mid-season, separates good harvests from great ones. Pull back the mulch, scatter granular fertilizer in a band a few inches from the stem, scratch it in lightly, water well, and replace the mulch. Heavy feeders like corn, brassicas, and tomatoes typically want side-dressing when they are knee-high or at first flowering. Light feeders like beans and herbs rarely need it; beans make their own nitrogen.
Micronutrients matter in tiny amounts with outsized effects. Calcium prevents blossom end rot in tomatoes and peppers, though uneven watering is the more common culprit. Magnesium powers chlorophyll; Epsom salts correct it fast. Boron deficiency hollows out brassica stems. A soil test every few years catches these before they cost you a crop. Kelp meal is the organic gardener’s multivitamin, supplying trace minerals plus natural growth hormones.
Watch your plants; they file deficiency reports in leaf color. Uniform yellowing of older leaves usually means nitrogen shortage. Purple tints suggest phosphorus deficiency, often in cold spring soil. Yellow edges on older leaves point to potassium. But diagnose carefully: overwatering, pH problems, and compacted soil mimic deficiencies perfectly. A soil test distinguishes a true shortage from a lockout, saving you from fertilizing a problem fertilizer cannot fix.
Pests, Diseases, and Organic Solutions
The pests most likely to bother Cabbage are cabbage worms, cabbage loopers, slugs, cutworms. Wildlife pests require different thinking than insect pests. Deer are best stopped by 8-foot fencing; repellents work until the deer get hungry enough to ignore them. Rabbits fall to 2-foot chicken wire with the bottom buried. Birds take fruit, netting is the only reliable answer, draped before color shows. For burrowing voles and gophers, hardware cloth under raised beds stops them cold. Identify the actual culprit with a trail camera before investing in defenses.
Crop rotation is pest control over time. Many soil pests and diseases specialize in one plant family and survive years waiting for its return. Moving nightshades, brassicas, and cucurbits to fresh ground each year starves them out. Even a simple two-bed swap beats planting tomatoes in the same spot annually. Keep a garden map; by year three you will not remember what grew where.
Floating row cover is the unsung hero of organic pest control. Draped over crops at planting, this gauzy fabric lets in light and rain while excluding cabbage moths, flea beetles, carrot rust flies, and cucumber beetles entirely. For crops that need pollinators, remove it at flowering or use it only until bloom. It is cheaper than any spray regimen and works while you sleep.
Companion Planting and Garden Layout
Some combinations genuinely hurt. Keep onions and garlic away from beans and peas; alliums inhibit legume growth. Do not plant tomatoes near corn; they share the earworm/fruitworm pest. Fennel secretes compounds that stunt almost everything nearby, so give it its own pot. When in doubt, diversity beats monoculture: mixed plantings confuse pests and use resources more completely.
Some combinations genuinely hurt. Keep onions and garlic away from beans and peas; alliums inhibit legume growth. Do not plant tomatoes near corn; they share the earworm/fruitworm pest. Fennel secretes compounds that stunt almost everything nearby, so give it its own pot. When in doubt, diversity beats monoculture: mixed plantings confuse pests and use resources more completely.
Seasonal Calendar and Timing
Spring success is decided in late winter. Start seeds indoors on schedule, counting back from your last frost date, not from your enthusiasm date. Harden off transplants for 7 to 10 days before planting out; unhardened seedlings stall for weeks. Direct sow peas, spinach, and radishes as soon as soil can be worked; wait for 60-degree soil for beans and corn. And resist planting warm crops early; one cold night can stunt peppers and tomatoes for a month.
Succession planting turns one harvest into a season of them. Instead of sowing all your beans at once, sow a third every two to three weeks until midsummer. Follow spring lettuce with summer beans, then fall kale in the same bed; a single bed can produce three crops a year. Interplanting works the same magic spatially: radishes mark carrot rows and harvest before carrots need the space.
Troubleshooting Common Problems
Wilting is a message, not always an emergency. Afternoon wilting in heat is often protective; check again in the cool morning before watering. Morning wilting means genuine water need. Wilting in wet soil is the dangerous kind: it signals root damage from rot or cutworms, and more water makes it worse. Learn to read which wilt you are seeing and you will stop killing plants with kindness.
Yellow leaves are the most common complaint and the least specific symptom. Uniform yellowing of older leaves usually means nitrogen shortage or natural aging. Yellow between green veins points to iron deficiency, often from high pH rather than missing iron. Yellow, wilted plants in wet soil mean root rot from overwatering. Match the pattern to the cause; fertilizing a drowning plant only hurries its end.
Yellow leaves are the most common complaint and the least specific symptom. Uniform yellowing of older leaves usually means nitrogen shortage or natural aging. Yellow between green veins points to iron deficiency, often from high pH rather than missing iron. Yellow, wilted plants in wet soil mean root rot from overwatering. Match the pattern to the cause; fertilizing a drowning plant only hurries its end.
Choosing the Right Varieties
Save the variety names that work. Memory fades by spring, but a garden journal entry saying which tomato out-produced the rest is priceless. Over a few seasons you will assemble a personal list of champions perfectly tuned to your soil and microclimate. That list becomes one of your most valuable gardening possessions.
Choosing the right variety matters as much as good technique. Look for varieties bred for your region first; local adaptation beats catalog hype. Disease-resistance codes on the label are worth real money, they represent years of breeding that protect your harvest. And match days-to-maturity to your season length with buffer weeks to spare.
Save the variety names that work. Memory fades by spring, but a garden journal entry saying which tomato out-produced the rest is priceless. Over a few seasons you will assemble a personal list of champions perfectly tuned to your soil and microclimate. That list becomes one of your most valuable gardening possessions.
Common Mistakes to Avoid
Overwatering kills more plants than underwatering, especially seedlings and container plants. Soggy soil suffocates roots, and the yellowing, wilting symptoms mimic drought, prompting even more water. Check soil moisture with your finger before watering, ensure drainage, and learn each crop’s preferences. When in doubt, most established vegetables prefer a deep drink twice a week to daily sprinkles.
Ignoring sunlight requirements dooms crops before they sprout. Fruiting vegetables need 6 to 8 hours of direct sun minimum; no amount of fertilizer compensates for shade. Watch your yard through a day before siting the garden, remembering that spring sun differs from summer sun as trees leaf out. When space is shady, grow what suits it: lettuce, spinach, and herbs tolerate part shade gracefully.
Forgetting to feed is the slow-motion mistake. Plants in fresh compost-rich soil start strong, then fade mid-season as nutrients deplete, exactly when tomatoes and corn need them most. Mark your calendar for mid-season side-dressing of heavy feeders. Container plants need feeding every two to three weeks without exception; their small soil volume depletes fast.
- Consistent moisture is the anti-splitting secret; drip irrigation is ideal. File this under lessons most gardeners learn the hard way; now you get to skip the hard way.
- Red cabbage needs the same care but stores even longer. Worth trying even on a small scale; the results will convince you faster than any article.
- After harvesting the main head, small secondary heads often form on the stump. Do this once and it becomes second nature; skip it and you will wonder why results disappoint.
- Clubroot-resistant varieties exist if your soil has a history of the disease. Small effort, outsized payoff; this is exactly the kind of detail that separates good gardens from great ones.
- Fall cabbage sweetens after light frost and stores into winter. Worth trying even on a small scale; the results will convince you faster than any article.
Extending Your Season
The real secret of season extension is timing, not equipment. Fall crops must be planted in summer while the garden looks abundant; spring crops go in while it is still winter. Work backwards from your frost dates, add buffer weeks, and plant on schedule even when it feels absurdly early. The gardeners harvesting in November started planning in July.
Season extension starts with the cheapest tool: floating row cover. This gauzy fabric adds 2 to 6 degrees of frost protection while letting in light and rain, stretching both ends of the season by weeks. Drape it over hoops or directly on crops, anchor the edges against wind, and vent or remove it on warm days. One $20 roll transforms what your garden can do in spring and fall.
Seasonal Task Calendar
Tape this rhythm to your shed wall. Gardening success is mostly timing, and a simple calendar beats a perfect memory.
| When | Tasks |
|---|---|
| Early Spring | Start seeds indoors; work compost into beds; test soil |
| Spring | Transplant after frost; mulch; install supports and row cover |
| Summer | Water deeply; harvest every 2-3 days; scout for pests weekly |
| Fall | Sow cool-season succession; plant garlic; clean up debris |
| Winter | Plan rotation; order seeds; sharpen and oil tools |
Harvesting and Storage
Harvest timing makes or breaks flavor, and the window is often narrow. Most vegetables peak in the cool of the morning, when sugars are highest and tissues are crisp; afternoon-picked produce wilts faster and tastes flatter. Learn each crop’s ripe signals: tomatoes fully colored but firm, cucumbers dark green and slender, beans that snap crisply. When in doubt, taste; the garden is the ultimate ripeness test.
Preserving extends the harvest further. Freezing is the easiest: blanch vegetables briefly, ice-bath them, and freeze flat in bags. Tomatoes freeze beautifully whole for sauce. Herbs freeze in oil in ice cube trays or dry hung in bundles. Fermentation turns cabbage into sauerkraut with nothing but salt and time. Start with freezing; it needs no special equipment and preserves flavor best.
Storage turns a glut into months of food. Onions and garlic need curing: two to three weeks in dry, airy shade until necks tighten and skins rustle. Root crops like carrots and beets store for months in damp sand in a cool cellar. Winter squash cures in the sun for ten days, then keeps at 50 to 60 degrees. Tomatoes, famously, should never see the refrigerator; cold kills their flavor compounds irreversibly.
Saving Seeds and Planning Next Year
Saving your own seeds closes the loop and quietly improves your garden every year. Plants grown from your saved seed are one generation more adapted to your exact soil, pests, and climate. Save from open-pollinated and heirloom varieties only; hybrid seeds do not come true. Let the best specimens fully mature, even past eating stage, since seed maturity and eating maturity differ.
Wet seeds like tomatoes need fermentation: squeeze seeds into a jar with water, let it ferment 2 to 3 days until mold forms, then rinse clean. This removes the germination-inhibiting gel coat. Dry seeds like beans and lettuce simply need thorough drying on screens. Dry everything until it snaps, not bends, then store in paper envelopes in a cool, dark, dry place; properly stored seeds last years.
Key Takeaways
- Success with Cabbage comes mostly from timing, soil preparation, and consistency.
- Start with the steps in this guide in order; do not skip the setup.
- Observe your plants weekly and catch problems early when they are easy to fix.
- Keep notes so next season builds on this one.
- Share your harvest and your lessons; gardening is better together.
- Start this weekend; the best time to begin was last season, and the second-best time is now.

Watch and Learn
Sometimes seeing it done beats reading about it. This hands-on video walkthrough covers the key techniques for Cabbage clearly:
Frequently Asked Questions
Why did my cabbage head split open?
A sudden influx of water after dryness swells the interior faster than outer leaves can stretch. Water evenly and mulch. Small adjustments beat big overhauls; change one thing at a time.
What are the green worms on my cabbage?
Cabbage worms (imported cabbageworm caterpillars). Handpick, use row cover, or spray Bt, an organic caterpillar control. Small adjustments beat big overhauls; change one thing at a time.
Can I grow it organically?
Absolutely. Build healthy soil with compost, rotate crops, use row cover against insects, and invite beneficial predators. Most home gardeners find organic methods easier, not harder, once the system is running. Experience is the best teacher here, so start simple and observe closely.
How often should I water?
Check the top two inches of soil; water deeply when dry. Most vegetables want about an inch per week, more in heat waves and less in cool, rainy spells. Mulch heavily to even out moisture swings. Most gardeners face this exact question in year one; it gets intuitive fast.
Why are my plants growing slowly?
The usual suspects are cold soil, insufficient sun, compacted ground, or nutrient shortage, in that order. Check soil temperature and sunlight hours first; those two explain most slow starts. Your local extension service can give advice tuned to your exact area.
What is the best fertilizer to use?
Start with compost worked into the bed, then side-dress heavy feeders mid-season with a balanced organic fertilizer. A soil test every few years tells you exactly what your ground needs. Your local extension service can give advice tuned to your exact area.
Keep Growing: More from DayZora
If you enjoyed this guide, you will love these reader favorites:
- Sweet 16 Backyard Party Ideas
- Best Roses to Give on Rose Day
- Romantic Rose Day Date Ideas
- Outdoor Proposal Ideas for Couples
Every expert was once a beginner staring at a seed packet. The difference is simply seasons in the ground. Plant your Cabbage, tend it with attention, learn from what happens, and enjoy one of the most satisfying hobbies on earth. Happy growing.