Every grand opening has a moment when all eyes turn to one spot: the ribbon cutting, the welcome speech, the first toast. That spot is your stage, whether it is a raised platform, a marked area of the sales floor, or simply the space in front of your entrance. How that spot looks in photographs will define how your opening is remembered, which means stage decoration deserves the same care as any other headline element.
This guide offers fifteen grand opening stage decoration ideas, organized by the elements that make a stage work: the backdrop, the floor, the framing, the lighting, and the details. You will find a comparison table of backdrop materials, guidance on coordinating sound and lighting, a rental-versus-buy breakdown, and answers to the practical questions that arise when a store, restaurant, or office suddenly needs a stage for a day.
First, a liberating truth: a grand opening stage does not need to be a stage. A clearly defined, beautifully dressed area performs the same function as a raised platform for most openings, and it keeps the event feeling accessible rather than corporate. Raise the platform only when the crowd is large enough that people in back cannot see, roughly more than fifty guests, or when the ceremony must be visible over a crowd.
Anatomy of a Grand Opening Stage: The 5 Zones
Think of your stage as five zones, and dress each one deliberately.
Zone 1: The backdrop. Everything behind the speakers, the single most photographed surface of your event. It must carry your brand, look good in photos from every angle, and hide whatever is actually behind it (storage rooms, blank walls, parking lots).
Zone 2: The floor. What the speakers stand on and what the camera sees at the bottom of every frame. A defined floor, carpet, vinyl decal, or simply a clean, marked area, separates the stage from the crowd visually.
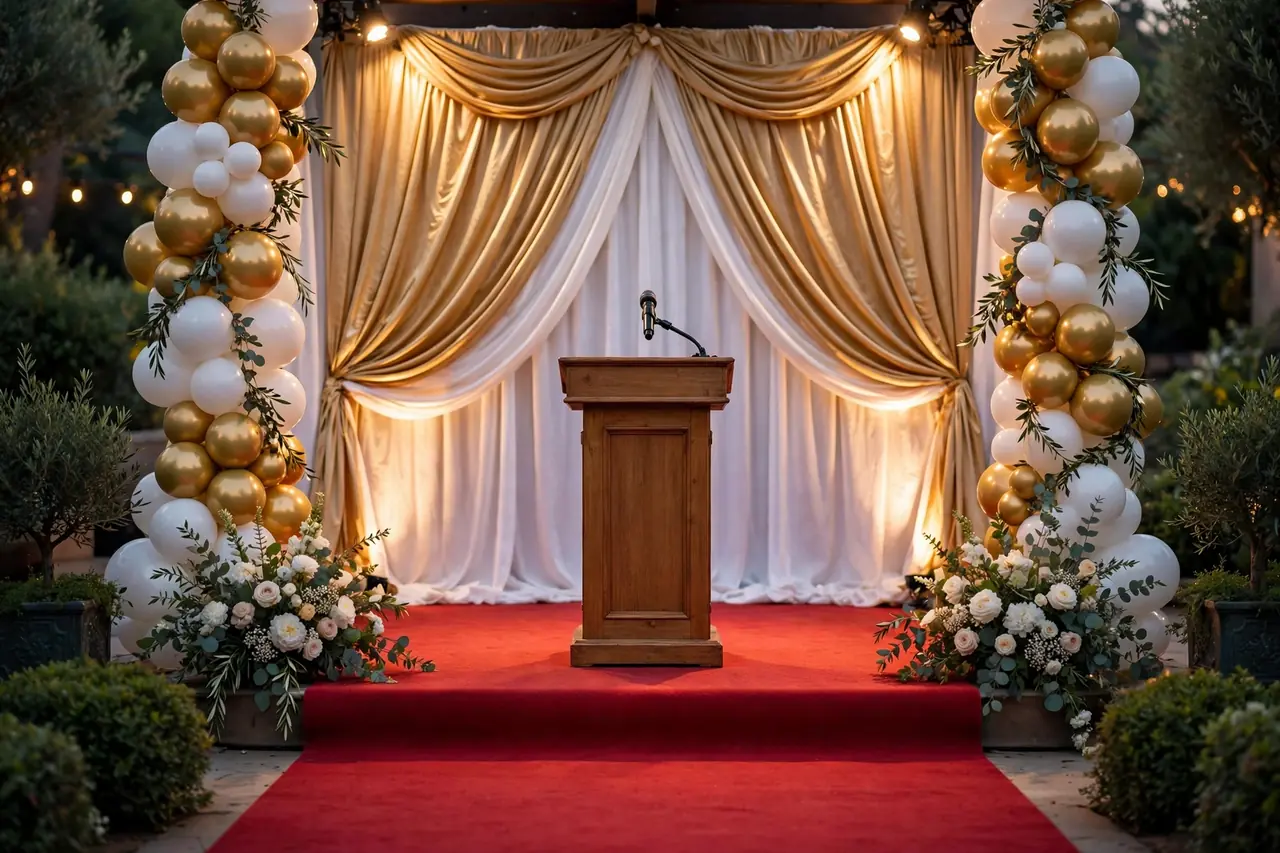
Zone 3: The framing. The left and right edges: balloon columns, floral arrangements, drapery panels, or light towers that give the stage width and presence. Framing is what makes a flat backdrop feel three-dimensional.
Zone 4: The lighting. The difference between amateur and professional. Even simple stages look premium under deliberate lighting and look flat under fluorescents. Plan lighting as a design element, not an afterthought.
Zone 5: The details. The podium, the microphone, the ribbon and scissors, the water glasses, the small table for awards or gifts. Details are what guests and cameras notice up close; they signal preparation and care.
Dress all five zones and even a modest setup looks intentional. Neglect two or more and even expensive elements look random. The fifteen ideas below are organized by zone so you can build a complete stage systematically.
15 Grand Opening Stage Decoration Ideas
Backdrop Ideas
1. The Draped Fabric Backdrop
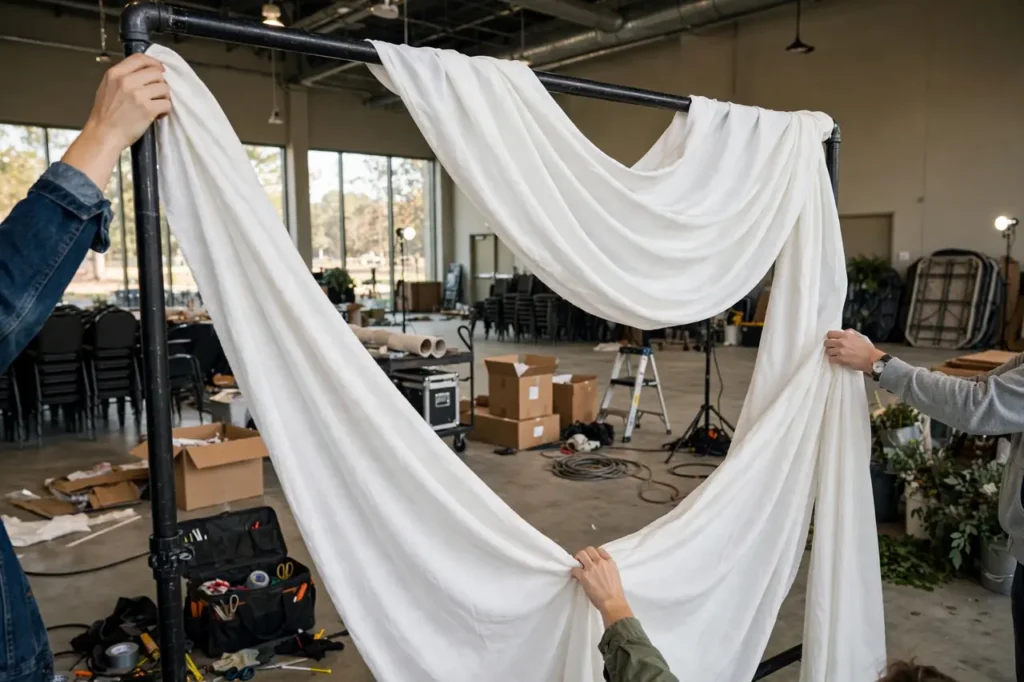
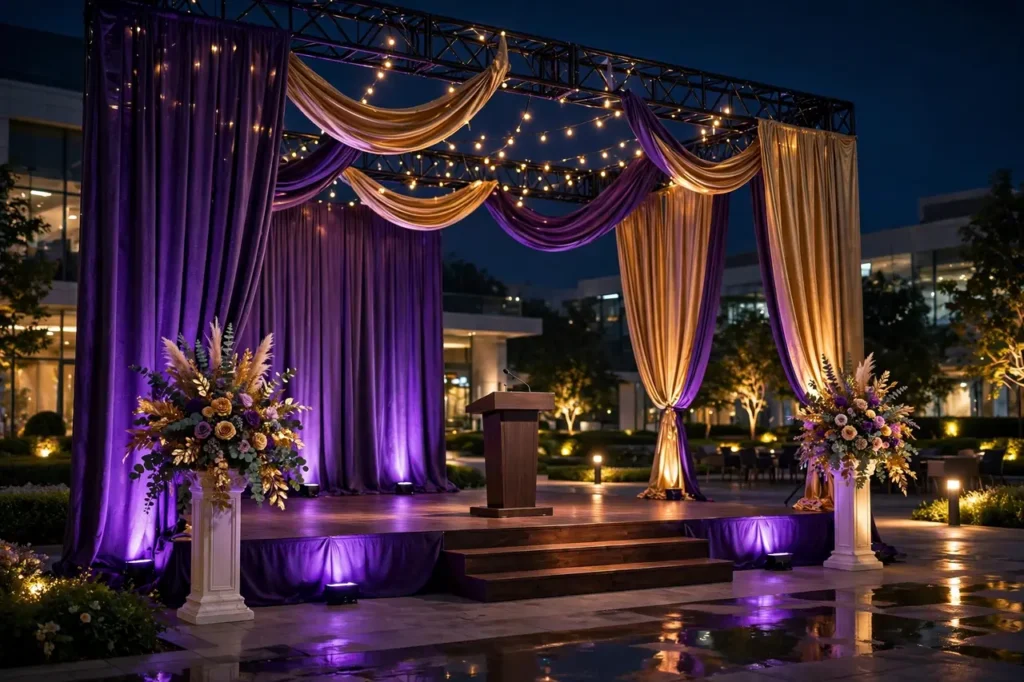
Floor-to-ceiling fabric panels in your brand colors remain the most versatile stage backdrop ever invented. Chiffon, organza, or polyester drapery on a portable pipe-and-drape frame creates softness, movement, and depth; it hides ugly walls completely and photographs with a premium softness that hard materials cannot match. Layer two tones, a solid base with a sheer overlay, for designer depth.
Gather the fabric rather than hanging it flat; fullness is what reads as luxury. Add fairy lights behind sheer panels for a starry glow, or uplight the drapery in your brand colors for evening drama. A 10-by-10-foot draped backdrop rents affordably or can be DIY-built with hardware-store pipe and purchased fabric panels.
Budget: $80 to $300. Best for: universal elegance and photo softness. Steam or iron panels before hanging; wrinkles photograph worse than any other flaw.
2. The Branded Step-and-Repeat
Borrow the red-carpet format: a backdrop printed with your repeating logo pattern where speakers, ribbon-cutters, and VIP guests pose. Every photo taken against it is branded content, and the format signals importance; people stand straighter in front of a step-and-repeat. Design the pattern with generous spacing so logos are never cut awkwardly by heads in photos.
Print on wrinkle-resistant fabric rather than vinyl to avoid flash glare, and mount it taut on a frame. Add a red carpet in front to complete the effect. This backdrop keeps working after the ceremony as the event’s photo station, doubling its value.
Budget: $100 to $250 printed. Best for: branded photography and VIP moments. Order two weeks ahead; custom printing needs lead time.
3. The Living Green Wall
A wall of greenery, real or high-quality faux, behind the stage brings organic luxury that suits wellness brands, restaurants, boutiques, and eco-conscious businesses. Faux boxwood or fern panels interlock into convincing walls in under an hour, store flat, and reuse indefinitely, making them the economical choice for serial celebrators.
Accent the green base with your brand color in flowers or signage: a large wooden or acrylic logo mounted on the greenery, or clusters of blooms at the corners. Keep the wall at least eight feet wide so it fills the camera frame behind a group; narrow walls look like hedges, wide walls look like installations.
Budget: $120 to $400 for panels (reusable). Best for: organic, premium, photogenic backdrops. Add subtle uplighting at the base to give the wall depth after dark.
4. The Balloon Backdrop Wall
A full wall of balloons in an organic pattern or a precise color-block design creates the festive energy no other material matches. Balloon walls photograph as pure celebration and are achievable DIY with garland tape and an electric pump, though large walls take several hours and hundreds of balloons.
Design in your brand colors with one metallic accent for festivity. Build the wall on a grid or frame rather than directly on the venue wall to protect surfaces and allow repositioning. Keep the wall out of direct sun and away from heat sources; a deflating wall mid-ceremony is a memorable disaster of the wrong kind.
Budget: $100 to $350 DIY. Best for: high-energy, festive, colorful brands. Build the morning of the event; balloon walls have a 12-to-24-hour prime.
Floor and Framing Ideas
5. The Red Carpet Stage Floor
Define the stage floor with a red, brand-colored, or logo-printed carpet that visually separates ceremony space from audience space. The carpet photographs as occasion, keeps the area clean for close-up shots of feet and ribbon, and gives speakers a confident surface. Tape all edges flat; a rippling carpet is both ugly and hazardous.
For outdoor stages, use outdoor-rated carpet or interlocking deck tiles that drain and do not stain. Custom logo carpets cost more but become permanent lobby assets afterward; a worthwhile investment if your entrance can host one long-term.
Budget: $40 to $250. Best for: defining the ceremony zone. Keep a lint roller handy; dark carpets show every speck in photographs.
6. Flanking Floral Towers
Two tall floral arrangements, one on each side of the stage, give it height, symmetry, and life. Towers on pedestals or in tall vases frame speakers beautifully and appear in every wide shot. Coordinate their colors with the backdrop rather than matching it exactly; complementary tones create depth while identical tones flatten.
After the ceremony, move the towers to the entrance or photo spot for their second act. This reuse principle applies to nearly every stage element: design each piece for two positions and your decoration budget effectively doubles.
Budget: $100 to $300 for the pair. Best for: elegance and ceremony framing. For arrangement techniques that scale from tables to towers, our wedding day table decoration ideas guide covers the structural basics.
7. Drapery Side Panels
Floor-length drapery panels at the stage’s left and right edges soften hard lines and add the verticality that makes small stages feel grand. Panels in a sheer overlay over a solid base echo the backdrop’s layering and tie the composition together. Weight the hems so panels hang straight and do not billow into speakers or equipment.
Tie panels back with ribbon or floral accents for an elegant gathered look, or let them hang straight for modern simplicity. Either way, ensure they clear walkways and do not obscure exit signage; beauty must never compromise safety.
Budget: $40 to $120. Best for: softness, height, and cohesion. Panels also hide side-stage clutter: cables, cases, and spare chairs disappear behind fabric.
8. Light Towers and Uplights
Place LED uplights or light towers at the stage corners to wash the backdrop in color and give the stage presence after dark. Battery-powered uplights now offer professional color control at accessible prices, and a pair flanking the stage transforms an ordinary corner into an event space in minutes.
Match uplight colors to your brand for cohesion, or use warm amber for universal flattery. Avoid red-green combinations that read as holiday-specific unless that is your intent. Test colors against your actual backdrop fabric; colors shift dramatically on different materials.
Budget: $50 to $150 for a pair. Best for: evening drama and color branding. Keep lights clear of walkways and tape down any cables crossing the floor.
Lighting and Atmosphere Ideas
9. The Spotlight Moment
A single follow spot or aimed spotlight on the speaker during remarks creates genuine theater: the room dims slightly, the light finds its mark, and the moment feels important. Even one rented spotlight, operated by a volunteer following simple cues, elevates remarks from announcements to occasions.
Coordinate with your sound person on timing: lights dim as the speaker is introduced, spot hits as they reach the podium, room lights restore for the ribbon cutting so photographers get bright, even illumination. Rehearse the sequence once; smooth technical cues read as professionalism.
Budget: $50 to $150 rental with operator guidance. Best for: keynote-style remarks and awards. Ensure the spotlight does not blind the audience’s front row; angle it from the side.
10. Fairy Light Canopy
Drape warm fairy lights overhead across the stage area to create a canopy of tiny stars. The effect is magical in photographs, flattering to faces, and achievable with battery-operated strands that need no power access. Weave lights through drapery, around framing columns, and across any overhead structure.
Use warm white (2700K) exclusively; mixed color temperatures look accidental. Conceal battery packs in floral arrangements or behind drapery folds. For evening ceremonies, the canopy can carry the entire lighting design, supplemented by one spotlight for the speaker’s face.
Budget: $25 to $60. Best for: warmth, magic, and flattering light. Test every strand the night before and bring spare batteries; dead sections show immediately.
11. The Confetti or Balloon Drop Moment
Time a confetti burst or balloon release to the exact second of the ribbon cutting for a photograph that defines your opening. Handheld confetti cannons, operated by two volunteers on cue, are affordable, dramatic, and safe when aimed upward and outward. Biodegradable confetti keeps the celebration responsible.
Coordinate the cue precisely: the person cutting gives a nod, cannons fire, photographers shoot. Warn guests in advance so cameras are ready; the moment lasts seconds. Check venue and municipal rules first; some indoor venues and cities restrict confetti, and outdoor releases of balloons are restricted or banned in many places due to environmental harm.
Budget: $20 to $60. Best for: the peak celebration photograph. Confetti cannons indoors require venue approval and a cleanup plan; assign the cleanup crew before the event.
Detail Ideas
12. The Dressed Podium
The podium appears in every speech photograph, so dress it deliberately: drape it in fabric matching the backdrop, mount your logo on its front, and flank it with small floral arrangements or candles. A dressed podium looks intentional; a bare rental podium looks borrowed. Keep the top clear except for water and notes; clutter at hand level photographs badly.
Adjust the microphone height for each speaker in advance and mark positions with tape on the floor. Nothing deflates a moment like two minutes of microphone fumbling. A small step stool discreetly placed serves shorter speakers without awkwardness.
Budget: $20 to $50. Best for: polished remarks and press photos. For tabletop styling that informs podium dressing, see our Valentine’s Day table setting ideas.
13. The Ribbon and Scissors Display
Present the ceremonial ribbon and oversized scissors as decor before the cutting: stretch the ribbon across the stage front between two stanchions or floral towers, and display the scissors on a velvet cushion on a small draped table beside the podium. The setup builds anticipation and photographs as a still life of the coming moment.
Pre-score the ribbon with a tiny nick at the cutting point so it parts cleanly on camera. Brief the cutter on grip and angle; oversized scissors are unwieldy for the uninitiated. After the cut, the ribbon pieces become souvenirs; offer segments to VIP guests as mementos.
Budget: $25 to $50. Best for: ceremony anticipation and tradition. Keep a backup ribbon ready; ribbons tear, snag, and occasionally vanish.
14. The Guest Book and Wishes Table
Place an elegant guest book or wishes station at the stage’s edge where it is visible but not in the ceremony’s way. A beautiful book, quality pens, and a small floral arrangement invite guests to leave messages during natural pauses. The collected wishes become a treasured artifact and excellent anniversary content.
For a modern twist, offer a video wishes booth: a phone on a tripod with a sign inviting 15-second messages. Compile the clips into a thank-you video within a week while the emotion is fresh. Either format gives guests a role beyond audience, deepening their connection to your story.
Budget: $20 to $60. Best for: guest participation and keepsakes. Station a team member nearby to invite participation; unstaffed stations get ignored.
15. The Branded Backdrop Sign
Mount your business name in large dimensional letters, a neon-style sign, or an illuminated logo at the center of the backdrop. This is the element that makes every stage photo unmistakably yours, and it becomes a permanent interior feature afterward. Dimensional letters photograph with a presence that flat prints cannot match.
Size the sign for the camera: letters at least 8 inches tall for readability in group photos. Light it separately from the backdrop wash so it pops. If a custom sign exceeds the one-day budget, rent one; many sign shops rent dimensional letters and neon-style pieces for events.
Budget: $80 to $300 (or rental). Best for: brand presence and permanent reuse. For broader styling context, our wedding day decoration ideas at home guide covers the hospitality details that make staged spaces feel welcoming.
Backdrop Materials Compared
Choosing the right backdrop material is the highest-leverage decision in stage decoration. This table compares the practical options.
| Material | Look and Feel | Typical Cost (10×10 ft) | Setup Time | Reuse Value |
|---|---|---|---|---|
| Draped fabric (chiffon/polyester) | Soft, elegant, premium | $80 to $300 | 1 to 2 hours | High; fabric stores compactly |
| Printed step-and-repeat (fabric) | Branded, corporate, red-carpet | $100 to $250 | 30 minutes | High; use for all events |
| Faux green wall panels | Organic, lush, modern | $120 to $400 | 45 minutes | Very high; permanent decor option |
| Balloon wall | Festive, colorful, joyful | $100 to $350 | 3 to 5 hours | None; single-day lifespan |
| Sequin/shimmer wall panels | Glamorous, sparkling, photo-magnetic | $150 to $400 | 1 hour | High; stores flat |
| Printed vinyl banner | Bold, graphic, budget-friendly | $50 to $150 | 20 minutes | Medium; keep for anniversaries |
| Wooden pallet/slat wall | Rustic, artisanal, textured | $60 to $200 DIY | 2 to 3 hours | High; doubles as interior feature |
When budget forces a choice, prioritize the backdrop over every other stage element. It occupies the most photographic real estate and defines the event’s visual identity. A $200 backdrop with $50 of supporting elements outperforms a $50 backdrop with $200 of supporting elements every time.
Coordinating Sound and Lighting
A beautiful stage with bad sound is a failed stage; guests forgive plain decor but not inaudible speeches. Coordinate these technical elements with the same care as the decorations.
Sound basics: one quality wireless microphone beats three mediocre wired ones. Test the mic at the actual podium position during setup, with the room in its event configuration; empty-room acoustics lie. Keep a backup mic with fresh batteries within arm’s reach. Brief every speaker: hold the mic four to six inches from the mouth, speak across it rather than directly into it to avoid pops, and never tap it to test.
Lighting basics: the speaker’s face needs dedicated light, ideally a warm spotlight from the front-side angle that models features without harsh shadows. Room lighting should dim slightly for remarks but never so far that photographers cannot shoot; modern phone cameras need reasonable ambient light. Coordinate a simple cue sheet: house lights at 70 percent for arrivals, 40 percent with spot for remarks, full for the ribbon cutting and celebration.
Music cues: prepare three tracks: upbeat background for arrivals, a short fanfare or swell for the ribbon cutting, and celebratory music for the post-ceremony mingling. Assign one person to audio cues with a printed cue sheet and a rehearsal. Fumbling with a phone for the right track during the ceremony is painfully common and entirely preventable.
Power and safety: map every powered element, lights, sound, screens, to outlets in advance, tape down all cables with gaffer tape (never duct tape on floors), and keep a small kit of extension cords, power strips, gaffer tape, and spare batteries at the side of the stage. One tripped breaker during remarks is a story nobody wants.
Rental vs. Buy: The Smart Math
Some stage elements deserve purchase; others should always be rented. The rule is frequency: if you will use it three or more times a year, buy; if once, rent.
| Item | Typical Rental | Typical Purchase | Verdict |
|---|---|---|---|
| Pipe-and-drape frame (10×10) | $75 to $150 | $200 to $400 | Buy if hosting quarterly events |
| LED uplights (pair) | $40 to $80 | $60 to $150 | Buy; useful for every evening event |
| Marquee letters | $100 to $250 | $300 to $800 | Rent; single-message items gather dust |
| Red carpet (10 ft) | $30 to $60 | $80 to $200 | Buy basic; rent custom logo |
| Stanchions (set of 4) | $30 to $60 | $80 to $160 | Buy; endlessly useful |
| Professional sound system | $150 to $400 | $500 to $2,000 | Rent unless events are monthly |
| Oversized scissors | $15 to $30 | $25 to $50 | Buy; it is a keepsake |
Build your permanent event kit over time: uplights, stanchions, drapery, a carpet, and the scissors live in one labeled bin and cut every future event’s decoration cost dramatically. Rent the spectacular one-offs, the sound system, the marquee letters, the confetti cannons, that make each occasion feel special without owning depreciating novelties.
Watch: Stage Backdrop Decoration Basics
This tutorial walks through simple, attractive stage backdrop ideas with full material lists, perfect inspiration for building your grand opening stage on a sensible budget with professional-looking results.
Watch on YouTube: Basic Stage Decoration Ideas | Backdrop Decoration Ideas
Frequently Asked Questions
Do I really need a stage for a small grand opening?
Not a raised platform, but you need a defined ceremony spot. For gatherings under fifty guests, a beautifully dressed area, backdrop, carpet marker, and framing, performs the same function while feeling more intimate and accessible. Raise the platform only when the crowd is large enough that rear guests cannot see, or when the ceremony must be visible over heads. The decoration principles in this guide apply at any scale.
How much does stage decoration cost for a grand opening?
A complete DIY stage, draped backdrop, carpet, framing florals or balloons, lighting, and details, typically costs $300 to $800. Hiring a decorator or event stylist for the stage alone runs $800 to $2,500 depending on market and complexity. The backdrop is the highest-leverage spend; allocate the largest share of your stage budget there, as the comparison table in this guide shows.
What size should my stage backdrop be?
Minimum eight feet wide by eight feet tall for small ceremonies; ten by ten feet is the versatile standard that fills camera frames for groups of up to six people. For larger crowds or press coverage, go twelve to sixteen feet wide. The backdrop must be wider than the widest group photo you will take; measure your expected VIP lineup and add two feet per side.
How do I keep a stage backdrop from falling over?
Use proper weighted bases on pipe-and-drape frames, sandbags on outdoor structures, and wall anchors where permitted. Never rely on friction or hope. Test stability by gently pushing the structure during setup; if it wobbles empty, it will fail with fabric, lights, and curious children added. For outdoor stages, have a wind plan with a defined takedown threshold, typically sustained winds above 25 mph.
What lighting do I need for an indoor daytime ceremony?
Even in daylight, add a warm spotlight on the speaker’s face and uplights washing the backdrop; indoor fluorescents flatten everything and cast unflattering shadows. If the room has windows, position the stage so daylight falls on faces rather than creating backlit silhouettes. For evening events, the fairy light canopy plus uplights plus one speaker spot covers most needs for under $150.
How long should the ceremony portion last?
Fifteen to twenty minutes total: two to three minutes of welcome remarks, brief thanks, the ribbon cutting itself, and an immediate transition to celebration. Attention spans are short and the crowd’s energy peaks at the cut; every minute of speeches after that peak diminishes returns. Rehearse remarks with a timer; speakers consistently underestimate their length by half.
Should the stage stay up after the ceremony?
Yes, repurpose it. The backdrop becomes the event’s photo station, the floral towers move to flank it for portraits, and the dressed podium becomes the announcements spot. A stage that transforms into a photo opportunity earns double value from the same investment. Keep it tidy through the transition; assign someone to reset the area within ten minutes of the ceremony’s end.
What if my venue has no good wall for a backdrop?
Use a freestanding pipe-and-drape frame, which needs no wall at all, or build the backdrop as a room divider that also improves the space’s flow. Outdoor openings can use a pop-up canopy frame dressed with fabric as a stage structure. Ugly walls are actually the best argument for a full backdrop; the worse the wall, the more transformative the drapery.
How do I coordinate photographers with the stage design?
Brief your photographer during setup, not during the event. Walk them through the ceremony sequence, mark their preferred shooting positions with tape, and confirm the lighting cue sheet with them. Ensure the backdrop is lit for cameras, not just eyes; what looks fine in person can photograph dark. Reserve the front-center position for the official photographer and ask guests to keep phone cameras low during the actual cutting.
Can I reuse stage decorations for future events?
Absolutely, and you should plan for it. Draped fabric, uplights, stanchions, carpets, green wall panels, and the step-and-repeat are all multi-use investments; store them as a labeled event kit. Design backdrops without event-specific dates where possible so they serve anniversaries and promotions. Each reuse drives your effective per-event cost down and your polish up, since practice improves every installation.
Your stage is where your opening becomes official: the speeches, the snip of the ribbon, the toast that everyone remembers. Dress its five zones with intention, light it like the moment matters, keep the ceremony tight, and give every element a second act after the applause. Do that, and the photographs from those fifteen minutes will represent your business beautifully for years to come.