
If you loved learning the basics of rangoli, this pattern gallery is your next step: twenty easy rangoli patterns for Diwali, each with a difficulty rating, time estimate, best placement, and clear step-by-step instructions. Unlike a technique tutorial, this guide is organized like a design catalog you can browse, pick from, and combine. You will find classic diya motifs, floral medallions, geometric grids, border patterns, footprint trails, and modern minimalist designs, plus guidance on choosing the right pattern for your space, scaling designs up or down, mixing patterns across the five days of Diwali, and fixing common problems. Every pattern here is rated beginner to easy-intermediate, and each can be completed in under an hour. Keep this guide open on Diwali morning and choose the pattern that matches your mood, your space, and your available time.
How to Choose the Right Pattern
Before browsing the gallery, consider four factors. First, your skill level: if this is your first rangoli, stick to one-star patterns; if you have made a few, try two-star designs. Second, your space: measure the area and choose a pattern sized to fit with margin around it; a good rule is that the rangoli should occupy about two-thirds of the available floor area. Third, your time: Diwali morning is busy, so match the pattern’s time estimate to your real schedule, not your ideal one. Fourth, the viewing angle: entrance rangolis are seen from standing height and from the side, so bold, high-contrast patterns work best; puja-room rangolis are seen up close, so finer detail pays off. The table below summarizes the full gallery for quick selection.
| # | Pattern | Difficulty | Time | Best Placement |
|---|---|---|---|---|
| 1 | Classic Diya Row | ★ Very easy | 15 min | Entrance steps |
| 2 | Marigold Medallion | ★ Very easy | 20 min | Entrance center |
| 3 | Dot-Star | ★ Very easy | 20 min | Hallway or lobby |
| 4 | Petal Diya Circle | ★ Very easy | 20 min | Balcony or courtyard |
| 5 | Corner Fans | ★ Very easy | 15 min | Room corners |
| 6 | Footprint Trail | ★ Very easy | 15 min | Entrance to puja room |
| 7 | Flower of Eight | ★★ Easy | 30 min | Entrance center |
| 8 | Diamond Grid | ★★ Easy | 30 min | Living room |
| 9 | Paisley Pair | ★★ Easy | 30 min | Puja room entrance |
| 10 | Concentric Celebration | ★★ Easy | 25 min | Courtyard |
| 11 | Lotus Bloom | ★★ Easy | 35 min | Puja altar front |
| 12 | Star Border Runner | ★★ Easy | 30 min | Hallway runner |
| 13 | Peacock Feather Fan | ★★★ Medium | 45 min | Entrance (showpiece) |
| 14 | Square Mandala Bands | ★★★ Medium | 45 min | Living room center |
| 15 | Welcome Arch | ★★★ Medium | 45 min | Main door |
| 16 | Floating Diya Mandala | ★★★ Medium | 40 min | Center table surround |
| 17 | Kolam Loop Practice | ★★★ Medium | 40 min | Doorstep (daily) |
| 18 | Minimalist White Line | ★★ Easy | 20 min | Modern interiors |
| 19 | Rainbow Chakra | ★★ Easy | 25 min | Kids’ areas |
| 20 | Grand Festival Medallion | ★★★ Medium | 60 min | Main entrance (Diwali night) |
Very Easy Patterns (★): First-Timer Friendly
These six patterns need no prior experience. If you can sprinkle powder inside a line, you can make these.
Pattern 1: Classic Diya Row
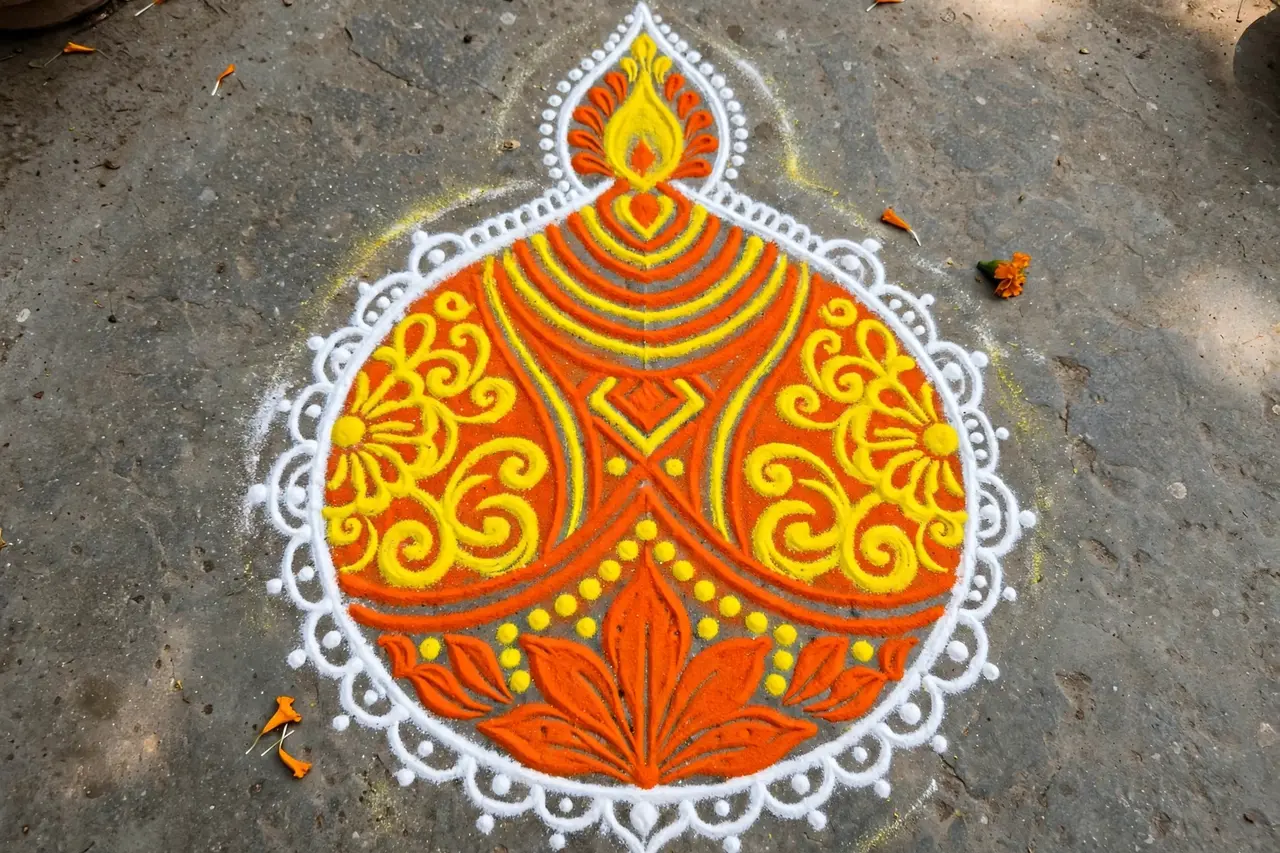
Draw three to five large diya outlines in a row with chalk along your entrance steps or hallway. Fill each diya bowl with orange powder and each flame with yellow and red. Add white outlines and a row of white dots beneath. Place a real diya in front of each drawn diya. The repetition creates rhythm, and the design scales to any length; add more diyas for longer spaces. Time: fifteen minutes for five diyas.
Pattern 2: Marigold Medallion
Draw a two-foot circle in chalk. Fill the circle’s edge with a ring of orange marigold heads placed side by side. Make an inner ring of yellow marigolds. Fill the center with red rose petals. No powder handling required beyond the optional chalk circle, and the result is lush, fragrant, and foolproof. Refresh petals on Diwali evening if they wilt.
Pattern 3: Dot-Star
Mark dots in a star shape: one center dot, eight dots in a circle around it. Connect the center to each outer dot with white powder lines, forming an eight-pointed star. Fill alternating star segments with red and yellow. Add a dot of green at the center. The geometric precision looks impressive, but the dots do all the work for you.
Pattern 4: Petal Diya Circle
Arrange marigold petals in the shape of a giant diya: an oval bowl of orange petals, a flame of yellow and red petals above it. Surround with a circle of white powder. Place LED tea lights around the border. Entirely repositionable until you are happy, which makes it stress-free.
Pattern 5: Corner Fans
In each corner of a room or entrance area, draw a quarter-circle fan with chalk: three arcs radiating from the corner point. Fill alternating segments with two colors (orange and yellow, or pink and white). Add white dots along each arc. Corner patterns frame a space elegantly and avoid foot traffic entirely.
Pattern 6: Footprint Trail
Cut a foot stencil from cardboard or draw freehand small footprints (an oval with five toe dots) leading from your entrance toward the puja area. Fill with red powder, outline in white. Space footprints a foot apart. This beloved tradition symbolizes Goddess Lakshmi’s arrival and children find it magical.
Easy Patterns (★★): Building Confidence
These six patterns introduce dot grids, symmetry, and slightly more complex motifs. They are very achievable after one or two practice attempts.
Pattern 7: Flower of Eight
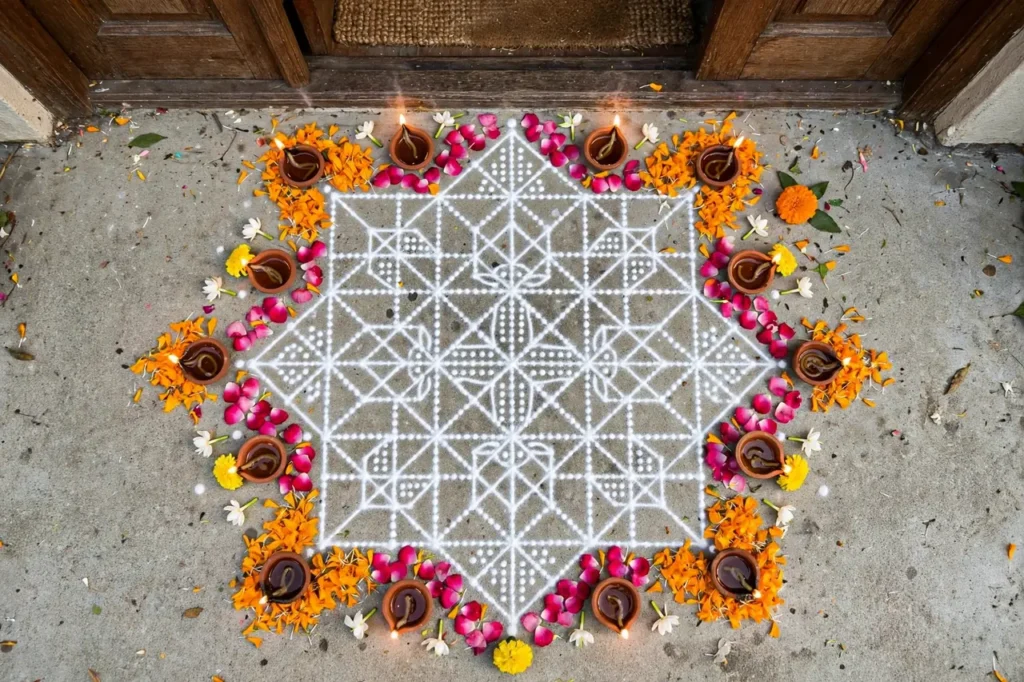
Mark a 5×5 dot grid. Draw eight petals radiating from the center, each petal spanning from the center dot to an outer dot. Fill alternating petals with red and orange powder. Place a yellow circle at the center and green dots between petals. Outline all petals in white. The grid guarantees symmetry; the flower looks professionally designed.
Pattern 8: Diamond Grid
Draw a large diamond (rotated square) in white powder, then progressively smaller diamonds inside it, creating four to five nested bands. Fill each band with a different color: outer red, then orange, yellow, green, with a white center diamond. Add small dots at each diamond’s corners. The nested geometry is mesmerizing and the straight lines are easy with a ruler or string guide.
Pattern 9: Paisley Pair
Draw two large paisley (mango) shapes curving toward each other with chalk. Fill one with deep red and the other with bright orange powder. Decorate each paisley interior with white dots, small flowers, and curved lines. Connect the pair with a green dotted vine. Paisleys are auspicious and elegant; this symmetrical pair suits puja room entrances beautifully.
Pattern 10: Concentric Celebration
Draw three concentric circles in white powder. Divide the middle ring into twelve equal segments (like a clock) and fill alternating segments with different colors for a color-wheel effect. Fill the inner circle with yellow and place a diya at the center. Scatter petals in the outer ring. At dusk, light the center diya for a glowing mandala.
Pattern 11: Lotus Bloom
Draw a lotus with eight petals using chalk: start with a center bud shape, then add petals in two layers. Fill inner petals with pink and outer petals with a deeper magenta. Add yellow at the petal bases and white outlines throughout. Place the lotus before the puja altar; the lotus is Goddess Lakshmi’s seat and deeply appropriate. Practice the petal shape on paper first; consistent petals are the key.
Pattern 12: Star Border Runner
Instead of a centerpiece, create a runner along a hallway: draw a straight guideline in chalk, then repeat a small star or diamond motif every six inches along it. Fill motifs in alternating colors. Add parallel white lines on both sides of the runner. This linear pattern guides guests visually through your home and is wonderfully simple to execute.
Medium Patterns (★★★): Showpieces
These eight patterns are your Diwali-night showpieces. They take longer but reward the effort with stunning results.
Pattern 13: Peacock Feather Fan
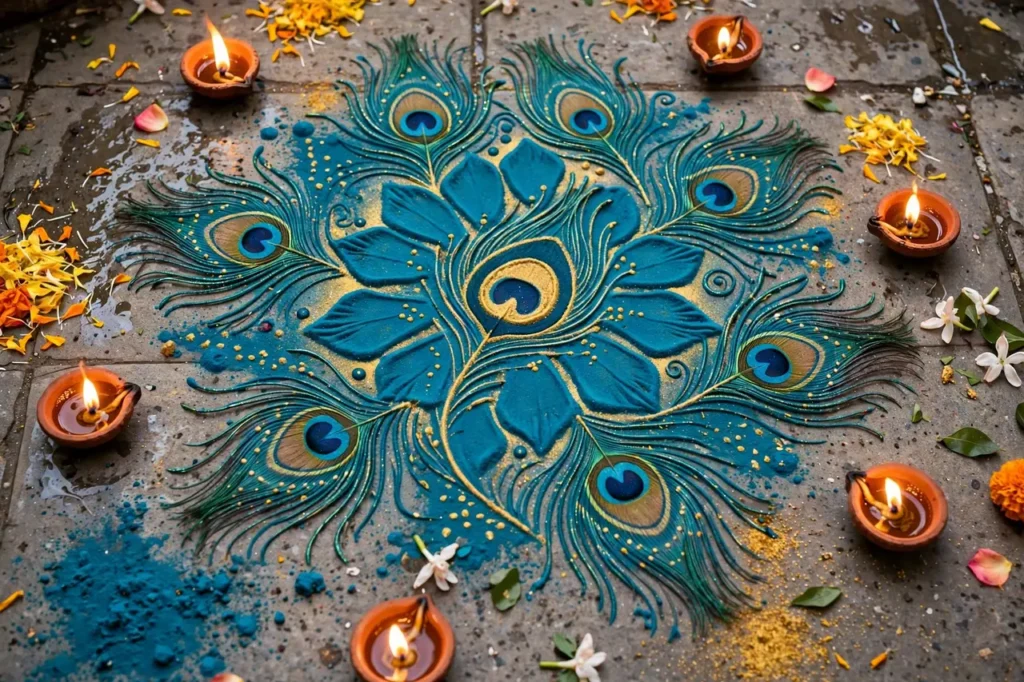
Draw a large fan shape (semi-circle) with chalk. Within it, draw five to seven peacock feather “eyes”: teardrop shapes with layered colors (outer teal, middle gold, inner deep blue with a white highlight). Fill the fan background with deep blue powder and add white dot details. This is the most admired pattern in the gallery; take your time with the feather eyes, as they are the focal point. Allow forty-five minutes and practice one feather on paper first.
Pattern 14: Square Mandala Bands
Mark dots in concentric squares on the floor. Fill each square band with a different color, working from the outermost band inward: red, orange, yellow, green, blue. Add white dot borders between bands and small flower motifs in the corners of each band. Finish with a diya or lotus motif at the center. The structured bands make this complex-looking design surprisingly systematic.
Pattern 15: Welcome Arch
Draw a large semi-circular arch, like a doorway toran rendered in rangoli, spanning three to four feet. Fill the arch band with alternating segments of marigold-orange and leaf-green. Inside the arch, draw a diya motif or write “Shubh Diwali” in powder (practice lettering on paper first). Flank the arch with piles of petals and real diyas. This grand entrance piece announces the festival to every visitor.
Pattern 16: Floating Diya Mandala
Create a rangoli mandala on a large tray or board (not the floor): concentric circles filled with colored powders and petals. Place small floating diyas or LED tea lights on the design. This portable rangoli can be made in advance, carried to the table or entrance when ready, and avoids all foot-traffic worries. It also works beautifully as a dining table centerpiece.
Pattern 17: Kolam Loop Practice
Try the Tamil pulli kolam technique: mark a 5×5 dot grid, then draw a single continuous looping line that weaves around the dots without lifting your finger (metaphorically; you will lift the powder flow). Start by tracing published kolam patterns slowly. The meditative, unbroken line is deeply traditional and the result has an elegant, lace-like quality. This pattern rewards patience over artistic talent.
Pattern 18: Minimalist White Line
For modern interiors, skip color entirely: draw a single elegant design, a large diya, a lotus outline, or geometric lines, in white powder on a dark floor (or white chalk on a dark tray). The restraint is striking and sophisticated. Add one small cluster of colored petals or a single red dot as an accent. This pattern proves that rangoli can suit any aesthetic.
Pattern 19: Rainbow Chakra
Draw a large circle divided into seven segments like a color wheel. Fill each segment with a rainbow color: red, orange, yellow, green, blue, indigo, violet. Outline in white and add white dots along the divisions. Kids love making this pattern; assign each child one color segment. Cheerful, vibrant, and impossible to get wrong.
Pattern 20: Grand Festival Medallion
Your Diwali-night masterpiece, combining everything: a four-foot medallion with a lotus center, surrounded by a ring of diya motifs, then a band of geometric patterns, then an outer ring of petals and real diyas. Plan it on paper first, allocate a full hour, and consider making it a family project with each person owning one ring. This is the rangoli guests will photograph and remember.
Scaling Patterns Up or Down
Any pattern can be resized. To scale up, use a grid: draw your small design on paper over a grid, then draw a proportionally larger grid on the floor and copy square by square. To scale down, simplify: reduce the number of rings, petals, or repetitions while keeping the core motif. A good rule is that details should be visible from the expected viewing distance; entrance rangolis viewed from six feet need bolder, larger elements than puja-room rangolis viewed from two feet. When enlarging dot-grid patterns, increase the dot spacing rather than the dot count to keep the work manageable. Always test a new size on newspaper first; scaling surprises even experienced makers.
Combining Patterns Across the Five Days
Diwali’s five days are an opportunity for a rangoli series rather than a single design. Consider this progression: Dhanteras, a simple diya row to welcome the festival; Choti Diwali, a flower medallion as you finish decorating; Diwali night, the grand festival medallion as your showpiece; Govardhan Puja, a petal circle (quick, after the big night); Bhai Dooj, a footprint trail celebrating family bonds. Alternatively, create a journey: a footprint trail on day one leading to a new pattern each day, culminating in the grand medallion. Photograph each day’s rangoli to create a festival diary. This approach keeps the art fresh, gives you multiple chances to practice, and turns rangoli into a five-day creative ritual rather than a one-time task.
Color Theory for Rangoli Makers
Understanding a little color theory elevates every pattern. Complementary colors (opposite on the color wheel: red-green, blue-orange, yellow-purple) create maximum vibrancy when placed adjacent; use them for festive energy. Analogous colors (neighbors: red-orange-yellow) create harmony and warmth; use them for elegant, cohesive designs. Always include white or a light neutral for outlines and breathing space; without it, colors bleed visually into mud. Dark outlines (deep blue or black powder) around bright fills make colors pop dramatically. Consider the floor color: on light marble, deep colors (red, blue, green) show best; on dark floors, whites, yellows, and pastels shine. Test your palette by sprinkling small piles of your chosen colors together before committing; what looks good in the packet does not always work on the floor. And remember lighting: colors look different in daylight versus diya-light, so check your design under the lighting it will be viewed in.
Troubleshooting Common Problems
| Problem | Cause | Fix |
|---|---|---|
| Powder clumps and won’t flow | Moisture in powder or on floor | Store powder airtight with rice grains; ensure floor is completely dry |
| Lines look wobbly | Pouring too fast or hand too high | Slow down; keep fingers close to the floor; use chalk guides |
| Colors look muddy | Too many colors touching; no white separation | Add white outlines between colors; limit palette to 4-5 colors |
| Design is lopsided | Asymmetric dot grid or freehand drift | Count grid dots twice; work from center outward |
| Powder blows away outdoors | Wind | Work in calm morning air; switch to petals or heavier grains outside |
| Rangoli gets stepped on | Poor placement | Choose low-traffic spots; ring with diyas as a visual barrier |
| Stencil smudges on lifting | Lifting too fast or at an angle | Lift very slowly, straight up; ensure powder layer is thin |
| Petals wilt quickly | Heat and dry air | Use fresh petals; mist lightly; make petal rangolis close to viewing time |
Rangoli Patterns for Each Day of Diwali
Diwali’s five days invite a progression of patterns rather than a single design. This day-by-day plan builds your skills through the festival while keeping each day’s rangoli fresh. On Dhanteras, start simple with Pattern 1 (Classic Diya Row) or Pattern 6 (Footprint Trail) to welcome the festival; these quick designs suit a busy day of shopping and preparation. On Choti Diwali, step up to Pattern 7 (Flower of Eight) or Pattern 2 (Marigold Medallion) as you finish decorating the house; the extra time available makes a slightly more elaborate design enjoyable. On Diwali morning, create your showpiece: Pattern 20 (Grand Festival Medallion) or Pattern 13 (Peacock Feather Fan) for the main entrance, the design guests will photograph all evening. On Govardhan Puja, go gentle with Pattern 4 (Petal Diya Circle); after the big night, a quick petal refresh maintains the festive feel without demanding hours. On Bhai Dooj, close with Pattern 6 (Footprint Trail) leading to the dining area where siblings gather, a sweet symbol of family bonds. Photograph each day’s creation to build a festival diary; over the years, these diaries become treasured records of your growing skill.
Photographing Your Rangoli Like a Pro
Your rangoli deserves great photos, and a few techniques make all the difference. Shoot in soft light: early morning or dusk with diyas lit flatters colors far better than harsh midday sun. Take two essential shots: one straight top-down (stand on a sturdy chair or shoot from a balcony) to capture the full symmetry, and one low-angle shot to show texture and dimension. Photograph twice: once in daylight to show the colors accurately, and once at dusk with diyas lit for the magical glowing version. Clean the surrounding floor before shooting; stray powder specks distract from the design. Include a human element in one shot, a hand placing the final diya or children’s feet beside the pattern, for scale and warmth. If sharing online, natural light and minimal filters show respect for the art; the rangoli community appreciates authentic colors. These photos become your portfolio, your festival diary, and your inspiration file for next year.
Rangoli with Kids: Family Pattern Projects
Rangoli is a wonderful family activity when patterns are chosen for collaboration. Assign roles by age: adults draw chalk outlines and handle fine details, school-age kids fill colors inside outlines, and young children place petals and press stencils. The Rainbow Chakra (Pattern 19) is ideal for families: each child owns one color segment, eliminating arguments about who does what. Petal rangolis suit all ages since petals are repositionable and there is no “wrong” placement. Turn it into a game: who can place the most symmetrical petals, or a timed challenge to complete a stencil design. For teens, the Kolam Loop (Pattern 17) offers a satisfying skill challenge. Always celebrate the finished family rangoli with a photo of everyone around it; children who help create the festival’s beauty feel ownership of the tradition. Our Christmas crafts for kids guide has more collaborative craft ideas that work for any festival.
Mixing and Matching: Creating Your Own Combinations
Once you know several patterns, start combining them into original designs. Use a border pattern (like the Star Border Runner) to frame a centerpiece medallion; pair a Corner Fan arrangement with a central Flower of Eight; surround a Minimalist White Line design with a ring of marigold petals for contrast. The design principles are simple: repeat one motif for rhythm, vary scale between large center elements and small border details, and keep the color palette consistent across combined patterns. Sketch combinations on paper first; what works in your head does not always work on the floor. Combining patterns is how beginners develop a personal style; within a few festivals, you will have signature combinations that feel uniquely yours.
Watch: Easy Rangoli Patterns Step by Step
Watch this step-by-step video tutorial for a beautiful, easy rangoli design perfect for Diwali, and follow along to create your own.
Frequently Asked Questions
What is the easiest rangoli pattern for Diwali?
The classic diya row or a marigold medallion: both take under twenty minutes, need no special skills, and look unmistakably festive. Stencil patterns are equally easy and produce professional results on the first try.
How do I choose between powder and petal rangoli?
Use powder for intricate, long-lasting designs and petal rangoli for quick, fragrant, natural looks. Many makers combine both: powder outlines with petal fills. Petals are more forgiving for beginners since they can be repositioned.
Can I reuse a rangoli pattern for multiple days?
Yes, but tradition favors fresh rangolis. A practical compromise: refresh the existing design each morning by touching up colors and replacing wilted petals, and create one entirely new showpiece for Diwali night itself.
How do I make my rangoli symmetrical?
Use dot grids, work from the center outward, and count carefully. For freehand designs, draw one half, then mirror it. Stencils guarantee symmetry with zero effort. Symmetry is the single biggest factor in a professional-looking rangoli.
What size should my Diwali rangoli be?
Match the space: two to three feet for doorsteps and puja areas, three to five feet for entrances and living rooms. The rangoli should fill about two-thirds of the available floor area. Bigger is not always better; a clean small design beats a messy large one.
How do I protect my rangoli from foot traffic?
Place it where people naturally walk around, not through; ring it with diyas or flower garlands as a visual barrier; and make it after major foot traffic subsides. For unavoidable high-traffic spots, use a tray-based portable rangoli.
Are there eco-friendly rangoli options?
Absolutely: rice flour, turmeric, kumkum, dried flower petals, and coffee powder make beautiful natural colors. Rice-flour rangolis even feed ants and birds, continuing the tradition’s original purpose. Avoid synthetic chemical powders.
How long does it take to learn rangoli?
You can make attractive simple rangolis on your first attempt using stencils or dot grids. Freehand confidence typically develops over one festival season of regular practice. Daily small kolams accelerate learning dramatically.
Can children make these patterns?
Yes. Kids excel at petal rangolis, stencil designs, the rainbow chakra (assign each child a color), and sprinkling colors inside adult-drawn outlines. Rangoli is a wonderful family activity; our Christmas crafts for kids guide has similar collaborative craft ideas.
What should I do with the rangoli after Diwali?
Sweep it up respectfully the morning after the festival. Compost flower petals and natural powders; discard synthetic materials responsibly. Many families save a photograph in a festival album. The impermanence is part of the art’s philosophy.
Keep Exploring Festival Ideas
For more Diwali creativity, see our Diwali and the Hindu New Year guide for festival traditions, our Christmas wreath ideas for the front door for entrance decorating inspiration, and our Christmas decoration ideas for seasonal styling techniques.