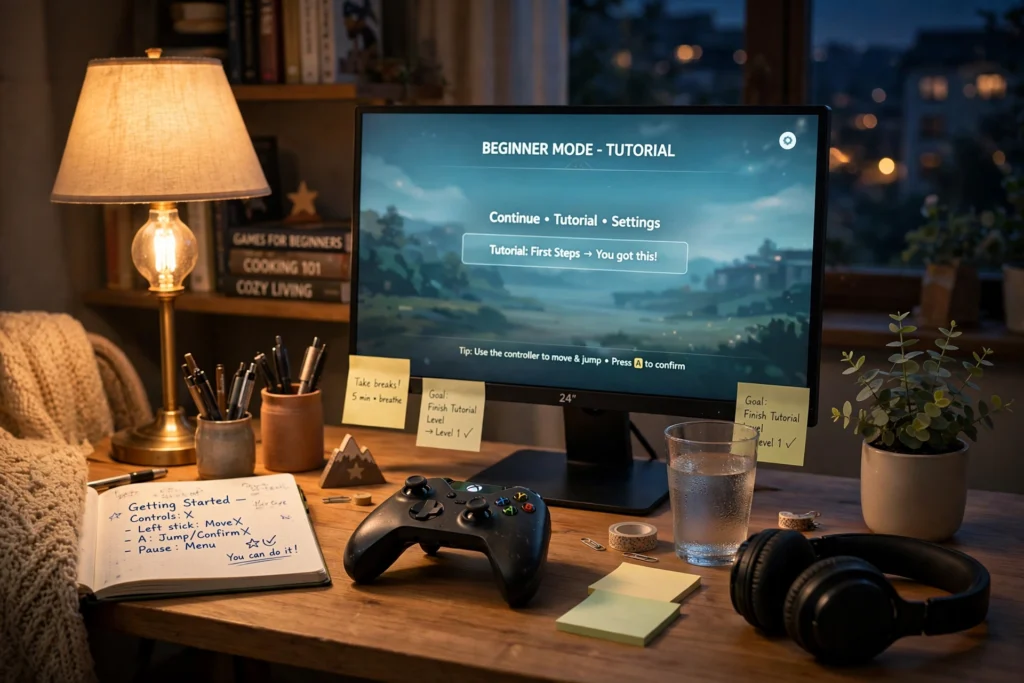
Here’s a truth the gaming industry doesn’t advertise: you don’t need a $2,000 PC and a battlestation that looks like a spaceship to have an amazing time playing games. Some of the happiest gamers in the world play on a secondhand console, a $30 headset, and a hand-me-down desk — because a great budget gaming setup isn’t about the price tag on any single item. It’s about spending smart, in the right order, on the things that actually change how games feel.
This guide is a playbook, not a shopping list. We’ll walk you through two complete paths to a full setup for under $500 — the console path and the PC path — then cover the parts most beginners get wrong: the desk, the chair, audio, and lighting. Finally, you’ll get a phased upgrade roadmap so every dollar you spend later builds on what you already have instead of replacing it. Whether you’re setting up your first gaming space or rebuilding on a tight budget, this is the whole game plan.
The Golden Rules of a Budget Gaming Setup
Before we touch a single product recommendation, let’s establish the principles that separate a smart budget gaming setup from a pile of cheap regrets. These five rules govern every decision in this playbook, and they’ll save you hundreds of dollars over the life of your setup.
Rule 1: The whole setup is the product, not just the machine. Beginners obsess over the console or PC and then play hunched over on a barstool with TV speakers. A balanced $500 setup — decent machine, decent chair, decent audio — beats a $500 machine with nothing else, every single time. Comfort and sound affect every minute of play; raw graphics power only affects some of it.
Rule 2: Buy used where it doesn’t matter, buy new where it does. Consoles, monitors, desks, and chairs are fantastic secondhand — they’re durable and easy to inspect. Headsets, mice, and keyboards (things that touch your skin or wear out) are usually worth buying new at budget prices. This one rule stretches $500 dramatically further.
Rule 3: Compatibility before coolness. Every purchase must work with your chosen path. A gorgeous monitor with the wrong ports, a headset that doesn’t connect to your console, a desk that doesn’t fit your room — these are the budget-killers. Measure your space, check your ports, then buy.
Rule 4: One bottleneck at a time. Your setup is only as good as its weakest link. There’s no point in a premium headset if your chair hurts after an hour, and no point in a fancy keyboard if your monitor is a decade old. Fix the worst thing first, then move on.
Rule 5: Leave upgrade headroom. Every item in this guide was chosen partly because it stays useful when you upgrade later. A good chair survives three PCs. A good headset works with every future console. Spend on things with long lives.
Path 1: The Console Path (Under $500)
The console path is the simplest, most reliable route to a complete budget gaming setup. You buy one box, plug it into a screen you may already own, and you’re playing within an hour. No drivers, no settings menus, no compatibility charts. For beginners, families, and anyone who just wants to play, this path wins on simplicity per dollar.
What to Buy: The Console Itself ($200–$300)
Your best value is a previous-generation or entry-level current console, ideally refurbished or secondhand. An Xbox Series S (often $250–$300 new, less refurbished) is the budget king: it plays all current games, includes access to Game Pass, and sips power. A refurbished PlayStation 5 Digital Edition or a Nintendo Switch (standard or OLED on sale) are equally valid depending on which games you want. The Switch is unbeatable for families and casual players; PlayStation and Xbox win for cinematic blockbusters and online multiplayer.
Buy refurbished from the manufacturer or a major retailer with a warranty — never a no-name marketplace seller with no return policy. Test it the day it arrives: disc drive (if it has one), controllers, Wi-Fi, and the fan noise under load.
The Screen: Use What You Have ($0–$120)
Here’s where the console path saves you a fortune: you probably already own a TV. Any modern TV works fine for starting out. If you don’t have one, a 24-inch monitor ($90–$120 new, half that used) doubles as a bedroom TV and a future PC monitor — it’s the smarter buy than a cheap TV because it stays useful if you ever switch paths.
Don’t chase 4K or 120Hz on this budget. A clean 1080p image on a decent panel looks fantastic, and the money is better spent literally anywhere else in this guide.
Console Path Sample Budget
| Item | Budget approach | Cost |
|---|---|---|
| Console (refurbished Series S / Switch / PS5 Digital) | Manufacturer-refurbished | $250 |
| Screen | Existing TV or used 24″ monitor | $0–$60 |
| Chair | Budget ergonomic office chair (see below) | $80 |
| Headset | Wired budget gaming headset | $30 |
| Lighting + comfort | LED strip, cable management | $25 |
| Game subscription (3 months) | Game Pass / PS Plus / Switch Online | $30 |
| Total | ~$415–$475 |
That leaves a cushion for a second controller or an extra game — and notice the chair and headset got real budget, not leftovers. That’s Rule 1 in action.
Path 2: The PC Path (Under $500)
The PC path takes more effort but rewards you with cheaper games (Steam sales are legendary), free online multiplayer, and a machine that also handles work, school, and creativity. Under $500, you’re not building a custom rig from shiny new parts — you’re assembling a smart mix of used and budget-new components. Done right, it plays modern games at 1080p with settings tuned sensibly, which is genuinely all most casual gamers need.
The Machine: Used Office PC + Budget GPU ($250–$350)
The classic budget move: buy a refurbished business desktop (a Dell OptiPlex or HP ProDesk with an Intel i5/i7, 16GB RAM, and an SSD — often $150–$200 refurbished), then add a low-power graphics card like a GTX 1650 or RX 6400 ($100–$150 new or used). These cards need no extra power cables, drop straight into most office PCs, and handle 1080p gaming at medium settings in the vast majority of titles.
Check three things before buying the office PC: that it has a PCIe x16 slot (nearly all do), that the power supply is at least 250W (fine for these cards), and that the case fits a low-profile or single-fan card if it’s a small-form-factor unit. When in doubt, buy the standard mini-tower version, not the ultra-slim one.
Alternative: a handheld or mini PC. If tinkering sounds miserable, a budget mini PC or a handheld gaming device (like a Steam Deck on sale or refurbished) gets you PC gaming with zero assembly. You’ll trade some raw performance for convenience — a fair deal for many beginners.
Peripherals: Where Budget PC Shines ($100–$150)
PC peripherals are where small money makes big differences. A $25 mouse with a decent sensor, a $35 membrane or budget mechanical keyboard, and a $30 headset cover your core needs. Buy these new — they’re wear items, and budget models from established brands are reliable. Skip RGB lighting and extra buttons you won’t use; spend the savings on the mouse sensor quality, which is what you’ll actually feel.
PC Path Sample Budget
| Item | Budget approach | Cost |
|---|---|---|
| Refurbished office PC (i5/i7, 16GB, SSD) | Business refurb, mini-tower | $175 |
| Graphics card (GTX 1650 / RX 6400 class) | New budget or used | $125 |
| Mouse + keyboard | Budget-new set | $55 |
| Monitor | Used 24″ 1080p | $60 |
| Headset | Wired budget headset | $30 |
| Desk + chair | Secondhand / budget (see below) | $50 |
| Total | ~$495 |
Tight, but complete — a real gaming PC, screen, controls, sound, and furniture for under $500. And every game you buy on Steam sale from here on costs a fraction of console prices, which pays back the effort fast.
Desk and Chair: The Unsexy Priority
Nobody posts their chair on social media, which is exactly why most budget gaming setup guides underweight it — and exactly why we’re giving it its own section. You will spend more hours touching your chair and desk than looking at your graphics settings. Back pain ends gaming sessions early; comfort extends them. This is the highest-ROI category in the entire playbook.
The Desk: Simple, Sturdy, Right-Sized ($0–$80)
You don’t need a “gaming desk.” You need a flat, stable surface at the right height (about 28–30 inches) with enough depth (24 inches minimum) for a monitor at arm’s length and room for your mouse. A secondhand office desk, a solid IKEA-style tabletop on legs, or even a sturdy dining table you already own all work perfectly. Measure your room first — a desk that’s too big for the space creates clutter stress that no RGB strip can fix.
If buying new on a budget, a basic 40-inch computer desk ($50–$80) is plenty for a single monitor or a console-plus-laptop arrangement. Prioritize stability over features: a wobbly desk with cup holders is worse than a rock-solid plain one.
The Chair: Your Most Important Purchase ($50–$120)
This is the hill we’ll die on: the chair is the single most impactful purchase in a budget gaming setup. A $60 ergonomic office chair with lumbar support and adjustable height beats a $150 “racing-style” gaming chair from an unknown brand in every way that matters — support, durability, and how your back feels at hour three.
Shop used office furniture stores, university surplus sales, and local marketplaces: quality office chairs from real ergonomic brands appear secondhand for $40–$80 constantly, because offices liquidate them in bulk. Sit in it before buying if you can. Check that the gas cylinder holds height, the tilt works, and the armrests (if any) don’t wobble. Your future self — the one gaming comfortably at midnight — thanks you.
Audio: The Cheapest Big Upgrade
Ask experienced gamers what transformed their setup most, and a surprising number say audio — not graphics. Good sound adds immersion that no settings menu can: footsteps behind you in a shooter, rain in an adventure game, a friend’s voice coming through clearly instead of through a tin can. And it’s the cheapest dramatic upgrade in this entire guide.
Headsets: What $30–$50 Actually Buys
A $30–$50 wired headset from an established brand delivers roughly 80% of the experience of a $150 one: clear game audio, a mic your friends can actually hear, and comfort for a few hours. Wired beats wireless at this price — budget wireless headsets cut corners on sound and battery to hit the price. Make sure the connection matches your path: 3.5mm works with nearly everything; USB headsets are PC-and-PlayStation friendly but need checking for Xbox.
Speakers vs. Headset: The Honest Tradeoff
Headsets win for immersion, late-night gaming, and voice chat — and they’re cheaper. Speakers win for shared living rooms, casual sessions, and anyone who hates things on their ears. On a $500 total budget, pick one: a headset if you play multiplayer or at night, a $40–$60 pair of powered bookshelf speakers if your setup is in a shared space. Don’t split the budget across both mediocrely.
Free Audio Upgrades
Before spending anything: turn on your platform’s free spatial audio (Windows Sonic, Sony’s 3D audio, and Dolby Atmos trials all cost nothing), position yourself centered between speakers, and lower in-game music volume slightly so dialogue and effects cut through. These three tweaks cost zero dollars and genuinely improve every game you own.
Lighting and Room Feel on a Budget
Lighting is the difference between “a desk in a bedroom” and “a gaming space.” It’s also absurdly cheap. Our eyes perceive contrast and color far more than raw brightness, so a $20 lighting setup can make a $400 rig feel premium. This is pure atmosphere-per-dollar — the best value in the playbook after the chair.
The $20 transformation: one USB-powered LED strip behind the monitor or desk ($12–$18) plus a warm-toned desk lamp or bulb you already own. The bias lighting behind the screen reduces eye strain in dark rooms and makes the display look richer; the warm lamp keeps the room from feeling like an interrogation chamber.
Level two ($30–$50): add a second strip along a shelf or behind the bed, or a small color-changing bulb in the room’s main lamp. Stick to warm whites and one accent color — rainbow-everything looks exciting for a week and tiring forever. Cozy beats flashy for spaces you actually live in.
What not to do: don’t light the room brighter than the screen (eye strain), don’t put lights where they reflect in the monitor, and don’t buy app-controlled “smart” lighting before the basics are covered — a dumb strip with a remote does the job at half the price.
Cables, Storage, and the Little Things ($20–$40 total)
The final 5% of a budget gaming setup is unglamorous and transformative: cable management. A $10 pack of Velcro ties, a $12 under-desk cable tray, and ten minutes of routing turn a rat’s nest into a clean space — which makes the whole setup feel more expensive and makes dusting and troubleshooting dramatically easier. Add a small surge protector ($15–$20, non-negotiable for protecting your gear), and a $10 microfiber cloth pack for the screen. These are the details that separate a setup that feels intentional from one that feels temporary.
Storage matters too: digital game libraries balloon fast. On console, a cheap external USB drive ($40–$50 for 1TB on sale) holds the games you’re not actively playing. On PC, a secondhand SATA SSD ($25–$35 for 500GB) is the best dollars-per-gigabyte upgrade in existence. Never let “storage full” be the reason you can’t play something new.
Your Upgrade Roadmap: Phases, Not Impulse Buys
Here’s where the playbook pays off long-term. Instead of randomly upgrading whatever looks shiny, follow this phased roadmap. Each phase targets your current bottleneck, and every purchase stays useful into the next phase. This is how a $500 setup becomes a genuinely great one over a year or two — without ever wasting money.
Phase 1: Fix Comfort (Months 1–3, ~$50–$100)
Whatever still hurts or annoys you daily gets fixed first. Usually that’s the chair (better lumbar cushion or a full chair upgrade), the headset (if the mic is trash), or lighting (if the room gives you headaches). Don’t buy performance upgrades yet — comfort is the bottleneck until comfort is solved.
Phase 2: Upgrade the Experience (Months 4–8, ~$100–$200)
Now target immersion: a better monitor (used 144Hz displays appear for $80–$120 and transform motion clarity), a quality headset or speakers, or a mechanical keyboard for PC players. Console players: this is the phase for an SSD storage expansion and a pro-style controller. Buy one item, live with it for a month, then decide what’s next.
Phase 3: Grow the Machine (Months 9+, ~$150–$300)
Only now — with comfort and experience dialed in — does raw power make sense. PC path: a stronger used graphics card (the used market is kind to patient buyers) or a CPU/motherboard jump if the office PC is truly maxed. Console path: this is when you start saving toward the next console generation or a premium display. Because phases 1 and 2 built a great foundation, phase 3 upgrades land on a setup worthy of them.
The golden rule of the roadmap: never finance upgrades, never buy two phases at once, and always sell or gift the old gear — the secondhand market that built your setup will happily fund its next phase.
Budget Setup Mistakes That Waste Your $500
Learn from everyone else’s regrets — these are the traps that turn a smart budget into an expensive lesson:
Buying the machine first and furnishing with leftovers. The classic error. A $400 PC on a $20 stool is a worse gaming experience than a $250 setup with a great chair. Budget the furniture into the $500 from the start.
Chasing specs you can’t perceive. On a budget display, the difference between high and ultra settings is nearly invisible — but the frame-rate cost is very real. Tune settings for smooth performance first; pretty screenshots are for marketing.
Ignoring the used market. Refurbished consoles, office PCs, monitors, and chairs are the entire reason a $500 setup is possible. Buying everything new at retail turns this playbook into a $900 project.
Subscription stacking. One game subscription is a fantastic deal; three overlapping ones is a leak. Pick the single service matching your path and actually finish games on it.
Upgrading sideways. Replacing a working $40 headset with a $60 headset is a $20 improvement. Replacing a painful chair with a comfortable one is a transformation. Always upgrade the weakest link, never a lateral move.
Frequently Asked Questions
Is $500 really enough for a good gaming setup?
Yes — if “good” means comfortable, great-sounding, and able to play modern games smoothly rather than maxing out every graphics setting. The sample budgets in this guide land complete setups between $415 and $495 by leaning on refurbished hardware, gear you already own, and smart prioritization. The upgrade roadmap then grows it over time.
Should I choose the console path or the PC path?
Choose console if you want simplicity: plug in and play, minimal tinkering, great for families and shared living rooms. Choose PC if you want cheaper games long-term, free online multiplayer, and a machine that doubles for work or school. Both paths hit under $500; the deciding factor is how much tinkering sounds fun versus annoying.
What’s the single best upgrade for under $50?
A comfortable seating improvement — usually a lumbar cushion or a used ergonomic office chair — or a $30–$50 wired headset. Both change every minute of play. After comfort and audio, an LED bias-lighting strip is the best under-$20 move in existence.
Can I use my TV instead of buying a monitor?
Absolutely — especially on the console path. Any modern TV works. The tradeoff is input lag (TVs are slightly slower to respond than monitors) and size (huge screens at desk distance cause neck strain). For couch gaming, a TV is ideal; for desk gaming, a 24-inch monitor is better. Start with what you own.
Is buying a used console or PC safe?
Yes, with basic precautions: buy refurbished from the manufacturer or a major retailer with a warranty and return window, test everything on day one, and check fan noise under load (loud = dusty or dying). Avoid no-name marketplace sellers with no returns. The savings — often 30–50% — are the engine of the entire budget playbook.
How do I keep the setup from looking cheap?
Cable management, consistent warm lighting, and a tidy desk do 90% of the work. A $10 pack of Velcro ties and a $15 LED strip make budget gear look intentional. Match your color scheme loosely (black gear + warm light is foolproof), hide the cables, and the setup photographs like it cost triple.
When should I upgrade beyond the $500 setup?
Follow the phased roadmap: fix comfort first (months 1–3), then immersion like the monitor and audio (months 4–8), then raw power (month 9+). Upgrade when a specific bottleneck annoys you regularly — not when a new product launches. If everything feels fine, save your money; the setup is doing its job.
Does a budget setup work for families sharing one space?
Very well — arguably better than an expensive one, since there’s less to worry about. The console path on the family TV is the classic shared setup. Add a second controller, keep a game subscription active for the library, use speakers instead of headsets so everyone hears, and set up parental controls on day one. It’s the most cost-effective family entertainment hub you can build.
Your Budget Gaming Setup Starts Today
A budget gaming setup was never about having less — it’s about choosing well. Pick your path, console or PC. Budget the chair and the audio like they matter, because they do. Light the room warm, tame the cables, and let the upgrade roadmap turn today’s $500 into something better every few months. The gamers having the most fun aren’t the ones with the most expensive rigs; they’re the ones whose setup disappeared beneath them — no pain, no friction, just the game.
Start with one decision today: your path. Everything else in this playbook flows from it. And remember — the best setup is the one you’re actually playing on tonight.