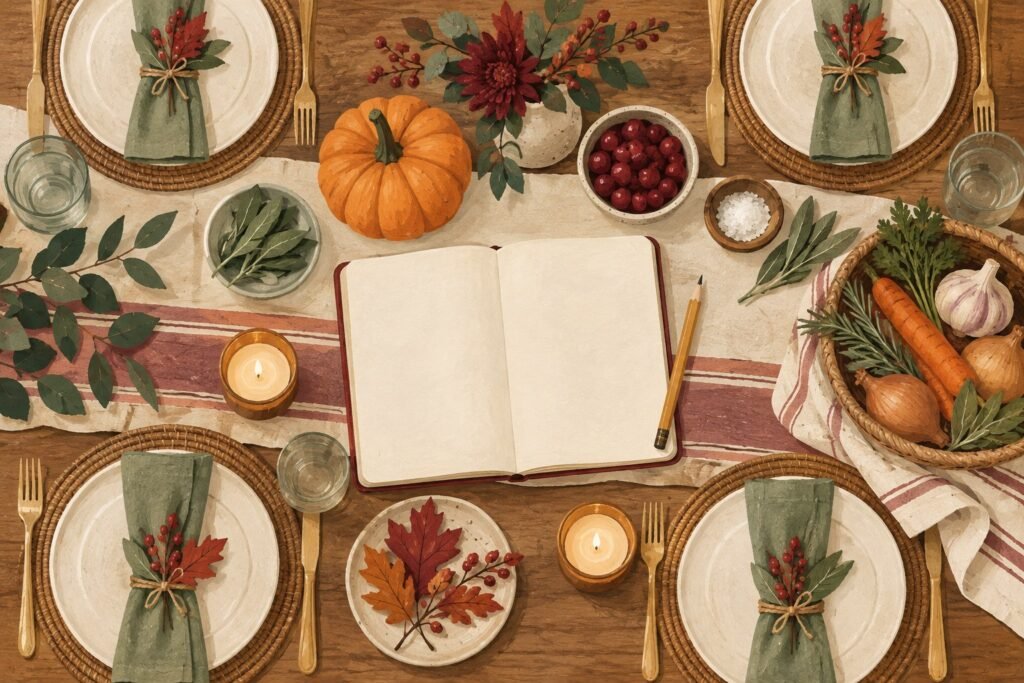
DIY Thanksgiving centerpieces are where holiday decorating gets personal. Unlike store-bought arrangements, a handmade centerpiece carries your taste, your garden’s bounty, and a story guests will ask about — and it typically costs a fraction of a florist design. Whether you have an afternoon or twenty minutes, this guide gives you twenty-five buildable DIY Thanksgiving centerpiece ideas across four styles, with full materials lists, step-by-step tutorials, budget breakdowns, and care tips.
You do not need crafting experience. Most of these projects use grocery-store pumpkins, yard clippings, candles, and basic supplies, and every tutorial below is written for a first-timer: exact materials, realistic time estimates, and the mistakes to avoid. By the end, you will have a centerpiece plan matched to your table, your timeline, and your budget.
Why Make Your Own Thanksgiving Centerpiece?
Three reasons: cost, customization, and meaning. A florist centerpiece for a holiday table typically runs $75–$150 and lasts a week; a DIY version built from pumpkins, gourds, and candles runs $15–$40 and often looks more abundant. Customization matters because your table is not a generic showroom — a DIY centerpiece can match your exact palette, fit your exact table length, and sit at exactly the right height for conversation. And meaning is the quiet advantage: the arrangement you built from your garden’s last roses or the pinecones your kids collected becomes part of the holiday’s story.
There is also a sustainability angle worth noting. DIY centerpieces built from produce, yard greenery, and reusable candles generate almost no waste — pumpkins compost, greenery returns to the garden, candles and vessels store for next year. Compare that to floral foam and imported blooms, and the handmade route is the gentler choice as well as the cheaper one.
Before You Build: The 5 Rules of Centerpiece Design
Rule 1: Mind the Sightlines
The number-one centerpiece mistake is blocking conversation. Keep arrangements under 12 inches tall (guests see over) or make them tall and narrow above 24 inches (guests see around). The 12-to-24-inch zone is the danger zone — that is exactly where faces are. Always do the chair test: sit down and check every sightline.
Rule 2: Odd Numbers and Triangle Shapes
Group items in odd numbers — three pumpkins, five candles — and arrange them in loose triangles rather than straight lines. The human eye reads odd-numbered groupings as natural and even-numbered ones as formal or stiff. Vary heights within each group: tall, medium, low.
Rule 3: One Hero, Supporting Cast
Every centerpiece needs one hero element (a large pumpkin, a lantern, a floral arrangement) and supporting elements (candles, greenery, small gourds). Without a hero, the arrangement looks scattered; without supporting cast, it looks sparse. The hero should be roughly twice the visual weight of any single supporting piece.
Rule 4: Anchor Everything on Something
A tray, runner, wood slice, or mirror base under your arrangement does three jobs: it defines the centerpiece’s footprint, protects the table, and makes the whole thing look deliberate. It also makes cleanup dramatically easier — lift the tray, wipe the table, done.
Rule 5: Plan for the Food
Your centerpiece shares the table with serving dishes. Before building, decide which dishes land where and leave those zones clear. A centerpiece that forces the turkey onto a side table has failed at its job. Build narrow for crowded tables, and consider a two-part design (a long runner arrangement plus a separate sideboard arrangement) when serving family-style.
Rustic DIY Thanksgiving Centerpieces
1. The Harvest Pumpkin Cluster
The simplest high-impact centerpiece there is. Materials: 3–5 pumpkins and gourds in varied sizes and colors, a wood slice or tray, eucalyptus or yard greenery, 3 pillar candles, pinecones. Time: 20 minutes. Place the tray, set the largest pumpkin slightly off-center, arrange smaller gourds around it in a triangle, tuck greenery into the gaps, nestle candles among the produce, and scatter pinecones to fill holes. Total cost: $12–$20. This is the centerpiece to build if you only build one — it is foolproof, photogenic, and compostable.
2. Mason Jar Candle Row
Line five to seven mason jars down the table’s center, each holding a tea light or votive, interspersed with mini pumpkins and sprigs of rosemary. Materials: mason jars (any size), tea lights or flameless candles, mini pumpkins, fresh herbs. Time: 15 minutes. For extra glow, put a spoonful of water and a floating cranberry or two in each jar — the berries catch the candlelight beautifully. Cost: under $10 if you own the jars.
3. Wheat Sheaf and Burlap Runner
Lay a burlap runner, then place three bundles of dried wheat (tied with twine) flat along it, alternating directions, with pillar candles between bundles. Dried wheat costs a few dollars per bundle at craft stores and lasts for years. Add dried orange slices or cinnamon sticks for scent and color. This design is nearly flat — perfect for tables where serving dishes need maximum space.
4. The Cornucopia, Modernized
Skip the wicker horn and build an “abundance spill”: tip a basket or wooden crate on its side at the table’s center and arrange produce spilling out — apples, pears, grapes, small pumpkins, nuts in shells. The spill should flow in one direction, wider at the mouth. Line the basket with a linen napkin first. Cost is whatever the produce costs, and it all gets eaten. For tables with kids, this doubles as the after-dinner snack station.
5. Pinecone and Lantern Grouping
Three lanterns in graduated sizes (or one lantern plus two candle hurricanes), surrounded by a generous scatter of pinecones, acorns, and dried leaves on a wood-slice base. Collect pinecones free from any park — bake them at 200°F (95°C) for 30 minutes on a foil-lined tray to kill insects and open the scales before using. This centerpiece stores flat and reassembles in five minutes next year.
6. The Garden’s Last Hurrah
Cut whatever is still alive in the garden — late roses, sedum, ornamental grasses, herbs — and arrange loosely in a low wooden box or crate lined with a plastic bag. Fill gaps with grocery-store mums. The charm is in the imperfection: this should look gathered, not arranged. Cost: nearly zero if you garden.
Modern DIY Thanksgiving Centerpieces
7. Monochrome White Pumpkin Row
Spray-paint or buy white pumpkins in graduated sizes and line them down a black or charcoal runner with black tapered candles in brass holders. The black-white-gold contrast is dramatic and unmistakably modern. Use matte spray paint (two light coats) for a ceramic look. Keep greenery out entirely — the power is in the restraint.
8. Metallic Gourd Collection
Paint small gourds and pumpkins in metallic gold, copper, and bronze (craft paint or spray paint), and cluster them on a mirror or marble tray with metallic candle holders. Metallics catch candlelight spectacularly at evening dinners. Pro tip: paint the undersides too, since guests see them when reaching across.
9. Sculptural Branch Arrangement
One dramatic branch — curly willow, bare birch, or dried pampas grass — in a tall, simple vase. That is the whole centerpiece. Spray it gold or leave it natural. This is the minimalist’s power move: a single sculptural element with presence. Secure the vase with a few stones at the bottom so it cannot tip.
10. The Candle-Only Centerpiece
Twenty or more candles in varied heights and holders (all glass, or all brass, or all black) clustered down the table’s center — no produce, no greenery. At dusk, nothing beats it. Mix pillar, taper, and votive sizes, keep all candles unscented, and use flameless LEDs for any candle within sleeve-reach of the table’s edge. This is the easiest “wow” in the entire guide.
11. Geometric Terrarium Fall Scene
Fill a glass geometric terrarium with layers: sand or moss at the bottom, then mini pumpkins, acorns, and a single air plant or succulent. These read as modern decor that happens to be seasonal — and the terrarium lives on your shelf all year with seasonal swaps.
12. Dark and Moody Harvest
Black or deep-plum tapered candles, dark grapes, blackberries, figs, and deep-red apples arranged on a dark wood tray with sprigs of dark greenery. Moody centerpieces photograph like fine art and feel luxurious at evening dinners. The produce should be deeply colored — the darker, the better.
Farmhouse DIY Thanksgiving Centerpieces
13. The Dough-Bowl Arrangement
A wooden dough bowl (or any long wooden trough) filled with pumpkins, pinecones, cotton stems, and candles. Dough bowls are the farmhouse workhorse — they corral everything into one tidy footprint and move as a unit. Fill order: greenery base, large pumpkins, medium gourds, candles, then small fillers tucked into gaps.
14. Galvanized Tiered Tray
Tiered trays maximize decor in minimal footprint — ideal for small tables. Style each tier: bottom tier with a large pumpkin and greenery, middle with candles and mini gourds, top with a small “give thanks” sign or a single statement pumpkin. Tiered trays photograph well because the verticality reads as abundance.
15. Cotton Stem and Wheat Jars
Three mason jars in a row: one with cotton stems, one with dried wheat, one with a candle. Tie twine around each jar’s neck. This is the five-minute farmhouse centerpiece, and it costs almost nothing. Cotton stems are reusable for years — store them in the jar, upright, in a closet.
16. The Bread-Basket Centerpiece
A large basket lined with a linen cloth, filled with artisan bread loaves, rolls, grapes, and figs — the centerpiece that gets eaten. Place it on a tray to catch crumbs. This works best for casual Thanksgivings where bread is served family-style anyway; you are simply presenting it beautifully instead of hiding it in the kitchen.
17. Enamelware and Eucalyptus
A white enamelware pitcher or roasting pan filled with eucalyptus branches and white pumpkins, flanked by enamelware mugs holding tea lights. The white-and-green palette is fresh and clean, a nice alternative when you are tired of orange. Eucalyptus dries beautifully — hang leftover branches upside down for next year.
Kid-Friendly DIY Thanksgiving Centerpieces
18. The Gratitude Pumpkin
Set out a large pumpkin with metallic markers and invite every guest to write what they are thankful for directly on the pumpkin. It starts as decor and becomes the evening’s activity and keepsake. Use oil-based paint markers (they do not smudge once dry) and display the pumpkin afterward — many families keep a growing collection year to year.
19. Handprint Turkey Garden
Have kids trace and cut out handprint “turkeys” from construction paper, glue them to wooden skewers, and “plant” them in a pumpkin or a pot of floral foam disguised with moss. It is cheerful, deeply personal, and takes about 30 minutes of craft time — perfect for the day before Thanksgiving. Seal the paper turkeys with clear tape if the centerpiece sits near food.
20. Painted Pumpkin Patch
Let kids paint mini pumpkins with acrylic paints — polka dots, stripes, faces, their names. Cluster the results on a tray as the centerpiece. Acrylic paint adheres well to pumpkin skin; add a coat of clear sealer for durability. This is the centerpiece kids will point to with pride all evening.
21. The Candy-Corn Vase
Fill a clear cylinder vase with layers of candy corn (or dried corn kernels for a non-candy version), then set a candle or small floral arrangement inside a smaller glass nested within. Kids love the candy layers, and it takes three minutes. Keep the candy version away from very small children who might dig in.
Step-by-Step Tutorial: The 30-Minute Harvest Garland Centerpiece
This is the most versatile project in the guide — a lush garland runner that fits any table length and any of the four styles above.
Materials
- Faux or fresh eucalyptus garland (one 6-foot strand per 4 feet of table)
- 5–7 mini pumpkins and gourds
- 6–8 taper or pillar candles in holders
- Floral wire or twist ties
- A runner or bare table
- Optional: string lights (battery-operated fairy lights)
Steps
Step 1: Lay the garland. Drape the garland down the table’s center, letting it puddle naturally with soft curves rather than a straight line. If joining two strands, overlap them by 6 inches and wire them together.
Step 2: Weave in lights (optional). If using fairy lights, weave the strand through the garland now, before adding pumpkins — it is much harder afterward. Tuck the battery pack under the garland at one end.
Step 3: Place the pumpkins. Set the largest pumpkin slightly off-center, then place medium and small ones in a loose zigzag, alternating sides. Push them gently into the garland so they nestle rather than perch.
Step 4: Add candles. Place candle holders in the gaps, varying heights. Keep every flame at least 6 inches from greenery and pumpkins, and use hurricanes for any candle near the table’s edge.
Step 5: Fill and fluff. Step back, look for holes, and tuck in extra greenery sprigs or small gourds. Fluff the garland so no bare table shows through. Do the chair test for sightlines.
Total time: 30 minutes. Total cost: $25–$45 depending on fresh versus faux greenery. Disassembly: lift the garland in sections into a storage bin; pumpkins compost; candles store.
Budget Breakdown: What Each Style Costs
| Centerpiece Style | Budget Build | Mid-Range | Notes |
|---|---|---|---|
| Harvest pumpkin cluster | $12–$20 | $30–$50 | Produce + candles; compostable |
| Mason jar candle row | $5–$10 | $20–$35 | Nearly free if you own jars |
| Modern monochrome | $15–$25 | $40–$70 | Spray paint transforms cheap pumpkins |
| Farmhouse dough bowl | $10–$20 | $40–$80 | Bowl is reusable for years |
| Kid gratitude pumpkin | $5–$12 | $15–$25 | One pumpkin + markers |
The universal money-saving moves: buy pumpkins at grocery stores rather than pumpkin patches (often half the price), collect greenery from your yard, use LED candles where real flames are impractical, and invest in reusable vessels (trays, lanterns, dough bowls) rather than disposable decor. Our budget Thanksgiving decorations guide extends these tactics to the whole house.
Small-Space Centerpiece Solutions
Small tables need centerpieces with small footprints and low profiles. The tiered tray is the small-table champion — three levels of decor in a 10-inch circle. Single-vessel designs (one bowl, one lantern, one pumpkin cluster on a small tray) also work. Avoid garlands on tables under 4 feet long; they eat the space needed for plates. And consider moving the “wow” to a sideboard: a grand arrangement on the buffet lets the dining table stay minimal and functional.
Care, Safety, and Storage
Fresh pumpkins last 2–3 weeks indoors away from heat; keep them off radiators and out of direct sun. Once cut or carved, they last days — so build carved-pumpkin centerpieces no earlier than the day before. Fresh greenery lasts about a week in water; mist it daily. Dried elements (wheat, cotton, pinecones) last years if stored dry.
Safety notes: keep all flames away from dried materials (wheat, dried leaves, and pampas grass are flammable — use LED candles near them), never leave lit candles unattended, and keep arrangements stable — a wobbly tall vase on a crowded table is an accident waiting for a serving platter. For pets: lilies, chrysanthemums, and many fall berries are toxic to cats and dogs, so choose pet-safe greenery (rosemary, wheat, pumpkins) if animals roam the dining room.
Storage: photograph each arrangement before disassembly, then store vessels nested, candles upright in a cool place, faux greenery in breathable bags (not compressed), and dried naturals in labeled boxes with silica packets. A labeled “Thanksgiving centerpiece” bin turns next year’s decorating into a 20-minute reunion rather than a shopping trip.
In Pictures: DIY Thanksgiving Centerpieces
Keep centerpieces low so guests can actually talk — this tutorial layers lush greenery and faux fruit into a designer-looking arrangement from craft-store finds.
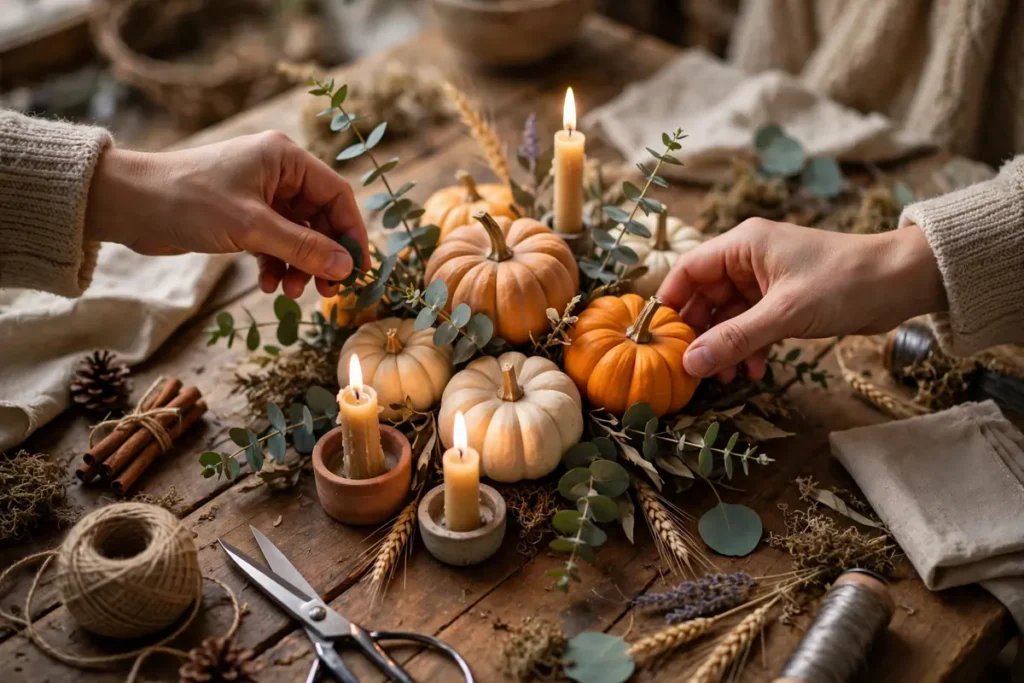
Hands arranging a DIY Thanksgiving centerpiece with pumpkins, eucalyptus, and candles on a wooden table.
Watch: DIY Thanksgiving Centerpieces
A step-by-step DIY Thanksgiving centerpiece — cutting floral foam, hiding it with moss, and layering greenery and fruit for a lush finished look.
At a Glance: DIY Thanksgiving Centerpieces
Centerpiece styles and how to build them.
| Style | Core materials | Tip |
|---|---|---|
| Greenery + fruit | Floral foam, moss, faux greenery, faux fruit | Cut foam to size and hide it completely with moss first |
| Pumpkin floral | Hollowed pumpkin, vase insert, fresh flowers | A short glass vase inside keeps flowers fresh without rotting the pumpkin |
| Candle cluster | Pillar candles, mini pumpkins, eucalyptus | Vary candle heights; flameless candles are worry-free |
| Harvest runner | Burlap runner, gourds, pinecones, berries | Odd numbers of each element look most natural |
| Height rule | Keep arrangements under 12 inches or above sightlines so conversation flows | |
| Budget source | Craft stores and dollar stores cover foam, moss, and faux stems for a few dollars | |
Frequently Asked Questions
How far in advance can I make a DIY Thanksgiving centerpiece?
Non-perishable designs (candles, faux greenery, dried elements, painted pumpkins) can be built weeks ahead. Fresh-produce designs are best assembled 1–2 days before Thanksgiving; fresh-flower designs the day before or morning-of. Build the base early, add fresh elements late.
What is the best height for a Thanksgiving centerpiece?
Under 12 inches tall so guests can see over it, or tall and narrow above 24 inches so they can see around it. Measure your tallest element before finalizing — the arrangement always looks lower in photos than it feels across the table.
How do I keep a centerpiece from looking cluttered?
Three fixes solve most clutter: anchor everything on a tray or runner (instant cohesion), remove one-third of the small items (edit ruthlessly), and repeat elements — five of the same candle looks intentional, five different candles looks accidental.
Are real or flameless candles better for centerpieces?
Real candles give unmatched ambiance; flameless LEDs give unmatched safety and longevity. The pro move is mixing: real candles in secure holders at the arrangement’s center, flameless ones near edges, dried materials, kids, and pets. Modern flameless candles with flicker effects read as real in photos.
How do I make my centerpiece last through the weekend?
Keep fresh produce cool overnight (a garage or enclosed porch works), mist greenery daily, replace wilted elements, and relight or recharge candles. Designs built on pumpkins and dried elements easily last a week; fresh flowers may need a day-two refresh.
Can I use my centerpiece items for other decor?
Absolutely — design for double duty. The garland from your table can move to the Thanksgiving mantel after dinner, pumpkins can join your fall front porch display, and candles migrate anywhere. Planning the afterlife of your centerpiece stretches every dollar.
Conclusion
The best DIY Thanksgiving centerpiece is not the most elaborate — it is the one that fits your table, your timeline, and your people. Start with the five design rules, pick one hero element, build on a tray, and let natural abundance do the heavy lifting. Pair your centerpiece with a thoughtfully set table from our Thanksgiving table settings guide and a runner from our table runner ideas, and your dining room will be ready before the oven timer dings. Happy crafting — and happy Thanksgiving.