Old fashioned apple pie is the dessert against which all American baking is measured — a flaky double crust wrapped around tender, cinnamon-spiced apples, baked until the juices bubble thick through the vents. But the gap between a transcendent apple pie and a disappointing one is wide, and it is crossed entirely on technique: choosing apples that hold their shape, preventing the dreaded gap between filling and top crust, achieving a bottom crust that is crisp rather than steamy, and weaving a lattice that is beautiful without being fussy. This guide is a complete technique manual for the classic, covering apple science, double-crust pastry, the pre-cooked filling debate, and every fix for the problems that plague home bakers.
What makes an apple pie “old fashioned” is not nostalgia — it is method. Old fashioned means a proper double crust (not a crumb topping), real butter pastry, apples sliced thick and spiced simply with cinnamon, nutmeg, sugar, and lemon, and a pie baked long enough for the filling to actually cook through. No shortcuts, no canned filling, no soggy compromises. Done right, it is the pie that anchors the Thanksgiving dessert table next to pumpkin and pecan — and for many families, it is the pie that matters most. If you are building the full holiday spread, our Thanksgiving dinner menu guide will help you plan the savory side to match.
What “Old Fashioned” Really Means
The phrase gets thrown around loosely, but in baking it denotes a specific tradition: the American farmhouse apple pie of the late 19th and early 20th centuries. Its hallmarks are a lard-or-butter double crust (we will use all butter for flavor), a filling of fresh tart apples with minimal adornment, and a pie served at room temperature, often with sharp cheddar cheese — a pairing that surprises newcomers and converts them instantly. The cheese tradition comes from New England and the Midwest, where dairy country met apple country; the salty, sharp cheddar against sweet, spiced apples is one of the great flavor pairings in American food.
Old fashioned also implies a certain generosity: a deep filling (this is not a skimpy pie), a sturdy slice that holds together, and flavors that taste of the orchard rather than the spice rack. Cinnamon leads, nutmeg supports, and everything else stays out of the way. If your apple pie tastes primarily of spice, the apples were an afterthought — and in an old fashioned pie, the apples are the point.
Apple Selection: The Science of Choosing
The single most consequential decision in apple pie is which apples to use, because varieties differ enormously in three properties that matter: acidity, sweetness, and — most critically — how their cell structure responds to heat. Some apples (like McIntosh) collapse into applesauce when baked; others (like Granny Smith) hold their shape with military discipline but can stay stubbornly firm. The ideal pie apple softens to tenderness while retaining distinct slices, and it brings enough acidity to balance the sugar.
The Best Pie Apples
Granny Smith: The backbone of most great pies. Tart, firm, and reliably shape-holding. Used alone it can be one-dimensional, but as half of a blend it provides structure and brightness.
Honeycrisp: Sweet-tart, explosively juicy, and holds its shape well. Its high juice content means you should account for extra liquid (see the thickener section).
Braeburn: A superb all-rounder — sweet-tart, aromatic, and firm when baked. If you want a single-variety pie, Braeburn is an excellent choice.
Golden Delicious: Sweet, thin-skinned, and bakes to a tender consistency. It breaks down more than the varieties above, which makes it a good blender — it fills the gaps between firmer slices with soft, sweet apple.
Northern Spy, Winesap, and Rhode Island Greening: Heirloom varieties prized by pie traditionalists for complex flavor. Worth seeking at farmers’ markets in apple season.
The Blend Strategy
Professional bakers almost always blend: typically two parts firm-tart (Granny Smith, Braeburn) to one part sweet aromatic (Golden Delicious, Honeycrisp). The firm apples provide structure and acidity; the sweeter ones contribute perfume and fill. Blending also hedges against the variability of any single variety in a given year. For a 9-inch deep-dish pie, you need 3 to 3 1/2 pounds of apples — about 8 to 10 medium apples — which looks like far too many until they cook down.
Preparation Matters
Peel the apples — skins turn leathery and bitter in the pie. Slice them 1/4 inch thick: thinner slices overcook to mush, thicker slices may not cook through. Uniformity matters more than exact thickness; even slices cook evenly. Toss the slices immediately with lemon juice to prevent browning — the acid also brightens the finished flavor.
The Double Crust: Technique
Apple pie needs two crusts — bottom and top — and each has its own job. The bottom crust must be sturdy enough to contain 3 pounds of juicy filling without turning to paste; the top crust must be tender and flaky, vented to let steam escape, and beautiful enough to carry the occasion.
Bottom Crust: Rolled Slightly Thicker
Roll the bottom crust to about 1/8 inch (slightly thicker than the top) and fit it into the pan with a 1-inch overhang. A thicker bottom stands up to the long bake and the wet filling. Some bakers brush the bottom crust with beaten egg white before adding the filling — the same sealing trick used in pumpkin pie — and it is just as effective here.
Top Crust Options
A full top crust is the most traditional and the most protective — it traps steam, which helps cook the apples. Cut 4 to 5 slits for vents, or cut a decorative pattern. A lattice top is showier and lets you see the filling bubble, which helps judge doneness; it also releases more steam, so the filling must be well-thickened. For lattice, roll the dough, cut 3/4-inch strips with a pastry wheel, and weave over-under on a parchment sheet before sliding onto the pie (weaving directly on the pie risks stretching the strips). A crumb or streusel top is delicious but not old fashioned — save it for the caramel apple crisp instead.
Sealing and Crimping
Brush the bottom crust’s edge with water or egg wash, lay the top crust over, and press to seal — an unsealed edge leaks juice all over your oven. Trim to 3/4 inch overhang, fold under, and crimp. A tight seal is structural, not decorative: it keeps the filling in and the steam (mostly) where it belongs.
The Gap Problem — and How to Prevent It
The most common apple pie failure is the gap: the apples shrink during baking, the top crust stays domed, and you slice into a pie with a cavern of air between fruit and pastry. It looks deflated and disappoints. The gap happens because raw apples contain enormous amounts of water and air; as they cook, they collapse to roughly two-thirds of their raw volume.
Solution 1: Pre-Cook the Filling
The most reliable fix is to cook the filling before it goes into the crust. Toss the sliced apples with sugar, spices, and lemon juice and let them macerate (sit) for 30 to 60 minutes — the sugar draws out a surprising amount of juice. Then cook the apples in that juice in a large skillet or Dutch oven for 8 to 10 minutes, until they are just beginning to soften at the edges but still hold their shape. Drain, reduce the juices to a syrup, thicken, and recombine. The apples have already done most of their shrinking before they meet the crust, so the gap never forms. This is the method serious pie bakers swear by, and it is worth the extra 20 minutes.
Solution 2: Macerate and Reduce
If you prefer a raw filling, at minimum macerate the apples: the drawn-off juice gets reduced to a concentrated syrup that goes back into the pie, so you lose volume (less gap) without losing flavor. Mound the filling high in the center — it will settle — and pack the apples tightly with minimal air pockets.
Solution 3: The Right Thickener
Even a gapless pie fails if the filling is soupy. Flour (the old fashioned choice) makes an opaque, slightly pasty filling. Cornstarch gives a glossy, clear filling but can break down with long baking or reheating. The modern professional choice is tapioca starch (or minute tapioca): it thickens cleanly, stays stable through long bakes, and produces a translucent, jewel-like juice. Use 3 to 4 tablespoons of tapioca starch for a juicy 9-inch pie. Whatever you use, the test is the bubble: the pie must bake until the juices bubble thickly through the vents — that bubbling means the thickener has reached its full gelatinization temperature. A pie pulled before the juices bubble will be runny no matter how much thickener you added.
Ingredients
For the Double Crust
- 2 1/2 cups (320g) all-purpose flour, plus more for rolling
- 1 teaspoon kosher salt
- 2 teaspoons granulated sugar
- 16 tablespoons (2 sticks / 227g) unsalted butter, cubed and frozen 15 minutes
- 1/4 cup ice water, plus 1/4 cup ice-cold vodka (or 1/2 cup ice water total)
- 2 teaspoons apple cider vinegar
- 1 egg beaten with 1 tablespoon milk, for egg wash
- Coarse sugar, for sprinkling
For the Filling
- 3 1/2 pounds mixed pie apples (about 9 medium), peeled, cored, sliced 1/4 inch thick
- 1 tablespoon fresh lemon juice
- 3/4 cup granulated sugar, plus more to taste
- 1/4 cup packed light brown sugar
- 3 tablespoons tapioca starch (or 4 tablespoons cornstarch)
- 1 1/2 teaspoons ground cinnamon
- 1/4 teaspoon freshly grated nutmeg
- 1/4 teaspoon kosher salt
- 2 tablespoons unsalted butter, cut into small pieces
Step-by-Step Method
- Make the dough. Whisk flour, salt, and sugar. Cut in the frozen butter to pea-sized pieces. Drizzle with the ice water, vodka, and vinegar, tossing with a fork until the dough just holds together. Divide into two disks (one slightly larger for the bottom), wrap, and refrigerate at least 1 hour or overnight.
- Macerate the apples. Toss the apple slices with lemon juice, both sugars, tapioca starch, cinnamon, nutmeg, and salt. Let stand 30 to 60 minutes, tossing occasionally, until the apples release their juice.
- Pre-cook the filling. Transfer the apples and their juice to a large Dutch oven. Cook over medium-high heat, stirring gently, for 8 to 10 minutes, until the apples are just beginning to soften at the edges. Using a slotted spoon, transfer the apples to a bowl. Boil the remaining juice until reduced to a thick syrup, about 1/3 cup. Pour over the apples and toss. Cool to room temperature.
- Roll the bottom crust. On a floured surface, roll the larger disk to a 13-inch round, about 1/8 inch thick. Fit into a 9-inch deep-dish pie pan, leaving a 1-inch overhang. Refrigerate while you roll the top.
- Fill the pie. Pile the cooled apple filling into the shell, mounding it high in the center. Dot with the butter pieces. Brush the edge of the bottom crust with water.
- Top and seal. Roll the second disk to a 12-inch round. Lay over the filling (or weave a lattice). Press the edges to seal, trim to 3/4 inch, fold under, and crimp. Brush the entire top with egg wash, sprinkle with coarse sugar, and cut vents if using a full top.
- Bake long and hot. Place on a preheated baking sheet and bake at 425°F (220°C) for 20 minutes, then reduce to 375°F (190°C) and bake 40 to 50 minutes more, until the crust is deep golden brown and the juices bubble thickly through the vents. Shield the edges with foil if they brown too fast. The bubbling is non-negotiable — it is the sign the filling is cooked and thickened.
- Cool completely. Cool on a wire rack for at least 4 hours — preferably 6. A warm apple pie slices into soup; a fully cooled one slices cleanly with distinct, glistening apple layers. Serve at room temperature.
Baking Science: Temperature and Timing
The two-stage bake (hot start, moderate finish) serves two masters. The initial blast at 425°F (220°C) sets the crust quickly — the butter’s water flashes to steam for maximum flakiness, and the crust’s structure firms before the filling’s juices can soak in. The longer finish at 375°F (190°C) cooks the apples through and brings the filling to the bubbling stage without burning the crust. A pie baked entirely at a moderate temperature often has a pale, soft bottom crust; a pie baked entirely hot burns before the apples cook.
Total bake time of 60 to 70 minutes surprises bakers used to 45-minute pies, but it is necessary: the filling must reach roughly 200°F (93°C) internally for the starch thickener to fully gelatinize and the apples to tenderize. Trust the bubbles, not the clock — when thick juice visibly bubbles through the vents for several minutes, the pie is done.
Troubleshooting
Soggy bottom crust. The oven was not hot enough at the start, the pie was not baked on a preheated sheet, or the filling was too wet. Always use the hot-start method, bake on a preheated baking sheet or pizza stone, and pre-cook the filling. A metal pan (not ceramic) also promotes bottom browning.
Gap between filling and top crust. The apples shrank. Pre-cook the filling, mound it high, and pack tightly. There is no fix after baking — but a gap does not affect flavor, only appearance.
Runny filling. The pie was pulled before the juices bubbled, or the thickener was insufficient for juicy apples. Next time, wait for sustained thick bubbling through the vents. For the current pie, serve it in bowls — it will still taste wonderful.
Tough crust. The dough was overworked or too warm. Handle it minimally, keep everything cold, and do not re-roll scraps more than once. The vodka trick in the ingredients list is cheap insurance.
Burnt edges, pale center. The oven has hot spots or the pie needed shielding. Use a pie shield or foil ring after the first 25 minutes, and rotate the pie halfway through baking.
Storage, Serving & the Cheddar Question
Apple pie keeps 2 days at room temperature (covered) or 4 days refrigerated — though the crust is crispest on day one. Reheat slices in a 350°F (175°C) oven for 10 minutes to re-crisp; the microwave makes the crust leathery. Freeze the baked pie up to 3 months, wrapped tightly; thaw at room temperature for 4 hours.
Serve at room temperature with vanilla ice cream (the à la mode classic), sharp cheddar cheese (the old fashioned New England way — try it once before dismissing it), or lightly sweetened whipped cream. A slice of warm pie with a slab of cold, sharp cheddar is a combination that has endured for two centuries for a reason: the cheese’s salt and fat cut the pie’s sweetness while its sharpness echoes the apples’ acidity, creating a bite that is somehow more than the sum of its parts.
In Pictures: Old-Fashioned Apple Pie
Old-fashioned apple pie means real apples, real butter crust, and no shortcuts — the 1944 way. The pie, lattice-topped and golden.
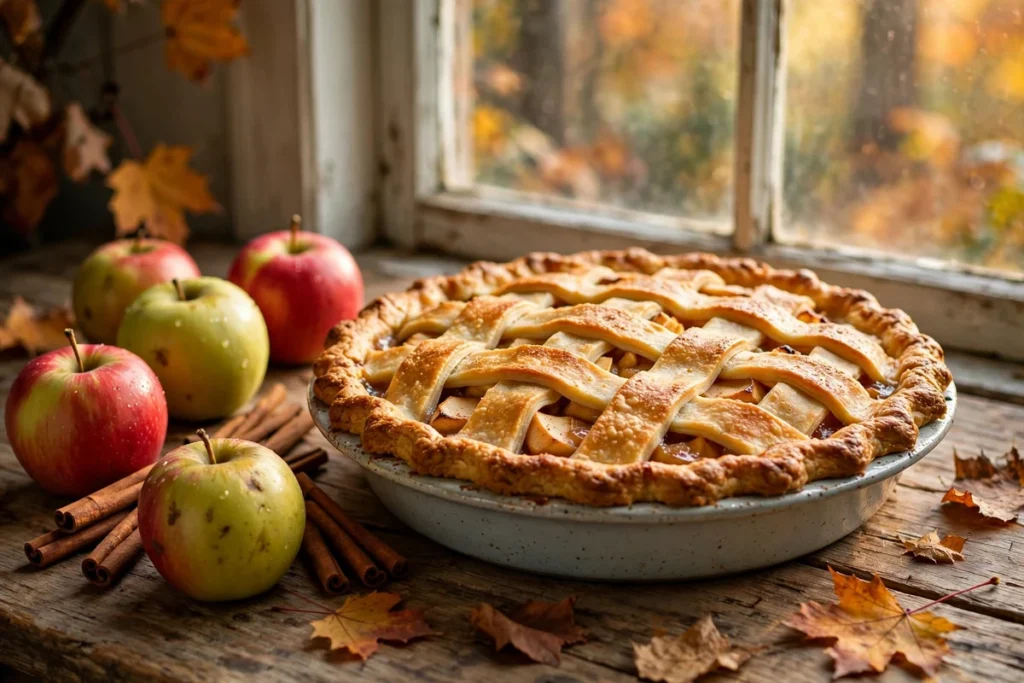
A golden lattice-top old-fashioned apple pie cooling on a rack, with apples and cinnamon nearby.
Watch: Old-Fashioned Apple Pie
This retro apple pie follows a 1944 Woman’s Home Companion recipe — Granny Smith and Pink Lady apples, a simple sugared filling, and a proper double crust.
At a Glance: Old-Fashioned Apple Pie
Apple science and old-fashioned technique, from the guide.
| Topic | Notes |
|---|---|
| What “old fashioned” means | Double crust, sliced fresh apples, simple spicing — the pre-convenience-food standard |
| Best pie apples | Granny Smith for tartness and structure; Pink Lady or Honeycrisp for sweetness |
| The blend strategy | Mix tart and sweet varieties so the filling is balanced, not one-note |
| Preparation matters | Uniform slices cook evenly; a little flour or cornstarch thickens the juices |
| Double crust technique | Roll the bottom slightly thicker; lattice or vent the top so steam escapes |
| The cheddar question | A slice of sharp cheddar alongside is the old New England tradition — try it once |
Frequently Asked Questions
Do I have to pre-cook the filling?
No, but it is the most reliable path to a gap-free, perfectly textured pie. If you skip it, macerate the apples for a full hour, pack them very tightly, mound high, and accept a small gap. The pie will still taste excellent — the pre-cook is about structure and appearance, not flavor.
Can I make apple pie ahead for Thanksgiving?
Yes — apple pie is an excellent make-ahead dessert. Bake it completely 1 to 2 days ahead and store at room temperature (covered) or refrigerated. The flavors meld and the filling sets firmly. Bring to room temperature before serving, or warm slices briefly in the oven to re-crisp the crust.
Why is my apple pie filling pink or gray?
Some apple varieties (especially with red skins incompletely peeled, or certain heirlooms) tint the juices. It is harmless and purely cosmetic. Fully peeling the apples prevents it.
Can I freeze an unbaked apple pie?
Yes — assemble the pie completely (without egg wash), wrap tightly in plastic and foil, and freeze up to 3 months. Bake straight from frozen at 425°F (220°C) for 20 minutes, then 375°F (190°C) for 50 to 60 minutes, until bubbling. This is a superb Thanksgiving strategy: assemble the weekend before, bake the day before the feast.
What is the best pan for apple pie?
A 9-inch deep-dish metal or glass pan. Metal promotes the best bottom browning; glass lets you check it visually. Avoid shallow pans — this generous filling needs depth. Dark metal pans brown fastest, so reduce the temperature by 25°F if yours is very dark.
Should I use all one apple variety?
You can, if it is a good pie apple like Braeburn or Granny Smith, but a blend is better. Different varieties bring different strengths — structure, sweetness, aroma — and blending hedges against a single variety being mealy or bland in a given year. The blend is also what gives a great pie its depth: no single apple tastes as complex as three working together.
Conclusion
Old fashioned apple pie rewards the baker who respects the details: the right apples in the right blend, a cold-handled double crust, a pre-cooked filling that eliminates the gap, and the patience to bake until the juices bubble thick and cool until the slices hold. None of these steps is difficult; together, they produce the pie that has anchored American celebrations for generations — flaky, juicy, warmly spiced, and deeply satisfying. Master it once, and it becomes a Thanksgiving tradition your family will expect, request, and eventually inherit. For the rest of the holiday dessert table, explore our Thanksgiving desserts collection — including the quicker caramel apple crisp for nights when pie feels like too much project.