Caramel apple crisp is the dessert you make when you want all the glory of apple pie with a fraction of the effort: tender, cinnamon-spiced apples bubbling under a buttery oat streusel, finished with ribbons of gooey caramel and served warm with vanilla ice cream melting into every bite. There is no pastry to roll, no lattice to weave, no blind baking, no gap between filling and crust to worry about — just sliced apples, a topping mixed in one bowl, and an oven. This guide covers the crisp-versus-crumble-versus-cobbler distinctions, the apple and topping science that separates great crisps from mediocre ones, homemade versus store-bought caramel strategy, and the variations that make this single recipe a whole dessert repertoire.
On a Thanksgiving table crowded with pies that each demanded hours of pastry work, the crisp is the relaxed overachiever — the dessert that took 20 minutes of active time and still gets asked about. It is also the most forgiving baked dessert in the holiday canon, which makes it the perfect assignment for a guest who wants to contribute, a weeknight practice run, or a host who has already spent their pastry energy on the old fashioned apple pie. For the full holiday spread, our Thanksgiving desserts collection has the rest of the lineup.
Crisp vs. Crumble vs. Cobbler vs. Pie: Know the Difference
The terms get mixed up constantly, so here is the definitive breakdown. A crisp has a streusel topping containing oats — the oats toast and crisp in the oven, giving the dessert its name and its signature crunch. A crumble is nearly identical but traditionally oat-free, with a topping of just flour, butter, and sugar (in practice, American recipes use the terms interchangeably, and no dessert police will ticket you). A cobbler is topped with biscuit dough or batter dropped in rounds — the “cobbles” — which bake into tender, cakey mounds. A pie has pastry, top and usually bottom, requiring rolling, crimping, and all the technique that entails.
Why does the distinction matter? Because it tells you what the dessert promises. A crisp promises crunch against softness — that contrast is the entire point, and it is what separates a memorable crisp from a merely sweet one. Understanding this keeps you from the most common crisp mistake: a topping that steams into sogginess instead of crisping, which happens when the fruit layer is too wet or the topping too thick. Every technique below serves the crunch.
Why It Is Easier Than Pie (and When That Matters)
Consider what apple pie demands: pastry made and rested, rolled and fitted, filling pre-cooked or macerated, lattice woven or vents cut, edges crimped and shielded, and a 70-minute bake watched for bubbling. The crisp asks for: apples sliced (no peeling precision required — rustic is fine), topping stirred together in one bowl, everything tumbled into a baking dish, 45 minutes in the oven. Active time is under 20 minutes, there is no technique to fail at, and the result is arguably more crowd-pleasing than pie — the warm-cold contrast with ice cream, the caramel, the crunch.
This ease matters strategically. Make the crisp when: you are already making a pie and want a second apple dessert without doubling the work; a guest volunteers to bring dessert and you want to assign something foolproof; oven space is tight (the crisp bakes at 350°F/175°C, alongside rolls and casseroles); or you simply prefer baking that feels like pleasure rather than project. Easier does not mean lesser — it means smarter allocation of your holiday energy.
Apple Selection for Crisps
The rules are similar to pie — firm, tart-sweet apples that hold their shape — but crisps are more forgiving, because there is no bottom crust to go soggy and no gap to form. Granny Smith remains the backbone for its acidity and structure; Honeycrisp, Braeburn, and Pink Lady all excel. Because the apples bake uncovered under only a streusel, they cook faster than in a pie — slice them slightly thicker, about 1/3 inch, so they retain some bite rather than melting into sauce.
One crisp-specific consideration: because there is no pastry to contain the juices, very juicy apples can make the bottom layer soupy. The fix is simple — toss the apples with the thickener (2 tablespoons of flour or 1 tablespoon of cornstarch per 3 pounds of fruit) and let them sit for 15 minutes before assembling. The starch absorbs the exuded juice and thickens it into a glossy sauce during baking. Taste your apples before sweetening: a crisp made with tart Granny Smiths needs the full sugar; one made with sweet Fujis needs noticeably less.
The Topping: Science of the Crunch
A great crisp topping is an exercise in fat, sugar, and texture working together. The formula — flour, oats, brown sugar, butter, salt, and spice — seems simple, but the details determine whether it bakes into shattering clusters or a sad, steamy mat.
Oat Choice Matters
Use old-fashioned rolled oats, not instant and not steel-cut. Rolled oats have the surface area to toast and the structure to stay distinct; instant oats turn to mush, and steel-cut oats stay hard and raw-tasting. Toast the oats in a dry skillet for 3 to 4 minutes before mixing the topping — this head start on browning guarantees crunch even under a juicy fruit layer.
Butter: Cold and Chunky
Cut cold butter into the dry ingredients until you have a mixture of pea-sized lumps and sandy crumbs. Those distinct butter pieces are what create the crisp’s varied texture — the small bits melt into sandy crunch, the larger lumps form the coveted clusters. Melted butter, by contrast, makes a uniform, dense topping that eats like a cookie rather than a streusel. Keep it cold, keep it chunky.
Brown Sugar for Flavor, White for Crispness
Brown sugar brings molasses depth that is perfect with apples and caramel, but its moisture slightly softens the topping. A 50/50 blend of brown and granulated sugar gives you both flavor and maximum crispness. A pinch of salt in the topping is essential — it sharpens the butter and sugar the way salt sharpens caramel.
Nuts: The Crunch Multiplier
Chopped pecans or walnuts in the topping add a second layer of crunch and a toasty depth that plain oat streusel lacks. Toast them with the oats. About 3/4 cup per crisp is the sweet spot — enough to notice in every bite, not so much that the topping becomes a nut brittle.
Caramel: Homemade vs. Store-Bought Strategy
Caramel is what elevates this from “apple crisp” to “caramel apple crisp,” and you have three legitimate options, each with its place.
Homemade Salted Caramel (Best Flavor)
A simple dry caramel — 1 cup of sugar melted to amber, then 6 tablespoons of butter and 1/2 cup of cream whisked in, finished with 1 teaspoon of flaky salt — takes 15 minutes and tastes profoundly better than anything from a jar: complex, buttery, with the slight bitterness of deeply caramelized sugar balancing the sweetness. Make it while the crisp bakes and drizzle it over the finished dessert. It keeps 2 weeks refrigerated and is worth making in a double batch.
Store-Bought Caramel Sauce (Best Convenience)
A good-quality jarred caramel (look for one with cream and butter high on the ingredient list, not corn syrup and artificial flavor) is a perfectly respectable shortcut. Warm it gently before drizzling — cold caramel seizes on contact with the hot crisp. For a Thanksgiving dessert you are assembling in minutes, this is the pragmatic choice, and no one will interrogate its origins.
Caramel Baked Into the Crisp (Deepest Integration)
For caramel in every bite rather than just on top, drizzle 1/3 cup of caramel over the apples before adding the topping, then drizzle more at serving. The baked-in layer melds with the apple juices into a gooey, toffee-like sauce at the bottom of the dish — the part guests fight over with their spoons. If using this method, reduce the sugar tossed with the apples slightly, since the caramel adds sweetness.
Ingredients
For the Apple Filling
- 3 pounds mixed apples (about 8 medium — Granny Smith, Honeycrisp, Braeburn), peeled, cored, sliced 1/3 inch thick
- 1 tablespoon fresh lemon juice
- 1/2 cup granulated sugar (adjust to your apples’ sweetness)
- 2 tablespoons all-purpose flour (or 1 tablespoon cornstarch)
- 1 1/2 teaspoons ground cinnamon
- 1/4 teaspoon freshly grated nutmeg
- 1/4 teaspoon kosher salt
- 1/3 cup caramel sauce, plus more for serving
For the Oat Streusel Topping
- 1 cup old-fashioned rolled oats, toasted
- 3/4 cup all-purpose flour
- 1/2 cup packed light brown sugar
- 1/4 cup granulated sugar
- 1 teaspoon ground cinnamon
- 1/2 teaspoon kosher salt
- 3/4 cup chopped pecans or walnuts, toasted
- 10 tablespoons (1 1/4 sticks) cold unsalted butter, cubed
Step-by-Step Method
- Heat the oven. Position a rack in the middle and heat to 350°F (175°C). Butter a 9×13-inch baking dish (or a 10-inch cast-iron skillet for a rustic presentation that goes straight to the table).
- Prepare the apples. Toss the apple slices with lemon juice, sugar, flour, cinnamon, nutmeg, and salt. Let stand 15 minutes, tossing once, so the flour begins absorbing the juices.
- Mix the topping. Combine the toasted oats, flour, both sugars, cinnamon, salt, and toasted nuts in a large bowl. Add the cold cubed butter and cut in with a pastry blender or your fingertips until you have a chunky mixture with pea-sized butter lumps. Do not overwork — visible butter pieces are the goal. Refrigerate the topping while the apples macerate.
- Assemble. Tumble the apples into the baking dish and spread evenly. Drizzle with 1/3 cup of caramel sauce. Crumble the topping evenly over the apples, leaving some larger clusters intact — do not pack it down.
- Bake. Bake 45 to 55 minutes, until the topping is deep golden brown and the juices bubble thickly around the edges. If the top browns before the apples are tender (test with a knife through the topping), tent loosely with foil.
- Rest and serve. Let the crisp rest 15 to 20 minutes — the juices thicken as it cools, and serving it molten means soup. Serve warm (not hot) in bowls with vanilla ice cream and a generous drizzle of warm caramel sauce. A pinch of flaky sea salt over each serving makes the caramel sing.
Variations
Pear and Cranberry Crisp
Replace half the apples with firm pears (Bosc or Anjou) and add 1 cup of fresh cranberries. The cranberries burst into tart pockets that cut the caramel’s richness beautifully — this is the most Thanksgiving-appropriate variation, echoing the cranberry sauce on the table.
Gluten-Free Apple Crisp
Swap the flour for a 1:1 gluten-free baking blend and use certified gluten-free oats. The topping crisps just as well — there is no gluten development to miss in a streusel. This is one of the easiest naturally-adaptable holiday desserts for gluten-free guests.
Individual Ramekin Crisps
Divide the filling and topping among 8 buttered ramekins and bake 30 to 35 minutes. Individual portions bake faster, serve elegantly, and eliminate the awkward serving of a bubbling communal dish — ideal for a formal Thanksgiving table. Top each with a small scoop of ice cream at the table.
Bourbon Apple Crisp
Add 2 tablespoons of bourbon to the apple mixture and use a bourbon caramel for drizzling. The bourbon’s vanilla-oak notes amplify the caramel and add a grown-up depth. Most of the alcohol bakes off, leaving pure flavor.
Apple-Pumpkin Crisp
Replace one-third of the apples with 1-inch cubes of peeled butternut squash or sugar pumpkin. The squash bakes to creamy sweetness that bridges the apple and caramel flavors — a subtle nod to the pumpkin pie also on the table, and a conversation starter.
Skillet Crisp with Oatmeal Cookie Crust
For the ultimate rustic presentation, press a layer of crumbled oatmeal cookies mixed with melted butter into a cast-iron skillet as a base, add the apples and caramel, and top with the standard streusel. The cookie base bakes into a chewy, caramelized foundation that makes each serving hold together beautifully — part crisp, part pie, entirely irresistible. Serve it straight from the skillet at the table with the ice cream passed separately.
Serving, Storage & Reheating
Apple crisp is at its peak warm from the oven, 15 to 20 minutes out — the topping at maximum crunch, the juices thick but flowing, the ice cream melting on contact. That is the serving to plan for. But it also keeps well: cover and refrigerate leftovers for up to 4 days.
Reheating is where many crisps die — the microwave turns the topping to rubber. Instead, reheat in a 350°F (175°C) oven for 12 to 15 minutes (single servings) or 20 minutes (a large dish, covered loosely with foil for the first half). The oven re-crisp the topping while warming the fruit through. For a single serving in a hurry, a toaster oven works perfectly. Freeze the baked crisp up to 2 months; thaw overnight in the refrigerator and reheat in the oven as above. The topping will never be quite as shattering as day one, but it will be very good — and a fresh drizzle of warm caramel covers a multitude of textural sins.
Troubleshooting
Soggy topping. The fruit layer was too wet, the topping was packed down, or the crisp was covered while cooling (trapped steam softens everything). Toss fruit with thickener, keep the topping loose and chunky, and cool uncovered. Next time, toast the oats — it is cheap insurance.
Apples still crunchy when the topping is done. The slices were too thick or the apples an extra-firm variety. Slice to 1/3 inch uniformly, tent with foil once the topping browns, and keep baking until a knife slides easily into the fruit. Pre-cooking the apples for 10 minutes in a skillet (as with pie filling) guarantees tenderness.
Filling too soupy. Insufficient thickener for juicy apples, or the crisp was served too hot. Always let it rest 15 to 20 minutes — the juices visibly thicken as it cools. For very juicy apples, increase the flour to 3 tablespoons.
Topping burned before the fruit cooked. The oven runs hot or the rack was too high. Bake on the middle rack, verify temperature with an oven thermometer, and tent with foil at the first sign of over-browning. The topping should be deep golden, not dark brown.
Too sweet / not sweet enough. Apple sweetness varies enormously by variety and season. Taste the raw apple mixture before baking — it should taste slightly too sweet, since baking mellows sweetness. Adjust sugar before the dish goes into the oven, not after.
In Pictures: Caramel Apple Crisp
Caramel apple crisp is autumn comfort at its easiest — jammy apples under a buttery oat crunch, no pie dough required. The crisp, bubbling and golden.
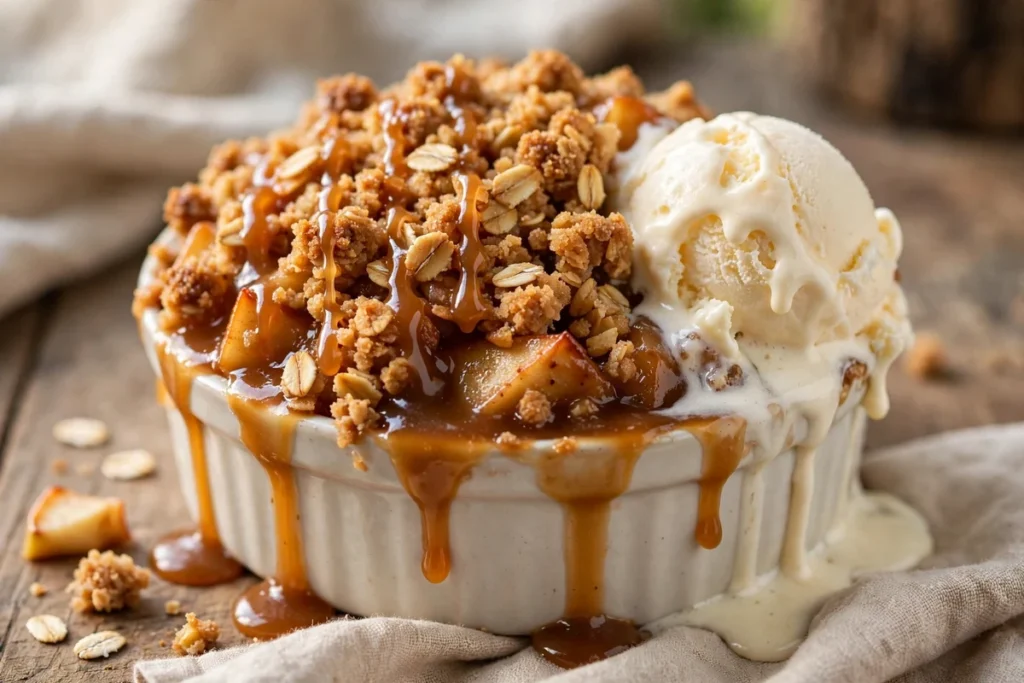
A warm caramel apple crisp with a golden oat topping and caramel dripping down, served with vanilla ice cream.
Watch: Caramel Apple Crisp
Divas Can Cook’s easy caramel apple crisp layers spiced Granny Smith apples with caramel chips under a cinnamon-oat streusel — 30 minutes at 350°F, then ice cream.
At a Glance: Caramel Apple Crisp
Crisp fundamentals, from the guide.
| Topic | Notes |
|---|---|
| Crisp vs. crumble vs. cobbler | A crisp has an oat streusel topping; a crumble’s is oat-free; a cobbler wears biscuit dough |
| Apple selection | Firm-tart apples like Granny Smith hold their shape and balance the caramel’s sweetness |
| Oat choice | Old-fashioned rolled oats give the crunchiest topping; quick oats turn pasty |
| Cold, chunky butter | Cut cold butter into the topping for crisp, pebbly clusters |
| Brown vs. white sugar | Brown sugar for flavor, white sugar for extra crispness |
| Serving | Serve warm — ideally with vanilla ice cream melting over the top |
Frequently Asked Questions
Can I make apple crisp ahead for Thanksgiving?
Yes — assemble the entire crisp (fruit and topping) up to 24 hours ahead, cover, and refrigerate unbaked. Bake straight from the refrigerator, adding 10 minutes to the baking time. Or bake it in the morning and reheat in the oven before dessert. The topping is added unbaked in the make-ahead version so it crisps fresh.
Do I have to peel the apples?
Peeling gives the most tender, refined result — skins can turn chewy and separate from the flesh during baking. But for a rustic crisp, unpeeled apples are acceptable, especially with thin-skinned varieties. The crisp is forgiving by nature; this is one place you can cut a corner without real consequence.
Can I use quick oats instead of rolled oats?
It is not recommended. Quick oats are cut smaller and absorb moisture faster, producing a topping that eats soft and porridge-like rather than crisp. If rolled oats are all you have, it is worth the trip to the store — the oat is the namesake of the dessert.
How do I keep the topping crisp for serving?
Three rules: do not cover the crisp while it cools (trapped steam is the enemy), serve within an hour of baking for peak crunch, and add the caramel drizzle at serving time rather than before baking (unless using the baked-in method deliberately). A crisp held for hours will soften — reheat it uncovered in a 350°F (175°C) oven for 10 to 15 minutes to revive the crunch before serving.
What is the best dish for baking apple crisp?
A 9×13-inch ceramic or glass baking dish is standard and serves a crowd. A 10- or 12-inch cast-iron skillet makes a stunning rustic presentation and retains heat beautifully at the table — preheat the skillet for an extra-crisp bottom. Avoid thin metal pans, which can scorch the sugary juices.
Can I make caramel apple crisp without nuts?
Absolutely — omit the nuts and increase the oats to 1 1/4 cups. The topping will still crisp beautifully. For nut-free crunch, add 1/2 cup of toasted pumpkin seeds (pepitas) instead; they bring a similar toasty depth and are safe for nut allergies. Sunflower seeds work too, though their flavor is milder — toast them well to bring out their nuttiness.
Conclusion
Caramel apple crisp is the rare dessert that asks little and gives much: 20 minutes of active work, no pastry skill, one baking dish, and in return — bubbling cinnamon apples, a shattering oat-pecan streusel, ribbons of warm caramel, and vanilla ice cream melting into the whole glorious mess. It is the dessert to make when the pies have consumed your ambition, the dessert to assign to a willing guest, and the dessert that will have people asking for the recipe before they have finished their serving. Master the chunky cold-butter topping, respect the resting time, and serve it warm — and keep our old fashioned apple pie guide handy for the day you feel like the full project. For everything else the holiday demands, our Thanksgiving desserts collection awaits.