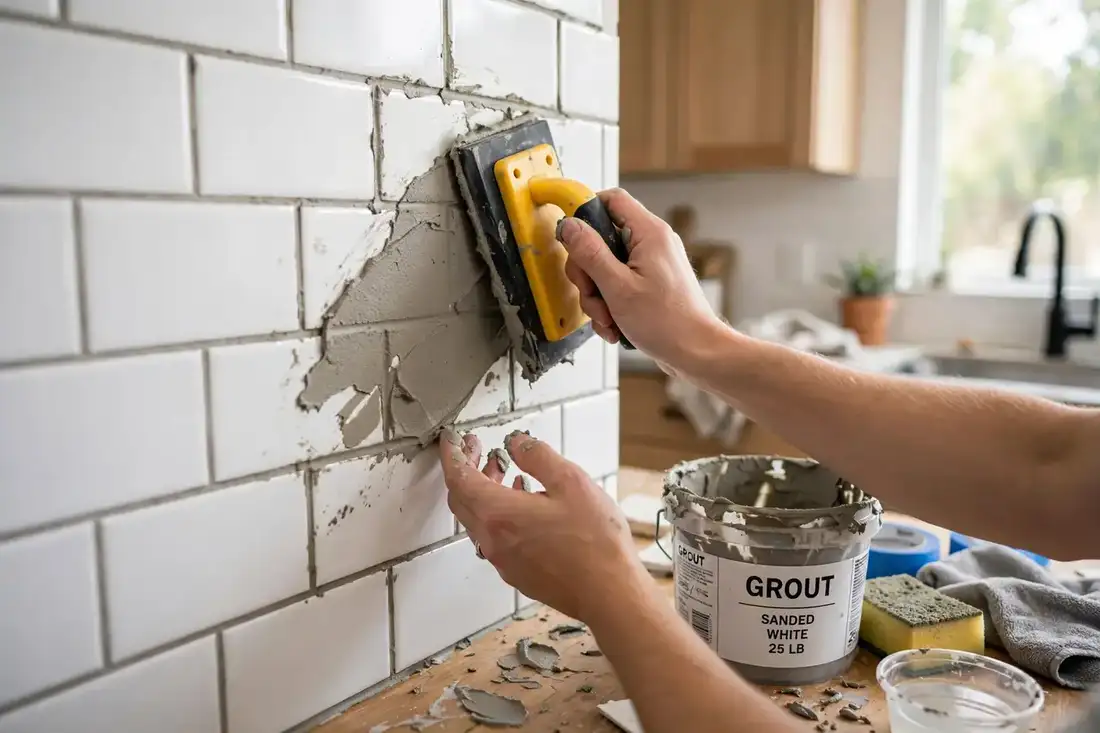
Grout ages worse than tile: it stains, cracks, and crumbles while the tile itself looks fine for decades. Regrouting, removing the old grout and applying fresh, makes tile look new for $30 to $80 in materials versus thousands for retiling. It is dusty detail work rather than difficult work, perfect for a patient weekend.
This guide covers assessing whether regrouting is the right fix, removing old grout without damaging tile, choosing grout type and color, the application technique, and sealing. A typical bathroom floor or kitchen backsplash takes one weekend.
| Item | What to get | Typical cost |
|---|---|---|
| Grout saw or oscillating tool | Manual saw for small areas; oscillating for large | $10-$60 |
| New grout | Sanded for wide joints, unsanded for narrow | $15-$30 |
| Grout float | Rubber float | $10 |
| Sponges and buckets | Two buckets, two sponges | $10 |
| Painter tape | Protect adjacent surfaces | $8 |
| Dust mask, goggles, gloves | Grout dust is harsh | $15 |
| Penetrating sealer | For cement grout after cure | $15 |
At a Glance: How to Regrout Tile
For the reader who scrolled straight here, the essentials of this guide in one place. Project: how to regrout tile, covered in 6 sequenced steps above. Materials budget: starting around $10-$60 for the core supplies, plus 15 percent contingency for consumables and second trips. Key tool: grout saw or oscillating tool anchors the toolkit; the full list is in the materials table. Time: plan a realistic window with setup and cleanup included, and multiply first-time estimates by 1.5.
The non-negotiables: read all steps before starting, prep the workspace completely, and never rush the curing, drying, or setting times specified. The most common failure: skipping preparation, whether surface prep, measurement, or the safety setup. The highest-ROI habit: the maintenance routine in this guide, performed in small regular sessions, which preserves the result for years instead of months.
When to get help: the safety briefing and the DIY-or-pro section above name the specific triggers; the most expensive outcome is the DIY attempt plus the professional repair. Keep after finishing: leftover materials labeled for future touch-ups, the product names and colors documented, and the finished photos as your maintenance standard. The project done well is the project that keeps paying back.
Your How to Regrout Tile Project Planner
Turn this guide into a completed project with a concrete plan. How to Regrout Tile breaks into 6 main steps, and the planning you do before starting determines whether the project takes a satisfying afternoon or a frustrating weekend. Work through this planner the evening before you begin.
Timeline. Read all 6 steps end to end first; the 20-minute read prevents the mid-project surprises that cause most delays. Then estimate generously: first-timers should multiply any time guess by 1.5, because setup, cleanup, and the learning curve on the first attempt are real. Schedule the project when the space can be disrupted without pressure, and never start an hour before guests arrive. The steps themselves run in strict sequence; each one sets up the next, so there is no skipping ahead.
Budget. Price every item in the materials table before shopping: Grout saw or oscillating tool, New grout, Grout float, Sponges and buckets, Painter tape, Dust mask, goggles, gloves. Add 15 percent contingency for the consumables and second trips that every project generates. The project that finishes on budget is the one where the budget was written down first. If the total surprises you, revisit the scope before spending, not after; a smaller well-executed project beats an underfunded ambitious one.
Skill check. Honestly assess: have you done each type of task in the steps before? The unfamiliar steps deserve a practice run on scrap material or a video rewatch, not learning live on the finished project. Identify the one step most likely to go wrong and give it the best time slot, when you are fresh, unhurried, and well-lit. Everything else flows from that step’s success.
Workspace setup. Clear the area completely before starting; working around clutter multiplies both time and mistakes. Lay down protection for floors and adjacent surfaces, set up a work light (even in daylight, task lighting reveals what ambient light hides), and stage all tools and materials within reach in step order. Keep a trash bag, cleaning supplies, and the project instructions open and visible. Professional results come from professional setup far more than from professional talent, and the setup takes thirty minutes that pay back all day.
Safety Briefing: How to Regrout Tile
Chemical hierarchy. Start with the mildest effective solution and escalate only as needed. Never mix chemical cleaners: bleach plus acids or ammonia creates toxic fumes, and sequential products should be rinsed between. Read every label before use, including the ones you have used for years; formulations change.
Protective gear. Gloves for every chemical task, eye protection when splashing is possible, and ventilation for anything strong-smelling. Skin and eyes are the usual casualties of cleaning projects; the gear is cheap and the injuries are not. Keep fresh air moving through the work area.
Mechanical safety. Augers, snakes, and sharp tools demand gloves and controlled force; never force a tool that resists, and keep hands clear of moving parts. For plungers and pressure methods, protect your eyes from splashback. The tool doing the work should never be fighting you.
Know the stop point. If a drain, stain, or problem resists the proper methods, or if you encounter sewage, mold beyond a small patch, or anything structural, stop and call a professional. The service call costs less than the damage from pushing past the safe limit.
Step 1: Confirm Regrouting Is the Fix
Regrout when grout is stained beyond cleaning, cracked, or crumbling but tiles are solidly bonded. If tiles are loose or hollow-sounding, the problem is adhesion, not grout, and regrouting will not fix it. Try a deep grout cleaning first; if stains remain after proper cleaning, regrout.
Test-clean a section first with a proper grout cleaner and brush; if the stains lift, you need cleaning, not regrouting. Check tile adhesion by tapping; hollow tiles mean the problem is bond failure, and new grout will not fix it. The honest assessment saves a weekend aimed at the wrong problem.
Step 2: Remove the Old Grout
Using the grout saw or oscillating tool with a grout blade, remove grout to at least two-thirds the tile depth, ideally full depth. Work carefully along tile edges; chipped tile edges are the main risk. Vacuum dust frequently. This is the longest step; a bathroom floor takes several hours. Wear the dust mask throughout.
Removal depth is the quality metric: two-thirds of the joint depth minimum, full depth ideal. The oscillating tool with a grout blade transforms this step from punishment to process; the manual saw is for small areas only. Work along tile edges carefully; the chipped edge is permanent.
Step 3: Clean the Joints Thoroughly
Vacuum all joints, then wipe with a damp sponge to remove dust. Let dry completely. Clean joints are what the new grout bonds to; dusty joints cause weak crumbly new grout. Tape off adjacent surfaces you do not want grouted.
Vacuum joints thoroughly, then damp-wipe to remove the last dust; new grout bonds to clean joints and fails on dusty ones. Let the joints dry completely before grouting. Tape adjacent surfaces now; the cleanup prevention beats the cleanup.
Step 4: Mix and Apply New Grout
Mix grout to a thick peanut-butter consistency and let it slake. Press grout into joints with the float held at 45 degrees, working diagonally across tiles to pack joints fully. Work in sections you can clean within 20 to 30 minutes. Pack firmly; voids become cracks.
Mix to the thick peanut-butter consistency and let it slake; the slaked grout works smoothly and cures stronger. Press grout in diagonally with firm pressure; the void left unfilled becomes the crack later. Work sections sized to your sponging speed.

Step 5: Sponge and Shape
After 15 to 30 minutes, wipe with a lightly damp sponge in diagonal motions, rinsing often and wringing well. Shape the joints evenly; too much water weakens grout and causes pinholes. Do a first pass, wait, then a lighter second pass for haze.
The sponge should be damp, not wet; wring thoroughly. Too much water weakens grout and causes pinholes and color variation. Two light passes beat one aggressive scrub. Shape joints consistently; the uniform joint is the professional signature.
Step 6: Cure and Seal
Let grout cure 48 to 72 hours before sealing or heavy use. Buff any remaining haze with a dry cloth. Apply penetrating sealer to cement grout per directions; epoxy grout skips sealing. Caulk movement joints (corners, tile-to-tub) with silicone instead of grout.
Cure 72 hours before sealing or heavy use; the rushed cure produces soft grout that stains immediately. Apply penetrating sealer per directions, two coats on the first application. Caulk the movement joints with silicone; the grouted corner cracks, the caulked one flexes.
Pro Tips
Pro tips: grout color transforms tile: darker grout hides future staining, matching grout looks seamless, contrasting grout emphasizes pattern. An oscillating multi-tool with a grout blade cuts removal time dramatically on large areas. Work in the cool of the day; heat accelerates grout setting.
Mistakes to Avoid
Common mistakes: shallow removal (new grout over old fails), too-wet sponging (weak powdery joints), grouting movement joints instead of caulking (cracks), rushing the cure (soft grout), and skipping sealer on cement grout (stains return immediately). Removal depth and water discipline are the two skills.
Grout Color Selection: The Design Decision
Grout color transforms tile more than any other single choice, and it deserves deliberate selection. The three strategies: matching (grout close to tile color) creates the calm seamless surface where the tile pattern whispers; contrasting (dark grout with light tile or vice versa) emphasizes the pattern geometry and adds graphic punch; mid-tone (the practical compromise) defines the pattern softly while hiding future staining.
The maintenance reality should weigh heavily: white grout in a busy kitchen or entry is a cleaning commitment that few households sustain; the mid-tone gray or warm greige hides the inevitable while looking intentional. In showers, the darker grout resists the mildew visibility that plagues white. Choose the grout for year five, not day one.
Test the color in place: grout dries lighter than the wet mix and different from the stick sample. Apply test joints in an inconspicuous area and let them cure fully before judging. The undertone matters; the gray grout with blue undertones fights warm tile at the subtle level. Compare the cured test against the tile in the room’s light.
Epoxy grout deserves consideration for the right zones: stain-proof, no sealing ever, the permanent solution for showers and kitchen backsplashes. The trade-offs are real: harder to install, less forgiving of technique errors, higher cost. For the DIY regrout, cement grout with quality sealer is the manageable choice; for the shower that stains chronically, epoxy is the solve-once answer.
Sealing Grout: The Protection That Preserves the Work
The regrout is only half the project; the sealer is what keeps it looking new. Penetrating sealers soak into the grout and block staining from within; topical sealers coat the surface. The penetrating type is the right choice for most applications; it protects without changing the appearance.
Timing: 72 hours minimum after grouting, longer in humidity; the sealer applied to uncured grout traps moisture and fails. Test the cure with the water drop test; the absorbed drop means ready, the beaded drop means wait. The rushed sealer is the wasted sealer.
Application: the applicator bottle or small brush for the joints only, avoiding the tile faces; the sealer on the tile hazes. Two thin coats beat one heavy coat; the second coat after the first dries ensures complete penetration. Ventilate well; the fumes are strong during application.
Maintenance schedule: the water-drop test yearly; when drops absorb instead of beading, reseal. Showers and kitchen zones need annual resealing; the low-traffic areas go years. The resealing takes an hour; the unsealed grout’s staining takes a regrout. The sealer is the insurance policy on the weekend’s work.
Planning Your How to Regrout Tile Project
Every successful how to regrout tile project starts before the first tool comes out. Walk through the space and define the scope in one sentence: what exactly will be done, and what is explicitly not included. For how to regrout tile, scope creep is the budget killer, a second area, a fancier material, an unplanned upgrade. Write the scope down and price every line item from the materials table above before spending anything.
Budget honestly using real numbers, not hopes. The materials for how to regrout tile typically start around $10-$60, and the full project usually lands 15 to 25 percent above the materials subtotal once consumables, tool needs, and the inevitable second trip are counted. Hold 10 to 15 percent as contingency and do not pre-spend it on upgrades. The projects that finish on budget are the ones that planned for surprises.
Schedule realistically: multiply your first time estimate by 1.5. 6 steps sounds quick, but each step includes setup, cleanup, and the learning curve on the first attempt. Plan the project for a period when the space can be disrupted, gather every tool and material before starting, and read through all the steps once so there are no surprises mid-project. An hour of planning saves a weekend of improvising.
Finally, set up the workspace for success: clear the area completely, protect adjacent surfaces with drop cloths and tape, ensure good lighting (a headlamp or work light changes everything in tight spots), and keep a trash bag and cleanup supplies within reach. Professional results come from professional setup far more than from professional talent.
After How to Regrout Tile: Keeping the Results
The work of how to regrout tile deserves protection through maintenance. Build the upkeep into a routine immediately while the motivation is fresh: a quick daily or weekly pass that takes minutes prevents the slow decline that would require repeating the whole project. The specific routine depends on the area, but the principle is universal, small consistent effort beats occasional heroic effort.
Prevent recurrence by addressing the cause, not just the symptom. If how to regrout tile fixed a problem, ask what created it: the habits, the missing tools, the bad setup. Fix the cause and the result lasts; fix only the symptom and the project becomes a recurring chore. This is the highest-leverage thinking in home maintenance.
Schedule seasonal check-ins tied to dates you will remember. A ten-minute inspection each season catches the early signs of recurrence while they are still trivial to address. Keep the supplies used for how to regrout tile stored together and labeled, so future touch-ups take minutes instead of requiring another full supply run.
Share the system with the household. Results that depend on one person’s vigilance fade; results embedded in shared routines persist. A brief explanation of what was done and the two-minute habit that maintains it turns a solo project into a household standard.
Troubleshooting How to Regrout Tile: When Things Go Sideways
Even well-planned how to regrout tile projects hit snags. The most common: a step takes three times longer than expected, a material does not fit or match, or the result looks wrong at the 80-percent mark. The rule for all three is the same: stop, assess, and fix the cause rather than pushing through. Forcing a bad fit creates the expensive problems.
When something looks wrong, diagnose before redoing. Is it a prep issue, a technique issue, or a materials issue? Prep issues require going back a step; technique issues improve with a practice run on scrap; materials issues require exchange or adaptation. Most mid-project problems are prep issues in disguise.
Know the call-a-pro triggers in advance: anything involving structural elements, electrical panels, gas lines, or major plumbing; any point where you feel unsafe; and any mistake that would cost more to fix than professional help costs to prevent. Calling a pro is not failure; it is the most experienced DIY decision there is.
Keep perspective: the vast majority of how to regrout tile projects finish successfully with results their owners enjoy for years. The troubleshooting section exists for the minority of moments, not the majority outcome. Work methodically, respect the safety boundaries, and the project will reward the effort.
DIY or Hire a Pro for How to Regrout Tile?
The honest answer depends on the project’s risk profile, not just its difficulty. How to Regrout Tile spans 6 steps and starts around $10-$60 in materials; the professional version typically costs three to five times the materials, mostly in labor. That gap is the DIY savings, but it is only savings if the result is correct and safe.
DIY it when: you have the tools (or the project justifies buying them), the steps match skills you have or can practice safely, mistakes are cheap and reversible, and you have the time to do it without rushing. How to Regrout Tile is firmly DIY-friendly when those conditions hold; the techniques are learnable, the materials forgiving, and the step-by-step structure keeps the project ordered. Most homeowners who prepare properly finish satisfied and save the labor cost entirely.
Hire a pro when: sewage backups, main-line blockages affecting multiple fixtures, mold beyond a small surface patch, and any plumbing inside walls or under slabs; when the project uncovers something unexpected like rot, faulty wiring, or structural issues; when your timeline is immovable and the learning curve does not fit; or when the cost of a professional fixing a DIY mistake exceeds the original quote. The most expensive project is the DIY attempt plus the pro repair; knowing which projects are yours prevents it.
The hybrid path often wins: DIY the preparation and finishing, hire the specialized middle. For how to regrout tile, that might mean handling demolition, painting, or cleanup yourself while a licensed pro does the technical core. You save meaningful money, the skilled work gets skilled hands, and the project finishes faster. Get the pro quote first, then decide which parts to carve out; many contractors will scope the labor-only portion.
Vetting a pro: three written bids on the same scope, license and insurance verified, references from similar jobs checked, and a payment schedule tied to milestones with no more than 10 percent upfront. The cheapest bid is rarely the cheapest outcome; the detailed bid from the contractor who asks good questions is the signal of competence. For how to regrout tile, the right pro at a fair price beats the wrong pro at any price, and beats the wrong DIY attempt most of all.
Watch and Learn: How to Repair Cracked Grout on a ceramic tile floor
Grout removal technique is the make-or-break skill here. This video shows the removal tools in action, the depth to aim for, and the grouting and sponging technique that produces clean professional joints.
If the video does not load above, you can watch it directly on YouTube here: How to Repair Cracked Grout on a ceramic tile floor.

Keep Reading
- Deep-Cleaning Checklist
- Room-By-Room Decluttering Guide
- Small Kitchen Organization Ideas
- Proposal Decoration Ideas At Home
Frequently Asked Questions
How long does regrouting take?
A bathroom floor or backsplash takes a weekend: most of Saturday removing old grout, Sunday applying new grout after prep. Removal is the time sink; application goes quickly.
Can I grout over old grout?
No, not successfully. New grout needs depth to bond; skimming over old grout produces a thin layer that cracks and flakes. Remove to at least two-thirds depth first.
Sanded or unsanded grout?
Sanded for joints 1/8 inch and wider; unsanded for narrower joints where sand would scratch or not fit. Match the original joint type. Epoxy grout is premium: stain-proof and no sealing, but harder to work.
What color grout should I choose?
Darker than the tile hides future staining and looks modern; matching disappears for a calm surface; contrasting emphasizes the tile pattern. Consider maintenance: white grout in a busy kitchen is a cleaning commitment.
Do I need to seal grout?
Cement-based grout yes, 72 hours after application, reapplied yearly in wet areas. Epoxy grout no. Sealer is what keeps the fresh look fresh; unsealed grout restains within months.
Why is my new grout cracking?
Usually shallow old-grout removal, voids from poor packing, too much water during sponging, or grout in a movement joint that needed silicone caulk. Each has a specific fix; identify which before redoing.
How deep should I remove old grout?
At least two-thirds of the joint depth, ideally full depth. New grout needs the depth to bond; skimming over old grout produces the thin layer that cracks and flakes. The removal depth is the quality metric.
Epoxy grout or cement grout?
Epoxy is stain-proof and never needs sealing, ideal for showers and backsplashes, but harder to install. Cement grout with quality sealer is the manageable DIY choice. Choose epoxy for the chronic-stain zones, cement elsewhere.
How often should grout be resealed?
Test yearly with the water-drop test; reseal when drops absorb instead of beading. Showers and kitchen zones typically need annual resealing; low-traffic areas go years. The hour-long reseal prevents the weekend regrout.
The Bottom Line
Regrouting is patience made visible: remove deeply, clean thoroughly, pack firmly, sponge lightly, cure fully, seal diligently. The tile you already own looks new for the price of a bag of grout.
A dusty weekend buys a decade of fresh-looking tile. The grout saw is the hero; respect the dust mask.