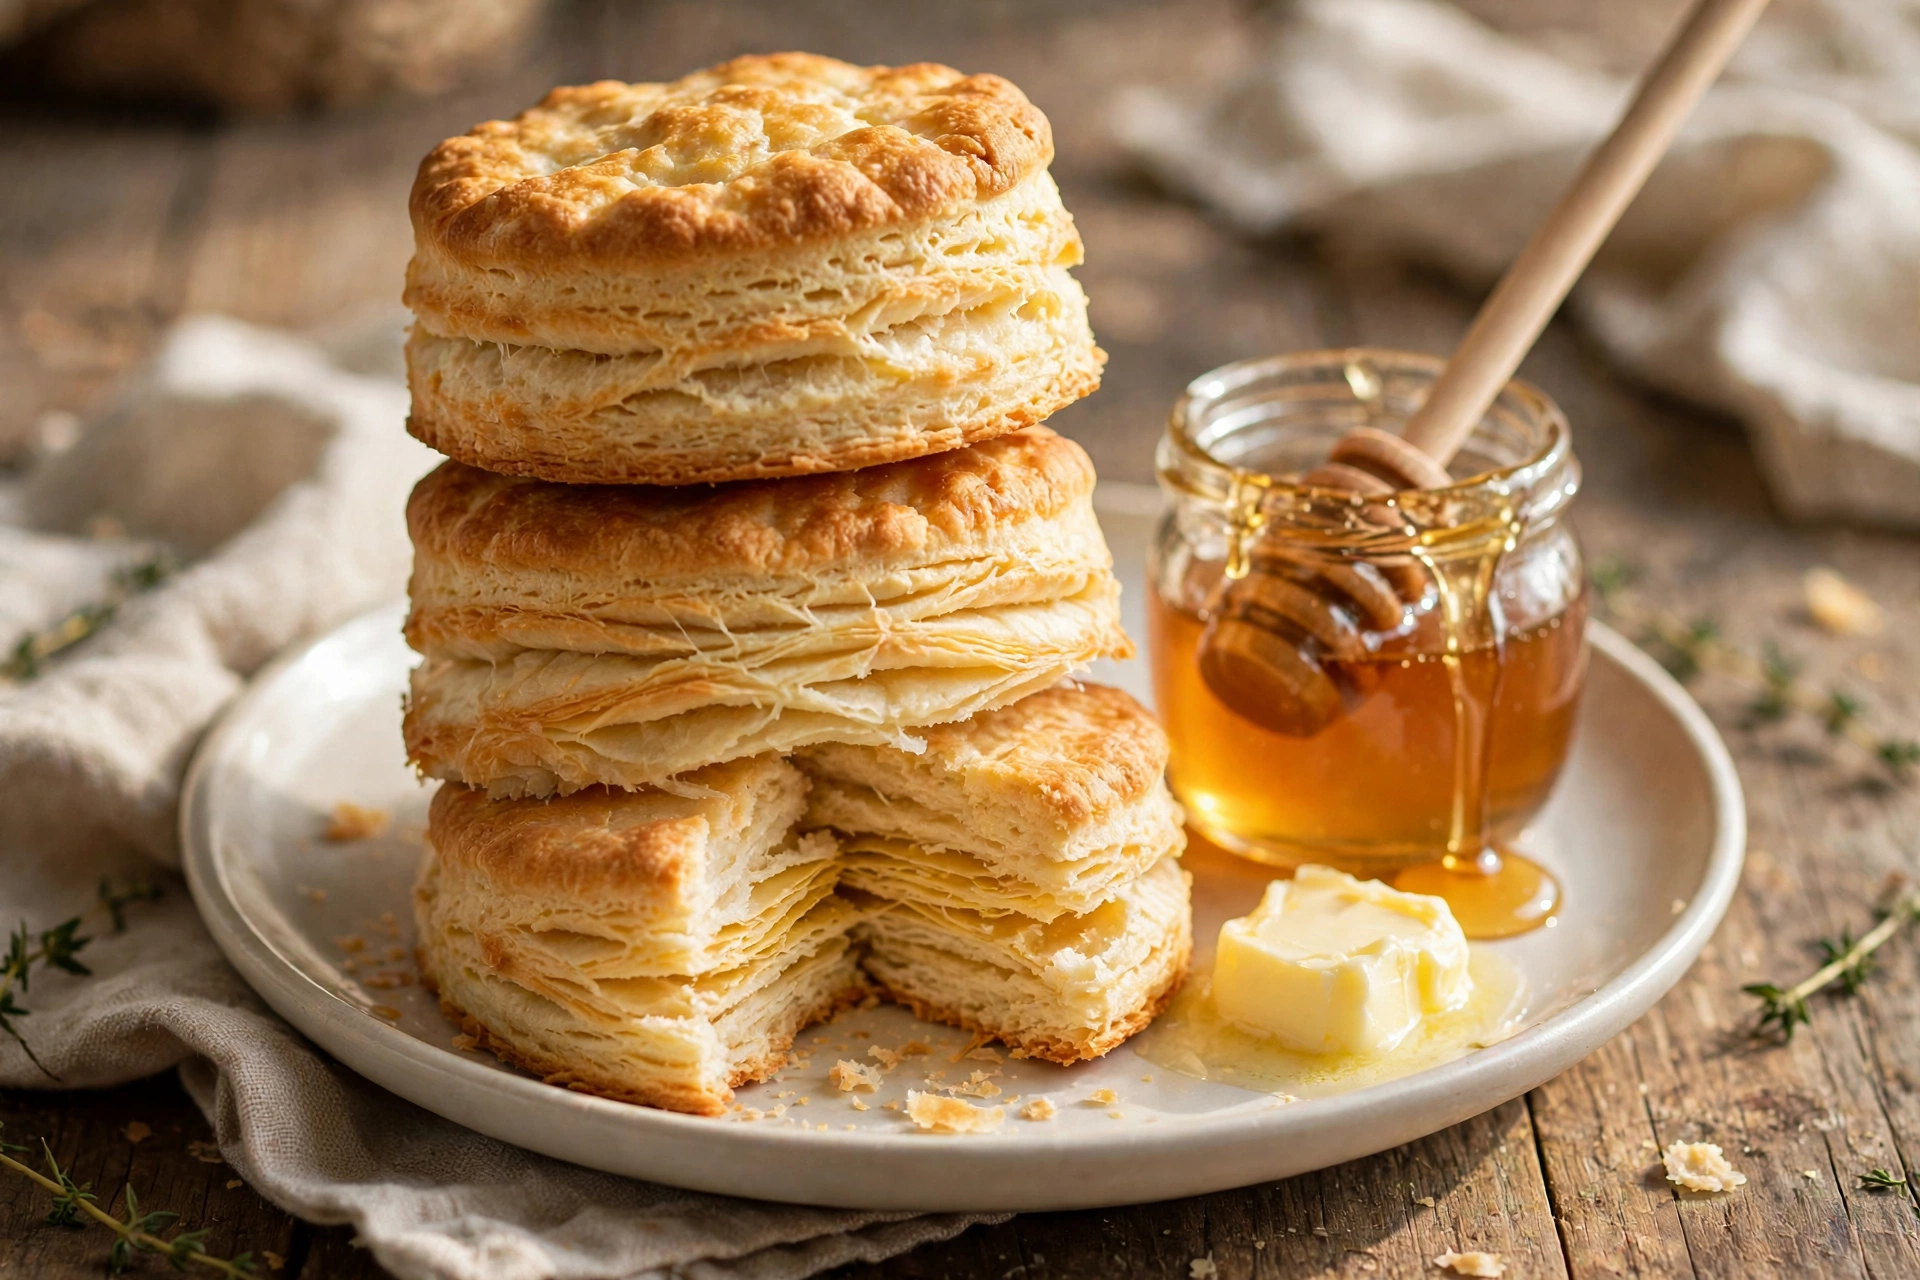
There is a special kind of silence that falls over a Southern table when a basket of hot biscuits arrives — a reverent pause, followed by the soft tearing of flaky layers and the quiet scrape of butter knives. Great buttermilk biscuits are an engineering marvel disguised as comfort food: tall and golden on the outside, steaming and tender within, with distinct, peel-apart layers that shatter delicately at the edges. They are the product of cold fat, gentle hands, real buttermilk, and a ripping-hot oven — plus a handful of techniques that Southern bakers have refined over generations. This guide teaches you every one of them, so your Thanksgiving biscuits rise high, split into layers, and taste like they came from a grandmother who never wrote anything down.
Unlike yeast rolls, biscuits are chemically leavened — they rely on baking powder and baking soda reacting with the acid in buttermilk, which means they go from flour to table in about thirty minutes. That speed makes them the perfect last-minute holiday bread: no proofing, no planning ahead, just cold ingredients and a hot oven. But speed does not mean simplicity. Biscuits punish rough handling and reward precision, and the difference between a tender, lofty biscuit and a tough, flat one comes down to details most recipes gloss over. We will not gloss over them.
The Anatomy of a Perfect Biscuit
Before touching flour, it helps to know what you are building. A great buttermilk biscuit has three defining qualities: height, flakiness, and tenderness. Each comes from a different mechanism, and the biscuit-maker’s art is satisfying all three at once.
Height comes from leavening and steam. Baking powder releases carbon dioxide twice — once when it meets liquid, once when it meets heat — and the water in the butter and buttermilk converts to steam in a hot oven, pushing the layers apart. A 450°F+ oven is essential: the blast of heat sets the structure quickly while the leavening is at maximum power. A timid oven produces squat, pale biscuits no matter how good your technique.
Flakiness comes from laminated fat. When pea-sized pieces of cold butter are folded through the dough, they create alternating layers of dough and fat. In the oven, the fat melts, the water in it turns to steam, and each layer puffs apart from its neighbor — the same principle behind croissants and pie crust, just less extreme. This is why biscuit dough gets folded like a letter two or three times: each fold multiplies the layers.
Tenderness comes from minimal gluten development. Unlike bread, where you want strong gluten, biscuits want just enough structure to hold together and no more. Every stir, knead, and re-roll develops gluten and toughens the crumb. The cardinal rule of biscuits — handle the dough as little as possible — exists to protect tenderness. Cold ingredients help too: cold fat stays in distinct pieces instead of melting into the flour (which would make the biscuit tender but crumbly rather than flaky), and cold liquid keeps everything firm and workable.
Ingredients: Simple, but Every One Matters
- 3 cups (375g) all-purpose flour, preferably a lower-protein Southern-style flour, plus more for dusting
- 1 tablespoon baking powder
- ½ teaspoon baking soda
- 1 tablespoon granulated sugar
- 1½ teaspoons fine sea salt
- ½ cup (113g) unsalted butter, frozen for at least 30 minutes, plus 2 tablespoons melted for brushing
- 1¼ cups full-fat buttermilk, well-shaken and very cold
- Optional: 1 tablespoon honey, for brushing
Flour: The Southern Secret
Ask a Southern biscuit baker about flour and you will get an opinionated answer, because flour protein content genuinely matters here. Lower-protein flours (around 8–10% protein, like White Lily, a beloved Southern brand milled from soft winter wheat) produce more tender biscuits than higher-protein national brands (10–12%). With less protein available to form gluten, the crumb stays soft even if your handling is imperfect — it is a built-in margin of error.
If you cannot find soft wheat flour, all-purpose flour works fine; just handle the dough even more gently. Do not use bread flour — its high protein will make tough biscuits almost regardless of technique. And measure carefully: spoon flour into the cup and level it off, or weigh it. Too much flour is the fastest way to dry, dense biscuits.
Real Buttermilk, Full-Fat
Traditional buttermilk was the tangy liquid left after churning butter; modern cultured buttermilk is milk fermented with lactic acid bacteria, and it is one of the hardest-working ingredients in baking. Its acidity does three things: it reacts with baking soda for leavening lift, it tenderizes gluten for a softer crumb, and it adds a subtle tang that makes biscuits taste like biscuits rather than bland dinner rolls.
Use full-fat cultured buttermilk, well-shaken and cold. Low-fat buttermilk works in a pinch but produces a slightly less rich biscuit. The common DIY substitute — milk soured with a tablespoon of lemon juice or vinegar — mimics the acidity but not the thickness or cultured flavor; it will leaven the biscuits, but the taste and texture will not be quite the same. For Thanksgiving, buy the real thing.
Butter: Frozen Is Non-Negotiable
The butter must be genuinely cold — frozen is best. Warm butter smears into the flour instead of staying in distinct pieces, and smeared butter cannot create layers. Freeze the butter for at least 30 minutes (an hour is better), then grate it on the large holes of a box grater directly into the flour. Grating creates thin shards of butter with enormous surface area that distribute evenly and stay cold — it is the single biggest upgrade most home bakers can make to their biscuit technique.
Some Southern bakers swear by a combination of butter and lard or shortening. Lard makes an exceptionally tender, flavorful biscuit (it was the traditional fat before butter became standard), and a 50/50 butter-lard blend gives you butter’s flavor with lard’s tenderness. If you go this route, freeze the lard too and grate it the same way.
Leavening: The Double-Acting Duo
Baking powder and baking soda work as a team. Baking soda (a base) reacts immediately with the buttermilk’s acid, giving an early lift; double-acting baking powder releases gas both when moistened and again when heated, carrying the rise through the bake. Using both gives you insurance across the whole timeline. Check that your baking powder is fresh — it loses potency within 6 to 12 months of opening. The test: drop a teaspoon into hot water; if it fizzes vigorously, it is alive.
The Lamination Technique: Building Layers
This is the heart of flaky biscuit-making, and it is simpler than it sounds. You are going to fold the dough like a business letter, creating layers of dough separated by butter.
Mixing Without Overworking
Whisk the dry ingredients thoroughly in a large, chilled bowl — even distribution of leavening is critical, since a pocket of baking soda tastes metallic and soapy. Add the grated frozen butter and toss quickly with your fingertips to coat each shard in flour. Then pour in the cold buttermilk all at once and stir with a fork or wooden spoon just until a shaggy, slightly sticky dough comes together. There will be dry patches; that is fine. Do not keep stirring to eliminate them — you will incorporate the flour during folding. The entire mixing process should take under a minute.
The Letter Fold
Turn the shaggy dough onto a lightly floured surface and gently press it into a rough rectangle about ¾ inch thick. Now fold: bring the right third over the center, then the left third over that, like folding a letter. Rotate the dough 90 degrees, pat it back out to ¾ inch, and fold again. Repeat for a total of 3 folds. That is it — three folds create 27 layers. More folds risk overworking; fewer leave the biscuits less flaky. If at any point the butter feels soft or the dough gets sticky, stop and refrigerate for 15 minutes. Cold is everything.
Patting, Not Rolling
Use your hands or a light touch with a rolling pin to pat the dough to its final thickness — a full 1 inch thick for tall biscuits. Many recipes say ¾ inch, but thicker dough makes taller biscuits, and tall biscuits are the goal. Do not roll aggressively back and forth; press gently and evenly. An uneven dough means uneven biscuits, so take a moment to square the edges with a bench scraper or your hands.
Cutting: The Details That Decide Height
How you cut biscuits affects how high they rise — this is real, not superstition.
Push Straight Down, Never Twist
Use a sharp biscuit cutter (or a floured glass in a pinch) and press straight down firmly, then lift straight up. Twisting the cutter seals the edges of the dough, gluing the layers together so they cannot separate and rise. This single habit — no twisting — is responsible for more dramatic biscuit improvement than almost any other tip. Dip the cutter in flour between cuts to prevent sticking.
Cut Close Together, Re-Roll Once
Cut the biscuits as close together as possible to minimize scraps, because re-rolled scraps make tougher biscuits — each re-roll develops more gluten. Gather scraps gently, press (do not knead) them together, and cut once more. After that, bake any remaining bits as “baker’s treats” — they will be rustic but delicious. Some bakers skip cutters entirely and bake the dough as one slab scored into squares (“cathead-style” dropped portions are another traditional option); squares have no scraps at all and every piece rises evenly.
Snug in the Pan
Place cut biscuits in a buttered cast-iron skillet or cake pan with their sides just touching. Biscuits that touch as they bake support each other and rise taller, with soft, pull-apart sides — the classic Southern presentation. Biscuits spaced apart on a sheet pan develop crustier sides and spread a bit more. For Thanksgiving, the touching method in a cast-iron skillet is both beautiful and traditional.
Step-by-Step: Tall, Flaky Buttermilk Biscuits
Makes 8 to 10 biscuits. Total time: about 35 minutes, including baking.
- Prep. Place a large mixing bowl in the freezer for 15 minutes. Freeze the butter for at least 30 minutes (up to overnight). Preheat the oven to 450°F (230°C) with a rack in the upper-middle position. Butter a 10-inch cast-iron skillet or 9-inch cake pan.
- Mix dry ingredients. In the chilled bowl, whisk together the flour, baking powder, baking soda, sugar, and salt until thoroughly combined.
- Add butter. Grate the frozen butter on the large holes of a box grater directly into the flour. Toss quickly with your fingertips to coat every shard. Work fast — you want the butter to stay frozen-hard.
- Add buttermilk. Pour in the cold buttermilk all at once. Stir with a fork just until a shaggy dough forms, under a minute. Dry patches are fine.
- Laminate. Turn onto a lightly floured surface, pat into a ¾-inch rectangle, and perform 3 letter folds (fold right third over center, left third over, rotate 90°, repeat). If the dough softens, chill 15 minutes.
- Cut. Pat to 1 inch thick. Cut straight down with a floured 2½-inch cutter — no twisting. Place biscuits touching in the prepared skillet.
- Bake. Bake 14 to 16 minutes until tall and deeply golden on top. For extra color, brush with melted butter in the last 2 minutes.
- Finish. Brush hot biscuits with melted butter (stir in a teaspoon of honey if you like). Cool 5 minutes in the skillet, then serve warm.
Troubleshooting: Diagnosing Biscuit Failures
My Biscuits Are Flat and Hard
Flat + hard usually means dead leavening or overworked dough — sometimes both. Test your baking powder in hot water; if it does not fizz vigorously, replace it. Review your handling: did you stir the dough until smooth? Knead the scraps? Roll aggressively? Each of those develops gluten and squeezes out the air. Also check your oven temperature with a thermometer — an oven running 50 degrees cool will not generate the steam blast biscuits need, and they will set before they rise.
My Biscuits Spread Instead of Rising
Spreading signals warm fat. If the butter melted into the flour before baking — because the kitchen was hot, the dough sat out too long, or the butter was not frozen — there are no distinct layers to puff apart, so the dough spreads sideways. The fix is temperature discipline: frozen butter, cold buttermilk, chilled bowl, and minimal time at room temperature. In a warm kitchen, chill the cut biscuits in the freezer for 10 minutes before baking.
The Bottoms Burned Before the Tops Browned
Your rack is too low or your pan conducts heat aggressively (dark metal pans brown bottoms faster). Move to the upper-middle rack and, if using a dark pan, consider lining it with parchment. A cast-iron skillet generally gives beautifully even results. If the tops need more color at the end, a brief 60 seconds under the broiler — watched like a hawk — finishes them.
They Taste Soapy or Metallic
Too much baking soda, or baking soda that was not evenly distributed. Measure carefully and whisk the dry ingredients thoroughly — every spoonful of flour should carry its share of leavening. Do not be tempted to add extra soda for more rise; the excess does not fully react and leaves an unpleasant chemical taste.
The Layers Did Not Separate
Either the cutter was twisted (sealing the edges), the dough was over-folded or over-pressed (fusing the layers), or the butter was not cold enough to create distinct strata. Next time: straight-down cuts, exactly three gentle folds, frozen grated butter. Also make sure the biscuits were touching in the pan — mutual support encourages upward rise and layer separation.
They Are Tender but Crumbly, Falling Apart
Crumbly biscuits usually need a touch more liquid or slightly less fat — the structure lacks enough gluten and moisture to hold together. Add buttermilk a tablespoon at a time next round. Alternatively, the flour may have been over-measured; spoon-and-level or weigh it. A rest helps too: letting the mixed dough sit 5 minutes before folding hydrates the flour more fully.
Make-Ahead, Storage, and Reheating
Biscuits are best within an hour of baking, but Thanksgiving logistics demand flexibility. The best make-ahead method is freeze-then-bake: cut the biscuits, freeze them solid on a tray, then transfer to a freezer bag for up to a month. Bake straight from frozen at 450°F, adding 3 to 5 minutes to the time. The results are nearly indistinguishable from fresh-mixed — the frozen butter actually performs beautifully.
You can also refrigerate cut, unbaked biscuits for up to 24 hours: arrange them in the skillet, cover tightly with plastic wrap, and refrigerate. Bake cold, adding a couple of minutes. Fully baked biscuits keep at room temperature in an airtight container for 2 days; refresh in a 350°F (175°C) oven for 5 to 8 minutes. Split and toast leftovers for breakfast — a day-old biscuit with sausage gravy or jam is one of life’s great pleasures.
Do not refrigerate baked biscuits (it accelerates staling) and do not microwave them unless you enjoy rubber. The oven refresh is always worth the few minutes.
Serving Ideas: Beyond the Bread Basket
At the Thanksgiving table, biscuits do triple duty: they sop up gravy, they carry butter and honey, and they become vehicles for leftovers. Set out softened butter, honey, and a good fruit preserve — the classic trio. For a savory-sweet bite that guests will talk about, split a warm biscuit and add a smear of cranberry sauce.
Biscuits also anchor a holiday brunch the next morning: split, toasted, and filled with leftover turkey, egg, and cheese. And if you are building a full Southern-leaning spread, biscuits belong alongside Southern cornbread (yes, both — they serve different roles), creamy mashed potatoes, and green bean casserole. For yeast-leavened contrast in the bread basket, our fluffy dinner rolls make a perfect companion. Plan the whole feast with our Thanksgiving dinner menu and side dish collection.
Variations Worth Trying
Cheddar and Chive Biscuits
Fold 1 cup of sharp cheddar and ¼ cup of snipped chives into the dry ingredients with the butter. The cheese creates savory pockets and extra browning. Reduce the salt slightly to compensate. These are magnificent with turkey and gravy.
Sweet Potato Biscuits
A Southern classic: replace ¾ cup of the buttermilk with ¾ cup of mashed roasted sweet potato, and add 2 tablespoons of brown sugar. The biscuits turn a gorgeous sunset orange, stay moist for days, and taste like autumn. They pair beautifully with ham and with Thanksgiving desserts as a not-too-sweet bite.
Herb and Black Pepper Biscuits
Add 2 tablespoons of chopped fresh rosemary or thyme and 1½ teaspoons of coarsely cracked black pepper to the dry mix. Sophisticated, savory, and excellent for sopping up the last of the gravy.
Honey-Butter Glazed Biscuits
Brush the hot biscuits with a mixture of melted butter and honey, then sprinkle with flaky salt. Sweet, salty, buttery — the biscuit equivalent of a warm hug.
In Pictures: Buttermilk Biscuits
A great buttermilk biscuit is tall, flaky, and pulls apart in layers — and it starts with frozen butter. The biscuits, golden and towering.
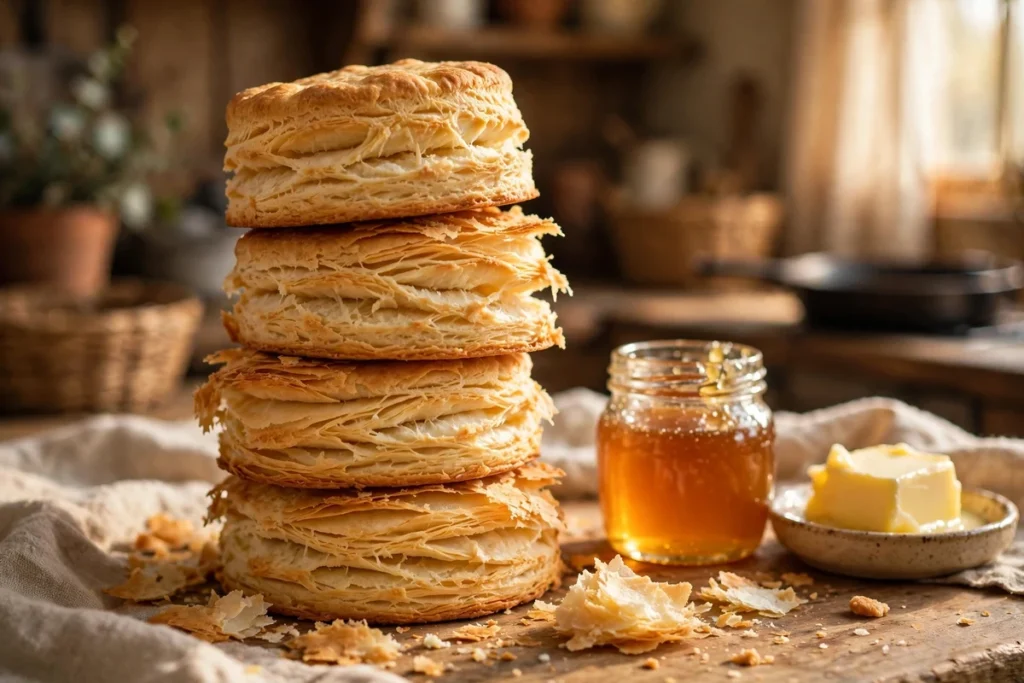
A stack of tall, flaky buttermilk biscuits with visible layers, served warm with butter.
Watch: Buttermilk Biscuits
Watch the step-by-step for Southern-style buttermilk biscuits — cold grated butter, gentle folding for layers, and biscuits baked close together for soft sides.
At a Glance: Buttermilk Biscuits
The anatomy of a perfect biscuit, from the guide.
| Topic | Notes |
|---|---|
| Frozen butter | Non-negotiable — cold butter creates the steam pockets that become flaky layers |
| Real buttermilk | Full-fat buttermilk’s acidity tenderizes the crumb and reacts with the leaveners |
| The leavening duo | Baking powder plus baking soda gives both lift and browning |
| Lamination | Fold the dough over itself a few times to build visible layers |
| Don’t twist | Press the cutter straight down — twisting seals the edges and stunts the rise |
| Timing | About 35 minutes total, including baking |
Frequently Asked Questions
Can I make buttermilk biscuits without buttermilk?
In a pinch, soured milk (1 tablespoon lemon juice or vinegar per cup of milk, rested 5 minutes) provides the acidity for leavening, but it lacks buttermilk’s thickness and cultured flavor — the biscuits will be paler in flavor and slightly less tender. For Thanksgiving, real cultured buttermilk is worth buying. Buttermilk powder reconstituted with water is a decent shelf-stable alternative.
Why must the butter be frozen?
Flaky layers form when distinct pieces of solid fat are folded through dough; in the oven’s heat, the water in the butter turns to steam and pushes the layers apart. If the butter is soft, it smears into the flour instead of staying in pieces, and you get a tender but crumbly biscuit with no layers. Grating frozen butter gives you thin, even shards that stay cold and distribute perfectly.
Can I make biscuit dough ahead of time?
Yes — freezing cut, unbaked biscuits is the gold standard: freeze solid, bag for up to a month, and bake from frozen, adding a few minutes. You can also refrigerate cut biscuits in the pan for up to 24 hours before baking. Avoid refrigerating the mixed dough for long periods, as the baking powder’s first reaction starts as soon as it meets liquid.
Why did my biscuits not rise?
The usual causes, in order: expired baking powder, oven not hot enough, twisted cutter sealing the edges, overworked dough, or warm butter that smeared instead of layering. Check leavening freshness first — it is the simplest fix — then review your handling against the technique sections above.
Cast iron skillet or sheet pan?
Cast iron, for Thanksgiving. Biscuits baked touching in a buttered skillet rise taller, develop soft pull-apart sides, and arrive at the table in a gorgeous rustic vessel. A sheet pan gives crustier sides and works fine, but the skillet presentation is unbeatable for a holiday.
How do I get the tops beautifully browned?
Three things: a hot oven (450°F), sugar in the dough (it promotes browning), and a butter brush — brush with melted butter before baking for color, or in the last 2 minutes for a glossy finish. A light brush of buttermilk or cream before baking also deepens browning. If the tops still look pale, 60 seconds under a watchful broiler finishes the job.
Conclusion
Buttermilk biscuits reward the baker who respects the details: frozen grated butter, cold buttermilk, three gentle folds, a straight-down cut, and a blazing oven. None of it is difficult — it just requires intention, and the payoff is a basket of tall, golden, shattering-layered biscuits that taste like heritage. Make them once from this guide and the technique is yours for life, ready for every Thanksgiving, Christmas, and Sunday supper to come. For more holiday breads and a fully planned feast, explore our Thanksgiving recipes collection — and remember: no twisting the cutter.