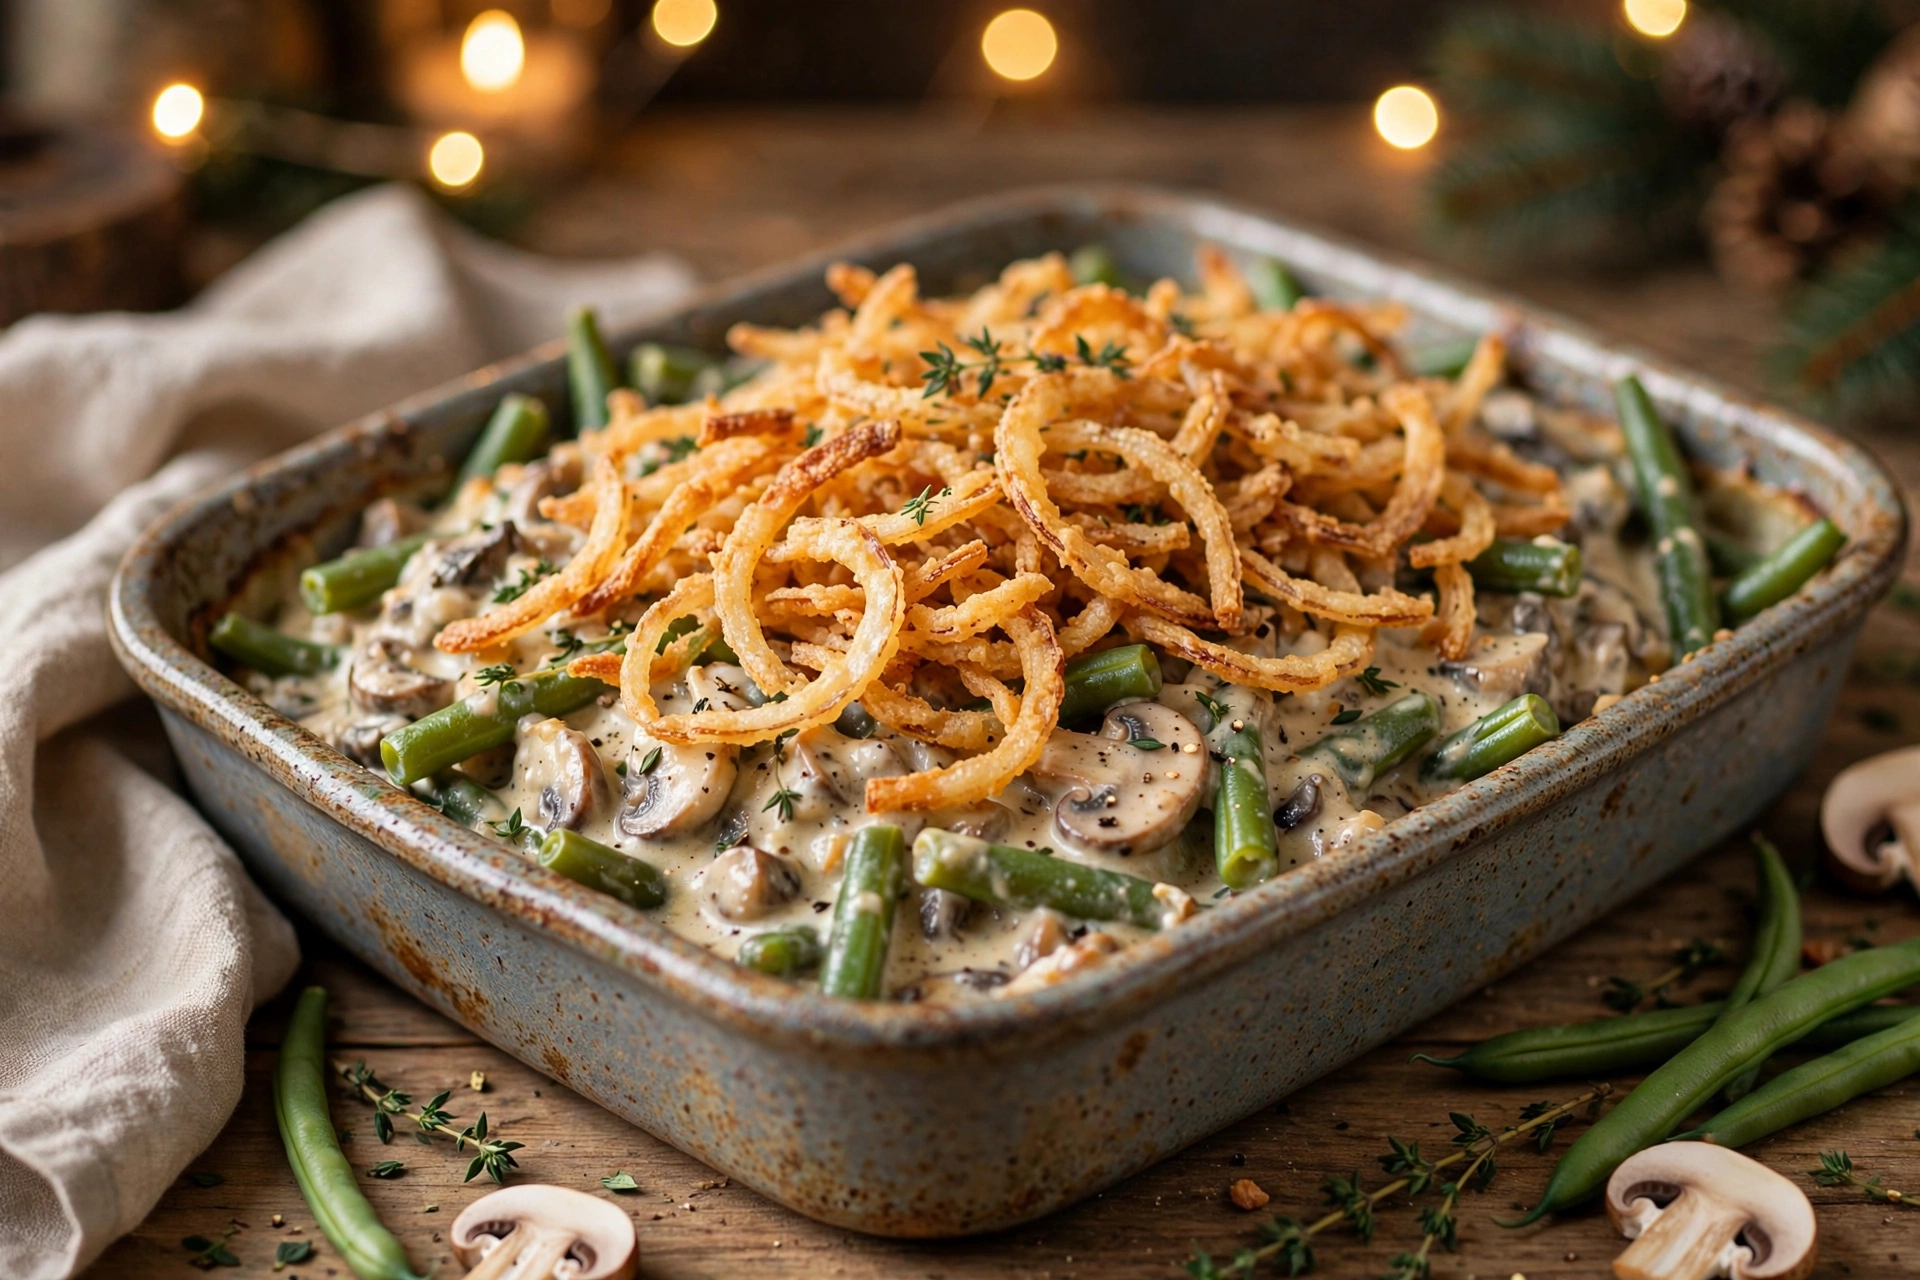
If you grew up with the canned-soup version of green bean casserole, you know it by heart: green beans, condensed cream of mushroom soup, crispy fried onions from a canister, baked until bubbly. It is a fine dish. But homemade green bean casserole from scratch — built on fresh beans, a silky mushroom cream sauce you make yourself, and shallots fried golden in your own kitchen — is the same idea taken to a completely different level. The beans stay bright and snappy, the sauce tastes like actual mushrooms instead of salt, and the topping shatters like glass.
This guide is both a recipe and an honest comparison. You will get the full from-scratch method with every technique explained — how to blanch beans so they stay green, how to build a lump-free cream sauce, how to fry shallots that stay crisp for hours — plus a clear-eyed look at where the classic canned version still makes sense. There are variations (cheesy, bacon-studded, gluten-free), troubleshooting for every common failure, and a make-ahead plan that lets you serve the upgraded version on Thanksgiving without losing your mind. No canned soup required, and no judgment if you keep a can in the pantry anyway.
The Story Behind the Dish
Green bean casserole is one of the rare American dishes with a documented inventor and a birth year. In 1955, Dorcas Reilly, a home economist in the Campbell’s Soup Company test kitchen in New Jersey, developed the recipe after an Associated Press reporter asked for a vegetable side dish. Reilly’s brief was practical: create something any home cook could make with ingredients likely already in the house. She considered corn, peas, and even lima beans before settling on what she called “Green Bean Bake” — green beans, condensed cream of mushroom soup, and crispy fried onions.
The recipe was printed on soup cans starting in the 1950s and became a fixture of the American Thanksgiving table. Decades later, Campbell’s estimated the dish appeared at tens of millions of Thanksgiving dinners each year, and a huge share of the company’s cream of mushroom soup sales went straight into versions of it. That history matters for this recipe because it explains the dish’s DNA: it was engineered for convenience, not flavor. The from-scratch version keeps the brilliant architecture Reilly invented — tender beans, creamy mushroom sauce, crunchy onion topping — and rebuilds each layer with real ingredients. If you are assembling the whole holiday spread, this casserole earns its place on any Thanksgiving dinner menu alongside the turkey and trimmings.
From Scratch vs. Classic: An Honest Comparison
Before you commit to the from-scratch method, it helps to see exactly what changes — and what does not — compared with the classic canned-soup version. The structure is identical; only the building blocks differ.
The beans
The classic uses canned or frozen green beans, which are soft by design — convenient, but one-note in texture. The from-scratch version uses fresh green beans, blanched just until tender-crisp. The difference in the finished dish is dramatic: fresh beans keep a bright color, a slight bite, and a vegetal sweetness that stands up to the rich sauce instead of disappearing into it. This is the single biggest upgrade in the recipe.
The sauce
Condensed cream of mushroom soup is a marvel of food engineering — concentrated, salty, and consistent — but its mushroom flavor is faint and its sodium is high. A homemade sauce starts with real mushrooms browned in butter, builds a roux with flour, and finishes with stock and cream. It takes about 20 minutes and tastes like mushrooms, butter, and thyme rather than salt. You also control the thickness precisely, which means no more watery or gluey casserole.
The topping
Canned fried onions are undeniably delicious and stay crisp almost indefinitely. Homemade fried shallots (or onions) taste fresher, sweeter, and more delicate — but they do soften faster once they touch the sauce, which is why this recipe adds half the topping before baking and the rest after. If you are short on time, there is no shame in using the canned onions on the from-scratch base; it is a perfectly respectable hybrid.
Time and effort
The classic assembles in about 5 minutes. The from-scratch version takes roughly 45 minutes of active cooking plus 25 minutes of baking. That is a real cost on Thanksgiving day — but almost all of it can be shifted to the day before, as the make-ahead section explains. For a holiday built around cooking the Thanksgiving turkey, shifting side-dish labor off the big day is the whole game.
The Three Components, Upgraded
Understanding each layer separately makes the whole dish easier to execute and troubleshoot. Here is what is happening in each one.
Blanched fresh green beans
Blanching — boiling briefly, then shocking in ice water — does two things: it cooks the beans to tender-crisp while setting their bright green color, and it stops the cooking instantly so they do not go mushy in the oven later. The beans finish cooking in the casserole, so you want them slightly underdone at this stage. Trim the stem ends (leave the pretty tapered tips), boil in generously salted water for 3 to 4 minutes, and shock immediately. Well-salted blanching water is the only chance to season the beans themselves, so do not be shy with the salt.
Homemade mushroom cream sauce
This is a classic béchamel-style sauce with mushrooms, and it follows the same logic as any great cream sauce: brown the mushrooms hard first (crowded, pale mushrooms steam instead of browning — work in batches if needed), cook the flour in the fat for a full minute or two to eliminate raw starch flavor, then add liquid gradually while whisking. Chicken or vegetable stock gives the sauce savory depth; heavy cream gives it body and richness. A splash of soy sauce or a pinch of mushroom powder deepens the umami without announcing itself. Fresh thyme is the classic herb pairing — its earthy, slightly minty notes are a natural match for mushrooms.
Crispy fried shallots
Thinly sliced shallots, fried in neutral oil until deep golden, are sweeter and more delicate than fried onions, and they look beautiful. The keys are thin, even slices (a mandoline helps enormously), oil at the right temperature (around 325–350°F — too cool and they absorb oil; too hot and they burn before crisping), and draining on a rack rather than paper towels so air circulates underneath. Salt them the moment they come out of the oil. They will keep crisp at room temperature for several hours in a loosely covered container.
Ingredients You’ll Need
- 2 pounds fresh green beans, trimmed
- Kosher salt, for the blanching water and seasoning
- 3 tablespoons unsalted butter, plus more for the baking dish
- 1 pound cremini or white button mushrooms, sliced
- 1 medium yellow onion, finely diced
- 3 cloves garlic, minced
- 1/4 cup all-purpose flour
- 1 1/2 cups chicken or vegetable stock, warmed
- 1 1/2 cups heavy cream
- 1 tablespoon soy sauce
- 1 teaspoon fresh thyme leaves (or 1/2 teaspoon dried)
- 1/2 teaspoon freshly ground black pepper
- 1/4 teaspoon freshly grated nutmeg
- 4 large shallots, thinly sliced into rings (for the topping)
- 1 cup neutral oil (such as vegetable or canola), for frying
Ingredient notes
Green beans: Look for firm, bright beans that snap cleanly when bent. Limp or oversized beans with visible seeds will be starchy and dull no matter how carefully you cook them. Haricots verts (the thinner French variety) work beautifully but cook a minute faster — watch them closely.
Mushrooms: Cremini mushrooms have more flavor than white buttons and brown better. A mix of cremini and shiitake is even better if your budget allows — shiitakes add a deep, almost meaty savoriness. Avoid washing mushrooms under running water; they absorb it like sponges. Wipe them clean with a damp cloth or soft brush instead.
Stock: A good stock is doing real work in this sauce, so use the best you have — homemade, or a quality store-bought low-sodium stock. Low-sodium matters because the sauce reduces and concentrates; regular stock plus the soy sauce can push it over the edge into too-salty territory.
Heavy cream: Do not substitute half-and-half or milk here. The sauce needs the fat content of heavy cream to stay stable and silky through baking; lower-fat dairy is more likely to thin out or separate in the oven’s heat.
Step-by-Step Instructions
- Blanch the green beans. Bring a large pot of generously salted water to a rolling boil and prepare a large bowl of ice water. Add the trimmed beans and cook 3 to 4 minutes, until bright green and tender-crisp — they should still have a slight bite. Transfer immediately to the ice water to stop the cooking, then drain thoroughly and pat dry. Excess water on the beans will thin your sauce, so take the drying seriously.
- Fry the shallots. Pour the oil into a deep skillet or Dutch oven to a depth of about 1/2 inch and heat over medium-high to 325–350°F (a slice of shallot should sizzle vigorously on contact). Fry the shallot rings in batches, stirring occasionally, for 3 to 5 minutes per batch, until deep golden brown. Lift out with a slotted spoon, drain on a wire rack set over a sheet pan, and salt immediately. Set aside; they will crisp further as they cool. Reserve the shallot oil for another use — it is liquid gold for roasting vegetables.
- Brown the mushrooms. In a large, deep skillet or Dutch oven, melt the butter over medium-high heat. Add the sliced mushrooms in a single layer (work in two batches if needed) and cook undisturbed for 3 to 4 minutes, until deeply browned on one side, then stir and continue cooking until browned all over, 5 to 7 minutes total. Season with a pinch of salt. Browning is where the flavor lives — pale, crowded mushrooms are the difference between a great sauce and a bland one.
- Build the sauce base. Add the diced onion to the mushrooms and cook 4 to 5 minutes until softened. Stir in the garlic and thyme and cook 1 minute more. Sprinkle the flour over everything and stir constantly for 2 minutes, until the flour is fully absorbed and smells faintly toasty. This cooks out the raw starch flavor.
- Add the liquids. Pour in the warm stock a little at a time, whisking constantly, letting each addition incorporate before adding more. Once all the stock is in, whisk in the heavy cream, soy sauce, black pepper, and nutmeg. Bring to a gentle simmer and cook 3 to 5 minutes, stirring, until the sauce thickly coats the back of a spoon. Taste and adjust salt — remember the blanched beans are already seasoned.
- Combine and bake. Heat the oven to 375°F (190°C). Butter a 9-by-13-inch baking dish. Add the drained green beans to the sauce and toss to coat. Spread in the dish, sprinkle half the fried shallots over the top, and bake 20 to 25 minutes, until hot and bubbling around the edges.
- Finish with the remaining topping. Scatter the remaining fried shallots over the hot casserole and bake 5 minutes more, just to warm them through. Serve immediately, while the topping is at its crispiest.
Variations to Try
Cheesy green bean casserole
Stir 1 1/2 cups shredded Gruyère or sharp white cheddar into the hot sauce until melted before combining with the beans. Gruyère adds nutty depth; cheddar adds familiar comfort. Either way, the cheese makes the dish richer and more indulgent — a natural fit alongside creamy mashed potatoes on a fully loaded holiday plate.
Bacon and mushroom
Cook 6 slices of chopped bacon until crisp, remove with a slotted spoon, and brown the mushrooms in a tablespoon of the rendered bacon fat plus butter. Stir the bacon into the casserole before baking. The smokiness plays beautifully against the creamy sauce — the same reason bacon works so well with roasted vegetables elsewhere on the table.
Gluten-free version
Replace the all-purpose flour with an equal amount of sweet rice flour or a gluten-free all-purpose blend, and make sure your stock and soy sauce are certified gluten-free (use tamari instead of soy sauce). For the topping, toss thinly sliced shallots in rice flour before frying — it fries up even crispier than wheat flour.
Dairy-free version
Use olive oil or vegan butter in place of the butter, full-fat coconut milk or unsweetened oat creamer in place of the heavy cream, and vegetable stock. The coconut version adds a subtle sweetness that works surprisingly well with the mushrooms. Fry the shallots as usual — they are naturally dairy-free.
The 5-minute classic (for comparison)
For the record, here is the original-style version: toss 2 pounds of cooked green beans (canned, drained, or frozen, thawed) with two cans of condensed cream of mushroom soup and half a canister of canned fried onions, bake at 350°F for 25 minutes, top with the remaining onions, and bake 5 minutes more. It is not as good as the from-scratch version — but it is ready in a fraction of the time, and on a chaotic Thanksgiving that counts for a lot.
Troubleshooting: Fixing Common Problems
The sauce is too thin
Thin sauce usually means the roux was under-measured or the liquid went in too fast. Simmer the sauce a few minutes longer before combining — it thickens noticeably as it bubbles. If the casserole is already assembled, bake it uncovered a little longer; evaporation will concentrate the sauce. Next time, make sure the sauce thickly coats a spoon before the beans go in — it should look slightly thicker than you want the final dish, because the beans release a little water in the oven.
The sauce is too thick or gluey
Over-thickened sauce comes from too much flour or over-reduction. Whisk in warm stock a few tablespoons at a time until it loosens to a creamy consistency. Glueyness specifically points to the flour: either it was not cooked long enough in the fat (raw starch tastes pasty) or the sauce was boiled hard after thickening, which can break down the starch. Gentle simmering is the rule once the sauce has thickened.
The beans turned olive-drab and mushy
That is overcooking — either blanched too long, shocked too late, or baked too long. The beans should go into the oven tender-crisp, not fully tender, because they keep cooking in the hot sauce. Set a timer for the blanch, have the ice bath ready before the beans go in, and pull the casserole when it is bubbling at the edges rather than waiting for the center to bubble.
The topping went soggy
Fried shallots soften on contact with steam and sauce — that is physics, not failure. The two-stage topping method in this recipe (half before baking, half after) guarantees a crisp layer on top no matter what. Also make sure the shallots are truly crisp when they come out of the oil; under-fried shallots that feel crisp when hot can go limp as they cool. When in doubt, fry them a shade darker than you think — they lighten slightly as they cool.
The whole dish tastes flat
Flatness means under-seasoning or under-browning. Mushrooms need aggressive browning and assertive salt; the blanching water needs to taste like the sea; and the finished sauce should be tasted and adjusted before the beans go in. A squeeze of lemon juice or a teaspoon of sherry vinegar at the end brightens everything without tasting acidic — acid is the secret weapon of rich casseroles.
Make-Ahead, Storage, and Reheating
Make ahead
This recipe is built for advance prep. Up to 2 days ahead: blanch the beans, make the sauce, and fry the shallots. Store the beans and sauce separately in the refrigerator (combine them only before baking, or the beans will soften), and keep the shallots at room temperature in a loosely covered container — never refrigerate fried shallots, or they will go limp. On Thanksgiving day, combine beans and sauce in the baking dish, bake as directed, and finish with the shallots. The active work on the day itself is about 30 minutes.
Storing leftovers
Refrigerate leftovers in a covered container for up to 4 days. The shallot topping will soften — accept this and plan to refresh it (see below) rather than mourning it.
Reheating
Warm in a 350°F oven, covered with foil, for 15 to 20 minutes until hot through. For the best texture, fry or re-crisp a small fresh batch of shallots (or use canned fried onions) to scatter over the top after reheating. The microwave works for single portions but will not restore any crispness to the topping.
In Pictures: Green Bean Casserole
The from-scratch green bean casserole keeps the soul of the 1950s classic while upgrading every component. The dish, bubbling with its crispy onion crown.
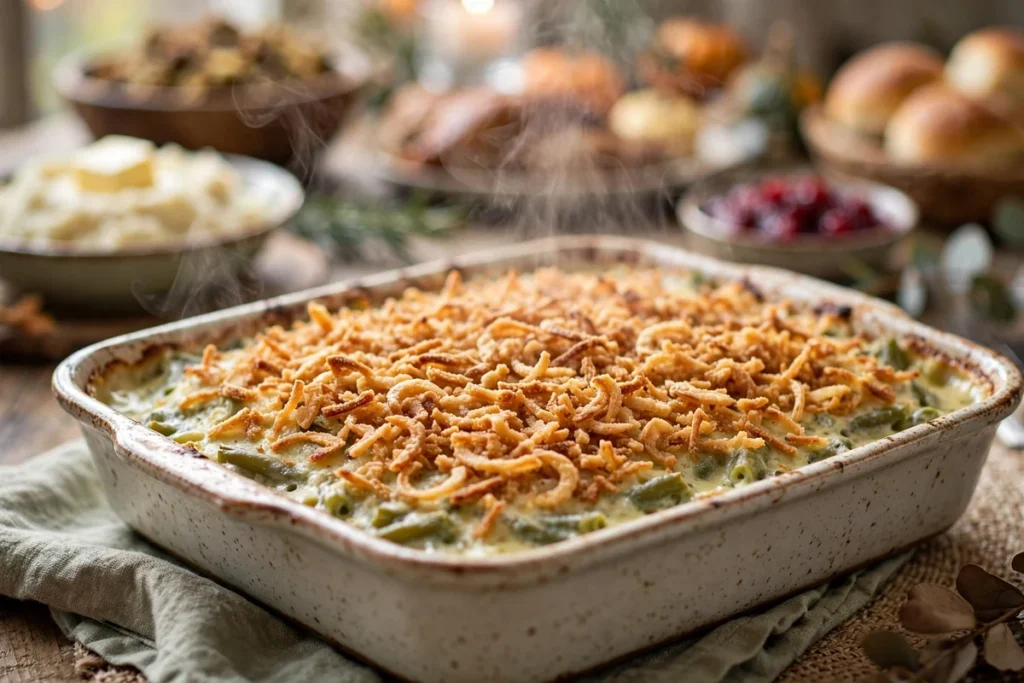
A from-scratch green bean casserole with fresh green beans, creamy mushroom sauce, and crispy fried onions on top.
Watch: Green Bean Casserole
This from-scratch tutorial upgrades all three components — blanched fresh beans, a real mushroom cream sauce, and a double-crunch topping — and yes, Campbell’s soup is pointedly not invited.
At a Glance: Green Bean Casserole
The three components, upgraded, from the guide.
| Component | The upgrade |
|---|---|
| The story | The original was created in a Campbell’s test kitchen in the 1950s — Dorcas Reilly’s recipe became a Thanksgiving icon |
| The beans | Fresh green beans, blanched about 5 minutes and shocked in ice water for color and snap |
| The sauce | A real mushroom cream sauce with bacon, onion, and gouda instead of condensed soup |
| The topping | French fried onions plus toasted panko for extra crunch |
| From scratch vs. classic | More effort, but brighter flavor and none of the canned-soup saltiness |
| Baking | Around 375°F for 25–30 minutes until golden and bubbling |
Frequently Asked Questions
Can I use frozen green beans instead of fresh?
Yes, with a small adjustment. Thaw frozen beans completely, pat them very dry, and skip the blanching — they are already cooked. Add them directly to the sauce and reduce the final bake by about 5 minutes since they need less oven time. The texture will be softer than fresh blanched beans but still much better than canned.
Why is my homemade mushroom sauce bland compared to canned soup?
Almost always, it is under-browning and under-salting. Canned soup is intensely salty, so your palate may initially read a properly seasoned homemade sauce as mild. Brown the mushrooms deeply — genuinely dark golden, not just softened — salt in layers (mushrooms, then sauce, then taste), and do not skip the soy sauce and thyme. Taste the sauce on a bean before you decide; the combination is what matters.
Can I make the fried shallots in advance?
Absolutely — they are one of the best advance-prep items on the Thanksgiving menu. Fry them up to 2 days ahead, cool completely, and store at room temperature in a container with the lid ajar or covered loosely with a paper towel. Do not refrigerate them. If they soften slightly, 5 minutes in a 350°F oven restores their crunch.
Can I assemble the entire casserole the night before?
You can combine the beans and sauce in the baking dish, cover, and refrigerate overnight — but keep the fried shallots separate until serving day. Bake the cold casserole 10 to 15 minutes longer than directed, then add the shallots for the final 5 minutes. This is the lowest-stress path to serving the from-scratch version on Thanksgiving.
What is the difference between shallots and onions for the topping?
Shallots are milder, sweeter, and more delicate than yellow onions, and they fry into lacier, more refined crisps. Sliced yellow onions work fine and are cheaper — slice them the same thin way and fry identically. Either is a major upgrade over canned fried onions in freshness of flavor, though the canned version wins on convenience and staying power.
How do I keep this gluten-free and still get a crispy topping?
Use sweet rice flour in the sauce and toss the shallot slices in rice flour before frying. Rice flour fries exceptionally crisp — many tempura batters rely on it for exactly this reason. Confirm your stock and tamari are gluten-free, and the whole dish is safe for gluten-free guests without any compromise in texture.
Conclusion
Homemade green bean casserole from scratch takes the smartest architecture in the Thanksgiving side-dish canon — Dorcas Reilly’s 1955 formula of beans, mushroom cream, and crispy alliums — and rebuilds it with ingredients that taste like themselves. The extra 40 minutes of work buys you brighter beans, a sauce with real mushroom depth, and a topping that crackles. Make the components ahead, assemble on the day, and serve it next to the classics on your Thanksgiving side dishes spread. Once your table tastes the from-scratch version, the can of soup may find itself permanently retired to the back of the pantry.