Why Roses Are a Photographer’s Dream Subject
Roses are the rare subject that is beautiful at every distance and in every light. A tight macro of a single bloom reveals spiraling geometry that looks almost architectural. A full bouquet gives you color, abundance, and romance in one frame. Scattered petals turn any surface into art. And roses carry built-in meaning — love, beauty, transience — so the photos resonate emotionally without any explanation.
Rose Day is the perfect excuse for a flower photoshoot because the material is everywhere: the bouquet you received, the arrangements on the table, the petals from last night’s dinner. This guide covers both sides of rose photography — shooting the flowers themselves as fine-art subjects, and using roses as props and styling in portraits. Whether you shoot on a phone or a dedicated camera, these 25 ideas plus the lighting, styling, and editing systems will elevate your results dramatically.
Gear: What You Actually Need
Honest truth: a modern phone is enough for 90% of rose photography. Phones excel at close focusing, have excellent macro modes, and their computational photography handles tricky rose reds (which are notoriously hard to expose correctly) better than many cameras on auto.
- Phone shooters: Use the main (1x) lens for most shots — it has the best sensor. Try the macro mode for extreme close-ups of petal texture and dew. A $15 clip-on macro lens can get you even closer.
- Camera shooters: A 50mm or 85mm prime at wide aperture gives you the creamy backgrounds that make rose portraits sing. A true macro lens (90mm–105mm) opens up the extreme close-up world.
- Everyone needs: A way to stabilize (tripod, stack of books, or even a bag of rice), something to diffuse harsh light (a white shower curtain or bedsheet works), and a reflector — white poster board is perfect — to bounce light into shadows.
- Nice to have: A spray bottle for misting petals (the dew-drop look), black and white poster boards for backgrounds, and floral wire for building crowns and installations.
25 Rose Day Flower Photoshoot Ideas
Rose Portraits: The Flower as Star (1–7)
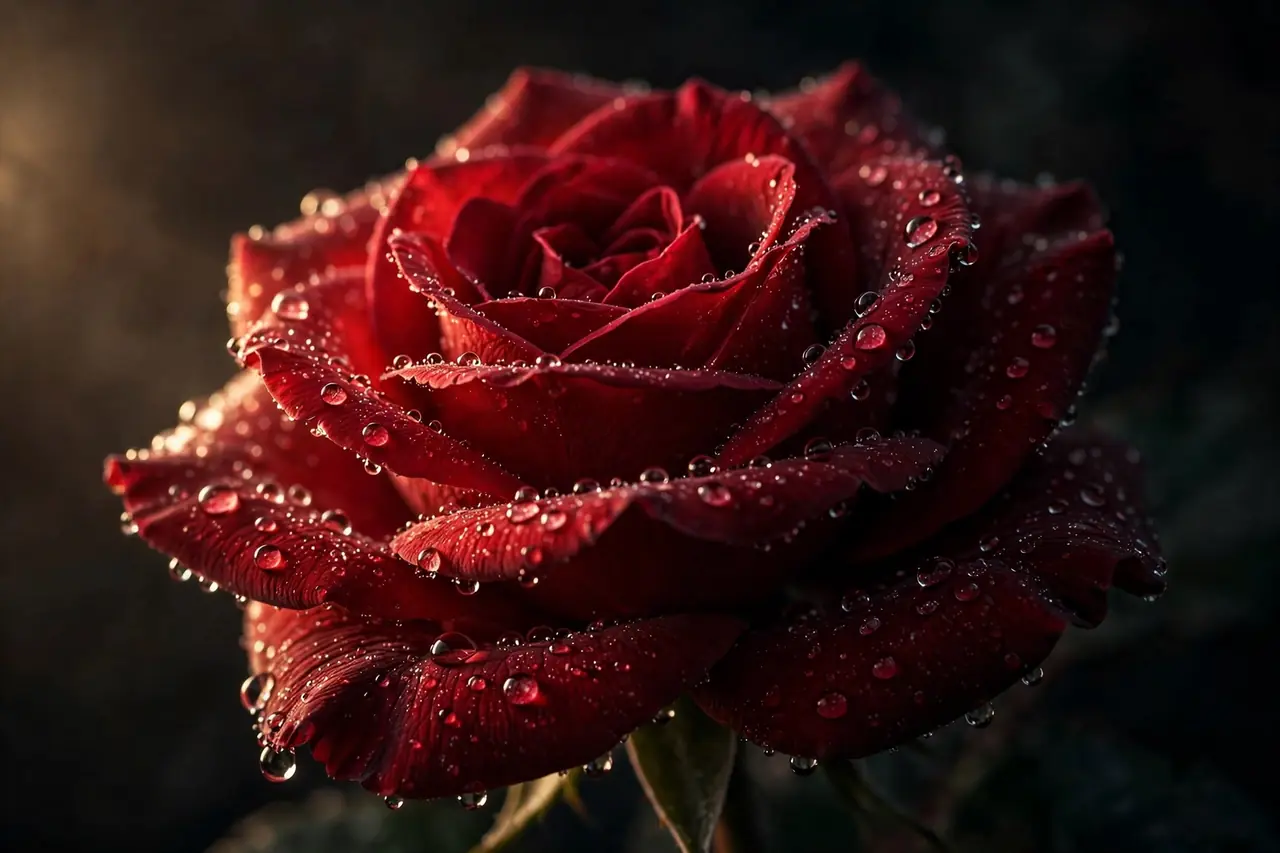
1. The single bloom, black background. One perfect rose against black poster board, side-lit from a window. The oldest trick in floral photography and still the most striking — the rose glows like it is lit from within.
2. The macro spiral. Get as close as your lens allows to the center of a partially open bloom and capture the spiral geometry of the petals. Convert to black and white for an abstract, architectural feel.
3. Dew-drop macro. Mist the rose lightly with a spray bottle and shoot the droplets clinging to petals and thorns. Backlight it for sparkle. Morning is best — real dew if you can get it.
4. The wilting beauty. A rose past its prime — curling petals, deepening color — photographed honestly against a dark background. There is profound beauty in transience, and these shots have emotional weight the perfect blooms lack.
5. The dozen from above. Arrange a dozen roses in a tight circle, blooms facing up, and shoot straight down. The radial symmetry is hypnotic.
6. Rose in water. Submerge a bloom in a clear glass bowl of water and shoot through the glass. Refraction bends the petals into dreamlike shapes.
7. The stem study. Photograph the whole rose — bloom, stem, leaves, thorns — against white. Botanical-illustration style; elegant and honest.
Roses With People (8–14)
8. The bouquet mask. Subject holds a large bouquet covering the lower face, eyes meeting the camera over the blooms. Mysterious and romantic.
9. The petal veil. Have someone toss petals just out of frame above the subject; shoot through the falling petals with a wide aperture. The foreground blur creates a dreamy frame-within-a-frame.
10. Rose crown portrait. Weave a crown of roses and greenery, place it on the subject, and shoot in soft window light. The making-of shots are as good as the portrait.
11. The hand-off. Two hands exchanging a single rose, shot close. The gesture is the story.
12. Roses in hair. Tuck stems into an updo or braid for an editorial beauty shot. Side light emphasizes the texture of both hair and petals.
13. The bath shoot. A bathtub filled with water, floating rose heads, and candles around the rim — subject partially visible or just hands and roses. Luxurious and wildly shareable.
14. The reader. Subject reading in a window seat, roses in a vase beside them, soft light. Quiet, literary romance.

Flat Lays and Still Life (15–20)
15. The love-letter flat lay. Roses, a handwritten letter, a ring or watch, coffee cup, and reading glasses arranged on linen. Shoot straight down. Nostalgic and rich.
16. The color gradient. Arrange roses in a spectrum — white to blush to pink to red to burgundy — in a flowing S-curve across the frame. Satisfying and striking.
17. The breakfast tray. Croissants, coffee, a small vase of roses, the morning paper on a tray. Lifestyle photography that sells a feeling.
18. Petals and silk. Loose petals scattered on silk or satin fabric, shot close with shallow depth of field. Pure texture and color.
19. The photographer’s desk. Camera, printed photos, roses, and notes arranged as a creative still life. Meta and personal.
20. The vanitas. Roses with a skull (fake), an hourglass or watch, and a candle — a meditation on beauty and time. Dark, artistic, and surprisingly moving.
Creative and Experimental (21–25)
21. Double exposure. Blend a rose macro with a portrait silhouette in editing. Most phone editors and all desktop software can do this; the results look like album art.
22. The frozen rose. Freeze a rose in a block of ice (in a container in the freezer) and photograph it as it melts, backlit. Ethereal and utterly unique.
23. Smoke and roses. A stick of incense just out of frame sends a curl of smoke across the roses. Shoot in burst mode. Moody and dramatic.
24. The shattered bouquet. Throw a cheap bouquet in the air and shoot the explosion of petals at high shutter speed. Chaotic joy, frozen.
25. Light painting. In a dark room, set a long exposure and “paint” the roses with a flashlight or phone light while the shutter is open. The roses emerge from darkness, glowing.
Lighting Setups for Rose Photography
Light makes or breaks flower photos. Roses are three-dimensional sculptures of overlapping petals — the right light reveals that depth; the wrong light flattens it into a red blob.
| Setup | How | Effect | Best For |
|---|---|---|---|
| Side window light | Place roses beside (not in front of) a large window | Reveals petal texture and depth; gentle shadows | Portraits, single blooms, still life — the default best light |
| Backlight | Shoot toward the window with roses between you and it | Petals glow translucent; edges light up | Dew drops, light-colored roses, dreamy effects |
| Diffused overhead | White sheet between sun and flowers, or bright overcast day | Soft, even, shadowless | Flat lays, color-accurate documentation |
| Dark and moody | One small light source in a dark room; black background | Dramatic chiaroscuro; rose emerges from black | Fine-art single blooms, the wilting series |
| Golden hour outdoors | Shoot in the hour before sunset | Warm, glowing, romantic | Garden roses, crowns, couple shots with flowers |
| Fairy-light bokeh | Roses in foreground, string lights behind, wide aperture | Sharp flowers over melted golden orbs | Evening romance, detail shots |
The single most important rule: never use direct on-camera flash on roses. It flattens petals, blows out reds into orange mush, and creates harsh shadows. If you must add light, bounce it — off a white ceiling, a poster board, anything but straight at the flower.
Backgrounds and Surfaces That Make Roses Sing
- Black poster board: The fine-art standard. Makes every color glow; hides imperfections in the surroundings.
- White poster board or foam core: Clean, bright, editorial. Slightly overexpose for a seamless high-key look.
- Linen and natural fabrics: Texture that complements petals without competing. Cream, gray, and oatmeal are the most versatile.
- Dark wood: Rustic warmth that suits garden roses and vintage styling beautifully.
- Marble or stone: Cool contrast to warm petals; the luxury flat-lay standard.
- Outdoors: Weathered fences, stone walls, green hedges (shot wide open for blur) — real environments add authenticity.
Keep backgrounds simple and darker or lighter than the roses — mid-tone busy backgrounds are where rose photos go to die. When in doubt, black.
Styling: Vases, Wraps, and Props
Styling is what separates a snapshot of flowers from a photograph. A few principles:
- Vessels matter enormously. A $5 thrifted brass vase or a simple glass cylinder elevates roses more than any filter. Avoid the plastic sleeve the roses came in — it photographs terribly.
- Odd numbers. Three or five stems in a vase look intentional; even numbers look like you just stuck them in. This is the oldest styling rule and it works.
- Vary heights. Cut stems to different lengths for a natural, garden-gathered look rather than a stiff dome.
- Add greenery. Eucalyptus, ruscus, or even grocery-store herbs (rosemary, mint) fill gaps and add texture contrast.
- Props tell stories: vintage books, a pocket watch, perfume bottles, handwritten letters, a teacup — each prop adds narrative. But limit yourself to three props per shot; more becomes clutter.
If you are styling a whole scene — say, a morning surprise with flowers — photograph the setup before the person sees it. The pristine arrangement is a photo subject in its own right.
{{IMAGE3}}
Editing Roses: Taming the Reds
Red roses are technically difficult: digital sensors tend to oversaturate reds, turning rich crimson into flat orange-red mush with no petal detail. Here is how to handle it:
- Shoot slightly underexposed. It is easier to recover shadows than blown-out red channels. Expose for the brightest petals.
- In editing, pull down red saturation selectively. In Lightroom’s HSL panel, reduce red saturation by 10–20 and shift red hue slightly toward magenta. This restores the deep crimson look and reveals petal texture.
- Increase texture/clarity modestly. +10 to +20 brings out petal veining without looking crunchy.
- Warm the image slightly for romance, or cool it for the moody fine-art look — but keep skin tones natural if people are in frame.
- Sharpen the focal point only. Use masking or selective sharpening on the in-focus bloom; sharpening the blurred background adds ugly noise.
For phone editors without HSL controls: reduce overall saturation slightly, increase contrast a touch, and warm the white balance. It gets you 80% of the way there.
Watch: Photographing Roses Beyond the Bloom
A professional rose photographer demonstrates how to shoot roses far beyond the classic perfect bloom — using hips, thorns, structure, and light for genuinely original images:
Frequently Asked Questions
What is the best way to photograph roses with a phone?
Use the main lens, get close, and shoot in soft side light from a window. Clean the lens first, tap to focus on the bloom, and drag exposure down slightly to protect the reds. Try your phone’s macro mode for extreme petal close-ups — modern phones focus astonishingly close.
Why do my red rose photos look orange and flat?
Digital sensors oversaturate reds, blowing out the red channel. Fix it by shooting slightly underexposed, then reducing red saturation selectively in editing (HSL panel in Lightroom, or overall saturation on phones). Side lighting instead of flat frontal light also preserves petal depth.
What background is best for flower photography?
Black for drama and fine-art looks, white for clean editorial shots, linen for warmth, dark wood for rustic styling. The key rule: keep the background simpler than the flower and either clearly darker or clearly lighter than the roses.
How do I make roses last through a photoshoot?
Keep stems in water until the moment you shoot, mist petals lightly, work in cool shade rather than hot sun, and have a water bucket nearby for between setups. A rose out of water for 30 minutes in warm light will visibly wilt — plan shots efficiently.
What props work well in Rose Day flower photos?
Vintage books, handwritten letters, perfume bottles, candles, silk fabric, teacups, and pocket watches all complement roses. Limit yourself to three props per shot. For styled scenes with people, see our morning photo ideas for more inspiration.
Can I do a flower photoshoot indoors?
Absolutely — some of the best rose photography is indoor window-light work. A large window, a black or white background, and a vase are a complete studio. You control the light, there is no wind, and you can shoot at any hour.
How do I photograph someone with roses without it looking cheesy?
Avoid the clichés (rose between teeth, sniffing the bouquet theatrically) unless you are going for camp. Instead: natural interaction — adjusting stems, laughing behind the bouquet, crowning each other. Candid-style interaction always beats posed flower-sniffing. A stunning location helps too — even a place as atmospheric as Kyoto’s temples shows how setting elevates floral portraits.
What time of day is best for outdoor rose photography?
Golden hour — the hour before sunset — for warm, glowing light. Overcast days are excellent too, acting as a giant softbox. Avoid harsh midday sun, which creates hard shadows and blows out reds; if you must shoot midday, find open shade.
The 7-Day Rose: A Photo Series Worth Trying
Here is a project that turns one Rose Day bouquet into a week of art: photograph the same rose every day from the day it arrives until it fades. Same rose, same vase, same window, same framing — only the flower changes.
Day one: the tight bud, full of promise. Day three: the glorious open bloom at peak. Day five: petals beginning to curl, color deepening. Day seven: the honest, sculptural wilt. Presented as a series — a grid, a slideshow, a printed strip — it becomes a meditation on beauty and time that no single photo can match. The technical challenge is consistency: mark your tripod position with tape, shoot at the same time each day, and lock your exposure manually so the light does not drift.
This series works beautifully as a gift, too. Print the seven frames as a strip for your partner a week after Rose Day with a note: “Like these roses, my favorite part was watching you bloom.” It is the kind of gesture people keep forever.
Common Rose Photography Mistakes
- Shooting in harsh direct sun. Hard shadows, blown reds, squinting subjects. Move to open shade or wait for golden hour — the photo will be ten times better for one hour of patience.
- Dirty or cluttered backgrounds. That outlet, that trash can, that pile of laundry — the camera sees everything you have learned to ignore. Check the edges of your frame before every shot.
- Over-saturating in editing. Roses are already vivid. Pushing saturation further turns them neon and fake. When in doubt, pull saturation back 10% from where your instinct stops.
- Focusing on the wrong bloom. In a bouquet, focus on the closest prominent bloom’s leading edge. Autofocus loves to grab the background — tap to override it.
- Ignoring the stems. Brown, slimy, or bent stems ruin close-ups. Trim them, hide them behind the vase rim, or compose them out.
- Only shooting the “pretty” angle. The back of a rose, the thorns, the fallen petals on the table — the less obvious angles are often the most interesting photographs.
- Forgetting to shoot the process. The arranging, the misting, the laughing — behind-the-scenes shots are the ones you will love most later.
Build a Rose Photography Kit for Under $50
You do not need expensive gear. Here is a complete starter kit:
- Black and white poster boards ($3 each) — instant studio backgrounds.
- Clip-on macro lens for phones ($12–$18) — extreme close-ups without a camera.
- Small tripod or phone mount ($15) — sharp long exposures and consistent series work.
- Spray bottle ($2) — the dew-drop look on demand.
- White shower curtain liner ($4) — a large, cheap light diffuser for window light.
- Floral wire and tape ($5) — crowns, installations, securing stems at angles.
- A thrifted vase ($3–$8) — brass, ceramic, or cut glass beats any plastic sleeve.
Total: under $50, and every item gets used in dozens of shoots beyond Rose Day. Photography is one of the few hobbies where the cheap version is genuinely 90% as good as the expensive one — light and ideas matter more than gear.
Seasonal Rose Shoots Beyond Rose Day
The skills transfer year-round. Spring garden roses in the rain, summer roses at golden hour in the garden, autumn roses with falling leaves, winter roses against snow or frost on a window — each season gives roses a different character. Valentine’s Day is the obvious next occasion, but consider anniversaries (recreate the bouquet from your wedding or first date), birthdays (their birth-month flower alongside roses), and “just because” Tuesdays, which honestly make the best photos because there is no pressure.
Build a seasonal habit: one flower photoshoot per season, same vase, same window. After a year you have a series; after five, you have a body of work. Some of the most beloved photography projects in history started exactly this way — one subject, patient attention, time.
What to Do With Your Rose Photos
Great photos deserve better than a camera roll. Print the best ones — even inexpensive prints transform how you experience your own work. Make a small Rose Day album each year; the accumulating series becomes a love story told in flowers. Share a few online, but keep the best ones private — not everything needs an audience, and the photos you keep just for the two of you will mean the most.
If your photos are genuinely strong, consider sharing them with the communities that celebrate this craft — gardening groups, photography forums, flower lovers. Roses are a universal language, and a beautiful rose photograph finds admirers everywhere. Just remember to enjoy the making as much as the sharing. The photoshoot itself — the laughing, the arranging, the golden light — is the real Rose Day gift. The images are just how you keep it.
Shooting Roses in the Rain
Rain is a gift to rose photographers. Overcast skies provide perfect diffusion, raindrops bead on petals like jewels, and wet surfaces — stone, wood, glass — gain rich, saturated color. If Rose Day brings rain, do not cancel the shoot; adapt it.
Protect your gear first: a plastic bag with a hole for the lens works, or shoot from under an awning, a porch, or a clear umbrella held by an assistant. Embrace the mood — roses in rain are melancholic and romantic in a way sunny photos never achieve. Capture droplets on petals with backlight, shoot reflections in puddles with roses in the foreground, and photograph rain-streaked windows with roses blurred behind the glass. Keep a microfiber cloth handy for the lens; wipe between every few shots. And when the rain stops, you get the best light of all — the fresh, clean glow right after a storm, with everything still dripping.
A Note on Sourcing: Buy Them, Don’t Pick Them
One ethical rule for flower photography: photograph roses you bought, grew, or were given — not roses you picked from someone else’s garden, a public park, or a memorial planting. It should go without saying, but every February florists and parks report stripped bushes. Public rose gardens often prohibit picking entirely, and many do allow photography — just ask at the entrance, stay on the paths, and never cut or bend stems for a better angle.
If you want garden shots without a garden, many rose farms and botanical gardens offer photography permits or dedicated photo hours, especially in peak seasons. A $10 entry fee and permission beats an awkward confrontation every time. The roses — and the gardeners who tend them — deserve the respect. Your photos will be better for the clear conscience.
Start Shooting: Your First Rose Session
You have the ideas, the lighting setups, and the editing recipe. Now the only step left is to begin — and the best first session is deliberately small. Take one rose, one window, and one background, and spend thirty unhurried minutes exploring every angle: the bloom, the stem, the thorns, the shadow it casts. Try the black background, then the white. Mist it, backlight it, get impossibly close.
That single session will teach you more than any guide, because rose photography is a physical skill learned through the lens, not a theory learned through reading. And when you look at the results — the spiral geometry, the glowing petals, the tiny universe inside one flower — you will understand why photographers return to roses again and again. They are inexhaustible. Every bloom is different, every light is different, and Rose Day gives you the perfect excuse to start looking closely.
Keep shooting, keep experimenting, and let the roses teach you to see. The camera is just the excuse — the real work is learning to notice beauty closely, which is a skill that enriches far more than your photo library.