Grilling Tips for Beginners usually start with “buy a great grill,” but the truth is that technique matters far more than equipment. A $150 kettle grill in skilled hands outperforms a $2,000 gas rig run on guesswork. If you are new to live-fire cooking — or your results have been more “charred outside, raw inside” than backyard hero — these grilling tips for beginners will get you from nervous first-timer to confident cook faster than any gear upgrade.
This guide covers choosing between gas and charcoal, the two-zone fire setup that solves most grilling problems, temperature control, timing for common foods, and the safety habits that keep cookouts fun. No prior experience assumed — just a grill, some food, and a willingness to learn the fire.
Gas vs. Charcoal: Which Grill Should a Beginner Choose?
The internet treats this as a holy war. Practically, both cook great food, and the right choice depends on your priorities:
| Factor | Gas Grill | Charcoal Grill |
|---|---|---|
| Ease of use | Excellent — push-button start, dial temperature control | Moderate — lighting and vent control take practice |
| Flavor | Clean, neutral heat | Subtle smokiness many people prefer |
| Heat-up time | 10–15 minutes | 20–30 minutes (chimney starter) |
| Temperature control | Precise and easy | Managed via vents; less precise |
| Cost | Higher upfront; cheap fuel | Lower upfront; ongoing charcoal cost |
| High-heat searing | Good | Excellent — charcoal runs hotter |
| Cleanup | Quick — brush grates, empty drip tray | More work — ash disposal every few cooks |
For most beginners, gas is the easier start — you will grill more often when lighting the grill takes 30 seconds. Charcoal rewards the curious with better searing and smoky flavor, and a basic kettle grill is inexpensive. Many serious grillers eventually own both. Either way, the techniques below apply to both.
The Two-Zone Fire: The Most Important Technique
If you learn one thing from this guide, make it the two-zone setup. Instead of spreading heat evenly, you create two areas:
- Direct-heat zone (hot side): food cooks directly over the flame or coals — for searing and fast-cooking items.
- Indirect-heat zone (cool side): no flame or coals beneath — for gentle cooking, finishing thick cuts, and keeping food warm without burning.
On gas: turn half the burners to medium-high and leave the other half off. On charcoal: pile all the lit coals on one side of the grill, leaving the other side empty.
Why it matters: nearly every grilling disaster — flare-ups incinerating chicken, burgers charred outside and raw inside, food done at wildly different times — is solved by moving food between zones. Sear over direct heat, finish over indirect heat. Flare-up? Slide the food to the cool side until it passes. It is the closest thing grilling has to a cheat code, and it works on every grill ever made.
Essential Grilling Gear (Beyond the Grill)
You need less than the grilling aisle suggests:
- Long-handled tongs — your primary tool; use them instead of a fork (piercing meat lets juices escape).
- Instant-read thermometer — the single biggest upgrade for a beginner. It eliminates guesswork and is the only reliable way to know food is done.
- Stiff grill brush — clean grates while hot, before and after cooking.
- Chimney starter (charcoal only) — lights coals evenly in 15–20 minutes with newspaper; skip lighter fluid, which imparts chemical flavors.
- Long spatula — for burgers and delicate fish.
- Spray bottle of water — for taming minor flare-ups.
- Aluminum foil and sheet pans — for resting meat and carrying food.
Preheating and Cleaning: The Non-Negotiable Setup
- Clean the grates. Brush the grates thoroughly while the grill heats — residue from last time becomes tonight’s off-flavors.
- Preheat with the lid closed for 10–15 minutes (gas) or until coals are ashed over (charcoal, 20–25 minutes).
- Oil the grates, not (only) the food. Dip a folded paper towel in high-smoke-point oil, grip it with tongs, and wipe the hot grates. This is what actually prevents sticking.
- Know your heat. Hold your hand about 5 inches above the grate: 2–3 seconds before pulling away is high heat, 4–5 seconds is medium, 6–7 is low. Crude but useful until you develop a feel.
Grilling Temperatures and Times: The Cheat Sheet
Times assume a preheated grill and are approximate — thickness and starting temperature vary. Always verify with a thermometer. The temperatures below are USDA-recommended safe minimums, with resting factored in where carryover cooking applies.
| Food | Heat | Time per Side / Total | Target Internal Temp |
|---|---|---|---|
| Burgers (¾-inch patties) | Medium-high direct | 3–4 min per side | 160°F |
| Chicken breasts | Medium direct, finish indirect | 6–8 min per side | 165°F |
| Chicken thighs (bone-in) | Medium indirect mostly | 30–40 min total | 165°F (great at 175°F) |
| Steak (1-inch, medium-rare) | High direct sear | 4–5 min per side | 145°F + 3 min rest |
| Pork chops (1-inch) | Medium-high direct | 5–7 min per side | 145°F + 3 min rest |
| Salmon fillets | Medium direct, skin down first | 6–8 min total | 145°F |
| Shrimp (large) | High direct | 2–3 min per side | Opaque & firm |
| Hot dogs / sausages | Medium direct | 7–10 min total, turn often | 160°F for fresh sausage |
| Corn on the cob (in husk) | Medium direct | 15–20 min, turn often | Tender kernels |
| Vegetable skewers | Medium direct | 8–12 min total | Tender, lightly charred |
Note on steak temperatures: the USDA recommends 145°F with a 3-minute rest as the safe minimum for whole cuts of beef, pork, and lamb; many grillers prefer lower for medium-rare, which is a personal choice about risk tolerance. Ground meat should always reach 160°F, and all poultry 165°F — no exceptions.
Technique Tips That Separate Beginners from Pros
Use the Thermometer Every Time
Cutting into meat to check doneness lets juices escape and still tells you little. Poking it tells you nothing. An instant-read thermometer inserted into the thickest part (away from bone) is fast, cheap, and definitive. Pull meat off a few degrees below target — carryover cooking during the rest finishes the job.
Rest Your Meat
Let grilled meat rest 5–10 minutes (thicker cuts up to 15) tented loosely in foil before cutting. Juices redistribute instead of flooding the cutting board, and the result is noticeably juicier. This single habit improves grilled food more than any marinade.
Do Not Press the Burgers
Pressing patties with a spatula squeezes out juice for a satisfying sizzle and a drier burger. Leave them alone except for one flip. Similarly, flip food as little as possible — once is ideal for most items. Constant flipping prevents proper browning.
Manage Flare-Ups Calmly
Flare-ups happen when fat drips onto flames. Small ones add flavor; big ones torch food. Move food to the indirect zone, close the lid briefly to starve the flames of oxygen, and never squirt water onto a grease fire — it spreads burning grease. For a true grease fire, close the lid and vents and step back.
Marinate and Season with Purpose
Salt meat 40 minutes to 24 hours ahead when you can — it seasons deeply and improves moisture retention. Sugary marinades and sauces (like BBQ sauce) burn over direct heat, so apply them in the last few minutes or after moving food to indirect heat. Dry rubs can go on anytime. If you love smoky-sweet flavors, our American BBQ guide breaks down regional sauce and rub styles worth trying on the grill.
Give Vegetables the Same Respect as Meat
Grilled vegetables are not an afterthought — corn, zucchini, peppers, mushrooms, and asparagus develop incredible flavor over fire. Toss in oil and salt, grill over medium direct heat, and pull them when tender with charred edges. A grilled vegetable platter often disappears faster than the burgers.
Grilling Safety Essentials
- Location: grill outdoors in a ventilated area, at least 10 feet from the house, deck railings, and overhanging branches. Never grill in a garage or enclosed space — carbon monoxide is odorless and lethal.
- Stability: place the grill on a flat, stable surface away from foot traffic.
- Attire: avoid loose sleeves and dangling apron strings near open flame; use long-handled tools and heat-resistant gloves.
- Fire readiness: keep a fire extinguisher or a bucket of sand nearby. Know that water spreads grease fires.
- Kids and pets: establish a 3-foot kid-and-pet-free zone around the grill.
- After cooking: on gas, turn off burners and then the tank valve; on charcoal, close all vents and let coals cool completely (they can stay hot for hours) before disposing of ash in a metal container.
Beginner-Friendly First Cooks
If you are firing up the grill for the very first time, build confidence in this order:
- Burgers and hot dogs — forgiving, fast, and the classic first cook.
- Chicken thighs — far more forgiving than breasts; hard to dry out.
- Sausages — nearly impossible to ruin; great for learning heat zones.
- Vegetable skewers and corn — teach direct-heat management with zero food-safety stress.
- Steak — attempt once you trust your thermometer; the payoff is enormous.
- Whole chicken or pork shoulder (indirect) — your graduation cook; low, slow, and impressive.
Grilling for a Crowd
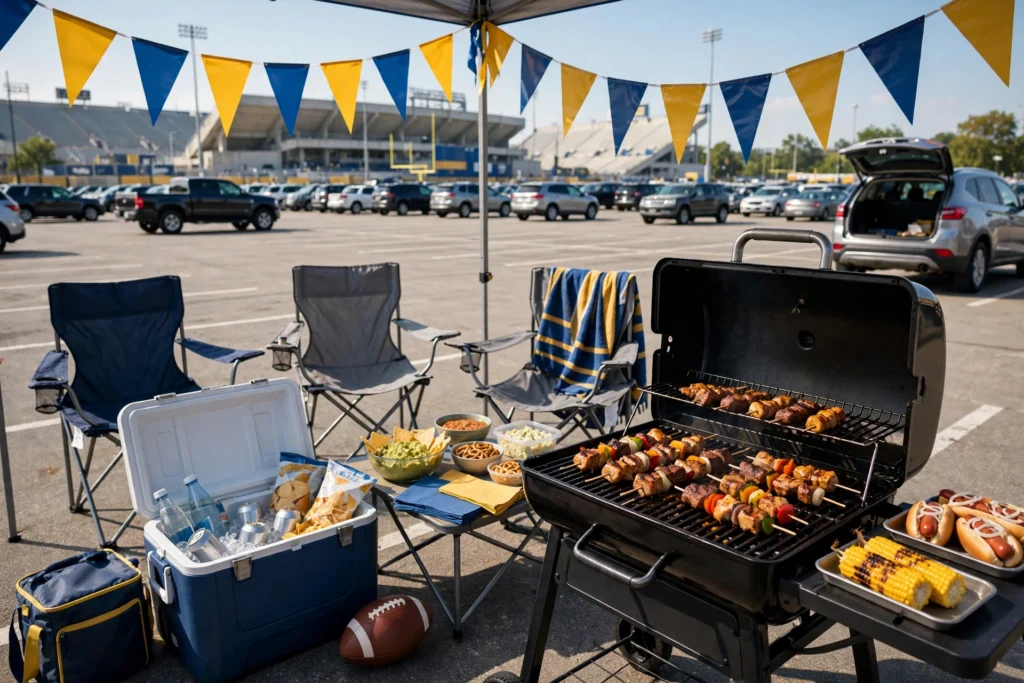
Cookouts scale well with a little planning. Figure roughly ½ pound of meat per person (⅓ pound for burgers when sides are plentiful), grill in batches, and hold finished food on the indirect zone or in a low oven. Prep everything before lighting the grill — once food starts cooking, there is no time to chop onions. Pair the spread with make-ahead sides, and check our potluck guide for dishes guests can contribute. If the gathering involves game-day energy, our tailgating guide for beginners covers the portable-grill version of all of this.
Cleaning and Maintaining Your Grill
- After every cook: while the grill is still hot, brush the grates clean. On gas, run the burners on high for 10–15 minutes with the lid closed to burn off residue, then brush again.
- Deep clean 2–3 times per season: remove grates and scrub with a grill cleaner or a vinegar-water solution; empty and wash drip trays; check gas lines and connections for leaks (soapy water on connections — bubbles mean a leak).
- Charcoal ash: remove ash once fully cool — ash buildup blocks airflow and makes temperature control harder.
- Cover it: a fitted cover dramatically extends grill life, especially for grills stored outdoors.
- End of season: give the grill a full clean, disconnect and store the propane tank upright outdoors (never indoors), and cover the grill for winter.
Charcoal 101: Lighting and Vent Control
Charcoal intimidates beginners mostly because nobody explains the vents. Here is the complete system:
Lighting with a Chimney Starter
- Fill the chimney with charcoal (briquettes for steady, even heat; lump for hotter, faster cooking).
- Stuff two sheets of newspaper or a paraffin cube underneath.
- Light and wait 15–20 minutes until the top coals are ashed over gray.
- Pour the coals onto the charcoal grate — piled on one side for two-zone cooking.
No lighter fluid, ever. It imparts a chemical taste and is unnecessary with a chimney.
Controlling Temperature with Vents
Charcoal grills have two sets of vents: bottom (intake) and top (exhaust). The rule is simple — more airflow = hotter fire. Open both vents fully for searing heat; close the bottom vent halfway to settle into medium; close both nearly shut to cool things down or extinguish coals after cooking. The top vent should generally stay at least partly open while cooking to let smoke escape; manage heat primarily with the bottom vent. Small adjustments take 5–10 minutes to take effect, so change one thing and wait.
How Much Charcoal?
- Quick grilling (burgers, dogs): half a chimney.
- Standard cookout: one full chimney, banked to one side.
- Long indirect cooks: one full chimney plus unlit coals arranged for the “snake method” (a C-shaped ring that burns slowly for hours).
Grilled Vegetables: Timing Quick Reference
| Vegetable | Prep | Heat | Time |
|---|---|---|---|
| Corn (in husk) | Soak 15 min | Medium direct | 15–20 min, turn often |
| Zucchini / summer squash | ½-inch planks, oil + salt | Medium-high direct | 3–4 min per side |
| Bell peppers | Halved or quartered | Medium-high direct | 4–5 min per side |
| Asparagus | Woody ends snapped, oiled | High direct | 3–5 min total |
| Portobello caps | Gills scraped, oiled | Medium direct | 5–6 min per side |
| Onion slices | ½-inch rounds, skewered | Medium direct | 5–7 min per side |
| Potato wedges | Parboiled 8 min first | Medium direct | 5–6 min per side |
The Lid: Your Temperature Dial
Beginners underuse the grill lid. The rule: lid on for thick foods, lid off for thin ones. Closing the lid turns the grill into an oven — circulating hot air cooks thick chicken breasts, bone-in pieces, and roasts through without incinerating the outside. Thin foods (burgers, hot dogs, shrimp, vegetables) cook through before the outside burns, so they are fine with the lid off, though closing it still speeds things up. When in doubt, close the lid: it gives more even heat, fewer flare-ups, and faster cooking.
FAQs
What are the most important grilling tips for beginners?
Master the two-zone fire (hot side + cool side), preheat with the lid closed, oil the grates, use an instant-read thermometer instead of guessing, rest meat before cutting, and keep a spray bottle handy for flare-ups. These six habits solve the vast majority of beginner grilling problems regardless of whether you use gas or charcoal.
Should a beginner get a gas or charcoal grill?
Gas is easier: push-button ignition, dial-controlled heat, and 10-minute preheating mean you will grill more often. Charcoal delivers smokier flavor and hotter searing but requires learning fire management with a chimney starter and vents. Beginners who value convenience should start with gas; those excited by the craft of fire should start with an affordable kettle-style charcoal grill.
How do I keep food from sticking to the grill?
Three things: clean grates, hot grates, and oiled grates — in that order. Brush residue off while preheating, let the grill get fully hot, then wipe the grates with an oil-soaked paper towel held in tongs. Also make sure the food’s surface is dry and lightly oiled, and do not try to flip too early — proteins release naturally once seared.
What temperature should the grill be for burgers?
Medium-high heat, roughly 375–450°F at the grate. Grill ¾-inch patties about 3–4 minutes per side with the lid closed, flipping once, and verify 160°F internally with a thermometer. Avoid pressing the patties — it squeezes out the juices.
How do you grill chicken without burning it?
Use the two-zone setup: sear bone-in pieces over direct medium heat to develop color, then move them to the indirect side with the lid closed to cook through gently (30–40 minutes total). For boneless breasts, pound to even thickness, grill over medium direct heat 6–8 minutes per side, and pull at 165°F. Sugary sauces go on only in the last few minutes.
Is it safe to grill on a charcoal grill on a wooden deck?
It can be done but requires caution: place the grill on a non-combustible grill mat, keep it well away from railings and the house, never leave it unattended, and ensure coals are fully extinguished afterward. Many fire departments recommend keeping grills 10 feet from structures. Check your local fire code and lease/HOA rules — some prohibit charcoal grills on wooden decks or balconies entirely.
Why does my grilled food taste like lighter fluid?
Lighter fluid flavor comes from cooking over coals that are not fully lit — the chemical taste transfers to food. The fix is a chimney starter: it lights charcoal with newspaper alone, no fluid needed, and you wait until coals are covered in gray ash before cooking. If you must use fluid, use sparingly and wait until it has completely burned off.