There is a special satisfaction in pointing at a party and saying “I made that.” DIY baby shower decorations are not just about saving money — though they absolutely do that — they are about creating a celebration that could not have come from any store. A hand-lettered welcome sign, a diaper cake built with love, pom-poms in the exact shade of the nursery: these details carry meaning that mass-produced decor never will. And contrary to the myth, you do not need to be “crafty.” You need a glue gun, an afternoon, and instructions that actually work.
This guide gives you 15 complete DIY projects, each with a materials list, honest time estimate, difficulty rating, and step-by-step instructions written for real beginners. You will also find a master supply list (buy once, craft many), a project comparison table to help you choose, pro tips that separate polished results from Pinterest fails, troubleshooting for common disasters, a weekend-by-weekend crafting plan, and answers to the questions first-time DIY hosts ask most. Pick three to five projects — that is the sweet spot for one person — and you will have a fully decorated shower. Everything here has been chosen for maximum visual impact per hour of effort, because your time is the real budget.
The DIY Master Supply List
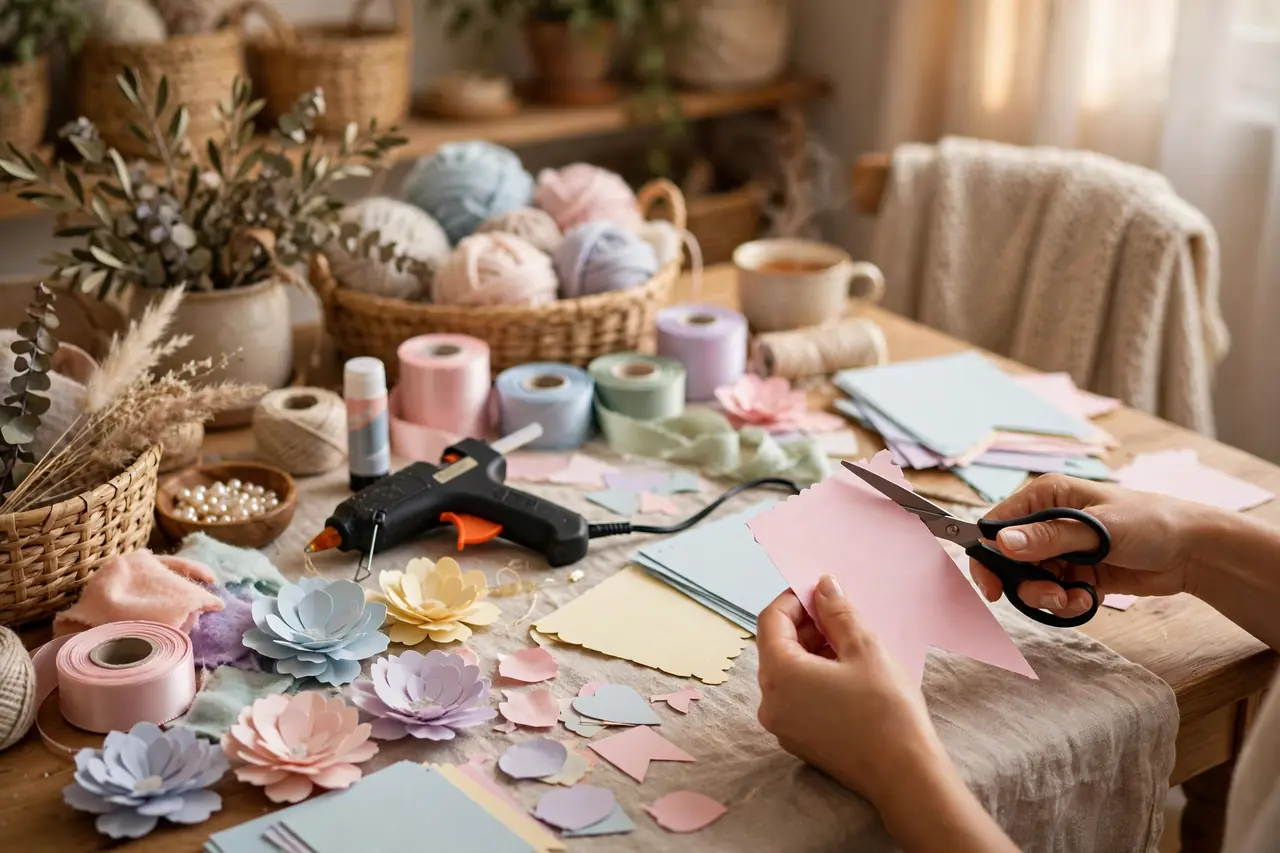
Buy these once and you can make nearly everything in this guide: a hot glue gun with extra sticks (the single most-used tool in party crafting), scissors and a craft knife, fishing line and curling ribbon (for hanging), removable adhesive strips and glue dots (walls stay damage-free), cardstock in your palette, tissue paper, crepe paper streamers, twine and burlap ribbon, an electric balloon pump ($15, non-negotiable — hand-pumping dozens of balloons ruins the experience), mason jars and glass bowls (thrifted), and LED fairy lights and flameless candles. Total one-time investment: $40–$60, most of it reusable for every future party you will ever throw. For general principles on transforming a home into a venue — decluttering sightlines, zoning light, mapping guest flow — our home decorating guide pairs perfectly with these projects.
15 DIY Projects With Real Instructions
Project 1: The Classic Diaper Cake (Easy, 45 minutes, ~$20)
Materials: 60 newborn diapers, rubber bands, one paper towel roll, ribbon in your palette, a cake stand or round tray, small decorations (a plush toy, silk flowers, baby socks). Steps: Roll each diaper tightly from the folded edge and secure with a rubber band — this is the meditative part; put on a podcast. Stand the paper towel roll in the center of your base. Arrange 30 rolled diapers in a ring around it for the bottom tier, securing the ring with a large rubber band or ribbon. Add a second ring of 20 diapers, then a top tier of 10. Wrap each tier with wide ribbon to hide the rubber bands, tucking the ends with a glue dot. Top with the plush toy and tuck silk flowers and rolled baby socks into the layers. Pro tip: use white or palette-colored diapers; printed diapers show through and cheapen the look.
Project 2: Tissue Paper Pom-Poms (Easy, 15 min each, ~$0.70 each)
Materials: tissue paper sheets, floral wire or twine, scissors. Steps: Stack 8–10 sheets of tissue, accordion-fold in 1-inch folds, and secure the center tightly with wire, leaving a loop for hanging. Round or point the ends with scissors (rounded = peony look, pointed = dahlia look). Gently separate the layers one by one, pulling half upward and half downward, fluffing as you go. Pro tip: the fluffing is everything — timid fluffing makes sad flat balls; commit to pulling each layer fully. Make them in three sizes for a professional clustered look.
Project 3: Hand-Lettered Welcome Sign (Easy, 30 minutes, ~$10)
Materials: foam board or canvas (16×20 inches), acrylic paint or paint pens, pencil, printed font template. Steps: Print your wording (“Welcome to [Name]’s Baby Shower”) in a font you love, sized to fit. Lightly shade the back of the printout with pencil, place it on the board, and trace firmly — the graphite transfers a perfect guide. Fill in with paint pens (far easier than brushes for beginners). Add simple flourishes: dots, leaves, or a small painted flower in the corner. Pro tip: paint pens on a dark board with light lettering look instantly professional and hide wobbles better than dark-on-light.
Project 4: Crepe-Paper Streamer Backdrop (Easy, 60 minutes, ~$12)
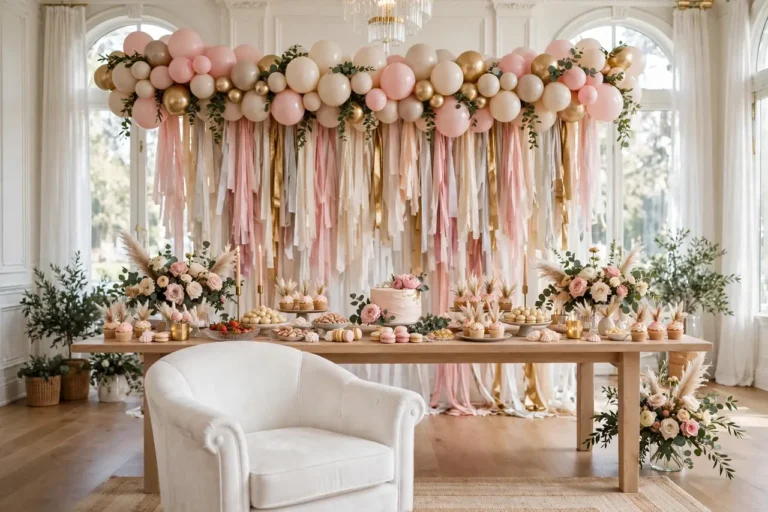
Materials: 10–12 rolls of crepe paper in 2–3 palette colors, painter’s tape or a tension rod, scissors. Steps: Cut streamers to floor length plus 12 inches. Starting at one end, twist each streamer as you attach it to the rod or tape line — the twist creates the textured, high-end look. Alternate colors in a pattern (two of color A, one of color B). Let the bottoms pool slightly on the floor for a luxe finish, or trim straight for a clean look. Pro tip: this backdrop photographs best with the dessert table in front of it; plan the pairing from the start.

Project 5: Balloon Garland Without a Kit (Medium, 90 minutes, ~$25)
Materials: 50–70 balloons in 3 sizes and 2–3 colors, electric pump, balloon decorating strip (or fishing line), glue dots, greenery sprigs (optional). Steps: Inflate balloons to varied sizes — the size variation is what makes garlands look “organic” rather than uniform. Attach to the decorating strip, alternating colors and sizes, pushing them close together with no gaps. Fill any holes with small 5-inch balloons attached via glue dots. Weave in eucalyptus or faux greenery for texture. Hang with removable hooks. Pro tip: under-inflate slightly (balloons look rounder and more premium) and build it the night before — it holds fine indoors.
Project 6: Photo Booth Props on Sticks (Easy, 40 minutes, ~$8)
Materials: cardstock, wooden dowels or paper straws, glue dots, printed prop templates. Steps: Print mustaches, lips, glasses, “mom-to-be” crowns, speech bubbles (“Oh baby!”, “Team pink/team blue”, “Worth the wait”), baby bottles, and rattles on heavy cardstock. Cut out, attach to dowels with glue dots, and stand them in a decorated jar labeled “strike a pose.” Pro tip: laminate or use thick cardstock — flimsy props droop in photos and get destroyed within an hour.
Project 7: Book-Page Garland (Easy, 45 minutes, ~$5)
Materials: an old book or printed pages, twine, mini clothespins, scissors. Steps: Cut pages into pennant triangles or scalloped flags. Stamp or stencil letters spelling BABY, the mom’s name, or “hello little one.” Clip to twine with mini clothespins, alternating page pennants with solid-color paper ones for contrast. Pro tip: pages with illustrations or interesting typography make the prettiest garlands — old children’s books are ideal.
Project 8: Mason Jar Flower Centerpieces (Easy, 20 minutes each, ~$4 each)
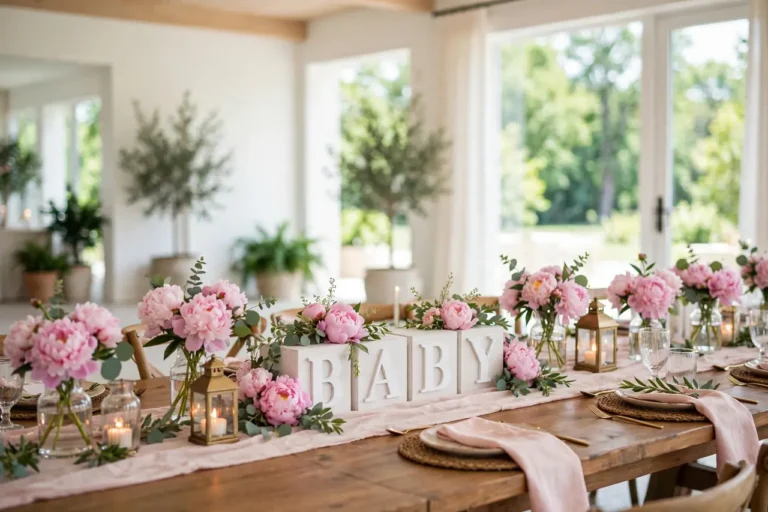
Materials: mason jars, burlap/lace/ribbon, grocery-store flowers or yard greenery. Steps: Wrap each jar with burlap secured by twine, or lace secured with a glue dot. Fill one-third with water, add a drop of flower food. Arrange 5–7 stems per jar: one tall focal stem, a few medium blooms, and greenery to fill. Make trios of varying heights per table. Pro tip: odd numbers and height variation are the entire secret — three jars at different heights beats one “perfect” arrangement.
Project 9: The Wishes & Advice Jar (Easy, 15 minutes, ~$5)
Materials: large glass jar, slips of paper or cards, pens, printed label. Steps: Label the jar “Wishes for Baby” or “Advice for the Mom-to-Be” in your theme font. Cut paper into uniform slips, fan them in a small dish beside the jar with several pens. Place at the gift table or entrance. Pro tip: add a few starter cards with prompts (“My wish for you is…”, “Always remember to…”) — blank slips intimidate guests, prompts unlock them. The parents will treasure these for years.
Project 10: Paper Fan Wall (Easy, 30 minutes, ~$12)
Materials: 12–16 paper fans in mixed sizes and palette colors, removable adhesive strips. Steps: Plan the arrangement on the floor first — start with the largest fan center-top and radiate outward, overlapping edges generously. Sparse looks sad; dense looks luxurious. Attach to the wall with removable strips (test one first). Pro tip: add one contrasting metallic gold fan as the “jewel” of the arrangement — a single accent elevates the whole wall.
Project 11: Onesie Garland (Easy, 30 minutes, ~$10)
Materials: 8–12 plain white newborn onesies (bulk packs are cheap), fabric markers or iron-on letters, twine, clothespins. Steps: Decorate each onesie — guests can do this as a party activity, or you pre-make them as decor spelling out a message. Clip to twine and hang across a wall or over the gift table. Pro tip: as a pre-party activity, this doubles as entertainment; as decor, pre-make them in your palette for a cohesive look. Either way, the mom-to-be takes home usable clothing.
Project 12: Floating Candle & Petal Bowls (Easy, 15 minutes each, ~$3 each)
Materials: wide glass bowls (dollar store), water, silk petals or flower heads, floating LED candles. Steps: Fill bowls two-thirds with water, scatter petals on the surface, and float 2–3 LED candles per bowl. Place one per table or cluster three of varying sizes as a hero piece. Pro tip: LED only — real floating candles near fabric and excited guests are a risk not worth taking, and LED reflections look identical in photos.

Project 13: The “Bump” Photo Backdrop (Medium, 45 minutes, ~$15)
Materials: large paper or fabric in a solid color, paper flowers or balloons, letter decals. Steps: Hang your base material (a plastic tablecloth works perfectly and costs $1) as a clean backdrop. Frame it with a balloon garland on one side and paper flowers on the other. Add large letter decals with a phrase like “hello little one” or the baby’s name if known. Pro tip: solid backgrounds photograph infinitely better than busy ones — the decor frames the people, it doesn’t compete with them.
Project 14: Painted Pumpkin / Seasonal Centerpieces (Easy, 30 minutes, ~$3 each)
Materials: small pumpkins or gourds (fall) / plain vases (any season), acrylic paint, brushes. Steps: For fall showers, paint mini pumpkins in your palette (blush, white, gold) — no carving, no mess. Top with a small flower or greenery sprig tucked into the stem area. For other seasons, paint simple glass vases with a band of color. Pro tip: spray paint gives the smoothest finish on pumpkins; brush paint gives charming texture on glass. Either reads as intentional.
Project 15: Custom Cake Topper (Easy, 20 minutes, ~$5)
Materials: cardstock, wooden skewers, glue, glitter (optional). Steps: Design or print your topper — “Oh Baby,” the baby’s name, a cute shape like a onesie or rattle — cut from heavy cardstock, attach to skewers, and insert into a plain grocery-bakery cake. Pro tip: a $20 plain white cake with a $5 custom topper looks like a $80 custom cake in photos. This is the highest ROI project on this list.
Project Comparison Table
| Project | Difficulty | Time | Cost | Impact |
|---|---|---|---|---|
| Diaper cake | Easy | 45 min | ~$20 | ★★★★★ (centerpiece + gift) |
| Tissue pom-poms | Easy | 15 min each | ~$0.70 each | ★★★★☆ |
| Welcome sign | Easy | 30 min | ~$10 | ★★★★☆ |
| Streamer backdrop | Easy | 60 min | ~$12 | ★★★★★ |
| Balloon garland | Medium | 90 min | ~$25 | ★★★★★ |
| Photo booth props | Easy | 40 min | ~$8 | ★★★★☆ |
| Book-page garland | Easy | 45 min | ~$5 | ★★★☆☆ |
| Mason jar centerpieces | Easy | 20 min each | ~$4 each | ★★★★☆ |
| Wishes jar | Easy | 15 min | ~$5 | ★★★★☆ (keepsake) |
| Paper fan wall | Easy | 30 min | ~$12 | ★★★★☆ |
| Onesie garland | Easy | 30 min | ~$10 | ★★★☆☆ |
| Floating candle bowls | Easy | 15 min each | ~$3 each | ★★★★☆ |
| Photo backdrop | Medium | 45 min | ~$15 | ★★★★★ |
| Painted seasonal pieces | Easy | 30 min | ~$3 each | ★★★☆☆ |
| Cake topper | Easy | 20 min | ~$5 | ★★★★★ (ROI king) |
Pro Tips: What Separates Polished From Pinterest-Fail
Finish the backs. Guests see the back of your welcome sign, the underside of your garland, the reverse of your backdrop. A finished back (paint it, line it, or face it to a wall) is the difference between handmade and homemade. Hide your mechanics. Tape, wire, and glue dots should never be visible — tuck, cover with ribbon, or design around them. Odd numbers and asymmetry. Three pom-poms beat two; an off-center arrangement beats a centered one. Symmetry reads as stiff, asymmetry reads as styled. Light everything. Fairy lights and candles make every DIY project look twice as good — craft-store decor under flat overhead lighting looks flat; the same decor under warm light looks magical. Do a trial run. Build one pom-pom, one centerpiece, one sign before committing to twelve — your tenth will be dramatically better than your first, so make the first one the experiment. Know when to buy. DIY the things that are fun and forgiving (garlands, signage, centerpieces); buy the things that are fiddly and cheap (printed game cards, favor boxes). Your time has value too.
For the tables these projects will live on, our tablescape layering guide shows how linen, runners, and candlelight turn simple DIY centerpieces into styled tables. And if you are feeding the crafting crew, the quantity formulas in our budget party food guide scale to any crowd.
Decorating by Party Zone: Where Each Project Goes
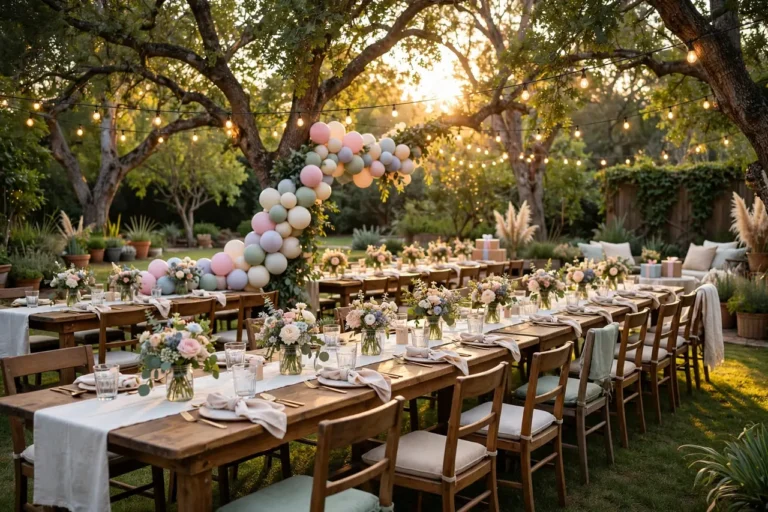
Projects only shine when placed with intention. Map your venue into five zones and assign projects to each. The entrance gets the welcome sign and a balloon garland arch — first impressions set the emotional tone, so spend your best work here. The gift table gets the wishes jar and the onesie garland overhead — it keeps guests engaged while presents accumulate. Guest tables each get a mason jar centerpiece trio and one floating candle bowl — low enough for conversation, pretty enough for photos. The dessert table gets the streamer backdrop behind it and the custom cake topper on the cake — this is your hero shot, so concentrate height and color here. The photo area gets the dedicated backdrop, the photo props jar, and the best lighting you can arrange — a floor lamp or string lights aimed at faces, not just decor. Walk the zones in guest order the morning of the party, phone in hand, photographing each one — the camera reveals gaps your eyes miss.
Troubleshooting Common DIY Disasters
Every crafter hits these; here are the fixes. Balloon garland has gaps: fill with 5-inch balloons on glue dots, or tuck in greenery sprigs — gaps are normal, filling is the job. Pom-poms look flat: you under-fluffed; pull each tissue layer firmly and separately, alternating up and down. Paint pens bleed on the sign: you pressed too hard or the board is porous — seal the board with a base coat first, or switch to a chalkboard-style dark board where light pens glide. Streamer backdrop sags: the strips are too long or too heavy when twisted — shorten by 6 inches and add a middle support line. Centerpieces look sparse: add greenery — filler foliage is cheaper than flowers and makes arrangements look twice as full. Glue gun strings everywhere: keep a bowl of ice water nearby; a quick dip stops strings, and a hair dryer on low melts stray strands. Running out of time: triage ruthlessly — finish the entrance, dessert table, and photo area; simplify or skip the rest. Those three zones are 90 percent of what guests photograph.
The Weekend Crafting Plan
Spread the work and it never feels like work. Three weekends out: shop for all supplies in one trip, print templates, and make one of everything as a prototype — your tenth pom-pom will be dramatically better than your first, so let the first be the experiment. Two weekends out: batch-produce the repetitive items (all pom-poms, all centerpiece jars, all props) assembly-line style; put on a movie and invite a friend. One weekend out: build the big pieces (balloon garland practice run, backdrop, diaper cake) and photograph them — the photos reveal what needs tweaking. Week of: only fresh items remain — flowers, food-adjacent pieces, final hanging. This pacing means no single day exceeds three hours of crafting, which is the difference between a fun project and a resentful one. And recruit help early: people love being asked to craft for a celebration, and an extra pair of hands halves every timeline above.
One final mindset note: handmade doesn’t mean perfect. Slightly uneven lettering, a pom-pom that’s fuller on one side, a garland with personality — these are features, not bugs. Guests respond to the love in handmade decor, not its precision. The goal was never a magazine shoot; it’s a room that says someone cared enough to make this by hand. That message lands every time.
Make It a Crafting Party
Here is the host’s secret weapon: turn decorating into a pre-party. Invite three to five close friends two weeks before the shower for a crafting afternoon — you provide the supplies, the templates, and the snacks, and the decorations get made in a fraction of the time while everyone has fun. Assign stations: one person on pom-poms, one on signage, one on centerpiece assembly, one on the garland. Play music, order pizza, and let the afternoon feel like part of the celebration rather than a chore. Guests who helped build the decor arrive at the shower with proprietary pride, pointing out “their” pom-poms to everyone. It also solves the biggest DIY risk — running out of steam alone at midnight the week of the party. Shared work is faster, better, and honestly more fun; the shower starts feeling special weeks before the actual date.
Watch: DIY Baby Shower Decor in Action
Watch a full garden-party baby shower come together with DIY projects — welcome sign, centerpieces, favors, and budget hauls:
Frequently Asked Questions
How many DIY projects should I take on for one shower?
Three to five projects is the sweet spot for one person — for example, a balloon garland, a welcome sign, centerpieces, a backdrop, and a cake topper. That covers every visual zone. More than five and you risk burnout; fewer than three and the party can feel undecorated. Recruit one helper and you can comfortably double it.
I’m not crafty. Which projects are truly beginner-proof?
Tissue pom-poms, the wishes jar, floating candle bowls, and the cake topper are nearly impossible to mess up. The balloon garland looks intimidating but is genuinely easy with an electric pump — the decorating strip does the structural work for you. Start with one pom-pom as a confidence builder.
How far in advance can I make DIY decorations?
Paper crafts (garlands, pom-poms, fans, signage, props) keep indefinitely — make them weeks ahead. The diaper cake keeps for weeks if stored clean and dry. Balloon garlands hold 24–48 hours indoors. Fresh-flower centerpieces should be assembled the day before at the earliest. Build in this order and day-of setup stays under two hours.
What tools do I absolutely need?
A hot glue gun with extra sticks, sharp scissors, an electric balloon pump, removable adhesive strips, and fishing line or twine. That five-item kit handles 90 percent of shower DIY. Everything else is project-specific and inexpensive.
How do I make DIY decorations not look cheap?
Strict color palette, hidden mechanics (no visible tape or wire), finished backs, warm lighting, and dense clustering (twelve pom-poms look luxurious, three look sparse). Also: good photography hides a multitude of sins — decor that looks “fine” in person looks great in photos with warm light.
Should I DIY or buy the balloon garland?
DIY if you have 90 minutes and an electric pump — a $25 kit makes what a professional charges $150–$250 for. Buy (hire) if the garland is the single showpiece of a large event and you want it flawless, or if you have zero setup time. Many hosts DIY the garland and hire nothing else — it is the best value in party decorating.
What do I do with DIY decor after the party?
Offer centerpieces and pom-poms to guests (have bags ready), save signage and frames for future parties, donate usable items, and resell large pieces like backdrop stands locally. The diaper cake goes home with the mom-to-be. Design with afterlife in mind and almost nothing gets wasted.
Can kids help with DIY shower decorations?
Yes — pom-pom fluffing, painting, cutting simple shapes, and assembling favor bags are all kid-friendly with supervision. Older kids can handle the glue gun with guidance. Making decor together becomes part of the celebration, especially for showers honoring a family member.
The Handmade Difference
Pick up that glue gun with confidence: the only real mistake is waiting for perfect conditions that never come.
Stores sell decorations; only people make celebrations. Every hand-tied bow, every carefully lettered sign, every pom-pom fluffed at midnight is a small act of love for the mom-to-be — and she will feel it in the room long after the last balloon comes down. Start with three projects, give yourself grace on the learning curve, and remember that the goal was never perfection. It was always love, made visible.