Every memorable party photo has one thing in common: something beautiful behind the people. The backdrop is the most-photographed square footage of your entire shower — it frames the mom-to-be in dozens of pictures, anchors the dessert table, and tells guests “this moment matters.” Yet it is the element hosts most often neglect, leaving the prettiest table in the room floating against a blank wall. These baby shower backdrop ideas fix that, with 15 complete builds organized by material, a sizing guide, hanging methods for every venue, lighting tips that make backdrops glow, a honest DIY-vs-rent breakdown, and a cost comparison table. Whether your budget is $15 or $500, there is a backdrop here that will make your shower photos unforgettable.
The golden rule of backdrops: they should be bigger than you think. A backdrop that looks generous in your living room looks skimpy in photos — cameras crop, people stand in front, and edges show. When in doubt, go 2 feet wider than your instinct says. The second rule: solid or simple beats busy. The backdrop frames people; if it competes with them, everyone loses. Texture and color, yes; visual chaos, no.
Where Backdrops Belong (and Where They Don’t)
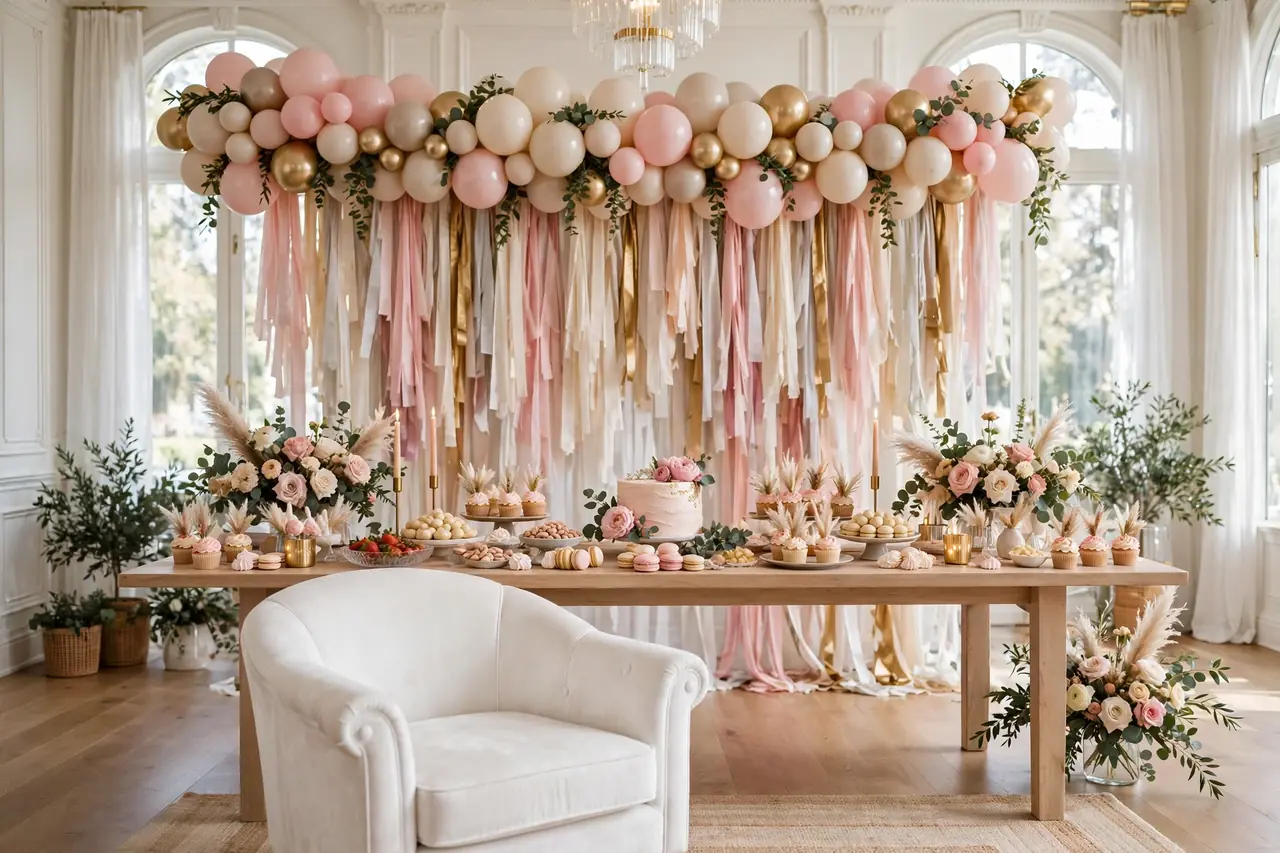
Place backdrops with intention. Behind the dessert table is the classic position — the table’s height variation plays against the backdrop’s flat plane, and every cake-cutting photo gets the treatment. The dedicated photo area deserves its own backdrop, positioned where the light is best (near a window for daytime, under warm lights for evening) with 4–6 feet of clear floor space in front so groups can gather. Behind the mom-to-be’s seat — her “throne” — a smaller backdrop makes her the undeniable focal point during gift-opening. At the entrance, a backdrop moment makes arrivals feel ceremonial.
Where not to put them: behind the gift table (gifts pile up and swallow the design), in dark corners (no light, no photos), or anywhere guests must squeeze past (backdrops and foot traffic are enemies). One great backdrop beats three mediocre ones — concentrate your effort. For the broader party-design principles that make backdrops work — guest flow, focal points, lighting zones — our home venue decorating guide covers room-by-room strategy that applies directly to shower layouts.
Fabric Backdrops (Ideas 1–3)
1. The Draped Fabric Wall
The timeless choice: 3–4 panels of sheer or linen fabric (chiffon, muslin, or sheer curtains — $8–$15 per panel) hung from a tension rod, backdrop stand, or ceiling hooks, gathered softly rather than pulled taut. The gentle folds catch light beautifully and hide imperfect walls completely. Layer two tones (white + blush, cream + sage) for depth. Add fairy lights behind the sheer layer and the whole wall glows. Cost: $25–$50. Best for: elegant, romantic, and indoor showers. The fabric packs into a bag afterward and reuses for every future event. For extra polish, let the bottom edges pool gracefully on the floor — pooling reads as luxurious, while a harsh cut line reads as unfinished.
2. The Sequin Shimmer Wall
Interlocking sequin panels ($25–$45 for a 6×8-foot coverage) that catch light with every movement — the backdrop that photographs like liquid gold. Because sequins reflect whatever light hits them, position the wall where it catches window light or string lights — under flat overhead light even shimmer walls look dull, so placement matters enormously. Assembly is meditative: panels snap together and hang on a stand or wall hooks. Available in gold, rose gold, silver, and pastel shades. Cost: $30–$60. Best for: glam showers, evening events, photo areas. One caution: sequin walls are loud visually — keep everything in front of them simple (a clean dessert table, minimal props) or the photos get busy.
3. The Macramé & Textile Hanging
A large macramé wall hanging, woven tapestry, or layered textile piece as an artful, boho backdrop. Thrifted macramé ($15–$30) or a DIY version with cotton rope gives texture that photographs with incredible richness. Layer with dried flowers, pampas stems, or a small balloon cluster at one corner. Cost: $15–$40. Best for: boho, rustic, and garden showers. The textile becomes home decor afterward — the rare backdrop with a permanent afterlife.
Paper Backdrops (Ideas 4–6)
4. The Crepe-Paper Streamer Wall
Ten to twelve rolls of crepe paper ($1 each) twisted and hung floor-to-ceiling in alternating palette colors — the highest impact per dollar in all of party decorating. The twisting technique creates texture that reads as expensive from any distance. Cost: $10–$15. Best for: budget showers, colorful themes, dessert-table backing. Build it the day before; it holds perfectly overnight. This is the backdrop to choose when money is tight and expectations are high. Vary the twist tightness for visual rhythm — alternating tight twists with looser ones creates the organic texture that separates this from a flat streamer curtain.
5. The Giant Paper Flower Wall
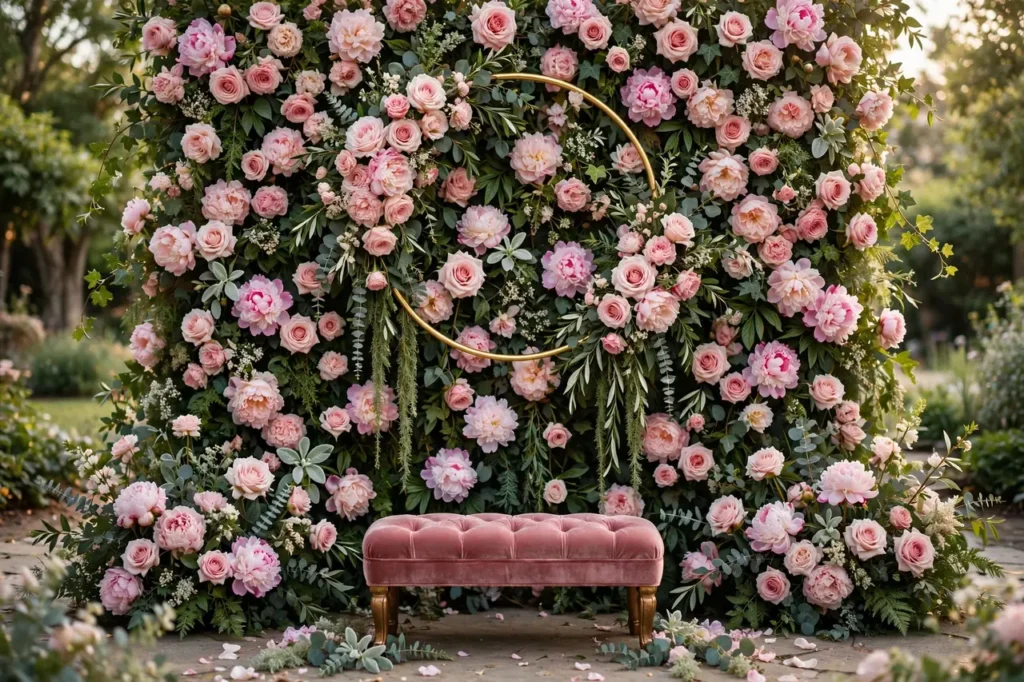
Oversized tissue or crepe-paper flowers (12–20 inches across) clustered densely on a foam board or directly on the wall — a flower wall for $20–$40 instead of $500. The key is density: sparse looks sad, packed looks luxurious. Mix 3 sizes and 2–3 colors for a natural, abundant feel. Cost: $20–$40. Best for: floral themes, spring showers, photo areas. Templates make the flowers fast; an assembly line with a friend makes them fun. Back the finished arrangement with a solid fabric panel rather than hanging flowers directly on a patterned wall — the clean background makes every bloom pop and hides all attachment mechanics.
6. The Paper Fan Medallion Wall
Paper fans in mixed sizes arranged in a radiating cluster — overlapping generously, anchored by one large central medallion. Cost: $12–$20 for 12–16 fans. Best for: modern, colorful, and budget showers. The geometric repetition photographs crisply, and fans pack flat for reuse. Add one metallic gold fan as the “jewel” — a single accent elevates the whole composition.
Balloon Backdrops (Ideas 7–9)
7. The Organic Garland Frame
A balloon garland ($25–$40 in materials) draped asymmetrically across the top and down one side of a fabric or solid-color base — the modern standard for shower photo areas. The asymmetry is deliberate: full coverage looks heavy, while the draped corner looks artful and modern. Anchor the heavier side with the largest balloons so the composition feels balanced, not lopsided. Weave in greenery or flowers for texture. Cost: $30–$60 total. Best for: nearly every shower style. Build the garland the night before; hang the morning of.
8. The Balloon Wall
150–250 small balloons pushed into a grid panel in a planned pattern — ombré, scattered, or a giant initial. Cost: $50–$80 in materials. Best for: photo booth backgrounds, high-impact moments. The most “expensive-looking” DIY in party decorating; the grid does the structural work, you just fill the pattern. Allow 2–3 hours and recruit help — this is genuinely a two-person job, and the time passes twice as fast with company and music.
9. The Balloon Arch Backdrop
A full balloon arch framing the dessert table or photo area — the ceremonial choice. Cost: $40–$70 DIY ($250–$500 pro). Best for: entrances, grand statements. Use a proper frame and double the base weight you think you need; a toppling arch is the classic balloon disaster, unforgettable for all the wrong reasons. Test-stability the night before by giving the finished arch a firm shake — if it wobbles, add weight before party day. For outdoor use, build as late as possible and keep shaded.

Floral & Greenery Backdrops (Ideas 10–12)
10. The Faux Flower Wall Panel
Interlocking faux flower panels ($30–$60 for 6×8 feet) hung on a stand — the Instagram-famous flower wall at a tenth of the fresh-flower price. Quality varies enormously: read reviews and favor panels with varied bloom types and mixed greenery over uniform ones — flat, identical flowers are the telltale sign of a cheap panel, while varied ones fool the eye completely. Cost: $40–$80. Best for: glam, romantic, and photo-heavy showers. Resell afterward — flower walls hold value well on local marketplaces.
11. The Greenery Wall
Faux boxwood or mixed-greenery panels ($25–$50) creating a living-wall effect, accented with a neon or wooden sign (“oh baby,” the mom’s name) and a few flower clusters. Cost: $40–$80. Best for: modern, garden, and gender-neutral showers. The green reads as fresh and expensive in photos; the sign gives it the personal touch that makes it shower-specific rather than generic. Fluff the panels on arrival — they ship compressed, and ten minutes of separating the leaves doubles their lushness.
12. The Hanging Floral Installation
Flowers and greenery suspended overhead — from a frame, a branch, or fishing line — creating a floating garden above the dessert table or mom-to-be’s seat. Use faux or dried for overhead work (no wilting, no dripping). Cost: $30–$70. Best for: dramatic statements, high ceilings. Guests look up and gasp — the most memorable backdrop is the one nobody expected.
Creative & Personal Backdrops (Ideas 13–15)
13. The Photo Timeline Wall
Twenty to thirty photos of the mom-to-be from babyhood to bump, hung on twine with clothespins and ending with the ultrasound image — the most emotionally powerful backdrop on this list. Cost: under $10 in prints. Best for: intimate showers, family-centered celebrations. Guests spend more time at this wall than any other installation; it becomes a gathering point, not just a background.
14. The Neon Sign Moment
A rented or purchased LED neon sign (“oh baby,” “hello little one,” the baby’s name) mounted on a greenery wall, fabric drape, or bare brick — the modern photo moment. Cost: $40–$100 rented, $80–$200 purchased. Best for: modern, glam, and evening showers. The sign becomes nursery decor afterward, which justifies the purchase for many families.
15. The Storybook Page Curtain
For book-themed showers: pages from a beloved book (or printed replicas) hung in overlapping rows like a curtain, with fairy lights woven through. Cost: under $15. Best for: literary themes, vintage showers. Backlit by fairy lights, the pages glow like stained glass — unexpectedly magical and deeply personal when the book is meaningful to the family.
Backdrop Sizing Guide
Size is the most common backdrop mistake — too small, and people stick out past the edges in every photo. For the dessert table: the backdrop should be at least as wide as the table plus 2 feet on each side, and tall enough to show 2–3 feet above the tallest table item. For a standard 6-foot table, that means 10 feet wide minimum. For a photo area: 8 feet wide × 8 feet tall accommodates groups of 4–6; couples and the mom-to-be need only 6×7. For the mom-to-be’s seat: 6 feet wide is plenty — she’s the focus, and a smaller backdrop keeps attention on her. Height rule: backdrops should reach at least 7 feet high (taller than your tallest guest) or the top edge appears in photos. When renting or buying panels, always get one more panel than the math says — seams and edges are where cheap backdrops reveal themselves, and overlap hides everything.
Hanging Methods for Every Venue
| Method | Best For | Cost | Weight Limit | Damage Risk |
|---|---|---|---|---|
| Backdrop stand (adjustable) | Any backdrop, any venue | $35–$70 | High | None (freestanding) |
| Tension rod in doorway | Fabric, streamers | $10–$20 | Light–medium | None |
| Removable adhesive hooks | Light garlands, signs | $5–$10 | Light | None if removed properly |
| Over-door hooks | Fabric panels | $5–$8 | Medium | None |
| Command strips (large) | Paper fans, signs | $5–$10 | Light | None if removed properly |
| Fishing line from ceiling | Hanging installations | $3–$5 | Light–medium | Minimal |
| Existing curtain rod | Fabric drapes | $0 | Medium | None |
| Freestanding frame (PVC/wood) | Heavy pieces, outdoors | $15–$30 DIY | Very high | None |
The backdrop stand is the single best investment for anyone who hosts parties — it works everywhere, holds anything, and eliminates every wall-damage worry. For one-time hosts, a DIY PVC frame ($15 in pipe and fittings) does the same job. Whatever you use, test-hang the full weight the day before — discovering at party time that your hooks can’t hold the garland is a preventable crisis. And for outdoor backdrops, weight the base like you’re expecting wind, because you are.
Lighting: The Backdrop Multiplier
A backdrop under flat overhead light looks flat; the same backdrop under thoughtful light looks magical. Daytime: position the photo backdrop near the largest window, with the light falling on guests’ faces (not behind the backdrop, which creates silhouettes). Sheer curtains diffuse harsh sun beautifully. Evening: fairy lights woven through or behind the backdrop are transformative — $8 of lights makes a $15 streamer wall look like $150. Uplights at the base ($15–$25 each to rent) wash the backdrop in color. The golden rule: light the people, not just the backdrop. A gorgeous backdrop with guests’ faces in shadow produces gorgeous pictures of an empty wall and terrible pictures of people. Aim one warm light source at face height in the photo area — a floor lamp, a string of Edison bulbs, even a couple of lanterns on side tables. Your photographer (even if it’s just a cousin with a phone) will thank you.
For brunch-format showers where the dessert table doubles as the food spread, our brunch menu guide covers make-ahead dishes and timelines that keep the food as beautiful as the backdrop behind it. And for carrying your theme from the backdrop through every detail, the party theme planning guide shows how one concept unifies invitations, decor, and send-off.
Styling Details That Make Backdrops Look Professional
The difference between a good backdrop and a great one lives in the finishing details. Hide the mechanics: no visible tape, no exposed stand poles, no sagging fabric — wrap poles in fabric or greenery, tuck tape behind layers, and steam out wrinkles (a $20 handheld steamer is a party decorator’s secret weapon). Finish the edges: backdrops end abruptly at their borders; soften them with a balloon cluster, greenery swag, or draped fabric at each side so the eye doesn’t hit a hard line. Layer deliberately: the most expensive-looking backdrops combine two materials — fabric + balloons, greenery + neon sign, streamers + paper flowers. Single-material backdrops can look flat; two materials create depth. Add one personal element: the mom-to-be’s name, the baby’s due date, a meaningful quote — personalization transforms a pretty background into their background. Ground it: place something at the base — a rug, petal scatter, lanterns, or the dessert table itself — so the backdrop doesn’t float disconnected in the room. A backdrop that touches the ground (or a table) looks intentional; one hovering mid-wall looks temporary.
DIY vs. Buy vs. Rent: The Smart Decision
DIY wins for paper, fabric, and balloon backdrops — the materials are cheap, the techniques are learnable, and the result is customized to your exact palette. Budget 2–4 hours and $10–$60. Buy when you’ll reuse it: backdrop stands, fairy lights, sequin panels, and quality faux flower walls all earn their purchase price across multiple events — and resell well afterward. Rent for the true showpieces: neon signs ($40–$100), large flower walls ($150–$300), and specialty furniture. Renting gives you the $500 look for a $75 outlay with zero storage afterward. The hybrid strategy most pros recommend: DIY the base (fabric drape or streamer wall, $15), rent the jewel (neon sign, $60), and buy the reusable (stand and lights, $50). Total: $125 for a backdrop that photographs like $800. Never rent what you can DIY in under an hour, and never DIY what requires skills you don’t have on a deadline — the stress isn’t worth the savings.
The Backdrop Timeline
Three weeks out: choose your backdrop design, order or rent materials (shipping and rental availability are the constraints — book early). Two weeks out: build paper elements (flowers, fans) and test-assemble the full backdrop in your garage or living room — discovering sizing problems now is free, discovering them at the venue is a crisis. Photograph the test assembly; the photo reveals gaps your eyes miss. Day before: prep everything transportable — pre-hang fabric panels on the rod, pre-build balloon garlands (they hold overnight), pack an emergency kit (extra adhesive hooks, tape, scissors, steamer). Day of: hang the backdrop first, before tables are set — you need clear floor space and it’s the hardest job. Allow 60–90 minutes for a complex backdrop, 20 minutes for a simple one. Then light it, photograph it empty, and build the rest of the party around it. The backdrop is the anchor; everything else orbits it.
Watch: DIY Backdrop for Parties & Showers
See a streamer backdrop built step by step — perfect for baby showers, gender reveals, and bridal showers:
Frequently Asked Questions
How big should a baby shower backdrop be?
Bigger than you think. For a dessert table, go 2 feet wider than the table on each side (10 feet for a 6-foot table) and at least 7 feet tall. For a photo area, 8×8 feet fits groups of 4–6. Undersized backdrops are the most common backdrop mistake — edges showing in photos ruins the effect instantly.
What is the cheapest good-looking backdrop?
A crepe-paper streamer wall at $10–$15 — twisted streamers hung floor-to-ceiling in your palette. It delivers the highest impact per dollar in party decorating. A paper fan wall ($12–$20) and a photo timeline ($10 in prints) are close seconds, each with a completely different feel.
How do I hang a backdrop without damaging walls?
Use a freestanding backdrop stand ($35–$70, reusable forever), a tension rod in a doorway, removable adhesive hooks for light pieces, or a DIY PVC frame. Never nail into rental walls. Test-hang the full weight the day before — discovering weight problems at party time is preventable.
Should the backdrop match the theme exactly?
It should speak the theme’s language — same palette, same mood — but it doesn’t need literal theme props. A blush-and-gold palette with elegant draping suits a dozen themes. One themed element (a sign, a character cutout, theme-colored balloons) plus a beautiful neutral base is the professional formula.
Can I use the same backdrop for the dessert table and photos?
Yes, if it’s large enough and positioned well — many showers use one hero backdrop behind the dessert table as the de facto photo area. But a dedicated photo backdrop in the best light, with clear floor space in front, produces dramatically better guest photos. If budget allows one more, the photo area is where to put it.
How do I light a backdrop for evening showers?
Weave fairy lights through or behind it ($8 transforms everything), add uplights at the base for color washing, and — most importantly — aim a warm light at guests’ faces in the photo area. Light the people, not just the backdrop; beautiful backdrops with shadowed faces produce disappointing photos.
What do I do with the backdrop after the party?
Offer it to the mom-to-be (flower walls and neon signs often become nursery decor), resell panels and stands locally (they hold value well), save fabric and fairy lights for future parties, or donate to a school or community group. Photograph it before teardown — you’ll want the memory of what you built.
Can I do a backdrop outdoors?
Absolutely — fabric drapes, balloon garlands, and greenery walls all work outdoors and often look better in natural light. Weight freestanding structures heavily, avoid paper in humidity, build as close to party time as possible, and always have an indoor backup plan for wind or rain.
Backdrops for Tight Budgets and Small Spaces
Limited money or square footage does not mean skipping the backdrop — it means choosing smarter. The $15 showstopper: a crepe-paper streamer wall in two palette colors, hung in a doorway or behind the dessert table. Nothing else in party decorating delivers this much impact per dollar. The no-space solution: a 4-foot-wide fabric panel on a tension rod in a doorway creates a complete photo moment in minimal square footage. The free option: a clean, uncluttered wall with a handmade banner and a balloon cluster at each side — honestly styled with good lighting and zero clutter, this photographs better than an elaborate backdrop in a messy room. The renter’s friend: every method in this guide uses removable hanging, so apartment and venue walls stay pristine. The principle: a small, well-executed backdrop beats a large, sloppy one every time. Constraints force the clarity that makes design work.
Make It Unforgettable
Years from now, the mom-to-be will not remember the exact shade of the napkins or the cupcake flavors. She will remember the photos — and in every one, your backdrop will be there behind her, holding the memory. That is what makes this the highest-leverage decor decision of the whole shower: a few hours and a modest budget, multiplied across every picture taken that day and every viewing for decades to come. Choose the build that fits your skills and budget, size it generously, light it warmly, hang it securely, and hang it with care. Then stand back and watch guests gravitate to it all afternoon — because everyone wants their picture taken somewhere beautiful, especially on a day this happy and this full of love.