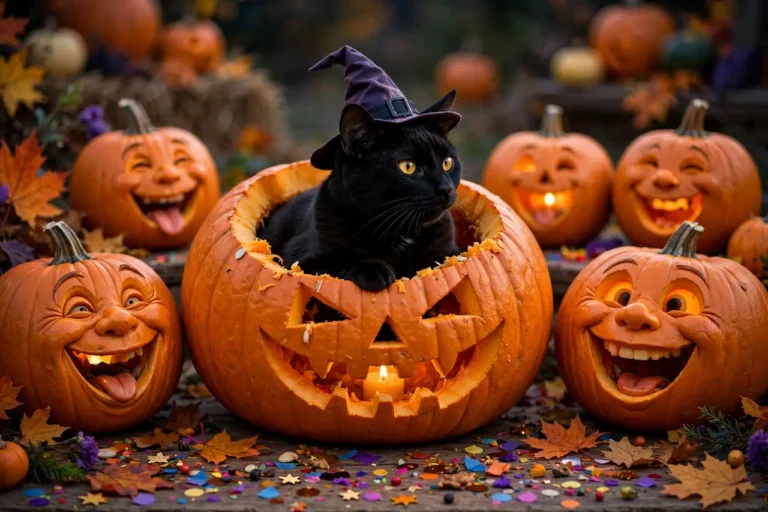
Some parties are remembered for the food. Others for the music. But a pumpkin carving party is remembered for the glowing faces lined up on the porch the next morning — each one a little work of art, each one carrying the fingerprints of someone you love. If you are looking for pumpkin carving party ideas that go beyond “hand everyone a pumpkin and hope for the best,” this is your complete playbook.
Inside: a full planning timeline, carving-station setups that actually work, tool guides with kid-safety rules, 30 design ideas organized by skill level, contest formats, party games for while hands are busy, food and drink menus, lighting and display tricks, cleanup shortcuts, and a sample budget. Whether you are hosting six friends or thirty neighbors, you will find everything needed to run a carving party people beg you to repeat.
Why a Carving Party Beats Carving Alone
Carving a pumpkin solo is a chore: the mess, the slimy seeds, the hour hunched over the kitchen table. Carving with a crowd is a celebration. The mess becomes communal laughter. The seeds become a roasted snack everyone shares. The inevitable lopsided faces become the night’s comedy highlights.
A carving party also solves Halloween’s biggest hosting dilemma: what do guests do? Unlike cocktail parties where strangers hover awkwardly, a carving party gives everyone an instant activity, a conversation starter (“what are you making?”), and a take-home souvenir. Kids stay engaged for hours. Adults who claim they “are not crafty” inevitably produce the night’s most creative pumpkin. And the cost per guest is remarkably low — pumpkins and basic tools are among the cheapest party supplies in existence.
Planning Your Carving Party: The Timeline
Three Weeks Before: Guest List & Date
Pick a weekend date 1–3 weeks before Halloween — close enough to feel seasonal, far enough that carved pumpkins survive until the 31st (a carved pumpkin lasts 5–10 days, longer in cool weather). Aim for late afternoon into evening: 4 PM to 8 PM gives daylight for carving and darkness for the grand illuminated reveal.
Keep the guest list manageable: 8–15 carvers is the sweet spot. Each carver needs about two feet of table space, so count your tables before you invite. For larger crowds, make it a drop-in “carving open house” with staggered arrival times.
Two Weeks Before: Invitations & Pumpkin Math
Send invitations with one critical question: are you bringing your own pumpkin, or should I provide one? The easiest model: guests bring their own pumpkin (they choose the size and shape they want), and you provide everything else. If you provide pumpkins, buy one per guest plus three spares, choosing a mix of sizes — medium pumpkins (8–12 inches) carve easiest for beginners.
Pumpkin math for supplies: one carving kit per two guests (kits are cheap and shareable), one roll of paper towels per four guests, and one large trash bag per table. You will use more newspaper than you think — ask guests to bring a stack each.
One Week Before: Tools, Templates & Food Plan
Gather tools (detailed list below), print template packets, and plan a simple menu — carving is hungry work, and you want food that can be eaten with messy hands. Confirm your lighting plan for the evening reveal: extension cords, LED candles, and a porch or yard display area.
Day Of: Setup (90 Minutes Before Guests)
Cover every table with a plastic tablecloth topped with newspaper. Set each place with a pumpkin (if providing), a carving kit or shared tools, a marker, and a printed template sheet. Put trash bags at both ends of each table and a “guts bowl” in the center for seeds. Set up the food station away from the carving zone — pumpkin guts and guacamole should never meet.
Carving Station Setups That Actually Work
The difference between a smooth carving party and a chaotic one is table logistics. Here are three proven layouts:
The Assembly Line (best for 12+ guests): Set up four stations guests rotate through: (1) Draw — markers and templates to design faces; (2) Gut — scooping stations with big bowls; (3) Carve — the main tables with tools; (4) Light & Photo — LED candles and a photo backdrop. Rotation keeps traffic flowing and prevents tool bottlenecks.
The Family Tables (best for mixed ages): Each family gets its own table with a full tool set. Kids carve at the “kids’ table” with safe tools and adult helpers; adults get the sharp implements at their own tables. This is the calmest, most controlled layout.
The Carving Bar (best for small groups): One long table, everyone together, tools in shared caddies down the center. Intimate and social — ideal for 6–10 close friends. Put the food and drinks at one end so people graze without leaving the fun.
Whichever layout you choose, follow these non-negotiables: good lighting at every seat (carving in dim light causes slips), a first-aid kit with bandages within arm’s reach, and hand-washing access nearby — a bathroom or a water jug with soap and paper towels.
Tools of the Trade: What You Really Need
You do not need expensive equipment. Here is the honest breakdown:
- Carving kits (the $5–8 sets with a small saw, scoop, and poker): one per two guests. The tiny saws are safer than kitchen knives and perfect for detail work.
- Large metal spoons or ice cream scoops: for gutting — faster and safer than kit scoops for big pumpkins.
- Permanent markers: for drawing designs before cutting. Washable markers smear on pumpkin skin; permanent does not.
- Printed templates: free patterns from craft sites, ranging from simple faces to elaborate scenes. Print 3–4 per guest.
- Thumbtacks or pushpins: for transferring template designs (poke dots along the lines, then connect).
- LED tea lights or fairy lights: one per pumpkin, plus extras. Safer than real candles, especially with kids and crowds.
- Newspaper, paper towels, trash bags: more than you think. Then double it.
What to skip: full-size kitchen knives (too big, too dangerous for a party), power tools (overkill and genuinely hazardous in a crowd), and “pumpkin carving power drills” marketed to enthusiasts — impressive on video, unnecessary in real life.
Kid-Safety Rules (Non-Negotiable)
Children under eight should not handle any cutting tools — they draw the design, scoop with a spoon, and an adult does the cutting. Ages eight to twelve can use the small kit saws with direct adult supervision, one adult per two kids. Teens can carve independently after a safety demo. The golden rules for everyone: always cut away from your body, never hold the pumpkin in your lap while cutting, and keep your free hand behind the cutting line. Announce the rules once at the start, with humor but firmly — then enforce them.

30 Pumpkin Design Ideas by Skill Level
Staring at a blank pumpkin is intimidating. Give guests this menu of ideas, grouped by difficulty, and watch creativity ignite.
Beginner (First-Time Carvers, Young Kids)
- Classic triangle-eyes jack-o’-lantern
- Toothy grin with one missing tooth
- Silly surprised face (O-shaped mouth)
- Polka-dot pumpkin (drill or poke holes, no carving)
- Cat face with triangle ears
- Simple ghost shape
- Heart eyes and smile
- Star cutouts all over
- “BOO” lettering
- Melting face (drips instead of features)
Intermediate (Some Experience)
- Witch silhouette with moon
- Haunted house scene
- Owl with big round eyes
- Spider and web
- Vampire fangs close-up
- Day-of-the-Dead sugar skull pattern
- Black cat arching its back
- Flying bats across a moon
- Frankenstein’s monster face
- Mummy wrapped face (shallow carve, don’t cut through)
Advanced (Confident Carvers)
- Shaded portrait (vary carving depth for grayscale effect)
- Intricate haunted mansion with windows
- 3D stacked pumpkin totem
- Diorama pumpkin (cut a large window, build a scene inside)
- Stencil-transferred movie character
- Lace-pattern pumpkin (drilled holes in patterns)
- Two-faced pumpkin (different face each side)
- Carved “dripping” candle effect
- Silhouette forest with moon
- Your house number in spooky lettering (doubles as porch decor)
No-carve options: not everyone wants to wield a saw. Set up a decorating station with paint, stickers, googly eyes, and washi tape — painted pumpkins are gorgeous, kid-safe, and last longer than carved ones.
Contests & Games While Hands Are Busy
Carving takes 45–90 minutes. Keep energy high with running competitions and side games:
Contest categories (vote at the end; everyone gets one vote per category, cannot vote for themselves): Scariest, Funniest, Most Creative, Best Use of a Template, Tiniest Details, and the coveted “So Bad It’s Good.” Print simple award certificates or hand out ribbon rosettes — the ceremony is half the fun.
Seed-spitting distance contest: while pumpkins are being gutted, hold a roasted-seed-free spitting contest into a bucket. Mark distances with tape. Surprisingly competitive, endlessly funny.
Guess the guts: fill a sealed box with pumpkin innards; guests reach in (blindfolded, one at a time) and guess what is inside. Reactions are priceless.
Carving bingo: bingo cards with squares like “someone says ‘this is harder than I thought,'” “a pumpkin rolls off a table,” “someone names their pumpkin,” “seed fight breaks out.” First bingo wins a prize.
Speed round: for the last 15 minutes, challenge confident carvers to a mini-pumpkin speed carve — smallest pumpkin, simplest face, fastest time. Great for guests who finished early.
Food & Drink: The Carver’s Menu
Feed people food they can eat with one hand while the other holds a pumpkin. The menu should be hearty, warm, and forgiving of pumpkin-gut fingers.
- Chili bar: a big slow-cooker of chili with toppings — the ultimate carving-party food. Vegetarian option in a second cooker.
- Roasted pumpkin seeds: toss the party’s seeds with oil and salt (plus a spicy batch and a cinnamon-sugar batch) and roast during the party. Nothing beats eating the literal fruits of your labor.
- “Mummy” pigs in a blanket: cocktail sausages wrapped in crescent dough strips, with mustard eyes.
- Grab-and-go: popcorn bags, apple slices with caramel dip, cheese and crackers.
- Drinks: hot apple cider (spiked and unspiked versions), pumpkin spice anything, and plenty of water — carving is thirsty work.
- Dessert: pumpkin bars, dirt cups with gummy worms, or a simple sheet cake decorated as a jack-o’-lantern.
Set up the food station in a separate area from carving tables, with hand wipes at both ends. Label everything — guests with allergies will thank you.

The Grand Reveal: Lighting & Display
The payoff moment: as darkness falls, gather everyone outside for the lighting ceremony. Kill the porch lights, place an LED tea light or string of fairy lights in each pumpkin, and line them up on steps, walls, or hay bales. Hand the “official photographer” role to your most enthusiastic guest.
Display tricks: vary pumpkin heights using crates and boxes; tuck fairy lights between pumpkins for a magical glow; mist the air with a little water for atmosphere if it is a still night; play a Halloween playlist softly in the background. Take three photos: a group shot with everyone holding their pumpkin, a lineup shot of pumpkins alone, and a close-up of the winning pumpkins.
Keeping pumpkins fresh: carved pumpkins last longest in cool weather (below 60°F). A light coating of petroleum jelly on cut edges slows moisture loss; storing pumpkins in the fridge or a cool garage overnight extends life by days. If Halloween is still a week away, keep carved pumpkins cool and re-hydrate shriveling ones with a cold water soak.
Cleanup: The 20-Minute Blitz
Cleanup dread keeps people from hosting. Beat it with a system: while guests do the final voting, recruit a “cleanup crew” (offer first pick of leftover seeds as bribery). Tablecloths get rolled up with all debris inside and tossed — this is why you used plastic. Tools go into a soapy-water bin to soak. Floors get a quick sweep. Assign every guest one small job as they leave (“grab a trash bag on your way out”). With everyone helping, a 15-person party cleans up in under 20 minutes.
Compost the guts: pumpkin innards, seeds, and scraps compost beautifully. If you do not compost, offer the scraps to a guest with chickens or a garden — or check for a local pumpkin composting drop-off, which many cities run in November.
Sample Budget: Carving Party for 12
| Item | Details | Est. Cost |
|---|---|---|
| Pumpkins | 12 medium + 3 spares (or guests bring their own: $0) | $0–60 |
| Carving kits | 6 kits shared between pairs | $30–40 |
| LED tea lights | Pack of 24 | $10–12 |
| Table covers & newspaper | Plastic covers + collected newspaper | $8–10 |
| Markers & templates | Markers + printed templates | $5–8 |
| Food (chili bar) | Slow-cooker chili + toppings for 12 | $35–45 |
| Drinks & snacks | Cider, popcorn, apples | $20–25 |
| Prizes | Ribbons/certificates + small prizes | $10–15 |
| Total | $118–215 |
That is roughly $10–18 per guest for an evening they will talk about for years. If guests bring their own pumpkins and a dish to share (potluck style), your cost drops below $75 total. For more inspiration on stretching a party budget, see our party theme ideas and table decoration ideas — many of the styling tricks transfer directly to a Halloween table.
After the Party: Keep the Magic Going
A carving party does not have to be a one-night event. Photograph every pumpkin and create a shared album guests can download. Post the winners on social media (with permission) and tag your guests — it builds anticipation for next year. Save the best templates and your supply list in a folder labeled for next October; future-you will be grateful. And consider pairing the party with a spooky outing the same weekend — a ghost tour in Durham or your own city’s haunted history walk makes a perfect carving-party after-party for the adults.
New to carving? Watch this beginner-friendly tutorial covering the whole process in five simple steps:
10 Themed Carving Party Ideas
A theme elevates a carving party from fun to unforgettable. Pick one and weave it through invitations, food, music, and contest categories:
- Classic Horror Movie Night: carve iconic villains and monsters; screen a horror film after the reveal; award “best movie homage.”
- Day of the Dead Fiesta: sugar-skull carving patterns, marigold decorations, pan de muerto, and vibrant painted pumpkins alongside carved ones.
- Mad Scientist Laboratory: “specimen” pumpkins with X-ray style carvings, dry-ice punch, lab-coat dress code.
- Enchanted Forest: woodland creature designs (owls, foxes, deer silhouettes), fairy lights everywhere, apple cider bar.
- Decades Throwback: everyone carves something from their birth decade; play hits from each era; costume contest by decade.
- Under the Sea (Spooky Edition): sea-monster and shipwreck carvings, blue lighting, “ocean potion” punch.
- Witch’s Coven: all-witch designs, black-and-purple decor, tarot-card photo booth, cackling contest.
- Neighborhood Championship: invite the whole street, carve team pumpkins per household, and parade the results down the block.
- Kids’ Monster Mash: daytime party, friendly-monster designs only, costume parade, trick-or-treat practice run.
- Glow Party: after-dark carving with only blacklights and glow tools; neon paint station; glow-stick dance break.
Advanced Techniques for Ambitious Carvers
For guests who have mastered the basics, these techniques produce showstoppers:
Shading (the “lithophane” effect): instead of cutting all the way through, carve away only the outer skin in some areas and thin the flesh to varying depths in others. When lit from inside, thin areas glow bright and thick areas stay dark — creating a photographic grayscale image. Print your design, tape it on, and use linoleum cutters or clay tools to shave rather than saw.
Drilling: a simple rotary tool or even a hand drill with small bits creates perfect circles for starry skies, lace patterns, and dotted designs. Drill from the outside in, and keep a vacuum handy — drilling makes fine dust.
Etching: use a pumpkin-carving etching tool (or a dull pencil) to scratch surface designs without cutting through. Etched areas catch light differently and look elegant by day; at night, they glow subtly. Combine etching with traditional cut-outs for contrast.
Stacked and combined pumpkins: carve two or three pumpkins as a single sculpture — a snowman-style stack with faces aligned, or a large pumpkin “eaten” by a smaller one. Use wooden skewers to join pieces securely.
Chimera carving: cut a large window in one side of the pumpkin and build a miniature scene inside: a haunted house silhouette, tiny LED “windows,” cotton-ball spider webs. Viewers peer through the window into a glowing diorama.
Hosting a Virtual Carving Party
Far-flung friends and family can carve together over video. Ship or drop off a “carving kit” to each household beforehand (kit, LED light, templates, seeds seasoning packet). On party day, everyone joins a video call, carves together with cameras on, and holds up finished pumpkins for a group screenshot vote. Mail prizes to winners afterward. It lacks the shared mess, but the shared laughter translates surprisingly well — and grandparents especially love being included.
Troubleshooting: Common Carving Disasters (and Fixes)
Every carving party produces at least one pumpkin emergency. Here is how to save them:
“I cut off too much!” A slipped saw that removes a nose or ear is the classic disaster. Fix it with toothpicks: reattach the piece with two toothpicks as splints, pushing them in at angles. From two feet away, the repair is invisible — and the story becomes party legend.
“My pumpkin is collapsing.” Over-carved pumpkins with too many cutouts lose structural integrity. Rescue it by placing a jar or cup inside as a support column, or convert it to a “no-carve” pumpkin by filling weak spots with painted patches. Next time, leave more uncut “bridges” between design elements.
“The design is lopsided.” Almost every freehand face is lopsided — that is part of the charm. If it truly bothers the carver, suggest leaning in: add a second mouth, turn it into a “surprised” face, or declare it abstract art. Some of the funniest contest winners started as mistakes.
“It smells already.” A pumpkin that smells on day one was probably overripe at purchase. Rinse the interior with a diluted bleach solution (one teaspoon per quart of water), dry thoroughly, and keep it cool. For future parties, teach guests the thump test: a ripe pumpkin sounds hollow, and the stem should be firm and green-brown, not mushy.
“The candle keeps going out.” Switch to LED tea lights — the single best upgrade for any carving party. If you insist on real candles, cut a small chimney hole in the top of the pumpkin lid and a few air holes in the back to create airflow.
Frequently Asked Questions
How far in advance should I host a carving party before Halloween?
One to two weeks before Halloween is ideal. Carved pumpkins last 5–10 days in cool weather, so a party the weekend before Halloween means jack-o’-lanterns are still glowing on the big night. If you live somewhere warm, host closer to Halloween or keep carved pumpkins refrigerated until the 31st.
Should guests bring their own pumpkins?
Either model works. Having guests bring their own is easiest for you and lets them choose their size — just specify this clearly on the invitation. If you provide pumpkins, buy medium ones (8–12 inches tall) with flat bottoms and smooth, blemish-free “faces.” Always buy 2–3 spares for late arrivals or cracked pumpkins.
What is the best age for kids at a carving party?
All ages can attend with the right setup. Under-eights draw designs and scoop while adults cut; ages 8–12 use small kit saws with supervision; teens carve independently. Set up a separate no-carve decorating station (paint, stickers, googly eyes) so the youngest guests have their own fun zone.
How do I keep pumpkin carving safe at a party?
Announce safety rules at the start: cut away from your body, never hold a pumpkin in your lap while cutting, keep free hands behind the blade. Provide small kit saws instead of kitchen knives, keep a first-aid kit visible, ensure good lighting at every seat, and use LED candles instead of real flames. One supervising adult per two young carvers is the right ratio.
What do I do with all the pumpkin guts?
Roast the seeds during the party (toss with oil and salt, 300°F for 30–40 minutes) — they are the night’s best snack. Compost the stringy innards, or offer them to guests with gardens or chickens. Many cities run November pumpkin composting programs; a quick search will find your local drop-off.
Can I host a carving party on a tight budget?
Absolutely. Ask guests to bring their own pumpkins and a dish to share (potluck), and your costs drop to tools, lights, and table covers — under $75 for 12 guests. Dollar-store carving kits work fine, newspaper is free table covering, and LED tea lights cost pennies apiece in bulk packs.
What if someone has never carved a pumpkin before?
First-timers are the heart of a carving party. Seat beginners near confident carvers, point them to the beginner design list and printed templates, and start everyone with a quick demo: draw, gut, carve, light. The video tutorial embedded above is a perfect pre-party share — send it with your invitations.
What is the best way to preserve carved pumpkins?
Cool temperatures are everything — carved pumpkins last longest below 60°F. Coat cut edges with petroleum jelly to lock in moisture, spritz the interior daily with cold water, and store pumpkins in a cool garage or fridge overnight. A 10-minute soak in cold water revives a shriveling pumpkin dramatically. Avoid direct sunlight and heat sources.
Can I host a carving party if I have a small space?
Yes — go vertical and staggered. Use a kitchen island plus a folding table, host two seatings (afternoon families, evening adults), or make it a porch/garage party with outdoor tables. The assembly-line station format works brilliantly in tight spaces because guests rotate rather than sprawling. Six carvers in a small kitchen is cozy; sixteen is chaos — know your limit.
How do I judge the contest fairly?
Anonymous voting works best: number each pumpkin, give every guest a ballot with the categories, and prohibit voting for your own. For categories like “most creative,” brief voters on what to look for. Announce winners with fanfare and photograph the champions — and always include a silly category (“so bad it’s good”) so beginners feel celebrated too.