There is a particular magic to DIY Valentine’s Day gifts for her that no store can replicate: the moment she realizes that the beautiful thing in her hands did not come from a shelf, but from your evenings, your patience, and your attention to the details of who she is. Handmade gifts for women work best when they hit one of three notes — romantic, useful-beautiful, or deeply personal — and this guide delivers all three across twenty-five projects.
Unlike generic craft lists, every project here was chosen with her actual life in mind: things she will wear, use, display, or treasure for years. Each project card includes the time, cost, and difficulty, and the hero projects include full step-by-step tutorials. You will also find a “her style” matcher to pick the right project, a materials shopping list that covers most builds in one trip, a video tutorial companion, and honest answers about handmade gifting etiquette. Whether you are crafty or picking up scissors for the first time since school, there is a project here with her name on it — pick one and start tonight.
First: Match the Project to Her Style
Picking the right project matters more than executing it perfectly. Use this matcher:
| She is… | Make this | Avoid this |
|---|---|---|
| The romantic | Handwritten love letter folio, pressed-flower frame, “reasons” jar | Anything jokey or purely practical |
| The fashion lover | Beaded bracelet, hand-painted silk scarf, customized tote | Anything she would consider “crafty-looking” |
| The cozy homebody | Knitted throw details, candle set, bath gift box | Anything requiring going out to enjoy |
| The sentimental keeper | Memory scrapbook, photo timeline, message capsule | Anything disposable or purely decorative |
| The minimalist | Single perfect item: one bracelet, one print, one letter | Anything fussy, glittery, or multi-piece |
| The funny one | Pun cards, meme art print, silly coupon book | Anything overly serious or formal |
Hero Project 1: The Beaded XOXO Bracelet
Time: 1–2 hours · Cost: $8–$12 · Difficulty: Beginner-friendly
This is the perfect starter project: genuinely beautiful jewelry you make with your own hands. Seed-bead bracelets look boutique-made when the tension is even and the pattern is clean.
Materials: seed beads in two colors (classic: matte red + gold, or blush pink + silver), beading thread or elastic cord, a small clasp or jump rings, a beading needle, scissors.
Step 1 — Plan the pattern. Lay out your XOXO pattern on a bead mat or dark cloth: X-O-X-O repeating, or her initials flanked by hearts made of bead placement. Sketch it on paper first — counting is everything in beadwork.
Step 2 — String with consistent tension. Thread your needle, knot the end, and string beads following your pattern. Keep tension even but not tight; beads should sit snugly without warping the line. This is the whole skill — everything else is patience.
Step 3 — Size it. Measure against her wrist (borrow a bracelet she owns and measure that if you want it to be a surprise). Standard women’s bracelet: 6.5 to 7 inches including clasp.
Step 4 — Finish professionally. Attach the clasp with jump rings, trim thread ends close, and dab a tiny dot of clear nail polish on knots for security. Present in a small gift box with tissue — never a plastic bag.
Make it hers: Use her birthstone colors, add one letter bead with her initial at the center, or make a matching pair — one for each of you.
Hero Project 2: The 3D Heart Card
Time: 45 minutes · Cost: $3–$5 · Difficulty: Easy
A handmade card beats a $7 store card every time — if it looks intentional. The 3D heart technique is the upgrade that makes people gasp.
Materials: heavy cardstock for the base, red/pink patterned paper, scissors, glue stick, a bone folder or ruler edge for crisp folds.
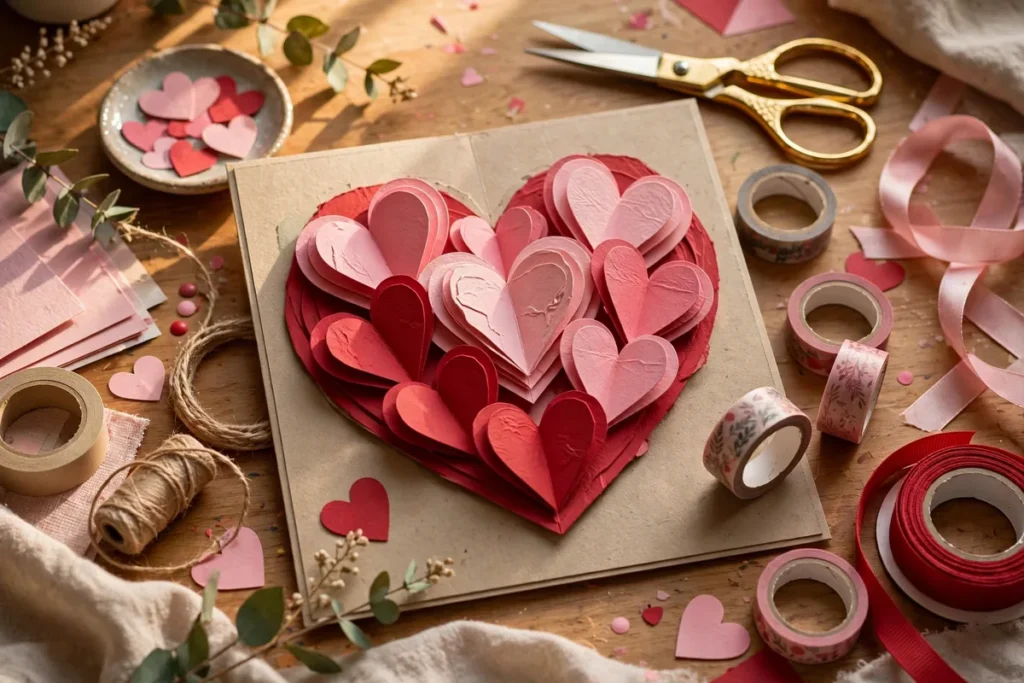
Step 1 — Cut the hearts. Cut 6–8 identical hearts from patterned paper, about 2 inches wide. Fold each in half vertically, crease sharply.
Step 2 — Build the 3D heart. Glue the folded hearts together along their folds, one after another, like pages of a book. When you fan them out and glue the last to the first, you get a full 3D heart that stands up from the card.
Step 3 — Mount and message. Glue the 3D heart to the card front. Inside, write your message by hand — three to five sincere sentences beat a page of filler. Sign it the way you actually sign things, not the way greeting cards do.
Make it hers: Use paper in her favorite colors, add a tiny photo under the heart, or write the message as a short poem if that is your thing (and only if it is).
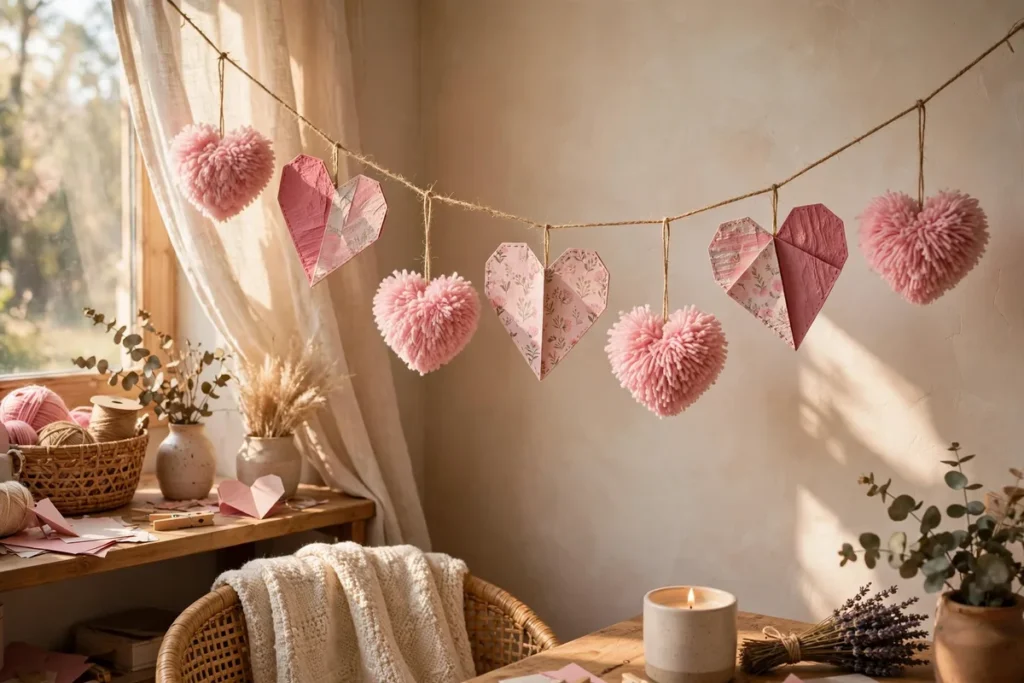
Hero Project 3: The Pom-Pom Heart Garland
Time: 2 hours · Cost: $6–$10 · Difficulty: Easy, slightly meditative
This doubles as a gift and as Valentine’s decoration — hang it together on the evening and it becomes part of the memory.
Materials: yarn in 2–3 colors (red, blush, cream), a pom-pom maker or two cardboard rings, twine or ribbon for stringing, scissors.
Step 1 — Make the pom-poms. Wrap yarn around your pom-pom maker (or cardboard rings) about 100 times for a full, lush pom. Tie tightly through the middle, cut the loops, fluff into a sphere. Trim to shape — the trimming is what makes them look professional rather than scraggly.
Step 2 — Shape some into hearts. For heart pom-poms: after tying, trim the top with two dips and the bottom to a point. It takes practice; your third one will look great.
Step 3 — String the garland. Thread twine through the centers with a large needle, spacing pom-poms 4–6 inches apart. Add small paper hearts between pom-poms for variety.
Make it hers: Match her decor colors, make it extra-long for the mantel, or add tiny LED fairy lights woven through for evening magic.
Hero Project 4: The Scented Candle Set
Time: 1.5 hours + cooling · Cost: $12–$18 · Difficulty: Beginner
Homemade candles sound ambitious; they are actually one of the easiest crafts with the highest perceived value. A set of three in matching vessels looks like a $40 boutique purchase.
Materials: soy wax flakes, candle wicks with stickers, three small glass jars or tins, fragrance oils (rose, vanilla, sandalwood), a pouring pitcher, clothespins or wick holders.
Step 1 — Prep the vessels. Stick wicks to the center bottom of each jar. Use a clothespin across the rim to hold each wick upright and centered — centered wicks are the difference between amateur and professional.
Step 2 — Melt and scent. Melt soy wax in the pouring pitcher over gentle heat (a double-boiler setup). Remove from heat, let cool two minutes, then stir in fragrance oil — about 1 oz per pound of wax. Stir gently for a full minute.
Step 3 — Pour and cure. Pour slowly into the jars, leaving half an inch at the top. Let cool undisturbed for 4+ hours. Trim wicks to a quarter inch. Cure 48 hours before burning for the best scent throw.
Safety note: Never leave melting wax unattended, and never pour wax down the drain. Craft with the focus it deserves.
Make it hers: Choose scents with a story — the rose from your wedding bouquet, the vanilla of her favorite bakery, the sandalwood of the trip you took together. Label each jar with the memory, not just the scent name.
Hero Project 5: The Pressed-Flower Frame
Time: 30 minutes + pressing time · Cost: $5–$10 · Difficulty: Easy
Botanical art is timeless, and pressed flowers cost nothing if you gather them. This project needs advance planning — flowers press in 1–2 weeks — so start early.
Materials: pressed flowers and leaves, a floating glass frame (two panes of glass in a frame), tweezers, clear glue dots.
Step 1 — Press the flowers. Place fresh flowers between blotting paper or newspaper, stack under heavy books, wait 1–2 weeks. Thin-petaled flowers (pansies, daisies, ferns) press best.
Step 2 — Compose. Arrange the pressed flowers between the glass panes using tweezers. Less is more — a single perfect stem with breathing room beats a crowded collage. Step back and squint; the composition should read clearly from six feet away.
Step 3 — Seal and gift. Close the frame, add glue dots to keep stems from sliding. Include a small card noting where and when the flowers were gathered — “from the park where we walk, October” turns decoration into memoir.
More DIY Gifts for Her: The Quick Collection
6. The “reasons I love you” jar. Fifty-two small cards in a beautiful jar, one per week. Use deckled-edge paper and a wax seal on the lid for heirloom presentation.
7. Hand-painted silk scarf. Silk-painting kits ($15) make this beginner-feasible. Abstract washes in her colors — no drawing skill needed, just beautiful color.
8. The memory candle. One large candle with a label you design: “The Night We…” plus the date. Burn it together on Valentine’s evening.
9. Customized tote bag. A quality canvas tote + fabric paint or iron-on design. Make it something she would actually carry — her favorite quote in beautiful lettering, a minimalist botanical print.
10. The love-letter folio. Write the real letter — pen, good paper, sealed with wax — and present it in a handmade paper folio. The letter is the gift; the folio is the ceremony.
11. Bath salt gift set. Epsom salt + baking soda + essential oils + dried rose petals, layered in three small jars. Ten minutes of work, spa-level result.
12. The “firsts” photo timeline. Your first photo, first trip, first holiday — printed small, hung as a staircase gallery with one empty frame labeled “next.”
13. Embroidered hoop art. A simple heart or her initial in an embroidery hoop ($10 kit). Modern embroidery is minimalist and chic, not grandmotherly.
14. The recipe book of your life. The dishes that mark your story, with a paragraph of memory under each recipe, printed as a small book.
15. Hand-decorated journal. A quality blank journal with a hand-tooled or painted cover. For the writer, the dreamer, the list-maker.
16. The “open when” letters. Ten envelopes, ten moments, ten letters. The gift that keeps arriving for months.
17. Chocolate-dipped everything kit. Good chocolate, strawberries, pretzels, and a double-boiler setup — then dip together. The activity is the gift.
18. The star-map print, handmade frame. Print the constellation field from a significant date; build or decorate the frame yourself.
19. Knitted chunky headband. Faster than a scarf, just as cozy. Chunky yarn, one evening, enormous charm.
20. The “day of us” coupon book. Not generic coupons — specific ones: “One sunrise walk with coffee, my treat,” “One museum afternoon, your pace, no rushing.”
21. Pressed-flower phone case. Clear phone case + tiny pressed flowers + clear sealant. She carries your craft everywhere.
22. The hand-poured soap set. Melt-and-pour soap base ($10) + molds + dried botanicals. Easier than candles, equally giftable.
23. A “future dates” jar. Fifty date ideas on colored sticks, sorted by budget. The jar solves “what should we do?” for a year.
24. The lyric art print. “Your song’s” most meaningful lyric, hand-lettered (or printed in a beautiful font) and framed.
25. The video love letter. Record yourself reading a letter, or compile clips from people who love her. Put it on a USB in a small gift box. Digital, but handmade.
The One-Trip Shopping List
Most projects above can be supplied in a single craft-store trip. Here is the consolidated list:
| Category | What to Buy | Covers Projects |
|---|---|---|
| Paper | Heavy cardstock, patterned paper pack, deckled-edge cards | Cards, reasons jar, letters, folio |
| Adhesives | Glue sticks, clear glue dots, Mod Podge | Cards, frames, mixed media |
| Textiles | Yarn (3 colors), embroidery hoop + floss, fabric paint | Garland, hoop art, tote, scarf |
| Beads & jewelry | Seed beads, elastic cord, clasps, bead box | Bracelet, phone case accents |
| Candle & bath | Soy wax, wicks, fragrance oils, Epsom salt, jars | Candles, bath salts, soap |
| Presentation | Kraft boxes, tissue, twine, wax seal kit, ribbon | Every single project |
Total for the full list: roughly $60–$80, which supplies five or more gifts. Or buy per-project for $5–$18 each.
Watch: DIY Valentine’s Gift Tutorials for Her
Techniques like beadwork and 3D cards are easier learned by watching. This bracelet tutorial is a perfect companion to Hero Project 1:
Handmade Gifting Questions, Answered
Is a handmade gift enough for Valentine’s Day, or should I also buy something?
A well-executed handmade gift is more than enough — it is the premium option. The only reason to add a purchased item is if the handmade piece is small (a bracelet pairs beautifully with flowers; a card pairs with dinner). Never add a purchased gift out of guilt; add it only if it genuinely enhances the moment.
What if my DIY project doesn’t turn out perfectly?
Small imperfections are features, not bugs — they prove a human made it. The threshold is effort visibility: if it is clear you tried hard, imperfections charm. If it looks rushed or unfinished, that is what stings. When in doubt, simplify the design rather than executing a complex one badly.
How do I keep a DIY gift secret while making it at home?
The eternal crafter’s dilemma. Craft while she is out, at work, or asleep. Store works-in-progress in an opaque bag in the car trunk or a friend’s house. Enlist a friend as a cover story if needed. And remember: being caught mid-craft is not the disaster you fear — it is often endearing.
Are DIY gifts okay for a new relationship?
Choose light, fun projects — the pom-pom garland, the funny card, the bath salts. Save the love-letter folio and the scrapbook for when the relationship has the weight to hold them. In new love, handmade should whisper “I’m thoughtful,” not shout “I’ve planned our future.” A small handmade touch early on sets a lovely precedent: this is someone who puts in effort.
What is the easiest impressive DIY Valentine’s gift for her?
The scented candle set or the “reasons” jar. Both take under two hours, cost under $20, require no special skill, and look like they came from a boutique. They are the highest return-on-effort projects on this list.
More Ideas for Her
- Valentine’s Day Gifts for Her: Cozy Loungewear and Comfort Picks — pair handmade with cozy.
- Valentine’s Day Self-Care Gifts for Her — the purchased companion to your bath-salt set.
- Valentine’s Day Jewelry Gifts Guide — if the bracelet sparks a jewelry theme.
- How to Write a Valentine’s Day Love Letter — make the card as good as the gift.
- Valentine’s Day Decoration Ideas for Home — display the garland in a styled room.
A Final Note on Handmade Love
The most beautiful thing about DIY Valentine’s Day gifts for her is what they prove: that you spent your most irreplaceable resource — time — thinking about her. No store sells that. Pick the project that matches her style, gather the materials in one trip, and make something that could only have come from your hands. She will keep it long after the flowers are gone, and every time she sees it, she will remember not just Valentine’s Day, but the evenings you spent making it — thinking of her the whole time.
Troubleshooting: When the Project Fights Back
Every crafter hits snags. Here is how to fix the common ones for the hero projects above:
Bracelet: beads won’t lie flat. Your tension is too tight or your thread path is wrong. Loosen slightly and make sure you are passing through beads in the same direction each row. If the bracelet curls, it is almost always tension — restring that section rather than fighting it.
Bracelet: clasp keeps popping. The jump ring is not fully closed, or the thread knot is slipping. Close jump rings with two pliers until the ends meet with no gap, and put a micro-drop of clear nail polish on every knot.
3D card: heart collapses flat. The folds are not creased sharply enough, or the glue did not hold the fan closed. Use a bone folder (or the back of a spoon) for razor creases, and let the glue cure fully before standing the card up.
Garland: pom-poms look scraggly. You are under-trimming. Professional pom-poms are trimmed aggressively — cut away until the sphere is dense and round. It feels wasteful; it is correct. Also, wrap more yarn than you think: 100+ wraps for a 3-inch pom.
Candles: sinkholes around the wick. Completely normal with soy wax. Fix with a second pour: after the first pour cools, poke relief holes around the wick with a skewer, then pour a thin top-up layer of melted wax. Problem solved.
Candles: weak scent. You added fragrance oil when the wax was too hot (it evaporated) or used too little. Add oil at the right temperature — off the heat, cooled two minutes — and use the full recommended ratio. Also, cure 48 hours; scent strengthens as the candle cures.
Pressed flowers: browning. The flowers were too thick or too moist. Stick to thin-petaled varieties, change the blotting paper after three days, and press for the full two weeks. Brown edges can be trimmed — imperfection at the edges reads as natural.
Gifts by How Much Time You Have
One evening (2–3 hours): The XOXO bracelet, the candle set, the bath salts, the “reasons” jar, the 3D card plus a long heartfelt letter. These are the highest-impact-per-hour projects on the list.
One weekend: Add the pom-pom garland, the embroidered hoop art, the customized tote, the lyric art print. A weekend gives you drying time between steps, which is the secret ingredient in professional-looking results.
Two weeks: The pressed-flower frame (pressing time), the memory scrapbook, the recipe book, the hand-painted scarf (practice piece first). Two weeks also lets you order anything you cannot find locally.
One month: The knitted headband or scarf, the full scrapbook, the bound book of your story. A month turns “I made this” into “I spent a month making this,” which is a different sentence entirely. Whatever your timeline, start tonight — even an hour of work today is a gift already in motion, and momentum is the crafter’s best friend.
The Valentine’s Morning Surprise Setup
The gift is only half the experience — the reveal is the other half. Here is a morning setup that costs nothing and doubles the impact:
Wake up thirty minutes before her. Hang the pom-pom garland across the bedroom doorway. Place the gift on her pillow with the 3D card propped against it. Put one perfect flower — a single stem from the grocery store, or a paper one you made — across the card. Start the coffee or tea so the smell reaches the bedroom. Then wake her the nice way, and let her discover the scene herself.
The psychology: she experiences the gift in a staged moment rather than receiving it handed over between tasks. Staging signals that this mattered to you — that you planned, that you anticipated her reaction, that the morning itself was part of the gift. It takes thirty minutes and it is the difference between “thanks, I love it” and the slow smile that means she will remember this one.
Presentation Rules for Gifts for Her
Women notice presentation details at a forensic level. These rules are non-negotiable:
- No visible price tags or store bags. Ever. Check twice.
- Tissue paper inside the box. The gift should rest in tissue, not rattle in cardboard.
- A real card, handwritten. Not a gift tag with three words — a card with sentences.
- One fresh element. A real flower, a sprig of eucalyptus, a dried orange slice. Fresh beats manufactured.
- Scent the wrapping lightly. One spritz of her perfume on the tissue, or a dried lavender sprig. Scent is memory’s fastest lane.
- Hide the work, show the result. She should never see the glue gun, the failed first attempt, or the messy craft table. The magic is in the reveal, not the process — save the process stories for later, told laughing.
More Answers for Her Gift Makers
How do I make a DIY gift look expensive, not crafty?
Three upgrades: restrained color palette (two to three colors maximum), quality base materials (real cardstock, real glass, real ribbon — not the dollar-store versions), and ruthless editing (remove one decorative element; then remove another). Expensive-looking design is 90% restraint. The projects that look boutique are the simple ones executed perfectly.
Should I tell her I made it, or let her figure it out?
Tell her — but let the gift speak first. Hand it over without preamble and let her discover the handmade quality herself; the dawning realization is delicious. Then, when she asks, tell her about making it. Never open with apologies or disclaimers about imperfections. Present it the way a gallery presents art: with quiet confidence.