Store-bought gifts say “I spent money.” DIY gifts say “I spent time,” and time is the currency siblings respect most. Anyone can click “buy now.” Not everyone will spend a Saturday building, baking, or crafting something specifically for you. That is why handmade Siblings Day gifts hit different: every imperfect stitch and slightly crooked frame is proof that someone chose effort over convenience.
This guide gives you 45 DIY Siblings Day gift ideas with real tutorials: actual materials lists, actual steps, honest time and cost estimates. They are organized by effort level, from weekend-warrior builds to five-minute wins, so you can match the project to your schedule and skill. No vague “just be creative” filler. Every project below is something a real person can actually make, with materials from a craft store or your kitchen. Siblings Day is April 10; start this weekend and you will be done with time to spare.
The DIY Gift Rules
Rule 1: effort is the gift. A slightly lopsided handmade frame beats a perfect store-bought one, because the lopsidedness is the point. Rule 2: finish is everything. Sand the edges, tie the bow neatly, write the card carefully. Sloppy finishing turns “handmade with love” into “made in a hurry.” Rule 3: play to your strengths. Good at baking? Bake. Good with tools? Build. Do not attempt watercolor portraits if you cannot draw; attempt the thing you are actually good at. Rule 4: personalize or perish. The difference between a craft project and a gift is the personal detail: their name, your shared joke, the specific memory. Rule 5: test before gifting. Taste the cookies. Light the candle. Make sure the frame holds. Nothing kills DIY romance like a gift that does not work. Rule 6: start early. Rushed crafts look rushed. Give yourself the full timeline below and the work feels like fun instead of panic.
Weekend-Warrior Projects (3+ Hours)
For when you want to go big. These take real time and deliver real wow.
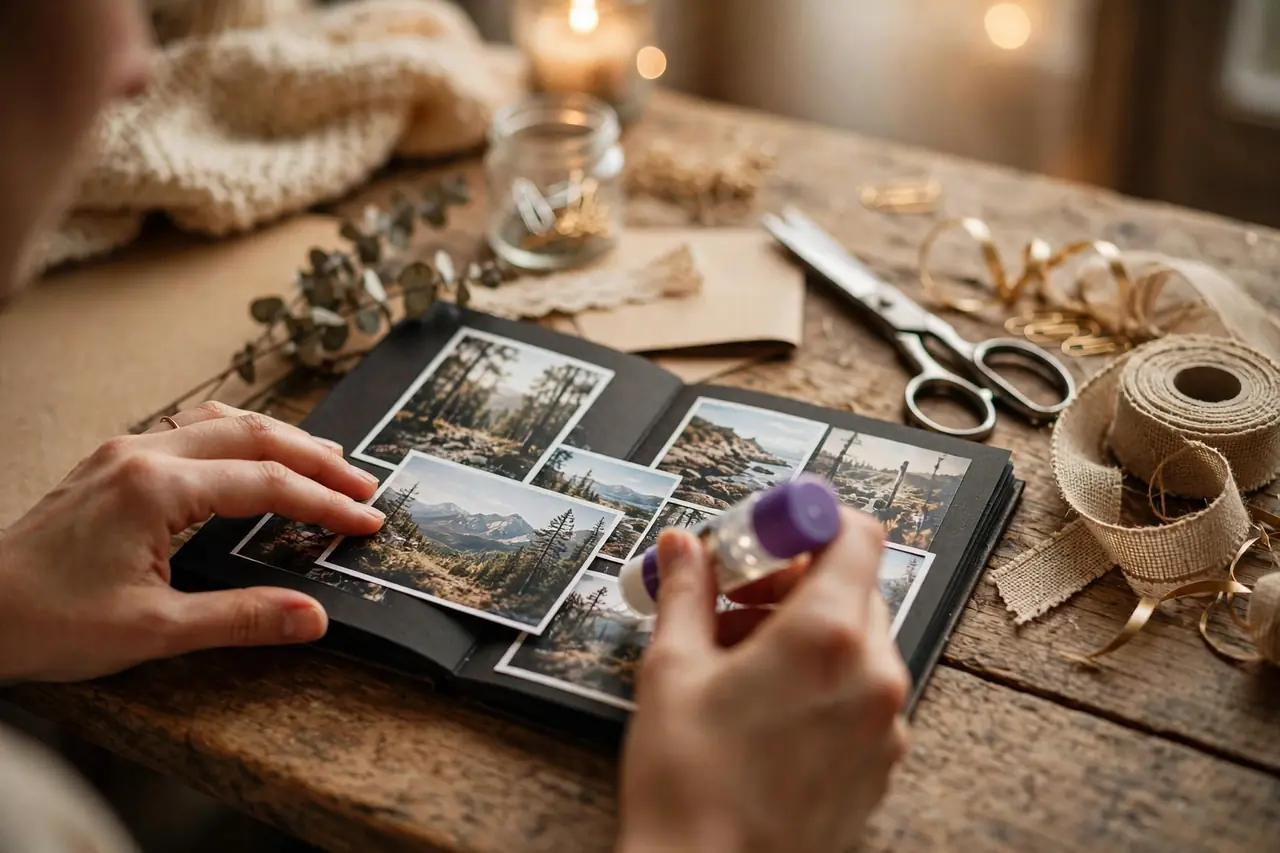
1. The Memory Scrapbook
Materials: blank scrapbook ($15), printed photos ($10), washi tape, markers, stickers, glue stick. Total cost: ~$30. Time: 4–6 hours.
Steps: Print 30–40 favorite photos spanning your whole sibling history. Arrange them chronologically, two to three per page. Write a caption or memory under each one; the handwriting is part of the charm. Add ticket stubs, dried flowers, or other flat mementos in envelope pages. Leave the last five pages blank with a note: “for the memories we haven’t made yet.” Wrap it in kraft paper with twine.
2. Custom Photo Puzzle
Materials: blank puzzle kit ($12), printed photo, Mod Podge, foam brush. Total cost: ~$18. Time: 3 hours plus drying.
Steps: Choose a favorite sibling photo and print it to fit the blank puzzle. Adhere the photo to the puzzle base with Mod Podge, smoothing out every bubble. Let dry completely, then seal with two more thin coats. Once cured, break it apart and package the pieces in a decorated box with a note: “some assembly required, like our relationship.”
3. Hand-Painted Sibling Portrait
Materials: small canvas ($8), acrylic paints ($15 set), brushes, reference photo. Total cost: ~$25. Time: 4–5 hours.
Steps: Do not attempt photorealism; go stylized. Sketch the basic shapes lightly in pencil. Block in large color areas first, then add details. Paint the background a solid bold color for a modern look. Sign and date the back. Frame it simply. The charm is in the handmade quality, so embrace the imperfections.
4. The “Open When” Letter Collection
Materials: 20–30 envelopes ($8), nice paper, stickers or washi tape for sealing. Total cost: ~$12. Time: 3–4 hours of writing.
Steps: Write letters for specific moments: “open when you’re sad,” “open when you need a laugh,” “open when you miss home,” “open on your birthday,” “open when you need advice.” Seal each with a sticker. Arrange in a decorated box labeled with the occasions. This is the gift that keeps giving for years.
5. DIY Candle Collection
Materials: soy wax flakes ($15), wicks ($8), fragrance oils ($12), jars or tins ($10). Total cost: ~$45 for 6–8 candles. Time: 3 hours.
Steps: Melt wax in a double boiler to the temperature on the package. Add fragrance oil off the heat (about 1 oz per pound of wax). Secure wicks in jars with a dab of hot glue. Pour wax, leaving half an inch at the top. Let cool completely, trim wicks to a quarter inch. Label each with a custom name: “Sunday Morning at Mom’s,” “Road Trip 2019.” Test-burn one before gifting.
6. Knitted or Crocheted Scarf
Materials: chunky yarn ($20), large needles or just your arms. Total cost: ~$25. Time: 5–8 hours (spread over evenings).
Steps: Arm-knitting is the fastest path: no needles needed. Cast on 10–12 stitches on your arm with chunky yarn. Knit row after row until the scarf is six feet long. Cast off, weave in the ends. Choose their favorite color. It will be slightly uneven. That is how they will know it is real.

One-Evening Projects (1–3 Hours)
7. Personalized Playlist + Custom Cover Art
Materials: free (streaming service), cardstock for the cover. Time: 2 hours.
Steps: Build a playlist of 20–25 songs: your shared anthems, road-trip staples, songs from specific memories. Order them like a story. Design cover art on free design tools or draw it by hand. Print the QR code linking to the playlist on a nice card with the tracklist on the back. The curation is the craft.
8. Custom Photo Coasters (Set of 4)
Materials: ceramic tiles ($8 for 4), printed photos, Mod Podge, felt pads, clear sealant. Total cost: ~$15. Time: 2 hours plus drying.
Steps: Cut photos to tile size. Mod Podge photo to tile, smoothing bubbles. Apply three thin top coats, drying between each. Spray with clear sealant for water resistance. Glue felt pads to the bottom. Tie the set with ribbon.
9. The Sibling Coupon Book
Materials: cardstock, ring binder or ribbon, markers. Total cost: ~$8. Time: 1.5 hours.
Steps: Create 12–15 coupons: “one home-cooked dinner,” “one airport pickup, no complaining,” “one movie night, your pick,” “one closet raid, no judgment,” “one 2 a.m. vent session.” Decorate each card. Bind with ribbon. The key: actually honor them. An unhonored coupon book is just paper.
10. Painted Plant Pots with Herbs
Materials: terracotta pots ($10), acrylic paint, herb seedlings ($12), potting soil. Total cost: ~$25. Time: 2 hours plus drying.
Steps: Paint pots with designs: their initials, inside jokes, simple patterns. Seal with clear coat. Plant basil, mint, and thyme. Attach care instructions on a cute tag. A gift that grows.
11. Customized Tote Bag
Materials: plain canvas tote ($8), fabric markers or iron-on letters ($10). Total cost: ~$18. Time: 1.5 hours.
Steps: Sketch the design lightly in pencil: their name, a quote, an inside joke, a simple illustration. Go over with fabric markers. Heat-set with an iron. Fill the tote with a few small treats before gifting.
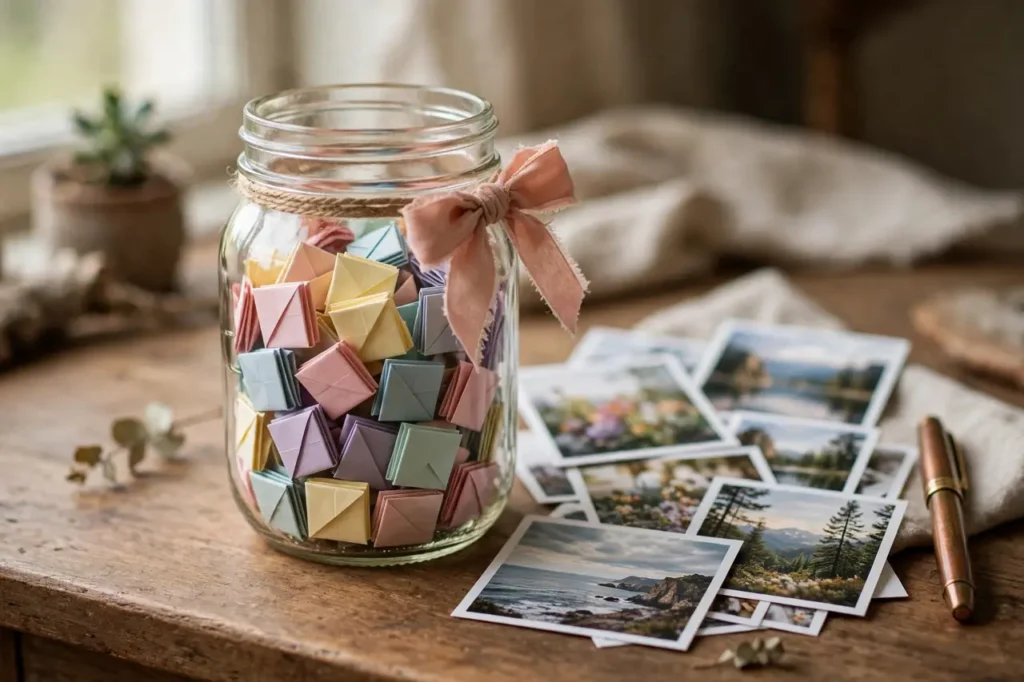
12. Memory Jar
Materials: large mason jar ($8), colorful paper strips, ribbon. Total cost: ~$10. Time: 2 hours of writing.
Steps: Write 50–100 short memories on paper strips: funny moments, proud moments, tiny details (“the way you always steal the burnt popcorn”). Fold and fill the jar. Tie with ribbon and a tag: “open when you need a reminder.” The writing is the work; the jar is just the container.
13. Handmade Soap Bars
Materials: melt-and-pour soap base ($15), molds ($10), fragrance and colorants ($10). Total cost: ~$35 for 8–10 bars. Time: 2 hours.
Steps: Melt soap base in the microwave in short bursts. Add fragrance and color, pour into molds. Add dried flowers or oats for texture. Let harden two hours. Pop out, wrap in kraft paper with twine. Label with custom scent names.
14. Photo Garland
Materials: printed photos ($10), twine, mini clothespins ($6). Total cost: ~$16. Time: 1 hour.
Steps: Print 15–20 photos in a consistent size. Clip to twine with mini clothespins, alternating photos with small handwritten notes. Package the garland coiled in a box with a note: “for your wall.” Instant room decor.
15. Custom Spice Blends
Materials: bulk spices ($15), small jars ($10), labels. Total cost: ~$25 for 4–6 jars. Time: 1.5 hours.
Steps: Mix signature blends: a taco seasoning, an Italian herb mix, a chai spice, a BBQ rub. Fill jars, label with custom names (“[Sibling]’s Secret Taco Mix”). Include a recipe card for each blend’s best use.
16. Embroidered Hoop Art
Materials: embroidery hoop ($6), fabric, floss ($10 set), needle. Total cost: ~$18. Time: 2–3 hours.
Steps: Choose a short quote or their initials. Transfer to fabric with a water-soluble pen. Stitch with basic backstitch; it is beginner-friendly. Frame in the hoop, trim the back. A simple stitched quote looks boutique-made.
30-Minute Miracles
Short on time, not on love. Each of these takes half an hour or less.
17. The Framed Inside Joke
Print the text screenshot, the meme, or the photo that started the joke. Frame it ($10 frame). Add a caption underneath. Cost: ~$12. The fastest genuinely personal gift in this guide.
18. Custom Bookmarks (Set of 3)
Cut cardstock to size, decorate with quotes and doodles, laminate with packing tape for durability, punch a hole and add ribbon. Cost: ~$5. For the reader sibling.
19. “Reasons I Love You” Deck
Write one reason per card on a deck of playing cards ($3), held together with a ribbon. 52 reasons. Cost: ~$5. Simple, devastating.
20. Decorated Mug
Plain white mug ($5) + oil-based paint markers ($10). Draw the design, bake at 350°F for 30 minutes to set. Cost: ~$15. Hand-wash only; note that on the card.
21. Scented Drawer Sachets
Small fabric bags ($6) filled with dried lavender or cedar chips ($8). Tie with ribbon. Cost: ~$14 for six. Lovely and useful.
22. Photo Magnets (Set of 6)
Print small photos, adhere to adhesive magnet sheets ($8), cut out. Cost: ~$12. Fridge-worthy immediately.
23. Custom Keychain
Blank acrylic keychain ($8 for a set) + printed photo or design inserted. Cost: ~$10. Daily-carry personal.
24. The “Emergency” Kit
Small box filled with their vices: chocolate, tea bags, a face mask, funny notes. Decorate the box. Cost: ~$20. Labeled “in case of emergency.”
25. Hand-Lettered Quote Print
Thick paper + markers. Letter your favorite shared quote by hand, frame it. Cost: ~$12 with frame. Imperfect lettering is the aesthetic.
26. Friendship Bracelets, Upgraded
Embroidery floss ($8 set) in their colors. Braid or knot a proper bracelet, not the summer-camp kind. Cost: ~$8. Nostalgia, wearable.
5-Minute Wins
For the truly last-minute. These take minutes and still beat a blank card.
27. The Voice Memo
Record a 3-minute message: your favorite memory, what you admire, one funny story. Send it. Cost: free. Impact: enormous.
28. The Curated Playlist
15 songs, ordered with intent, sent with a one-line explanation per song. Cost: free. The curation is the craft.
29. The Photo Dump, Captioned
Ten favorite photos texted one by one, each with a one-line memory. Cost: free. Better than any card.
30. The Public Tribute Post
A real social media post with a genuine caption and your best photo together. Cost: free. Public appreciation hits different.
31. The Handwritten Card
Not a gift tag. A card. Five real sentences. Specific memories. Cost: $5. The highest ROI in gifting.
32. The “I Owe You” Text
A specific, dated promise: “Dinner, my treat, next Friday.” Cost: free now, dinner later. Specificity is what makes it real.
33. The Memory Text Thread
Start a thread: “remember when…” and keep it going all day. Cost: free. A whole day of nostalgia.
34. The Video Montage (Phone-Edited)
Clips from your camera roll, edited in your phone’s free app, set to your song. Cost: free. Twenty minutes of work.
35. The Digital Coupon
One beautiful digital card: “good for one [thing they want].” Designed in a free app. Cost: free. Honor it.
36. The Recommendation List
Your top 10: books, shows, restaurants, songs. “Things I love that you need.” Cost: free. Deeply personal.
Edible DIY Gifts
Food is love made tangible. These are the tastiest projects in the guide.
37. Cookie Mix in a Jar
Layer flour, sugar, chocolate chips, and oats in a mason jar ($12 for jar + ingredients). Attach the recipe card: “just add butter and eggs.” Cost: ~$12. Looks gorgeous, tastes better.
38. Infused Olive Oil
Good olive oil + rosemary, garlic, or chili in a sealed bottle. Steep two weeks. Cost: ~$18. Start this one early.
39. Homemade Granola Bags
Oats, nuts, honey, dried fruit baked at 300°F for 30 minutes. Bag in cellophane with ribbon. Cost: ~$15 for 4 bags. Breakfast, gifted.
40. Chocolate-Covered Everything
Melt chocolate, dip pretzels, strawberries, or marshmallows, cool on parchment. Box beautifully. Cost: ~$18. Impossible to dislike.
41. The Sibling Snack Box
Their five favorite snacks, full-size, arranged in a decorated box with a note per snack (“for the movie nights”). Cost: ~$25. Personal curation wins.
42. Homemade Hot Chocolate Mix
Cocoa, sugar, chocolate chips, marshmallows layered in a jar. Attach instructions. Cost: ~$12. Winter sibling essential.
43. Pickled Vegetables
Vinegar brine + cucumbers, carrots, or green beans in mason jars. Ready in 48 hours. Cost: ~$14 for 3 jars. Trendy and tasty.
44. Baked Bread Loaf
A no-knead loaf: flour, water, salt, yeast, time. Wrap in a tea towel with butter. Cost: ~$8. The smell alone is a gift.
45. Custom Trail Mix
Their perfect ratio: nuts, chocolate, dried fruit, pretzels. Bag with a custom label (“[Name]’s Genius Mix”). Cost: ~$15. Snack science.
DIY Project Specs: Pick Your Build
| Project | Time | Cost | Skill Level | Best For |
|---|---|---|---|---|
| Memory scrapbook | 4–6 hrs | ~$30 | Easy | The sentimental sibling |
| “Open when” letters | 3–4 hrs | ~$12 | Easy | Long-distance sibling |
| DIY candles | 3 hrs | ~$45 | Medium | The cozy sibling |
| Photo coasters | 2 hrs | ~$15 | Easy | The homebody |
| Memory jar | 2 hrs | ~$10 | Easy | Any sibling |
| Coupon book | 1.5 hrs | ~$8 | Easy | The practical sibling |
| Custom playlist | 2 hrs | Free | Easy | The music lover |
| Cookie mix jar | 30 min | ~$12 | Easy | The foodie |
| Voice memo | 5 min | Free | Easy | Last-minute save |
| Handwritten card | 5 min | ~$5 | Easy | Always, with everything |
DIY Fails (and How to Avoid Them)
The unfinished project. The number one DIY killer is ambition exceeding the calendar. Fix: choose a project one level easier than you think you can handle. A finished simple gift beats an unfinished impressive one. The Pinterest-expectation gap. Your first attempt will not look like the tutorial photo. That is normal. The tutorial maker has done it forty times. Fix: embrace “rustic” as an aesthetic and focus on neat finishing. The wrong-skill project. Attempting watercolor portraits when you cannot draw. Fix: play to your actual strengths. The untested recipe. Gifting cookies you never tasted. Fix: always make a test batch. Your sibling is not a focus group. The gift that needs the recipient to finish it. “Some assembly required” is funny on a puzzle; it is not funny on furniture. Fix: deliver it done. The hygiene miss. Edible gifts in unwashed jars, candles with untrimmed wicks. Fix: the last 10% of effort is 90% of the impression.
Your 4-Week DIY Timeline
Four weeks out: choose your project and order materials. Infused oils and anything needing cure time starts now. Three weeks out: print photos, write the letters, do the writing-heavy work. Writing cannot be rushed. Two weeks out: build. This is the making weekend. One week out: finish, wrap, write the card. The card takes longer than you think; give it an evening. Day before: test everything (light the candle, taste the cookies, check the frame holds), then wrap. A timeline turns “I’ll DIY something” from a fantasy into a finished gift sitting on the table.
Wrapping DIY Gifts: Presentation Is Half the Craft
A handmade gift in a plastic bag looks like an afterthought. The same gift in kraft paper with twine and a sprig of dried lavender looks like a boutique find. Match the wrap to the gift: rustic kraft for food and candles, clean white boxes for jewelry and small crafts, fabric wrap for anything soft. Label everything: homemade goods need ingredient labels and dates; it looks professional and it is responsible. Include the story: a small card explaining what you made and why (“I remembered you loved these cookies at grandma’s”) turns a craft into a gift. Photograph before wrapping: you will want the memory, and so will they. The wrap is the frame; the gift is the art. Frame it well.
Watch: 25 DIY Gifts People Actually Love
See DIY gifting in action. This video walks through 25 handmade gift ideas with real tutorials: sugar scrubs, coasters, spa baskets, photo gifts, and more, all explicitly recommended for brothers and sisters. Watch it for techniques, then pick your project from the list above.
More Gift Inspiration
For store-bought companions to your handmade gifts, see our gift ideas for him and personalized gifts guide. For step-by-step craft gift tutorials, the DIY gift ideas collection has 42 more projects, and sentimental family gifts covers the emotional side of gifting.
DIY Siblings Day Gift Ideas: FAQs
What is the best DIY gift for Siblings Day?
The memory scrapbook and the “open when” letter collection are the all-time winners: deeply personal, achievable for beginners, and guaranteed to move your sibling. For less time, the memory jar or a custom playlist deliver similar impact in under two hours.
How much do DIY sibling gifts cost?
Most projects in this guide cost $5 to $45 in materials. The most meaningful ones (letters, playlists, voice memos, photo dumps) are free. Budget more for candles and soap-making, which have higher material costs but produce multiple gifts.
I am not crafty. What can I make?
The memory jar, the coupon book, the playlist, the “reasons” card deck, and the photo garland all require zero craft skill, just time and honesty. If you can write and use scissors, you can make a great DIY gift.
How far in advance should I start?
Weekend projects: start two weekends before Siblings Day. One-evening projects: the week of. Candles and infused oils need curing/steeping time, so start those earliest. The 5-minute wins work day-of.
What if my DIY gift looks bad?
Imperfection is the aesthetic. A slightly crooked frame proves a human made it. That said, finish matters: sand rough edges, tie neat bows, write the card carefully. “Handmade with love” and “made in a hurry” are separated by fifteen minutes of finishing.
Can I combine DIY with a store-bought gift?
Absolutely, and it is often the best strategy. Pair a small handmade item (the card, the playlist, the memory jar) with a store-bought main gift. The handmade piece provides the meaning; the purchased piece provides the polish.
What DIY gifts work for brothers vs. sisters?
The projects are universal, but lean practical for brothers (coasters, spice blends, snack box, playlist) and sentimental-personal for sisters (scrapbook, candles, “open when” letters, embroidery). Know your sibling first, stereotype second.
How do I personalize a DIY gift?
Add the personal detail: their name, your inside joke, the specific date, the shared memory. A plain candle is a craft project; a candle labeled “Road Trip 2019” with the scent of the car freshener from that trip is a gift.
What tools do I need to start?
For most projects: scissors, glue, a printer, and honesty. The weekend builds add Mod Podge, acrylic paint, or a microwave. You do not need a craft room; a kitchen table works fine. Start with what you have.
Are edible DIY gifts safe to give?
Yes, with common sense: check for allergies, use clean jars and utensils, label ingredients, and note the date made. Most edible gifts keep one to two weeks. When in doubt, the cookie-mix-in-a-jar (they bake it fresh) sidesteps every food-safety concern.
What is the easiest impressive DIY gift?
The memory jar. It requires a jar, paper strips, and two hours of writing, and it consistently produces the strongest reaction of any project in this guide. Second place: the “open when” letter collection. Both are writing projects disguised as crafts, which means anyone can make them beautifully.
How do I make a DIY gift look professional?
Three things: consistent color palette, neat finishing (trimmed edges, tied bows, aligned labels), and good lighting in any photos you include. Buy matching jars, use the same ribbon throughout, and print labels instead of handwriting them if your handwriting is chaos. Professionalism in DIY is 90% consistency.
The best DIY Siblings Day gift is the one you actually finish. Pick the project that matches your weekend, gather the materials today, and make something no store can sell: proof that you showed up with your hands, not just your wallet. Start with the timeline above, finish with the card, and photograph the result before you wrap it. Years from now, you will both remember the making as much as the gift. For more handmade inspiration, explore our DIY gift tutorials and card message ideas for the words to go with the craft.