Professional party decorators charge hundreds. A craft store run and a free weekend cost a fraction of that — and handmade decorations carry a charm no store-bought kit can match. These 25 DIY pet birthday decorations cover everything from garlands to photo backdrops, organized by category so you can pick the projects that fit your space, your pet, and your patience. Every project uses affordable, widely available supplies, most take under an hour, and the planner table at the end helps you build a realistic crafting schedule. Whether this is your first handmade party or your fifteenth, you will find projects at your level here.
DIY Decorating Ground Rules
Before the glue gun heats up, three rules keep your handmade decor pet-safe and party-ready.
Rule 1: Decorate above the danger zone. Anything within your pet’s reach will be sniffed, batted, chewed, or sat upon. Hang garlands high, mount banners on walls rather than draping them at pet level, and keep small pieces on tables behind barriers. Design for the pet you have: a determined chewer needs everything at ceiling height; a calm senior cat lets you get away with more.
Rule 2: Choose pet-safe materials. Paper, felt, fabric, and wood are your friends. Avoid small detachable parts (buttons, beads, googly eyes) on anything within reach, skip tinsel and curling ribbon entirely (linear foreign body risk for cats especially), and use non-toxic glue and paint. If a decoration sheds pieces, it does not belong at a pet party.
Rule 3: Match effort to impact. The decorations guests notice most are the big, bold ones: the banner, the backdrop, the balloon clusters. Spend your time on three statement pieces rather than thirty tiny details. A full, simple look beats a sparse, fussy one every time — and you will actually finish before the party. When choosing between projects, always ask: will this show up in photos? If yes, prioritize it; the camera is the ultimate judge of decoration effort.
Hanging Decor: Garlands and Strands (Projects 1–7)
Garlands are the workhorses of party decor — cheap, fast, and transformative in volume.
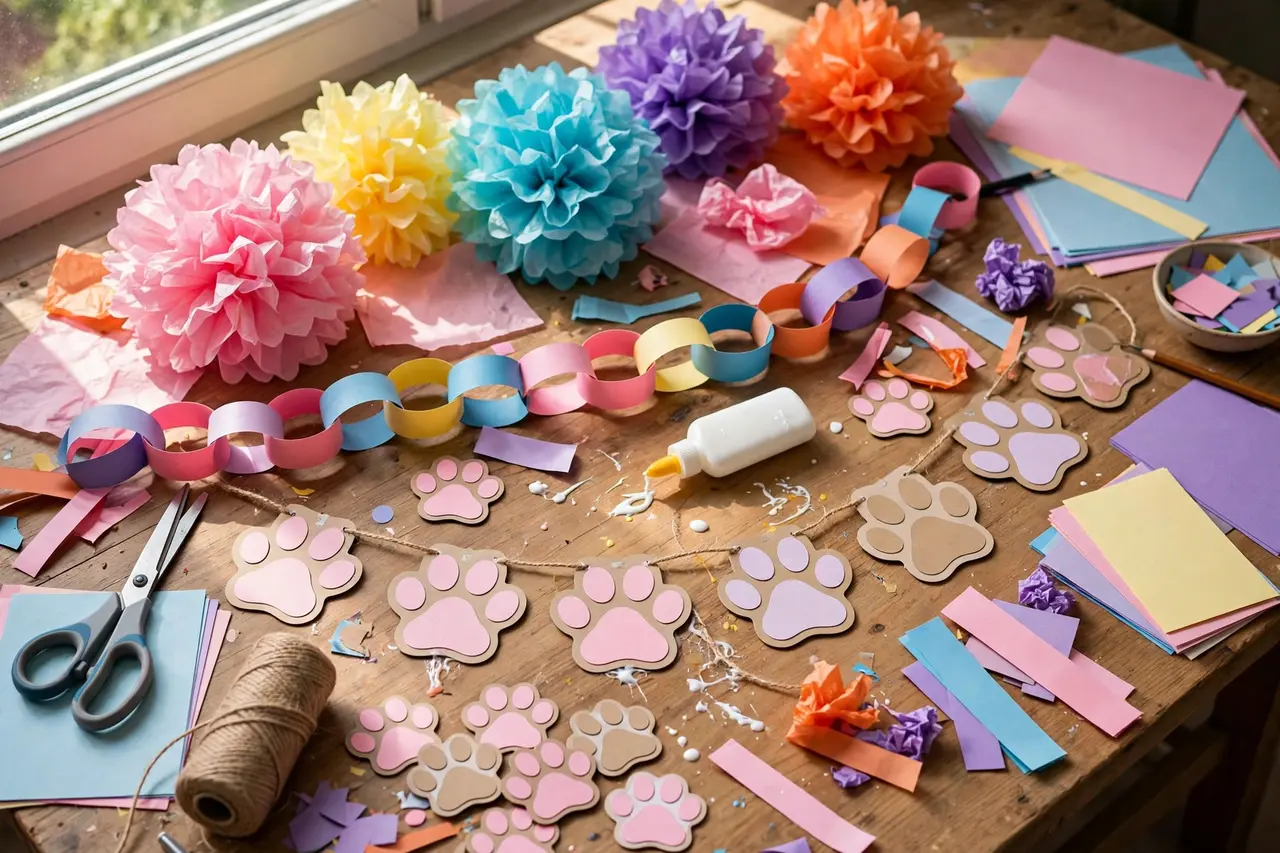
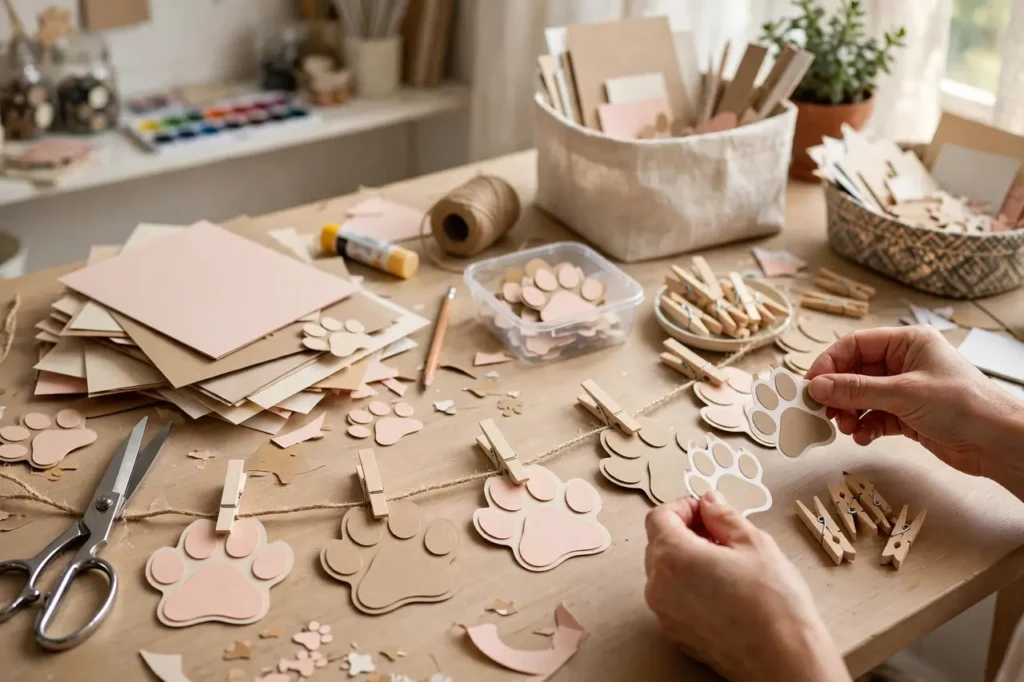
1. Paw-print paper chain. Cut paw-print shapes from cardstock in your party colors, then link them into a chain with a stapler or glue dots. A single chain takes about thirty minutes and stretches six to eight feet. Drape across doorways, windows, and the treat table backdrop. Make two or three for a full-room effect.
2. Tissue paper pom-poms. Stack eight sheets of tissue paper, accordion-fold, tie the middle with wire or string, trim the ends round, and fluff. Hang at varying heights from the ceiling with fishing line. A dozen pom-poms in mixed sizes creates a cloud-like celebration overhead. Cost: about five dollars for the whole batch.
3. Photo garland. Print favorite photos of your pet through the years, clip them to twine with mini clothespins, and alternate with paw-print cutouts. Hang it where guests gather — it is decoration and entertainment in one, and everyone will stop to look. After the party, it becomes keepsake wall art.
4. Fabric strip garland. Cut fabric scraps or old t-shirts into one-inch by twelve-inch strips and tie them along a length of twine, pushing them close together for fullness. No sewing, no glue — just tying. It looks delightfully rustic and costs nothing if you raid the rag bag. Perfect for outdoor and farmhouse-style parties.
5. Balloon tassel garland. Cut strips from plastic tablecloths or tissue paper, gather them into tassels, and string them between balloon clusters. The tassels add texture and movement that plain balloons lack, and a fifteen-foot strand costs under three dollars in materials. This one detail makes balloon decor look professionally styled.
6. Honeycomb ball strand. Buy a multi-pack of paper honeycomb balls (often under ten dollars for sixteen), open them up, and string them on fishing line at staggered heights. They catch light beautifully and add dimension that flat garlands cannot. Hang the strand across the photo backdrop or treat table for maximum visibility.
7. Dried-flower hoop garland. For an elegant, natural look, wire small bundles of dried lavender, wheat, and baby’s breath (keep out of pet reach — many dried flowers are still toxic if chewed) onto a grapevine hoop or along twine. This suits sophisticated “cat café” style parties. Hang high and treat as look-don’t-touch decor.
If you enjoy this kind of crafting, our craft ideas collection has more pet-safe projects for creative weekends.
Banners and Signs (Projects 8–12)
The banner is the room’s focal point — make it count.
8. Felt letter banner. Cut letters from craft felt using printed templates, glue them onto felt pennant shapes, and string on ribbon. Felt does not fray, needs no hemming, and looks polished even with wobbly cutting. Spell “HAPPY BIRTHDAY” plus your pet’s name on a second strand. Total cost: under eight dollars.
9. Chalkboard birthday sign. A framed chalkboard (or chalkboard-painted cardboard) with hand-lettered birthday wishes becomes a reusable party staple — just wipe and rewrite each year. Add doodled paw prints and the date. Lean it on the treat table or hang it at the entrance.
10. “Milestone” age sign. Dogs and cats do not care about numbers, but humans love them: “[Name] is THREE!” with the date, on cardstock decorated with stickers or stamps. Prop it in the photo corner. It turns cute photos into documented memories and is fun to compare across years.
11. Directional party signs. Small signs pointing the way — “Pawty this way,” “Treats ahead,” “Photo booth” — guide guests and add charm, especially for yard parties or multi-room setups. Mount on wooden stakes for outdoors or lean on small easels indoors. They make the party feel like an event, not just a gathering.
12. Custom pet portrait sign. Print an enlarged favorite photo of your pet, mount it on foam board, and add a birthday message with letter stickers. Frame it like a movie poster: “[Name] in: The Birthday Pawty.” Place it at the entrance. Guests will photograph it almost as much as the pet.
Table and Centerpiece Decor (Projects 13–17)
The treat table deserves its moment. These projects make it the party’s visual anchor.
13. Layered tablecloth look. Start with a plastic tablecloth for protection, add a fabric runner or kraft paper overlay, and finish with scattered confetti (large paper pieces only) and a few toys as scatter. Three layers look intentional and styled; a single flat tablecloth looks like an afterthought. The whole upgrade costs under ten dollars.

14. Themed treat labels. Design tent cards on your computer (or hand-letter them) naming each treat with playful titles: “Peanut Butter Pupcakes,” “Salmon Sashimi Bites,” “Pupsicle Bar.” Labels make a homemade spread look catered and prevent humans from sampling the dog treats — a real and recurring party hazard.
15. Mason jar treat displays. Fill mason jars with layered treats — biscuits at the bottom, training treats in the middle, something colorful on top — and tie a ribbon around each lid. They are decoration, storage, and take-home favors in one. Line three to five jars down the center of the table as a edible centerpiece.
16. Balloon table weights. Instead of plain weights, anchor table balloon clusters in small decorated boxes or wrapped gift boxes filled with sand. The “weight” becomes part of the decor. This trick elevates the whole table and costs nothing beyond the boxes you already have.
17. Pet-safe floral centerpiece. A low arrangement of pet-safe flowers (roses, sunflowers, orchids — never lilies around cats) in a sturdy, tip-proof vase adds life to the table. Keep arrangements low so they do not block the treat view or get tail-whipped onto the floor. For cat parties, consider high-quality faux arrangements to eliminate chewing risk entirely.
For more tablescape inspiration, see our room-by-room decoration guide — the styling principles work for any celebration.
Photo Backdrop DIYs (Projects 18–21)
Great party photos need a great background. These backdrops are cheap, fast, and photogenic.
18. Streamer wall. Tape crepe-paper streamers in your party colors vertically along a wall, overlapping slightly, from ceiling to floor. A six-foot-wide wall takes about an hour and twenty rolls of crepe paper (roughly ten dollars). It creates the classic party-photo background that makes every picture pop. Keep pets from pulling streamers by mounting the top edge securely and supervising the area.
19. Balloon mosaic wall. Arrange inflated balloons in a tight grid on the wall using removable adhesive dots, mixing sizes and shades within your palette. It looks incredibly lush and professional — the kind of backdrop people assume cost hundreds. Budget about thirty dollars in balloons for a six-by-six-foot section. This is the highest-impact project on this list.
20. Kraft paper mural. Tape a big sheet of kraft paper to the wall and let kids (or artistic adults) draw a birthday scene: paw prints, bones, fish, the birthday pet’s portrait. It is part decoration, part activity, and completely unique. Photograph it before the party ends — it will not survive storage, but the pictures will.
21. Fabric drape backdrop. Hang a large piece of fabric — a flat bedsheet, a thrifted curtain, a length of tulle — as a soft, elegant background. Add a balloon cluster on each side and a rug for pets to sit on. The simplest backdrop here, and the most forgiving: wrinkles look intentional, colors stay true in photos, and it packs flat for reuse.
Finishing Touches (Projects 22–25)
The final layer — small projects with outsized charm.
22. Party hats (for photos). Roll cardstock into cones, decorate with stickers and pom-pom tops, and attach thin elastic. Keep wear time to the photo moment — most pets tolerate hats for exactly as long as treats flow. Make extras; they will get batted off and lost, which is part of the fun.
23. Favor bags. Fill small paper bags with treats and a toy, fold the tops, and seal with a sticker bearing the birthday pet’s name and the date. Line them up by the exit. They are the last decorated thing guests see and the thing they take home — make them cute.
24. “Guest book” paw-trait station. Set out a scrapbook with the prompt “Wish [Name] a happy birthday!” and let human guests write messages. For pets, press a washable inkless paw print next to their human’s message. By party’s end you have a keepsake album. It is the decoration that becomes a treasure.
25. Fairy light finale. As the party winds down (or for evening parties), switch off overhead lights and let battery LED string lights and candles carry the room. Drape them along the backdrop, around the treat table, and through the garlands. The room transforms from “party” to “magic” in the flip of a switch — a beautiful end to the celebration.
DIY Project Planner: Difficulty, Time, and Cost
| Project | Time | Cost | Difficulty | Impact |
|---|---|---|---|---|
| Paw-print paper chain | 30 min | $3 | Very easy | Medium |
| Tissue pom-poms (12) | 45 min | $5 | Easy | High |
| Photo garland | 30 min | $6 | Very easy | High |
| Fabric strip garland | 40 min | Free–$5 | Very easy | Medium |
| Balloon tassel garland | 30 min | $3 | Easy | Medium |
| Honeycomb ball strand | 20 min | $10 | Very easy | High |
| Dried-flower garland | 45 min | $12 | Medium | Medium |
| Felt letter banner | 1 hour | $8 | Easy | Very high |
| Chalkboard sign | 20 min | $8 | Very easy | Medium |
| Milestone age sign | 15 min | $3 | Very easy | Medium |
| Directional signs | 30 min | $5 | Very easy | Low–Medium |
| Portrait sign | 25 min | $8 | Easy | High |
| Layered tablecloth | 15 min | $10 | Very easy | High |
| Treat labels | 20 min | $2 | Very easy | High |
| Mason jar displays | 20 min | $8 | Very easy | High |
| Balloon table weights | 15 min | Free | Very easy | Medium |
| Floral centerpiece | 20 min | $12 | Easy | Medium |
| Streamer wall | 1 hour | $10 | Easy | Very high |
| Balloon mosaic wall | 1.5 hours | $30 | Medium | Very high |
| Kraft paper mural | 1 hour | $5 | Easy | Medium |
| Fabric drape backdrop | 20 min | Free–$10 | Very easy | High |
| Party hats | 30 min | $4 | Easy | Medium |
| Favor bags | 30 min | $10 | Very easy | Medium |
| Paw-trait guest book | 15 min setup | $8 | Very easy | High |
| Fairy light finale | 10 min | $10 | Very easy | High |
The $50 Complete DIY Party Plan
Here is proof that a gorgeous handmade party does not require a big budget — a complete shopping list and project plan for fifty dollars.
Supplies to buy (about $50): a 24-pack of balloons in two colors ($8), two packs of crepe paper streamers ($4), a felt letter banner kit ($8), tissue paper multi-pack for pom-poms ($5), cardstock multi-pack ($6), a roll of twine and mini clothespins ($5), battery LED string lights ($8), and kraft paper roll ($6). Raid your home for scissors, tape, glue, fabric scraps, mason jars, and printed photos.
Projects to make: the felt letter banner (focal point), a twelve-pom-pom ceiling cloud, two paw-print paper chains, the photo garland, the streamer photo wall, layered tablecloth with treat labels, mason jar treat displays, party hats, and favor bags. That is ten projects — more than enough for a full, cohesive party.
The schedule: Monday — cut paw prints and assemble chains. Tuesday — make pom-poms and the felt banner. Wednesday — print photos and assemble the garland; make treat labels. Thursday — prep favor bags and party hats. Friday (party eve) — hang the streamer wall. Saturday morning — inflate balloons, hang everything, dress the table. Each evening takes under an hour, and nothing feels rushed.
The result: a party that looks like it cost three times the budget, decorations you can reuse next year, and the satisfaction of having made it all yourself. For invitation wording and card messages to match your handmade aesthetic, our birthday quotes collection has you covered.
Troubleshooting Common DIY Disasters
Things go wrong. Here is how to fix the classics.
Balloons keep popping or deflating. You are likely overinflating — fill to about ninety percent and tie securely. Keep balloons away from heat sources, rough surfaces, and direct sun. For the party, inflate the morning of, not the night before. And always buy twenty percent more balloons than you think you need; some loss is inevitable.
Garlands will not stay up. Painter’s tape fails on textured walls and in humidity. Upgrade to removable adhesive hooks for heavy garlands, and use thumbtacks (patched later) for anything that must not fall mid-party. Test-hang everything the day before so failures happen without an audience.
The banner letters look crooked. Lay the full banner flat on the floor and arrange the letters before hanging — what looks straight in your hands rarely is. Use a ruler or a strip of painter’s tape as a guide line on the wall. Slight imperfection reads as “handmade charm”; obvious chaos reads as “mistake.” The floor test is the difference.
Running out of time. Triage ruthlessly: the banner, the backdrop, and the dressed table are non-negotiable; everything else is bonus. A party with three great statement pieces beats a party with twelve half-finished projects. It is also completely fine to buy one or two store-bought items to fill gaps — handmade purism is optional.
Watch: DIY Dog Birthday Party Decorations
See handmade-style party decorations in action — signs, balloons, table setups, and all the festive details — in this first-birthday party walkthrough full of ideas you can recreate at home.
Frequently Asked Questions About DIY Pet Birthday Decorations
How much money can I save with DIY pet birthday decorations?
A lot. A store-bought decoration kit with banner, garlands, balloons, and tableware typically runs forty to eighty dollars for one party. The DIY equivalents here total roughly fifteen to thirty dollars in supplies — and many projects use materials you already own. The real savings compound across years: reusable projects like the felt banner, chalkboard sign, and fabric backdrop serve every future birthday at zero additional cost.
What tools do I need for DIY pet party decorations?
The basics cover nearly everything: scissors, a hot glue gun (with extra sticks), tape (painter’s tape for walls, packing tape for structure), a stapler, string and twine, and a printer for templates and photos. Nice-to-haves include a paper trimmer, circle punches, and a staple gun for fabric projects. You do not need a craft room — a cleared kitchen table works fine. Buy quality scissors; cheap ones will make every cutting project miserable, and you will be cutting a lot.
How do I make decorations pet-safe?
Mount everything above pet reach or behind barriers, avoid small detachable parts, skip tinsel and curling ribbon, use non-toxic supplies, and do a “pet-height sweep” before guests arrive — crouch down and remove anything chewable, tippable, or toxic. For cats specifically, secure all dangling items taut and high; for dogs, weight everything so excited tails cannot topple it. Supervise the party’s chaotic peak when pets are most curious, and designate one guest as the safety watcher during gift-opening excitement.
Can I make good decorations if I am not crafty?
Yes — most projects here are rated “very easy” for a reason. The photo garland is just clipping pictures to string. The layered tablecloth is just stacking covers. The balloon mosaic is just sticking balloons to a wall. Choose three projects marked very easy, follow the steps, and you will have a genuinely festive room. Craftiness helps, but enthusiasm and a clear color scheme matter more.
How far in advance should I start DIY decorating projects?
Start non-perishable projects (garlands, banners, signs) a week before, working an hour or two per evening. Assemble backdrops and balloon structures the day before or morning of. Inflate balloons the morning of the party for maximum freshness. The full 25-project list is aspirational — most successful parties use eight to twelve projects, which fits comfortably in two to three relaxed evenings.
What is the best color scheme for pet birthday decorations?
For the pet’s benefit: dogs see blues and yellows best, so a blue-and-yellow palette is genuinely visible to the guest of honor. For photos: pick two main colors plus one metallic accent (gold or silver) — this classic formula looks cohesive in every shot. For practicality: choose colors where replacements are easy to find if you run short. Avoid all-white schemes with pets; they will not stay white.
How do I decorate a small apartment for a pet birthday?
Think vertical and concentrated: one decorated wall (the backdrop), ceiling garlands, and a dressed table — skip trying to decorate every surface. A balloon cluster in one corner and the banner over the treat table can make a studio apartment feel like a venue. Use the photo garland as dual-purpose decor and entertainment. Small spaces actually photograph better: everything is close together, so the room looks full and festive.
Can I reuse DIY decorations for next year’s party?
Many of them, yes. Felt banners, chalkboard signs, fabric garlands, string lights, tiered stands, and the drape backdrop all store well and reuse beautifully. Photograph your setup before the party as a reassembly reference, store paper items flat and dry in a labeled “party box,” and you will cut next year’s prep time in half. Plan for reuse from the start by choosing durable materials over single-use ones.
What should I do with decorations after the party?
Sort immediately while motivation is high: reusable items into the party box, recyclable paper and cardboard into recycling, trash into bags. Save one or two favorite pieces (the milestone sign, a photo from the garland) for the keepsake box. Compost or discard anything food-soiled. A fifteen-minute sort after the party beats a sad pile of decorations lingering for weeks — and a well-packed party box makes next year’s setup dramatically faster.
How do I involve kids in making pet birthday decorations?
Kids are fantastic decoration helpers with age-appropriate tasks: cutting paw prints (with safety scissors), fluffing pom-poms, clipping photos to garlands, decorating party hats, and drawing the kraft paper mural. Keep them away from hot glue guns, craft knives, and small parts. Making decorations together becomes part of the celebration — and kids take enormous pride in pointing out “their” garland at the party. For more family craft ideas, our birthday party guide has timelines that include kid-friendly prep.
What is the single highest-impact DIY decoration for a pet birthday?
The photo backdrop wall — either the streamer wall or the balloon mosaic. It concentrates your effort in the spot where the most photos happen, which means it appears in nearly every picture from the party. Guests naturally gather in front of it, the birthday pet’s photos look professional, and it transforms the room’s feel more than any scattered decorations. If you only have time for one big project, make it the backdrop.
Handmade decorations tell a story that store-bought kits cannot: someone loved this pet enough to spend evenings cutting, gluing, and fluffing. Your pet will never know the difference — but your guests will feel it, your photos will show it, and you will remember the making as fondly as the party itself. Start with the planner table, pick the projects that excite you most, and give yourself the gift of an unhurried crafting week. The $50 plan above proves you do not need a big budget — just a little time and a lot of love. For the perfect words to go on your handmade signs, browse our birthday quotes collection. Happy crafting — and happiest of birthdays to your furry celebrant.