In an age of two-second texts and disappearing stories, a handmade card is a small act of rebellion. It says: you are worth my time, my effort, and my slightly crooked cutting. DIY daughter’s day card ideas turn that rebellion into an art form — 37 of them, in fact, ranging from five-minute washi-tape wonders to frame-worthy watercolor keepsakes.
Daughter’s Day arrives on the last Sunday of September — September 27, 2026, September 26, 2027, September 24, 2028 — and a handmade card is the day’s perfect centerpiece. This guide walks you through everything: the essential supplies (and the nice-to-haves), 37 original card designs organized by style and skill level, message pairings for each card, a quick-picker table, video tutorials, and answers to common questions. Whether you are a seasoned paper crafter or someone whose last craft project was in third grade, there is a card here with your name on it.
Card-Making Basics: Supplies and Setup
The essential kit (under $20)
You do not need a craft room to make a beautiful card. The essentials: heavy cardstock for card bases (white and a few colors), a paper trimmer or sharp scissors, a glue stick and double-sided tape, a black fine-liner pen for messages, and an assortment of decorative papers. That kit alone can produce two dozen of the cards in this guide.
The nice-to-haves
If you catch the card-making bug: washi tape in several patterns, a set of ink pads and a few stamps, embossing powder and a heat tool, watercolor paints and brushes, ribbon and twine, adhesive foam dots for dimension, and a corner rounder punch. Buy gradually — each new supply unlocks new designs.
Workspace setup
Cover your table, gather everything before you start, and keep a damp cloth nearby for gluey fingers. Good lighting matters more than fancy tools — you cannot cut straight what you cannot see. Put on music or a podcast; card-making is meditative, and the calm shows in the finished product.
The golden rules
Measure twice, cut once. Let glue dry fully before adding the next layer. Write your message before assembling delicate 3D elements (nothing ruins a pop-up like a shaky hand over it). And sign and date every card — future generations will thank you.
37 DIY Daughter’s Day Card Ideas
Classic Elegance (Timeless and Beautiful)
1. Layered Floral Heart
Difficulty: Easy | Time: 25 minutes
Cut or punch paper flowers in graduated sizes, layer them with foam dots, and arrange into a heart shape on the card front. Add a pearl center to each bloom. The dimensional effect looks professionally made but requires only patience. Message pairing: “You are the heart of this family.”
2. Kraft and Lace
Difficulty: Easy | Time: 20 minutes
Start with a kraft cardstock base for rustic warmth, layer a strip of paper lace or doily, and add a simple stamped sentiment. Tie with twine and a tiny dried flower. Understated, elegant, and impossible to mess up. Message pairing: “Simple, strong, beautiful — like you.”
3. Gold-Foil Accent Card
Difficulty: Medium | Time: 30 minutes
Write or stamp your sentiment with glue pen, press gold foil transfer sheets over it, and peel to reveal shimmering letters. Mount on dark cardstock for drama. The foil technique looks like magic the first time and never stops feeling fancy. Message pairing: “You shine brighter than gold.”
4. Embossed Monogram
Difficulty: Medium | Time: 30 minutes
Stamp her initial in VersaMark ink, dust with embossing powder, and heat-set for a raised, glossy monogram. Frame with a thin border and mount on a contrasting base. Personal, polished, and deeply impressive for the effort involved. Message pairing: “Made for the one and only [initial].”
5. Pressed-Flower Panel
Difficulty: Easy | Time: 20 min + pressing
Arrange pressed wildflowers on the card front and seal under clear contact paper or with Mod Podge. Each card is unique — nature did the designing. Start pressing flowers a week or two before Daughter’s Day. Message pairing: “You make life bloom.”
6. Quilled Border Card
Difficulty: Medium | Time: 45 minutes
Roll thin paper strips into coils and shape into petals, leaves, and scrolls to form a decorative border around your message. Quilling looks intricate but is just rolling and gluing — meditative and gorgeous. Message pairing: “Framed with love, like you frame my life.”
7. Vintage Botanical Card
Difficulty: Easy | Time: 20 minutes
Print or cut vintage-style botanical illustrations, distress the edges with ink, and layer onto kraft or cream cardstock with a simple sentiment. Add a wax seal sticker for old-world charm. Perfect for the daughter who loves all things vintage. Message pairing: “A classic beauty, then and now.”
8. Ribbon-Weave Card
Difficulty: Easy | Time: 25 minutes
Weave strips of satin ribbon through slits in the card front to create a textured panel, then add a small tag with your message. The weaving is simple and the texture is luxurious. Choose her favorite colors. Message pairing: “Woven into my heart forever.”
Pop-Up and Interactive (The Wow Factor)
9. Twist Pop-Up Heart
Difficulty: Medium | Time: 35 minutes
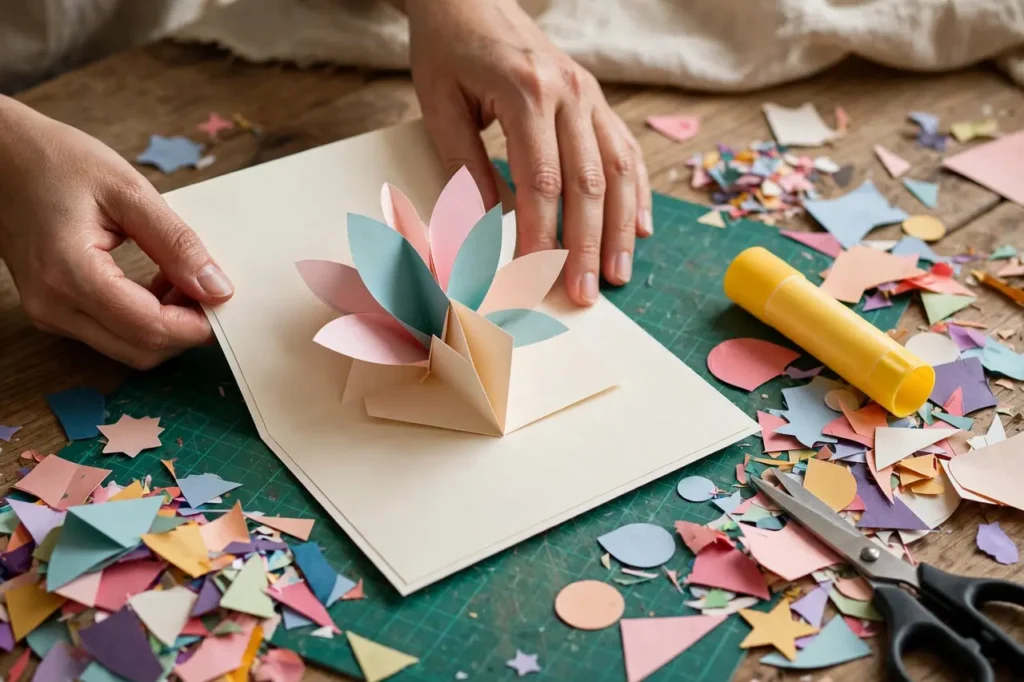
Build a twist pop-up mechanism so a layered heart spins up when the card opens. Decorate the heart with patterns and a tiny message. The mechanism is simpler than it looks — two folded strips and careful gluing. The gasp when it opens is worth every minute. Message pairing: “You make my heart do flips.”
10. Box Card Diorama
Difficulty: Hard | Time: 60 minutes
Construct a 3D box card with layered panels creating a little scene — a garden, a bookshelf, a starry sky — with her name on the back panel. Folds flat for the envelope, pops into a diorama on opening. This is the showstopper card, the one she will display for months. Message pairing: “My world is better with you in it.”
11. Pull-Tab Surprise Card
Difficulty: Medium | Time: 30 minutes
Create a card with a ribbon pull-tab that reveals a hidden message or photo when tugged. The interactive element delights kids and adults alike. Hide the sweetest line of your message behind the tab for maximum impact. Message pairing: (hidden) “You are my greatest surprise.”
12. Spinning Sentiment Wheel
Difficulty: Medium | Time: 35 minutes
Build a rotating wheel behind a window cutout so spinning it reveals different messages: “loved,” “brave,” “kind,” “mine.” Kids adore the interactivity; the messages make it a keepsake. Use a brad fastener for smooth spinning. Message pairing: “So many reasons, one card.”
13. Waterfall Card
Difficulty: Medium | Time: 30 minutes
Attach a series of small flaps with a pull ribbon so tugging cascades through four mini messages or photos in sequence. It is like a tiny flip-book of love. Sequence idea: “You were… you are… you will be… loved.” Message pairing: “Our story, in four pulls.”
14. Shaker Card
Difficulty: Medium | Time: 35 minutes
Build a windowed card front filled with sequins, micro-beads, and glitter that shake and swirl. Frame the window with patterned paper and add a sentiment below. Irresistibly tactile — recipients cannot stop shaking it. Message pairing: “You shake up my world (in the best way).”
15. Tunnel Book Card
Difficulty: Hard | Time: 50 minutes
Layer three to four cutout panels with spacers to create a 3D tunnel scene viewed through a front window — a path through flowers toward a heart, for example. Folds flat, expands into depth. Ambitious but unforgettable. Message pairing: “Look how far you have come.”
Watercolor and Painted (Artistic and Dreamy)
16. Galaxy Wash Card
Difficulty: Easy | Time: 30 min + drying
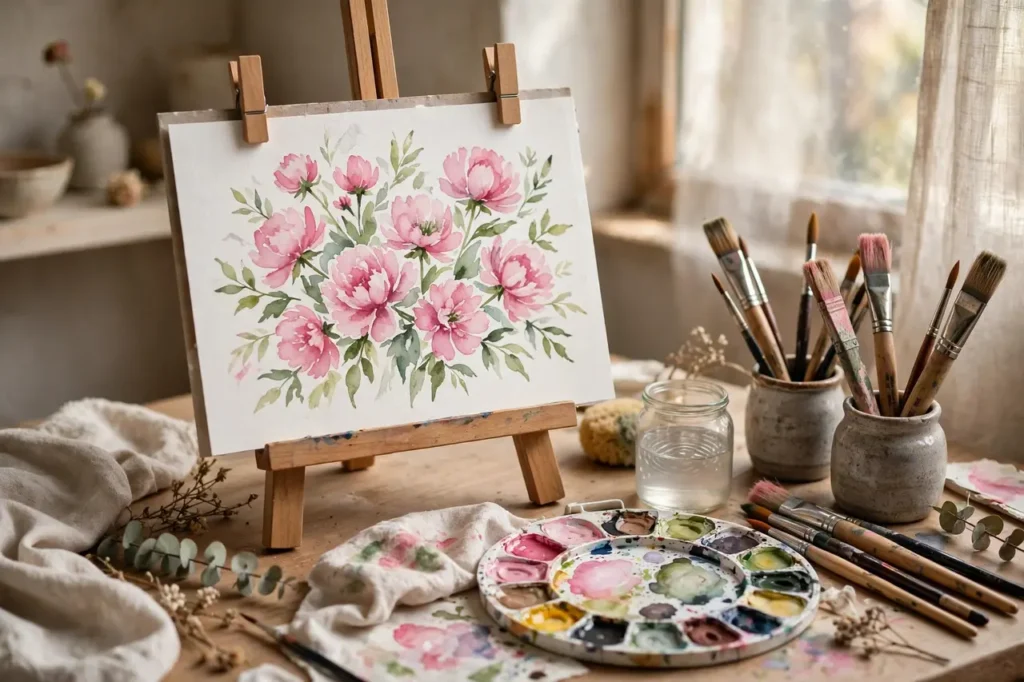
Paint a dark watercolor wash, flick white paint for stars, and add a moon or planet cutout. Write your message in metallic gel pen. The galaxy effect is stunning and nearly foolproof — watercolor blooms do the artistic heavy lifting. Message pairing: “You are my whole universe.”
17. Loose Floral Wreath
Difficulty: Medium | Time: 40 min + drying
Paint a loose circle of watercolor flowers and leaves around a hand-lettered sentiment in the center. Imperfect, flowy florals are the goal — this style forgives wobbly hands beautifully. Practice the wreath on scrap paper first. Message pairing: “[Her name], surrounded by love.”
18. Silhouette Sunset Card
Difficulty: Easy | Time: 30 min + drying
Paint a sunset gradient wash, then add a black silhouette — a tree, a mother and child holding hands, birds in flight — cut from cardstock or painted freehand. Dramatic, emotional, and simple. Message pairing: “Every sunset reminds me of you.”
19. Fingerprint Heart Tree
Difficulty: Easy | Time: 25 min + drying
Paint a tree trunk and branches, then add fingerprint “leaves” in autumn colors — use the whole family’s fingerprints. Sweet, personal, and frame-worthy. Label each print on the back with names and the year. Message pairing: “Our family tree’s sweetest branch.”
20. Alcohol-Ink Marble Card
Difficulty: Medium | Time: 30 minutes
Drop alcohol inks onto glossy cardstock and tilt to create marbled, agate-like patterns. Each card is unrepeatable art. Work in a ventilated area — the inks are potent. Mount the best section as the card front. Message pairing: “One of a kind, like you.”
21. Painted Quote Card
Difficulty: Easy | Time: 25 min + drying
Paint a soft abstract background, then hand-letter a favorite quote or your own short message in the center with a brush pen. The contrast of loose paint and careful lettering is striking. Keep the quote short — less is more. Message pairing: Use one of our daughter quotes as the featured line.
Photo Cards (Memories Front and Center)
22. Then-and-Now Flip Card
Difficulty: Easy | Time: 25 minutes
Attach a childhood photo on the front flap and a recent photo inside — “then” and “now.” The comparison always gets an emotional reaction. Add the years beneath each photo. Simple, devastating, perfect. Message pairing: “Look how far you have come.”
23. Photo Strip Accordion
Difficulty: Easy | Time: 30 minutes
Print small photos, mount on an accordion-folded strip, and tuck into a decorated envelope-style card. She unfolds a whole timeline of memories. Choose photos that tell a story: firsts, funny moments, quiet ones. Message pairing: “Our story, unfolding.”
24. Polaroid-Style Frame Card
Difficulty: Easy | Time: 20 minutes
Mount a favorite photo on white cardstock with a wide bottom border, Polaroid-style, and handwrite a caption beneath like the old days. Add washi tape at the top as if it is taped to the card. Nostalgic and charming. Message pairing: Caption it: “My favorite person.”
25. Shutter Card with Hidden Photo
Difficulty: Medium | Time: 30 minutes
Build a card front with slats that open like shutters to reveal a photo beneath. The reveal mechanism is simple strips and brads; the effect is delightful. Choose a photo she has not seen in a while for maximum impact. Message pairing: “Some treasures stay hidden until the right moment.”
26. Map-Heart Photo Card
Difficulty: Easy | Time: 25 minutes
Cut a heart from a map of a meaningful place — her birth city, your family hometown, where she lives now — and mount a small photo at its center. Deeply personal geography. Print maps from online sources if you do not have a paper one to sacrifice. Message pairing: “Home is wherever you are.”
Kid-Made Cards (She Makes Them)
27. Sticker Story Card
Difficulty: Very Easy | Time: 20 minutes
Give young kids a blank card and a sheet of stickers and let them create a scene, then dictate or write a message. The sticker scene plus a dictated “I love you because…” is pure gold. No wrong answers. Message pairing: Dictated: “I love Mom/Dad because…”
28. Handprint Flower Bouquet Card
Difficulty: Easy | Time: 25 minutes
Stamp painted handprints as flower heads on stems drawn on the card, add fingerprints as petals’ centers, and write a message beneath. Classic, beloved, and different every year as hands grow. Date it. Message pairing: “Watch me grow, year after year.”
29. Torn-Paper Collage Card
Difficulty: Very Easy | Time: 25 minutes
Tear (not cut) colored paper into pieces and glue into a heart, rainbow, or abstract design. Tearing is easier than cutting for little hands and creates a lovely textured edge. Add a simple message in big letters. Message pairing: “You hold my heart together.”
30. Pasta Jewelry Card
Difficulty: Very Easy | Time: 30 min + drying
Paint penne and macaroni, thread onto yarn as a “necklace,” and attach to the card front with the message inside. Gloriously old-school. Spray with a little glitter for extra magic. Message pairing: “A priceless jewel, made with love.”
31. Thumbprint Heart Card
Difficulty: Very Easy | Time: 15 minutes
Press two thumbprints side by side in red ink to form a heart, add arms and a smile to make it a character, and write a message. Takes minutes, melts hearts for years. Make one every Daughter’s Day to track growing thumbs. Message pairing: “Two thumbs up for my daughter!”
Quick and Simple (Under 15 Minutes)
32. Washi-Tape Frame Card
Difficulty: Very Easy | Time: 10 minutes
Frame a blank card front with washi tape borders, add a sticker or stamped sentiment in the center. Ten minutes, zero skill required, genuinely pretty. Keep washi tape and blank cards on hand for last-minute needs. Message pairing: “Framed with love.”
33. Single-Stamp Statement Card
Difficulty: Very Easy | Time: 10 minutes
Stamp one large, beautiful image — a flower, a heart, a tree — in the center of quality cardstock, add a handwritten message beneath. Restraint is elegance. One perfect stamp beats ten fussy layers. Message pairing: “Sometimes one thing says it all.”
34. Confetti-Shaker Envelope Card
Difficulty: Easy | Time: 15 minutes
Fill a clear envelope or pouch with confetti and a small card, seal decoratively. She opens confetti chaos and finds your message in the middle. Festive, fun, and fast. Message pairing: “You are worth celebrating.”
35. Bookmark Card
Difficulty: Very Easy | Time: 10 minutes
Decorate a sturdy bookmark with patterns, her initial, and a short message, then slip it into a simple folded card. Two gifts in one, and she will use the bookmark daily. Laminate for durability. Message pairing: “For all your next chapters.”
36. Tea-Bag Tag Card
Difficulty: Very Easy | Time: 10 minutes
Attach her favorite tea bag to a card with a punny message: “You are my cup of tea” or “I love you a latte.” Cozy, clever, and consumable. Pair with a mug for a complete gift. Message pairing: “Let us have tea and talk soon.”
37. Giant Hug Coupon Card
Difficulty: Very Easy | Time: 10 minutes
Decorate a card as a redeemable coupon: “Good for one giant hug, redeemable anytime, never expires.” Add other coupons inside: movie night, breakfast in bed, a walk together. The gift of time, beautifully packaged. Message pairing: “The best gifts are not things.”
Card Picker: Find Your Perfect Design
| Card # | Name | Difficulty | Time | Best For |
|---|---|---|---|---|
| 1 | Layered Floral Heart | Easy | 25 min | Classic beauty; any age |
| 9 | Twist Pop-Up Heart | Medium | 35 min | Maximum wow factor |
| 10 | Box Card Diorama | Hard | 60 min | The showstopper; milestone years |
| 16 | Galaxy Wash Card | Easy | 30 min + dry | Artistic types; teens love it |
| 22 | Then-and-Now Flip Card | Easy | 25 min | Guaranteed tears (good ones) |
| 28 | Handprint Flower Bouquet | Easy | 25 min | Young kids making for parents |
| 32 | Washi-Tape Frame Card | Very Easy | 10 min | Last-minute; beginners |
| 37 | Giant Hug Coupon Card | Very Easy | 10 min | The gift of time together |
Watch: How to Make a Pop-Up Card
Pop-up cards look like magic until you see how they are built. This step-by-step video tutorial walks through making a beautiful pop-up greeting card — watch it, then try card #9 above with confidence.
Pro Tips from Experienced Card Makers
Score before you fold. Run a bone folder or empty ballpoint pen along a ruler where you want the fold. Scored folds are crisp and professional; unscored folds crack the cardstock and look homemade in the bad way.
Work from background to foreground. Glue down the largest background layers first, then build forward with progressively smaller elements. Trying to slide a background under a finished foreground is how cards get ruined.
Use foam dots for dimension. A single layer of adhesive foam dots between paper layers creates shadows and depth that make even simple designs look expensive. They are the highest-impact supply in card-making.
Keep a “mistake” pile. Miscut pieces, failed experiments, and leftover strips become collage material, shaker-card filler, and gift tags. Nothing is wasted in a card-maker’s studio.
Photograph every card. Before you give it away, snap a photo. In a year you will have a portfolio of your work — and proof of how far your skills have come.
Storing and Displaying Handmade Cards
A handmade card deserves better than a junk drawer. For cards you receive: a decorative box or album, organized by year, becomes a family archive. Many families keep a dedicated “Daughter’s Day box” where every year’s card goes — watching the stack grow is its own joy.
For display, box cards and dioramas (#10, #15) look stunning on a mantel or bookshelf for weeks after the holiday. Shaker cards (#14) live on desks where they can be fiddled with. Framed watercolor cards (#16–#21) become permanent wall art. And the humble washi-tape card, taped to the fridge, gets seen and smiled at more than any other card in the house.
If you are the maker, consider making two of card #22 (then-and-now) — one to give, one to keep. Future you will be grateful.
5 Message Formulas for Any Card Design
Stuck on what to write inside your masterpiece? These formulas fit any card:
1. Memory + love: “Remember when [specific memory]? I think about that day whenever I need to smile. I love you.”
2. Pride + future: “I am so proud of [specific achievement or trait]. I cannot wait to see what you do next.”
3. Gratitude + belonging: “Thank you for [something she does]. This family would not be the same without you.”
4. Short and true: “Happy Daughter’s Day. I love you more than these words can say.”
5. The question: “What is your favorite memory of us? Mine is [yours]. I love you.”
Pick one, personalize the bracketed part, and you are done. The card did the visual work; the message just needs to be true.
Frequently Asked Questions
When is Daughter’s Day?
Daughter’s Day is celebrated in the United States on the last Sunday of September: September 27, 2026, September 26, 2027, and September 24, 2028. Start watercolor and pressed-flower cards a week early to allow drying time.
What supplies do I need to start making cards?
The essentials cost under $20: heavy cardstock, scissors or a paper trimmer, glue stick and double-sided tape, a fine-liner pen, and decorative papers. That kit handles most cards in this guide. Add washi tape, stamps, and watercolors as you grow.
I am not crafty. Which card should I make?
Start with #32 (washi-tape frame), #33 (single-stamp statement), or #36 (tea-bag tag card) — all take ten minutes and require zero skill. The secret of card-making is that simple, well-executed designs beat fussy, overworked ones every time.
What should I write inside a handmade Daughter’s Day card?
Pair your card with a message from our message guides: daughter quotes for inspiration, or write one sincere paragraph in your own words. Write the message before assembling delicate 3D elements, and always sign and date the card.
How do I make a pop-up card?
Start with card #9 (twist pop-up heart) and watch the embedded video tutorial above — it walks through the mechanism step by step. The basic principle is two folded strips glued strategically; once you understand it, you can pop up anything.
Can kids make these cards?
Cards #27–#31 were designed for kids to make, and many others (#32, #34, #35) work for ages 8+ with light supervision. Let kids choose their own card — ownership of the project is half the fun.
How do I mail a bulky or 3D card?
Use a padded mailer or a small box rather than a standard envelope, and add “hand cancel” postage if the card is lumpy. Box cards (#10) fold flat for mailing and pop up on arrival — design genius for long-distance daughters.
What is the best card for a last-minute Daughter’s Day?
The Quick and Simple section (#32–#37) — all under 15 minutes. The tea-bag tag card (#36) paired with her favorite tea and a heartfelt paragraph is a complete, thoughtful gift in ten minutes flat.
Your Hands Made This
Here is the quiet magic of a handmade card: every imperfection is proof of effort. The slightly crooked cut, the glue fingerprint, the letter that leans a little to the left — those are not flaws. They are the evidence that a real person sat down, thought hard about your daughter, and made something with their hands. No factory, no algorithm, no same-day delivery can replicate that.
So pick your card, gather your supplies, and make something gloriously imperfect this Daughter’s Day. Write the message, sign your name, date it. She will keep it. They always keep the handmade ones.
Need words for the inside? Explore our 400+ daughter quotes, learn what to write in a Valentine’s Day card, or try Thanksgiving place card DIYs for your next paper project.