Store-bought party decorations are convenient, but handmade ones look better, cost less, and carry the kind of personal touch guests actually notice. The secret most craft blogs will not tell you is that impressive DIY birthday decorations at home rarely require artistic talent — they require the right project, a short materials list, and steps you can follow while half-watching television the night before the party.
This guide gives you exactly that: ten complete step-by-step tutorials, each with a materials list, numbered instructions, time and cost estimates, and a pro tip for making it look store-bought. You will also find a starter toolkit checklist, a project comparison table, and professional styling tricks that make simple crafts look expensive. Pick two or three projects, and your home will look party-ready by tomorrow — no craft degree required.
Your DIY Decoration Toolkit: What to Have on Hand
Nearly every project in this guide uses some combination of the same dozen supplies. Gather these once and you are equipped for years of birthdays:
- Cutting: sharp scissors, a craft knife, and a self-healing cutting mat
- Adhesives: hot glue gun with extra sticks, double-sided tape, glue dots, and painter’s tape (for walls)
- Paper: cardstock in your theme colors, tissue paper, crepe paper streamers
- Hanging: fishing line or clear thread, removable adhesive hooks, string
- Measuring: ruler, pencil, and a circle template (plates and lids work fine)
- Extras: balloons and a hand pump, LED fairy lights, and a stapler
Buy the adhesives and tools once; they last for dozens of parties. The consumables — paper, balloons, streamers — cost only a few dollars per party when bought in multi-packs. If you are decorating for a larger celebration too, these at-home decoration ideas use the same toolkit scaled up.
10 Step-by-Step DIY Birthday Decoration Tutorials
1. Classic Balloon Garland (No Arch Kit Needed)
Time: 45–60 minutes | Cost: $8–12 | Difficulty: Easy
Materials:
- 40–60 balloons in 2–3 theme colors (mix 12-inch and 5-inch sizes)
- Balloon decorating strip (the plastic strip with holes) or fishing line
- Hand pump, glue dots, removable wall hooks
Steps:
- Inflate all balloons with the hand pump, varying the sizes — fully inflated 12-inch balloons for structure, half-inflated ones and 5-inch balloons for filler.
- Tie each balloon with a double knot, leaving the knot tails long.
- Thread the knots through the holes of the decorating strip, alternating colors and sizes as you go. Push each knot fully through so it locks.
- Once the strip is full, hold it up to check for gaps; fill thin spots by attaching extra small balloons with glue dots.
- Hang the garland with removable hooks, draping it in a swag over a doorway, along a mantel, or around the cake table. Twist small clusters to face outward for fullness.
Pro tip: Inflate balloons the morning of the party, not the night before — latex slowly deflates and fresh balloons look dramatically fuller in photos.
2. Tissue Paper Pom-Poms
Time: 15 minutes each | Cost: $0.50 each | Difficulty: Very easy
Materials:
- 8–10 sheets of tissue paper per pom-pom, 20×30 inches
- Floral wire or pipe cleaners, scissors, fishing line
Steps:
- Stack 8–10 tissue sheets neatly and accordion-fold the whole stack in 1.5-inch folds, like a paper fan.
- Wrap a 6-inch piece of floral wire tightly around the center of the folded stack and twist to secure, leaving a loop for hanging.
- Trim both ends of the folded stack into rounded or pointed shapes — rounded for peony-like poms, pointed for dahlia-like ones.
- Gently separate the layers one by one, pulling half the sheets upward and half downward to form a sphere. Work slowly; tissue tears if rushed.
- Fluff the finished pom and hang at varying heights with fishing line.
Pro tip: Make poms in graduated sizes (large, medium, small) and cluster them in odd numbers — trios photograph far better than evenly spaced singles.
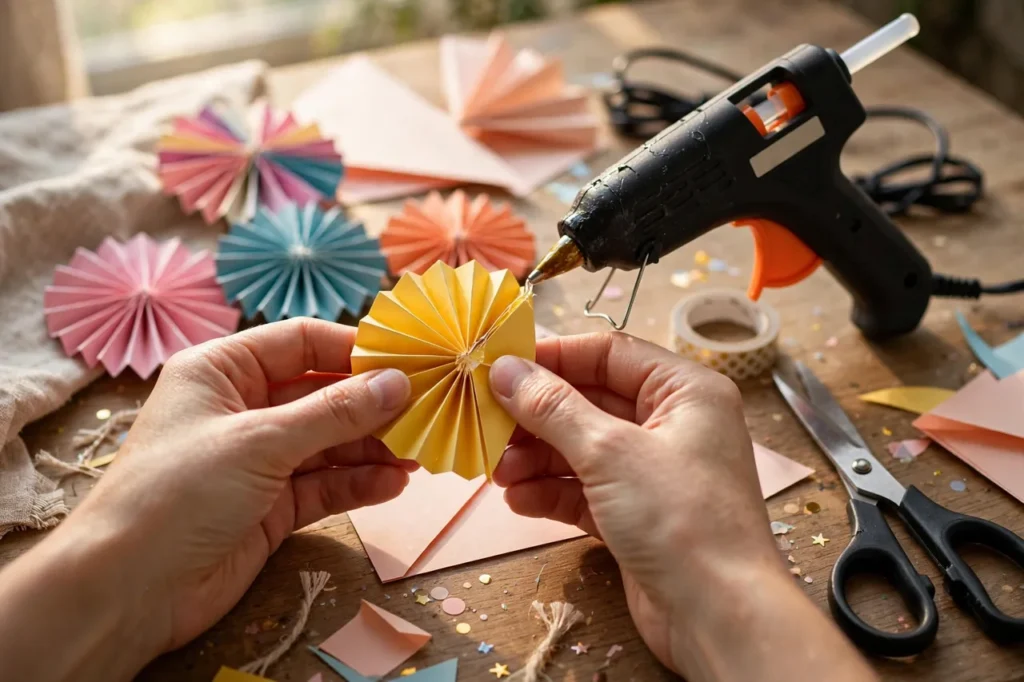
3. Paper Rosette Backdrop Wall
Time: 60–90 minutes for 12 rosettes | Cost: $6–10 | Difficulty: Easy
Materials:
- Cardstock or scrapbook paper in 3–4 coordinating colors/patterns
- Hot glue gun, scissors or paper trimmer, ruler
- Painter’s tape or removable mounting squares
Steps:
- Cut paper into strips 2 inches wide and 12 inches long. For a large rosette you need 4 strips; for medium, 3; for small, 2.
- Accordion-fold each strip in 0.5-inch folds.
- Glue the strips end-to-end into one long folded band, then join the two ends to form a ring.
- Push the ring flat from the top so it fans into a circle; secure the center back with a generous dot of hot glue and a small cardboard circle.
- Cut a smaller contrasting circle and glue it to the front center of each rosette for a finished look.
- Arrange rosettes on the wall in a loose cluster behind the cake table, largest in the center, and attach with painter’s tape loops.
Pro tip: Mix solid colors with one metallic or patterned paper — the contrast makes the whole wall look designed rather than merely crafty.
4. Crepe Paper Streamer Backdrop
Time: 30–40 minutes | Cost: $4–6 | Difficulty: Very easy
Materials:
- 6–8 rolls of crepe paper streamers in alternating colors
- Painter’s tape or a tension rod, scissors
Steps:
- Choose your hanging line: a strip of painter’s tape across a wall, a tension rod in a doorway, or a length of string between two hooks.
- Cut streamers to your desired length — floor-length for drama, or table-height for a cake-table backdrop. Cut 20–30 strands.
- Tape or tie each strand along the hanging line, alternating colors in a repeating pattern.
- For a twisted fringe look, hold the top of each strand and twist the bottom 3–4 times, then let it hang — the twist holds naturally.
- Trim the bottoms into a straight line, a V shape, or staggered lengths for texture.
Pro tip: Layer two backdrops — streamers in front, fairy lights behind — and the lights glowing through the paper create a magical depth no single layer achieves.
5. Personalized “Happy Birthday” Letter Banner
Time: 40–50 minutes | Cost: $3–5 | Difficulty: Easy
Materials:
- Cardstock in two colors, printed letter templates or stencils
- String or ribbon, hole punch, scissors, glue stick
Steps:
- Print or trace your letters — “HAPPY BIRTHDAY” plus the birthday child’s name on a second line if you like. Size each letter to about 5 inches tall.
- Cut a backing shape for each letter: pennant triangles, circles, or scalloped squares, roughly 6 inches wide.
- Cut the letters from contrasting cardstock and glue one letter centered on each backing shape.
- Punch two holes at the top corners of each shape.
- Thread the shapes onto string in order, leaving 4–6 inches of slack between pieces so the banner drapes nicely.
- Hang with tape or hooks, adjusting spacing so the words read clearly from across the room.
Pro tip: Add the birthday child’s age as a large standalone number at one end of the banner — it becomes the photo-op focal point.
6. Photo Memory Garland
Time: 25–35 minutes | Cost: $2–4 | Difficulty: Very easy
Materials:
- 12–20 printed photos (one per year of life, plus favorites)
- Mini clothespins, twine or ribbon, washi tape (optional)
Steps:
- Print photos at home or at a drugstore kiosk — 4×6 prints are cheapest, or print four-to-a-page and cut apart.
- Cut a length of twine to fit your display spot (mantel, hallway, or above the food table), adding 12 inches extra for draping.
- Clip photos along the twine with mini clothespins, spacing them 3–4 inches apart. Arrange chronologically for a “growing up” story.
- Optional: frame a few key photos with washi-tape borders or glue them to slightly larger cardstock for emphasis.
- Hang the garland where guests naturally gather — near the entrance or food table — and watch it become the party’s conversation piece.
Pro tip: Include one funny or embarrassing photo per few sweet ones — guests linger longer at garlands that make them laugh.
7. Table Centerpieces from Dollar-Store Finds
Time: 20 minutes per centerpiece | Cost: $3–5 each | Difficulty: Very easy
Materials (per centerpiece):
- One glass vase, jar, or tin bucket
- Filler: tissue paper shreds, sand, candy, or faux flower stems
- Theme topper: balloon on a stick, paper number, small toy, or photo
Steps:
- Choose a container that matches your theme — mason jars for rustic, gold-painted tin cans for glam, sand buckets for beach themes.
- Fill the bottom third with your filler material to anchor everything and add color.
- Insert the topper: push a balloon stick into the filler, nestle a small toy among tissue shreds, or arrange faux flowers.
- Add one sparkle element — a curling-ribbon spray, a few fairy lights coiled inside a glass jar, or metallic confetti scattered at the base.
- Place centerpieces only on every other table section or at the ends of a long table; over-decorated tables leave no room for food.
Pro tip: Make centerpieces do double duty as take-home favors — guests love leaving with the cute jar they admired all afternoon. For elegant table styling principles that scale to any party, see these table decoration ideas.
8. Giant Crepe-Paper Flower Wall Accents
Time: 20 minutes per flower | Cost: $1–2 each | Difficulty: Easy
Materials:
- Crepe paper in petal colors plus green for leaves
- Scissors, hot glue gun, pencil, small cardboard circles
Steps:
- Cut 8–10 petal shapes (teardrops about 5 inches tall) from crepe paper, stretching the center of each petal gently to cup it.
- Cut 2–3 green leaf shapes.
- Glue petals in overlapping layers around a 2-inch cardboard circle: outer ring of 5–6 petals, inner ring of 3–4 smaller petals.
- Roll a small strip of contrasting crepe paper into a tight bud and glue it in the center.
- Glue leaves behind the flower and attach finished flowers to the wall in clusters of three or five with painter’s tape.
Pro tip: Three oversized flowers make a stronger statement than twelve small ones — scale is what reads as “designed” in photos.
9. Confetti-Filled Clear Balloons
Time: 20 minutes for a dozen | Cost: $5–7 | Difficulty: Easy
Materials:
- 12 clear latex balloons, tissue-paper or metallic confetti
- Small funnel (or a rolled paper cone), hand pump
Steps:
- Stretch each clear balloon a few times to loosen the latex.
- Insert the funnel into the balloon neck and drop in 1–2 tablespoons of confetti per balloon.
- Inflate slowly with the hand pump; static electricity will make the confetti cling to the inside walls beautifully.
- Tie off and rub the balloon gently with your hands or a cloth to boost the static cling.
- Group in clusters of three at different heights, or let a few float to the ceiling with curling ribbon tails.
Pro tip: Match confetti colors to your exact palette and skip mixed “party” confetti — coordinated confetti inside clear balloons looks custom and chic.
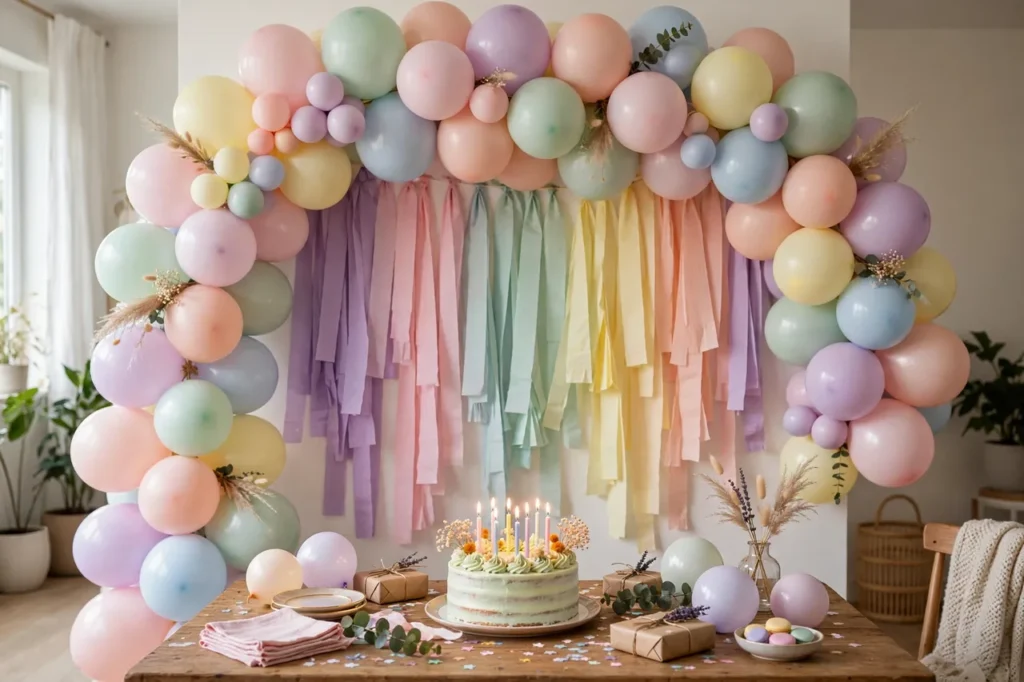
10. Themed Cake-Table Backdrop (The Showpiece)
Time: 60–75 minutes | Cost: $10–15 | Difficulty: Medium
Materials:
- A folding table, floor-length tablecloth, and 2–3 projects from above (garland + rosettes + banner work perfectly)
- Cake stand or sturdy box draped in fabric (for height), fairy lights
Steps:
- Position the table against the wall that photographs best — near a window for natural light, never with its back to one.
- Drape the tablecloth to the floor on the front and sides; a puddled cloth hides table legs and looks luxurious.
- Hang your backdrop on the wall behind: rosette cluster centered, streamer curtain as the base layer, letter banner across the top.
- Build height on the table: place the cake on a stand at center-back, flank with two smaller stands holding cupcakes or treats.
- Weave fairy lights along the table’s back edge and around the backdrop’s base for glow.
- Step back and photograph the setup — the camera reveals gaps and crooked lines your eyes miss. Adjust, then stop fussing.
Pro tip: The cake table is where 90% of party photos happen, so concentrate your best work here and keep the rest of the room simple. One spectacular focal wall beats five mediocre decorated corners.
DIY Decoration Project Comparison Table
| Project | Difficulty | Time | Cost | Best For |
|---|---|---|---|---|
| Balloon garland | Easy | 45–60 min | $8–12 | Entrances, cake tables, photo backdrops |
| Tissue pom-poms | Very easy | 15 min each | $0.50 each | Ceiling clusters, party zones |
| Paper rosette wall | Easy | 60–90 min | $6–10 | Cake-table backdrop, photo wall |
| Streamer backdrop | Very easy | 30–40 min | $4–6 | Doorways, dessert tables |
| Letter banner | Easy | 40–50 min | $3–5 | Personalized focal point |
| Photo garland | Very easy | 25–35 min | $2–4 | Milestone birthdays, grandparents’ delight |
| Dollar-store centerpieces | Very easy | 20 min each | $3–5 each | Dining and food tables |
| Giant paper flowers | Easy | 20 min each | $1–2 each | Garden, fairy, or spring themes |
| Confetti balloons | Easy | 20 min/dozen | $5–7 | Ceiling, clusters, dance floors |
| Cake-table showpiece | Medium | 60–75 min | $10–15 | The party’s photo headquarters |
Styling Like a Pro: 7 Tricks That Make DIY Look Expensive
The difference between “homemade” and “handcrafted” is styling, not skill. First, limit your palette to three colors — two mains plus one metallic accent — and repeat them in every project. Restraint reads as design.
Second, decorate in odd-numbered clusters (threes and fives) rather than even rows; the eye finds asymmetry more interesting. Third, vary heights: mix floor-length streamers, table-level centerpieces, and ceiling-hung poms so the room has visual layers.
Fourth, light it well. Fairy lights, candles (LED for safety), and daylight flatter every decoration you make. Fifth, hide the mechanics — tape, strings, and hooks should be invisible in photos; view your setup through your phone camera to spot them.
Sixth, repeat one motif — stars, dots, or the birthday child’s initial — across the banner, cake topper, and favors for a cohesive branded feel. Seventh, edit ruthlessly: remove one decoration from every surface. Negative space makes the remaining pieces look intentional. These principles work for surprise setups too, as these morning surprise decoration ideas demonstrate.
Where to Buy Supplies Cheaply
You do not need a craft-store splurge. Dollar stores cover tablecloths, balloons, curling ribbon, and basic tableware in solid colors. Online marketplaces sell balloon garland strips, tissue paper multi-packs, and LED fairy lights for a fraction of craft-store prices — order two weeks ahead for the best deals.
Warehouse clubs are unbeatable for bulk balloons and paper goods if you decorate often. Thrift stores yield glass jars, baskets, and fabric for centerpieces at pocket change. And do not overlook your own home: bedsheets become tablecloths, string lights migrate from the holidays, and printed photos cost pennies at kiosks.
Set a per-party supply budget before shopping — $25 to $40 covers all ten projects in this guide — and keep a labeled bin of reusable tools and leftover paper between parties. Your second DIY party costs half as much as your first. More budget celebration ideas can stretch every dollar further.
Troubleshooting Common DIY Decoration Disasters
Even simple projects hit snags. Here is how to fix the most common ones without starting over.
Balloon garland has bald spots
This is normal — garlands always look sparse until the last 20% of balloons go on. Keep a bag of small 5-inch balloons aside specifically for gap-filling, and attach them with glue dots pushed deep into the thin areas. If the whole garland looks limp, you under-inflated: balloons should be firm and round, not soft. A garland that looked full an hour ago and now sags has a slow leak somewhere — it is faster to rebuild the sagging section than to find the culprit.
Tissue pom-poms tear while fluffing
You are pulling too fast or the tissue is low quality. Slow down and separate layers with a gentle lifting motion rather than yanking. If sheets stick together, the air is humid — run a fan nearby while you work. Torn poms are not ruined: trim the ragged edges into a smaller, tidier pom, or layer the damaged one behind intact ones in a cluster where flaws hide.
Streamer backdrop looks messy, not chic
Nine times out of ten the problem is uneven lengths or too many colors. Trim all strands to consistent lengths with sharp scissors, limit the palette to two or three colors, and make sure strands hang straight down without tangling. A quick pass with your hands to smooth twists, plus fairy lights behind, rescues almost any streamer wall.
Hot glue shows through or strings everywhere
Use less glue than you think — a pea-sized dot bonds cardstock fine, and excess creates visible blobs and strings. For visible seams, cover the glue spot with a small decorative element: a button, a sticker, or a punched circle. Keep a bowl of ice water nearby; pressing a just-glued joint with a cold fingertip sets it instantly and prevents stringing.
Colors clash once everything is up
Step back and identify the intruder — usually one item in a slightly wrong shade (teal among turquoise, warm gold among cool silver). Remove or replace just that item rather than redoing everything. When shopping, carry a paper swatch of your palette; phone screens lie about color. And remember the 60-30-10 rule: 60% dominant color, 30% secondary, 10% accent keeps any combination harmonious.
Ran out of time the night before
Triage ruthlessly: finish the cake-table backdrop first (it is in every photo), then the entrance, then tables. Skip ceiling decor entirely — nobody photographs ceilings. A single balloon garland plus a letter banner reads as “fully decorated” in photos even if the rest of the room is plain. Enlist one friend for 30 minutes of hanging; two people work four times faster than one.
Watch: Easy DIY Birthday Decorations at Home
See the paper pom-poms, rosettes, and garlands from this guide made in real time — watching the folding techniques once makes every project twice as fast.
Frequently Asked Questions
How far in advance can I make DIY birthday decorations?
Paper projects — rosettes, banners, pom-poms, paper flowers — keep perfectly for weeks stored flat in a dry box, so make them up to a month ahead. Streamer backdrops and photo garlands can go up the day before. Inflate latex balloons the morning of the party (they last 8–12 hours at full size); foil balloons hold for days and can be inflated 2–3 days early.
What are the cheapest DIY birthday decorations that still look good?
Crepe paper streamer backdrops ($4–6), tissue pom-poms ($0.50 each), and printed letter banners ($3–5) deliver the most visual impact per dollar. A $15 budget spread across those three projects plus a balloon bunch will transform a living room. The trick is committing to a tight color palette so cheap materials look deliberate.
How do I hang decorations without damaging walls?
Use painter’s tape loops, removable adhesive hooks, and poster mounting squares — all remove cleanly from painted walls. For heavy garlands, drape over curtain rods, tension rods in doorways, or removable over-door hooks instead of taping to walls. Test any adhesive in a hidden spot first, especially on fresh paint or wallpaper.
Can kids help make the decorations?
Absolutely — and they love it. Ages 3+ can stuff confetti balloons, sort tissue paper, and stick glue dots; ages 6+ can fold pom-poms, cut simple shapes, and thread banners with supervision. Keep the hot glue gun and craft knife as adults-only tools, and treat decoration-making as a pre-party bonding activity the day before.
How many decorations do I actually need?
Less than you think. One statement backdrop (behind the cake table), one entrance treatment (garland or balloon cluster), table centerpieces, and ceiling interest in the main room are enough. Guests remember one spectacular focal wall far longer than ten lightly decorated corners. When in doubt, photograph the room — the camera shows instantly whether it looks festive or sparse.
What if I am not crafty at all?
Start with the three “very easy” projects in this guide: streamer backdrops, pom-poms, and photo garlands. They require no drawing, no measuring precision, and no artistic judgment — just folding, cutting, and hanging. Imperfections genuinely do not show at party distance, especially once the room fills with people, food, and lighting.
How do I store decorations to reuse them?
Flatten paper rosettes and banners between sheets of tissue in a large box; deflate (don’t pop) foil balloons and store flat; coil fairy lights around cardboard to prevent tangling. Label everything by color palette, not by party — “navy/gold/silver” gets reused far more often than “Emma’s 7th birthday.” Properly stored paper decor survives three to five parties.
How do I make DIY decorations look good in photos?
Photograph your setup before guests arrive and critique it like a stranger. The camera exposes crooked banners, visible tape, and color clashes your eyes gloss over. Shoot the cake table straight-on at cake height, not from above — that is the angle guests will share. Turn off harsh overhead lights in favor of lamps and fairy lights, declutter the background of everyday items (mail piles, chargers, pet toys), and take one wide shot of the whole room plus close-ups of each project. These photos also become your reference for next year’s party.