There is a particular disappointment in walking into a New Year’s Eve party decorated entirely with store-bought kits: the same gold “Happy New Year” banner as every other party, the same foil balloons, the same generic sparkle. DIY New Year’s Eve decorations solve this — not just by saving money (though they do), but by giving your party a look no one else has. Handmade decor carries the host’s fingerprint: the slightly imperfect fringe curtain, the hand-lettered signs, the centerpieces built for your table. Guests feel the difference, even if they cannot name it.
This guide gives you twelve DIY decoration projects, each with a complete materials list, step-by-step instructions, cost estimate, and time requirement — organized from highest visual impact to finishing touches, so you can stop at any point and still have a stunning party. It pairs with our photo booth ideas guide (which covers backdrops in depth) and works for any theme — though Gatsby-party hosts should also see our Roaring 20s hosting guide for era-specific styling. For the rest of the party plan, our at-home New Year’s Eve plan has you covered.
Five Design Principles Before You Buy Anything
DIY decor fails most often not from poor craftsmanship but from poor planning. These five principles keep every project pulling in the same direction:
1. Pick one palette and commit. The difference between “festive” and “chaotic” is almost entirely color discipline. Choose two main colors plus one metallic (black + cream + gold; navy + silver + white; burgundy + blush + rose gold) and reject anything outside it, no matter how pretty. Every project below assumes a disciplined palette.
2. Light is decor. The highest-ROI decoration in any room is not an object but a lighting change: overheads off, warm fairy lights and candles on. Budget your time accordingly — an hour spent on lighting beats three hours on fiddly crafts. Every project below is designed to look good in warm, dim light, because that is the light your party will actually have.
3. Go big in few places. One dramatic installation (a balloon arch, a fringe curtain wall) outperforms twenty small scattered decorations. The eye needs a focal point; give it one per room and let the rest be supporting texture. This principle also saves money — impact concentrates where you spend.
4. Repeat motifs. Pick two or three motifs — stars, clocks, champagne coupes — and repeat them across projects. Repetition reads as intentional design; variety reads as a craft-store explosion. If stars are your motif, they appear in the garland, the table scatter, and the photo backdrop, nowhere else and everywhere consistent.
5. Build for teardown. Every project should come down in under an hour on January 1st, preferably into a labeled box for next year. Avoid anything glued to walls (use removable hooks and painter’s tape), and favor freestanding or hanging-from-existing-fixtures designs. Future-you, possibly hungover, will be grateful.
Projects 1–3: The Showstoppers (Entryway and Focal Walls)
Project 1: Fringe Curtain Doorway
Impact: very high. Cost: $15–$25. Time: 45 minutes. Skill: beginner.
A shimmering curtain guests walk through to enter the party — the single most transformative cheap decoration in existence. Materials: 3–4 metallic fringe curtain panels (foil, in your palette metallic), a tension rod or removable adhesive hooks, scissors. Steps: Mount the rod or hooks across the doorway at about 7 feet. Hang the fringe panels side by side, overlapping slightly so there are no gaps. Trim the bottoms to just above the floor — long enough to brush, short enough not to trip. Fluff the strands apart with your fingers so they hang full rather than clumped. Pro tips: Layer two colors (gold over black) for depth. If the doorway is wide, hang panels in two staggered rows for a fuller curtain. This also works brilliantly as a photo backdrop background layer — which is why it appears in our photo booth guide too.
Project 2: Organic Balloon Garland Arch
Impact: very high. Cost: $25–$40. Time: 1.5–2 hours. Skill: beginner (patient beginner).
The draped, asymmetrical balloon garland you see at every stylish party — entirely buildable at home. Materials: 60–80 balloons in 3–4 sizes and 2–3 palette colors (plus 5–10% extra for pops), a balloon garland strip (the plastic strip with holes — a few dollars online), a hand pump (non-negotiable; your lungs will not survive 70 balloons), removable hooks, fishing line. Steps: Inflate balloons in varied sizes — the mix of sizes is what makes it look “organic” rather than uniform. Clip balloons into the garland strip holes, alternating colors and sizes, packing them tightly. Hang the strip with hooks in a swag, arch, or asymmetrical drape over a doorway, mantel, or the food table. Fill gaps by tying small balloon clusters with fishing line and tucking them in. Pro tips: Build it the morning of the party — balloons look best within 12 hours. Keep it away from heat sources and curious cats. Under-inflate slightly for a softer, more premium look; rock-hard balloons look cheap.
Project 3: Giant Clock Countdown Wall
Impact: high. Cost: $10–$20. Time: 1 hour. Skill: beginner.
A giant clock face counting down to midnight — thematic, photogenic, and a natural gathering point at 11:55 PM. Materials: a large round object as the base (a hula hoop, an embroidery hoop, or a circle cut from foam board — 24–36 inches diameter), black and gold cardstock, a marker, removable adhesive. Steps: Cover the base in black (paint, fabric, or paper). Cut twelve large Roman numerals (XII, I, II…) from gold cardstock and arrange them clock-style. Cut two clock hands from cardstock, attach with a brad fastener so they actually move. Mount on the main party wall at eye level. Pro tips: Set the hands to 11:55 and let a designated guest move the minute hand during the final countdown — it becomes a ritual. Surround the clock with a starburst of gold paper rays for extra drama. This is the wall everyone photographs at midnight, so give it the room’s best lighting.
Projects 4–6: Table and Light (Where Guests Actually Look)
Project 4: Candle Cluster Centerpieces
Impact: high. Cost: $20–$35 for 3–4 tables. Time: 30 minutes. Skill: beginner.
Clusters of candles at varying heights are the fastest route to an expensive-looking table — restaurants have known this forever. Materials: per table: 5–7 candles in mixed heights (pillar candles, tea lights, taper candles), candle holders in your metallic (thrifted brass candlesticks are ideal and cheap), a round mirror or metallic tray as the base, greenery sprigs or eucalyptus (optional). Steps: Place the mirror/tray in the table’s center — it doubles the candlelight by reflection. Arrange holders tallest in the middle, shortest at the edges. Add tea lights in the gaps. Tuck greenery around the bases to hide holder bottoms and add texture. Pro tips: Use LED candles for any cluster near drapes, balloon garlands, or high-traffic edges — real flame only where it is supervised and stable. Light every candle 30 minutes before guests arrive, not earlier; you want full glow at doors-open, not half-melted pillars. Odd numbers of candles (5, 7) look better than even — a genuine design rule.
Project 5: Gold-Dipped Bottles and Vases
Impact: medium-high. Cost: $10–$15. Time: 1 hour + drying. Skill: beginner.
Empty wine and champagne bottles transformed into gold-dipped vases — free vessels, glamorous result. Materials: 6–10 empty bottles (save them through December, or ask friends), metallic gold spray paint, painter’s tape, newspaper, a well-ventilated workspace. Steps: Soak bottles to remove labels; dry completely. Tape a clean line around each bottle — straight across for a classic dip, diagonal for a modern look. Spray light, even coats (two thin coats beat one thick drippy one); let dry 30 minutes between coats. Remove tape while the last coat is slightly tacky for the crispest line. Pro tips: Group in odd-numbered clusters of 3 or 5 with single stems (one rose, one eucalyptus sprig, one feather) — the restraint is what makes them look designer rather than crafty. These also make excellent bar and bathroom decor, spreading the palette through the whole party for almost no money.
Project 6: Confetti Chargers and Table Scatter
Impact: medium. Cost: $8–$12. Time: 40 minutes. Skill: beginner.
Charger plates (the decorative plates under dinner plates) in metallic gold instantly formalize any table — and DIY versions cost a fraction of rentals. Materials: cardboard cake rounds (the silver ones from craft stores, 10-inch), gold spray paint or gold wrapping paper + glue, confetti shapes (stars, circles) in palette colors. Steps: If spraying: two light coats of gold on the cake rounds, dry completely. If wrapping: cover each round in gold paper, folding edges neatly underneath and gluing. Place one at each setting — they stay down all evening as the table’s jewelry. Scatter confetti shapes loosely around them, plus a few larger star cutouts. Pro tips: Confetti on the table (not just in poppers) is the detail that makes photos sparkle — it catches candlelight beautifully. Keep food-serving areas confetti-free for hygiene; confine scatter to guest tables and the bar surround.
Projects 7–9: Walls and Ceiling (The Atmosphere Layer)
Project 7: Hanging Star and Moon Ceiling
Impact: high. Cost: $12–$20. Time: 1–1.5 hours. Skill: beginner.
Dozens of gold stars hanging at varying heights from the ceiling turn any room into a night sky — magical in dim party light. Materials: gold and metallic cardstock, star templates (print or hand-draw in 3 sizes), fishing line or clear thread, removable ceiling hooks, scissors or a craft punch. Steps: Cut 40–60 stars in mixed sizes. Punch a tiny hole in each; thread fishing line through and knot. Hang from ceiling hooks at staggered heights — longer strands over the dance/food area, shorter near walls. Cluster rather than spacing evenly; clusters read as constellations, grids read as office. Pro tips: Hang a few strands in front of a light source (fairy lights, a lamp) so the stars catch light and cast shadows — the shadows double the effect for free. This is the project to delegate to a crafty friend; it is meditative work, perfect for a pre-party crafting hangout.
Project 8: The “Cheers Wall” Photo Backdrop
Impact: very high. Cost: $20–$30. Time: 1 hour. Skill: beginner.
A dedicated photo wall — because if you do not build one, guests will take photos against your cluttered kitchen. Materials: a tension rod or two removable hooks + a curtain rod, 2–3 yards of black fabric (or a black plastic tablecloth), a gold fringe curtain layer, large cutout letters spelling “CHEERS” or “2027” (cardstock + string), fairy lights. Steps: Hang the black fabric as the base layer. Layer the fringe curtain over the bottom two-thirds. String the letters across the top third. Weave fairy lights through the fringe. Place a small rug or gold floor cushion to mark “stand here.” Pro tips: Light the faces, not the backdrop — a floor lamp or ring light aimed at the standing spot, not at the wall. Our full photo booth guide covers prop baskets, lighting setups, and three more backdrop builds if you want options. Position the backdrop away from the food line — photo queues and buffet queues must never merge.
Project 9: Resolution Wish Tree (or Champagne Cork Tree)
Impact: medium-high. Cost: $5–$10. Time: 45 minutes. Skill: beginner.
An interactive decoration: a branch “tree” where guests hang written wishes for the new year. Materials: a tall branch (foraged or from a craft store) in a weighted vase, or a small tabletop tree; cardstock tags in palette colors; ribbon or string; pens. Steps: Secure the branch in the vase (stones or sand in the bottom for weight). Pre-cut 30 tags with a hole punched and ribbon threaded. Set out with pens and a sign: “Write a wish for the new year. Hang it on the tree.” Pro tips: Read a few aloud (with permission) before midnight — it becomes an impromptu toast. Save the tags; reading them next New Year’s Eve is a tradition that builds itself. For a champagne crowd, the variant is a cork tree: guests write wishes on saved champagne corks and drop them in a tall glass vase — zero hanging required.
Projects 10–12: The Finishing Touches
Project 10: DIY Party Crowns (Not Hats)
Impact: medium. Cost: $8–$12 for 20. Time: 1 hour. Skill: beginner.
Skip the cone hats — gold paper crowns photograph better and guests actually keep them on. Materials: gold cardstock, a crown template (printable, or draw zigzag tops freehand), elastic cord or ribbon, glue dots, stick-on gems (optional). Steps: Cut crown strips to fit head sizes (measure a few volunteers; make small/medium/large). Decorate flat: gems, drawn deco patterns, or “2027” numerals. Attach elastic with glue dots or staples. Pro tips: Make them during a pre-party craft night — it is genuinely fun group work. Place finished crowns in a basket by the door with the photo props; crowns + the Cheers Wall = your guests’ profile pictures for January. For a Gatsby party, swap crowns for headbands using the same technique (see our Roaring 20s guide).
Project 11: Confetti Poppers, Upgraded
Impact: medium (at midnight: very high). Cost: $10–$15 for 20. Time: 45 minutes. Skill: beginner.
Store-bought poppers are fine; personalized poppers are a party favor and a midnight moment in one. Materials: 20 push-pop or twist poppers (the plain kind, bought in bulk), wrapping paper or cardstock in your palette, ribbon, small printed labels (“Pop at midnight!”). Steps: Wrap each popper in paper, securing with ribbon. Attach the label. Arrange in a basket or a “midnight station” with the champagne. Pro tips: The station matters more than the popper: a dedicated table with poppers, champagne flutes, and a sign (“Midnight kit — take one!”) turns logistics into decor. Warn guests with pets or babies about the noise; keep a few silent alternatives (bubble wands, shakers) for the sensitive. And check cleanup: confetti poppers mean confetti everywhere — glorious at midnight, a January project after. Biodegradable confetti exists and is worth the small premium.
Project 12: Hand-Lettered Signage Suite
Impact: medium. Cost: $5–$8. Time: 1 hour. Skill: beginner (tracing counts).
A matching set of signs — bar menu, food labels, wifi password, “coats here,” the midnight plan — is the detail that makes a party feel produced rather than assembled. Materials: black cardstock or small chalkboards, a gold paint pen (or white chalk pen), a ruler. Steps: List every sign you need (bar menu, each food item with allergen notes, wifi, coats, restrooms, the evening schedule, the rideshare reminder). Letter them in a consistent style — print a reference alphabet if your handwriting wobbles; tracing is legitimate. Frame or tent each one. Pro tips: The food-label signs are secretly the most important: guests with allergies or dietary needs should never have to guess or interrogate the host mid-party. The evening-schedule sign (“11:55 gather for countdown”) does your herding for you. Consistent signage is the cheapest possible upgrade to perceived party quality.
The Master Shopping List
Buying for all twelve projects at once? Here is the consolidated list, grouped by store section to save you three trips:
- Craft store: metallic fringe curtains (4), gold/black/cream cardstock (2 packs), gold spray paint (2 cans), painter’s tape, fishing line, removable hooks (2 packs), LED tea lights (24-pack), fairy lights warm white (3 strings), gold paint pen, stick-on gems, ribbon, glue dots.
- Party supply / dollar store: balloons (70+ in palette colors), balloon garland strip, hand pump, push-pop confetti poppers (20), plastic champagne flutes (if needed), gold plastic chargers alternative (cardboard cake rounds).
- Thrift / home: brass candlesticks, pillar and taper candles, small mirrors or metallic trays, black tablecloths, a branch for the wish tree, empty bottles (start saving in December).
- Grocery / floral: eucalyptus or greenery sprigs, a few roses or single stems, fresh flowers for the entryway.
- Already own (check first): scissors, tension rods, a printer (for templates and labels), vases, ice buckets.
Total for all twelve projects at a 20-guest party: roughly $150–$250 if you shop the dollar and thrift stores first — less if you already own candles, vases, and fairy lights from previous holidays. The single biggest cost saver is the discipline to buy only your palette: every off-palette impulse purchase is money spent on visual noise.
Budget Tiers: What to Build at Each Level
You do not need all twelve projects. Here is how to prioritize by budget:
The $50 party (maximum impact, minimum spend): Projects 1 (fringe curtain), 4 (candle clusters with candles you own + thrifted holders), and 12 (signage). Plus the free one: turn off the overheads and light every candle you own. This trio — a dramatic entry, glowing tables, and professional signage — outperforms a $200 scattered shopping spree.
The $150 party (the sweet spot): Add Project 2 (balloon garland), Project 8 (Cheers Wall backdrop), and Project 6 (chargers + scatter). You now have a showstopper entry, a photo destination, dressed tables, and candlelight — the complete visual package. This is where most hosts should aim.
The $250 party (the full build): All twelve projects. The wish tree, the clock wall, the star ceiling, the crowns, the upgraded poppers — the layers of detail that make guests say “you thought of everything.” Diminishing returns start here, but for a milestone year or a big crowd, the full build is worth it.
When to Build What: The Crafting Timeline
- Two weeks out: Projects 5 (gold-dipped bottles — needs drying time), 10 (crowns — good group craft night), 12 (signage — needs the final menu and schedule).
- One week out: Projects 3 (clock wall), 7 (star ceiling), 9 (wish tree). Hang now; they keep perfectly.
- Two days out: Projects 6 (chargers), 8 (backdrop). Set tables early so party-day is calm.
- Party day morning: Project 2 (balloon garland — freshest within 12 hours), Project 1 (fringe curtain — 45 minutes), Project 11 (wrap poppers, set the midnight station).
- Party day, one hour before doors: Project 4 (light the candles — the final transformation). Step back, look at the room, and let yourself feel proud before anyone arrives.
In Pictures: DIY New Year’s Eve Decorations
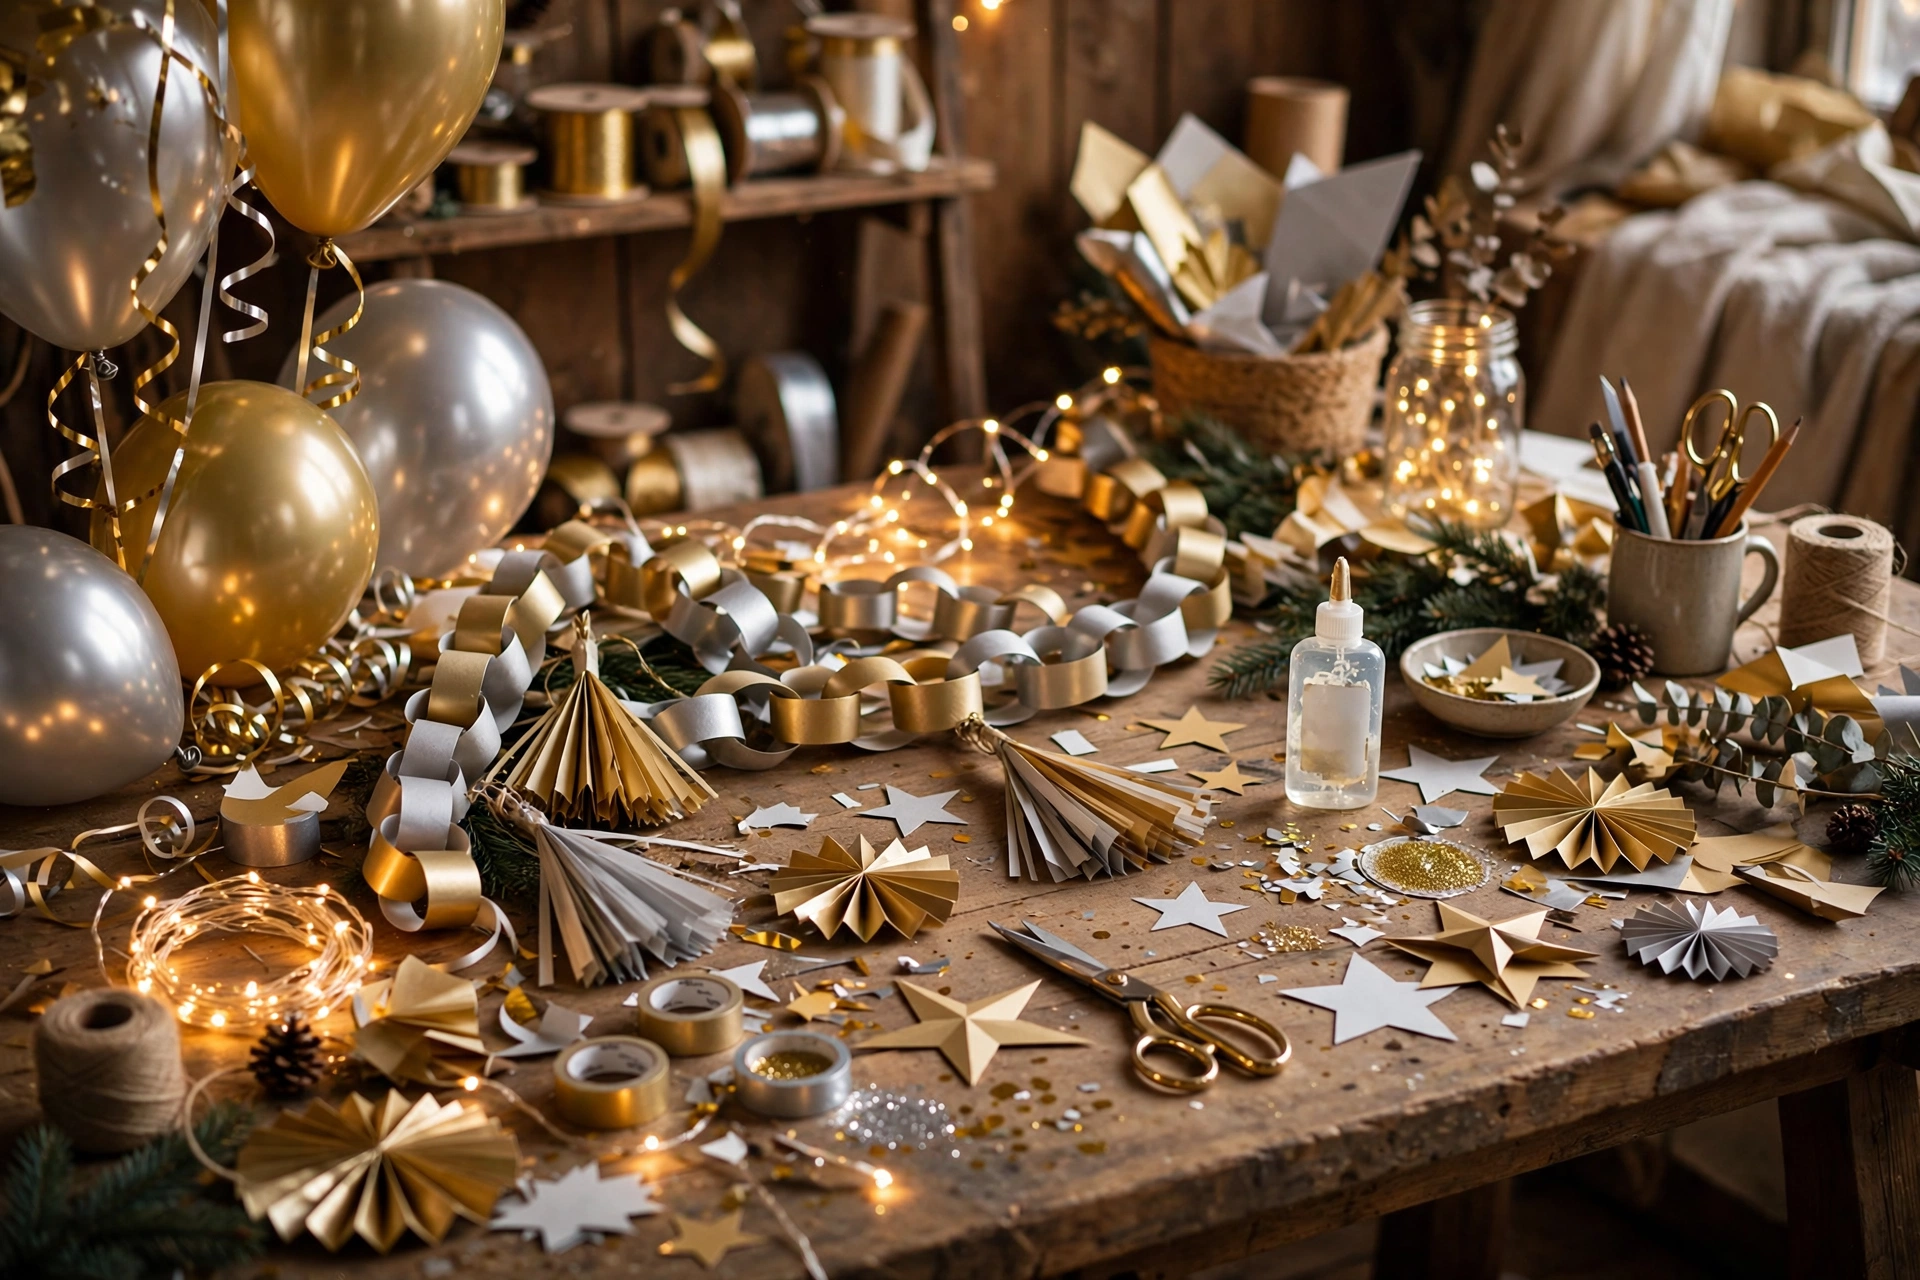
Store-bought kits make every party look the same. DIY decorations solve that — personal, cheaper, and genuinely stunning.

Handmade sparkle: DIY décor that makes the party look like you, not a kit.
Watch: DIY New Year’s Eve Decorations
Easy, inexpensive New Year’s DIY decoration ideas from The DIY Mommy — glamorous looks from cheap accessories.
At a Glance: DIY New Year’s Eve Decorations
The DIY projects from the video, plus the post’s design principles.
| Project | What you make | From the video/post |
|---|---|---|
| Table runner | A glamorous runner from affordable materials | The video’s centerpiece project |
| Champagne flute bows | Bow ties for flutes and bottles | The video’s elegant touch |
| Backdrop fans | Decorative fans for an Insta-worthy backdrop | The video’s photo-wall project |
| Principles | Five design principles before buying anything | The post’s planning section |
| Showstoppers | Entryway and focal-point builds | The post’s Projects 1–3 |
Frequently Asked Questions
How far in advance can I make DIY decorations?
Most paper, painted, and assembled projects keep for weeks — build anything non-perishable two weeks out. Balloons are the exception: build garlands the morning of the party for maximum fullness (they start to soften after 12–24 hours). Fresh greenery lasts 3–5 days in water. Candles are lit day-of, obviously.
What if I am not crafty?
Choose projects by skill honesty, not ambition. Projects 1, 4, 6, and 12 require zero craft skill — hanging, arranging, and writing. The balloon garland looks impressive but is genuinely beginner-level; the instructions above are the whole technique. Skip anything involving spray paint if fumes or mess worry you, and lean on the highest-ROI move available to the craft-averse: lighting. Dim overheads plus $20 of fairy lights transform a room with no crafting at all.
How do I hang things without damaging walls?
Removable adhesive hooks (rated for the weight), painter’s tape for lightweight paper, and tension rods in doorways. Test every adhesive in a hidden spot 48 hours before — paint finishes vary, and “removable” is a promise, not a guarantee. Never use nails, staples, or hot glue on walls you do not own. Command-style strips removed with the proper pull technique (slow, along the wall) are the safest bet.
Can I reuse these decorations next year?
Almost all of them. The fringe curtains, clock wall, star ceiling strands, crowns, signage holders, candle clusters, and gold-dipped bottles pack flat into one or two labeled boxes. The only true consumables are balloons, confetti, and fresh greenery. Photograph each installed project before teardown so next year’s setup is a reassembly, not a redesign. A “NYE decor” box that grows slightly each year is how hosts end up with legendary parties on shrinking budgets.
What is the one decoration guests notice most?
The entryway. It is the first thing guests see, it sets the expectation for the whole evening, and it is where the “wow” happens — the fringe curtain doorway (Project 1) consistently gets the strongest reaction per dollar of any party decoration. Second place goes to lighting: guests may not consciously notice the candles, but they feel the difference between a dimly glowing room and a brightly lit one in every photo and every conversation.
How do I decorate on a tiny budget — like under $30?
Do the free things first: rearrange furniture for flow, turn off overheads, gather every candle you own into clusters, print signage on home paper. Then spend the $30 on one fringe curtain ($8), one pack of gold cardstock for stars and scatter ($5), a string of fairy lights ($8), and tea lights ($6). That combination — entry drama, table glow, ceiling sparkle, warm light — reads as a decorated party, not a bare room with snacks.
Make It Yours
The best DIY decoration is not the most impressive one — it is the one that could only be at your party. The wish tree with your friends’ actual handwriting. The clock wall set to your city’s midnight. The signage in your lettering, the playlist on your speaker, the gold-dipped bottles from your December. Store-bought decor says “a party happened here.” Handmade decor says “you happened here.”
So pick your palette, choose your three (or twelve) projects, and schedule the crafting the way you would schedule anything that matters — because it does. When your guests walk through that fringe curtain on December 31st, past the candle clusters and under the hanging stars, they will not be thinking about your budget or your craft skill. They will be thinking: this is going to be a good night. And they will be right.