Looking for halloween crafts for kids that will not end with pumpkin guts in the carpet and glitter in places glitter should never be? You are in the right place. This guide collects 25 easy no-carve Halloween projects, sorted by age group so toddlers, preschoolers, and big kids each get crafts matched to their skills and attention spans. Every project below skips the carving knife entirely, which means kids do the real making while grown-ups supervise instead of taking over.
No-carve crafting is the unsung hero of October parenting. Painted, stickered, wrapped, and glued pumpkins look fantastic on the porch, they last far longer than carved jack-o-lanterns, and nobody has to wrestle a serrated knife near small fingers. The 25 projects below range from five-minute sticker sessions for two-year-olds to genuinely impressive decoupage pumpkins and haunted-house lanterns for tweens. Pick one craft a weekend in October and you will have a whole season of memories, plus a house full of decorations your kids made themselves.
Each craft lists exactly what you need and walks you through the steps in order, so there are no surprise supply runs mid-project. We have also added a mess-level rating to every idea, a full supply cheat-sheet table, safety notes worth reading before you break out the glue gun, and a video walkthrough near the end. Ready your smocks and paper towels, and let us make something spooky.
Why No-Carve Halloween Crafts for Kids Are the Smartest October Move
Carving a pumpkin looks simple until you try it with a four-year-old bouncing beside you. The carving tools are sharp, the pumpkin interior is a slimy battle, and the finished jack-o-lantern starts sagging within days. No-carve projects solve every one of those problems. Kids aged two to twelve can genuinely participate, the decorations survive the whole month, and cleanup is usually one wet rag instead of a hazmat operation.
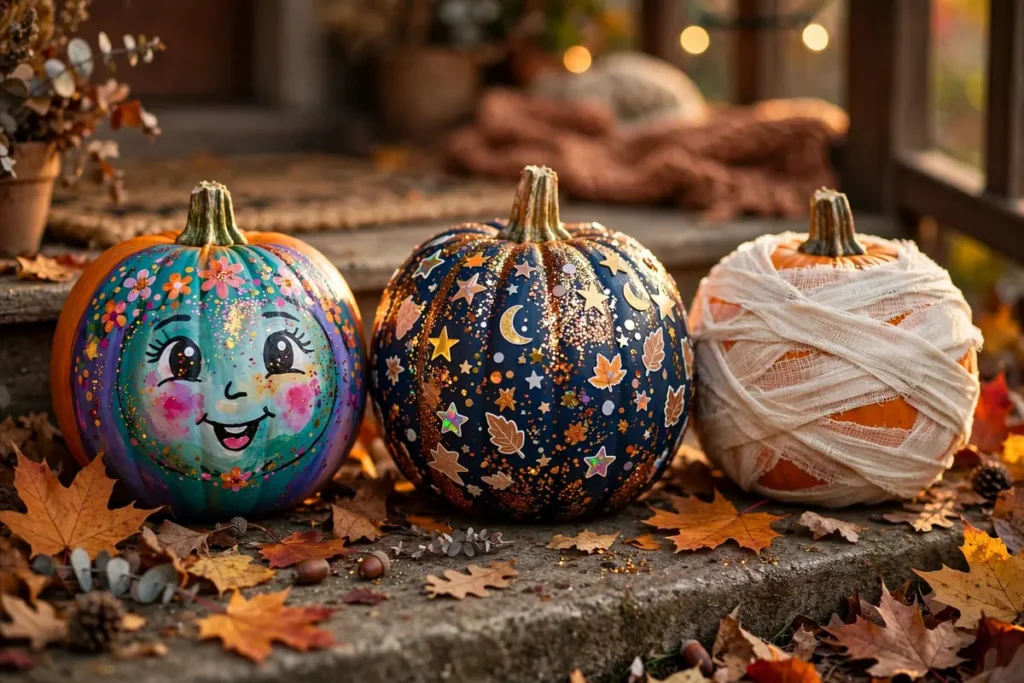
There is also a creative upside most parents do not expect. When carving is off the table, kids invent: they paint galaxy pumpkins, wrap mummies in gauze, build haunted houses from popsicle sticks, and design monsters that no cookie-cutter template could produce. If your family does want a couple of classic carved pumpkins on the porch, check our no-carve pumpkin decorating ideas for design inspiration, and when the kids are old enough to handle tools safely with an adult, our easy pumpkin carving ideas and templates make a great next step.
How to Use This Guide: Pick Crafts by Mess Level
Every craft below carries a mess rating so you can match the project to your mood, your kitchen table, and your tolerance for glitter migration.
- Low mess: Stickers, markers, foam shapes, and washi tape. Doable on the couch with zero cleanup. Best for rainy afternoons and tired parents.
- Medium mess: Washable paint, glue sticks, tissue paper, and yarn. Lay down newspaper or a plastic tablecloth and you will be fine.
- High mess: Glitter, slime, liquid glue, and anything involving a small child plus orange paint. Worth it, but change into old clothes first.
A note on ages: the groups below are guidelines, not rules. A crafty three-year-old may happily attempt a preschool project with help, and a seven-year-old might still love a toddler classic on a lazy Sunday. Follow your kid’s interest, not the label.
Halloween Crafts for Toddlers (Ages 2 to 4)
Toddler crafting is about process, not product. These eight projects are forgiving, quick, and built around sticking, stamping, and squishing rather than precision.
1. Sticker Pumpkins
Mess level: Low | Time: 10 minutes
- Materials: small pumpkins or gourds, Halloween sticker sheets (faces, bats, stars)
- Wipe the pumpkins clean and dry so stickers adhere.
- Peel sticker sheets apart and let your toddler choose faces and decorations.
- Press stickers firmly onto the pumpkin, smoothing out bubbles.
- Display immediately. No drying time, no drama.
2. Cotton Ball Ghosts
Mess level: Medium | Time: 20 minutes
- Materials: white cotton balls, non-toxic white glue, black construction paper, googly eyes, string
- Cut a ghost shape from black construction paper as a backing.
- Help your toddler squeeze glue dots onto the paper.
- Press cotton balls onto the glue to make a fluffy ghost body.
- Add googly eyes and a black paper mouth. Punch a hole, add string, and hang.
3. Handprint Spiders
Mess level: Medium | Time: 15 minutes
- Materials: black washable paint, white paper, paintbrush, wet wipes
- Paint your toddler’s palm and fingers with black washable paint.
- Press the hand onto white paper, fingers spread wide, then press again slightly rotated to make eight legs.
- Let dry, then add a spider body dot and googly eyes between the handprints.
- Frame the best one. Grandparents love these.
4. Tissue Paper Pumpkin Suncatchers
Mess level: Medium | Time: 25 minutes
- Materials: orange tissue paper squares, clear contact paper, green and brown construction paper, scissors
- Cut two identical pumpkin shapes from clear contact paper and peel the backing off one.
- Let your toddler stick orange tissue squares all over the sticky side, overlapping freely.
- Add a green stem and brown vine cut from construction paper.
- Seal with the second contact paper sheet and hang in a sunny window.
5. Foam Bat Sticker Scene
Mess level: Low | Time: 15 minutes
- Materials: self-adhesive foam Halloween shapes, black and purple cardstock
- Fold black cardstock into a night-sky backdrop, or use purple for a twilight look.
- Let your toddler peel and stick foam bats, moons, and stars wherever they like.
- Add a paper moon cut from yellow foam for a finishing touch.
- Tape to the fridge gallery for the full month.
6. Fingerprint Candy Corn
Mess level: Medium | Time: 15 minutes
- Materials: yellow, orange, and white washable finger paint; paper; a drawn triangle outline
- Draw a large candy-corn triangle on paper and divide it into three bands.
- Show your toddler how to press a fingertip into paint and stamp inside the matching band: yellow at the bottom, orange in the middle, white on top.
- Fill the triangle with overlapping fingerprints.
- Let dry flat, then display next to the real candy corn bowl.
7. Paper Plate Jack-o-Lanterns
Mess level: Low | Time: 15 minutes
- Materials: orange paper plates, black construction paper, glue stick
- Pre-cut triangle eyes, a nose, and a jagged mouth from black paper.
- Let your toddler arrange the face pieces on the back of an orange paper plate.
- Glue pieces down with a glue stick and press flat.
- Hang on the wall or string several together as a garland.
8. Toilet Roll Mummies
Mess level: Low | Time: 10 minutes
- Materials: empty toilet paper rolls, white crepe paper streamers or gauze, googly eyes, glue stick
- Wrap the roll in crepe paper streamers, overlapping and leaving a small gap for the face.
- Secure the end with a dab of glue.
- Stick googly eyes in the gap.
- Line them up on a shelf. They look spooky in groups.
Halloween Crafts for Preschoolers (Ages 4 to 6)
Preschoolers can follow multi-step directions, handle scissors with rounded tips, and concentrate for twenty to thirty minutes. These eight projects build real skills, like cutting, painting, and simple construction, while staying firmly no-carve.
9. Painted Mini Pumpkins
Mess level: Medium | Time: 30 minutes plus drying
- Materials: mini pumpkins, acrylic or tempera paint, paintbrushes, paper plates as palettes
- Wash and dry the mini pumpkins so paint sticks well.
- Squeeze small amounts of paint onto paper plates.
- Let your preschooler paint freely: faces, stripes, polka dots, monsters, anything goes.
- Set pumpkins on newspaper to dry for at least an hour before handling.
10. Paper Bag Monsters
Mess level: Low | Time: 20 minutes
- Materials: brown paper lunch bags, construction paper scraps, googly eyes, glue stick, markers
- Flatten the paper bag and draw a monster face on the bottom flap with markers.
- Cut horns, fangs, and ears from construction paper scraps.
- Glue on the paper parts and a few googly eyes.
- Pop the bag open to make a puppet and stage a monster show.
11. Leaf Ghosts
Mess level: Low | Time: 15 minutes
- Materials: large dried leaves, white acrylic paint, black marker, string
- Collect big sturdy leaves on a walk, then press them flat under a book overnight.
- Paint each leaf white and let dry completely.
- Draw a simple ghost face with a black marker.
- Poke a small hole at the stem end, thread string, and hang as a leaf-ghost garland.
12. Egg Carton Bats
Mess level: Medium | Time: 25 minutes
- Materials: cardboard egg carton, black paint, googly eyes, black pipe cleaners, string
- Cut one egg cup from the carton for the bat’s body, keeping the two side flaps as wings.
- Paint the whole piece black and let dry.
- Glue on googly eyes and twist pipe cleaners into little legs.
- Hang upside down from string, the way real bats roost.
13. Washi Tape Pumpkins
Mess level: Low | Time: 20 minutes
- Materials: small pumpkins, Halloween-patterned washi tape, scissors
- Cut washi tape into strips of different lengths.
- Wrap strips around the pumpkin in stripes, crisscrosses, or random collage patterns.
- Overlap tape ends and smooth them down firmly.
- Peel and redo as many times as your preschooler wants. Washi tape forgives everything.
14. Pipe Cleaner Spiders
Mess level: Low | Time: 15 minutes
- Materials: black and orange pipe cleaners, black pom-poms, googly eyes, glue
- Twist four pipe cleaners around a black pom-pom to make eight legs.
- Bend each leg into a zigzag spider shape.
- Glue googly eyes onto the pom-pom head.
- Make a whole family in different sizes and scatter them on the mantel.
15. Witch’s Brew Glitter Slime
Mess level: High | Time: 20 minutes
- Materials: clear school glue, baking soda, contact lens solution, green and purple food coloring, fine glitter, mixing bowl
- Pour half a cup of clear glue into a bowl and stir in half a teaspoon of baking soda.
- Add a few drops of green or purple food coloring and a generous shake of glitter.
- Stir in contact lens solution one tablespoon at a time until the slime pulls away from the bowl.
- Knead by hand for two minutes. Store in a sealed jar labeled with a warning: do not eat, little witches.
16. Popsicle Stick Haunted Houses
Mess level: Medium | Time: 30 minutes
- Materials: popsicle sticks, non-toxic glue, black and gray paint, paper windows and doors
- Glue popsicle sticks side by side into a square wall panel, then make a triangle roof panel.
- Paint the panels black or gray and let dry.
- Cut tiny windows and a door from yellow paper for that lit-from-inside look.
- Glue the house together, add a paper moon, and prop it on the windowsill.
Halloween Crafts for Big Kids (Ages 7 to 12)
Older kids want projects that look genuinely cool, not babyish. These nine no-carve crafts produce decorations they will be proud to display, and several teach real techniques like decoupage, origami, and lantern-building. When they are ready for the real thing, our easy pumpkin carving ideas and templates walk through safe carving with an adult.
17. Decoupage Pumpkins
Mess level: Medium | Time: 45 minutes plus drying
- Materials: pumpkins, Halloween napkins or tissue paper, decoupage glue (Mod Podge), foam brush
- Peel Halloween napkins down to their single printed layer and tear them into pieces.
- Brush a thin layer of decoupage glue onto a section of pumpkin.
- Press napkin pieces onto the glue, smoothing gently, then brush another thin glue layer on top to seal.
- Cover the whole pumpkin, let dry for two hours, and add a second sealing coat.
18. Origami Bats
Mess level: Low | Time: 20 minutes
- Materials: black origami paper squares, white gel pen or chalk marker
- Fold the paper in half diagonally to make a triangle, then fold the two bottom corners up to the top point.
- Fold the top flaps back down at an angle to form bat wings.
- Draw eyes and fangs with a white gel pen.
- String a dozen on thread for a flying-bat garland across the hallway.
19. Mason Jar Mummy Lanterns
Mess level: Medium | Time: 25 minutes
- Materials: mason jars, white gauze or medical tape, googly eyes, glue, battery tea lights
- Wrap the jar in gauze strips, crisscrossing and leaving a gap for the eyes.
- Secure the gauze end with a dot of glue.
- Glue googly eyes into the gap.
- Drop in a battery tea light and watch the mummy glow. Never use real candles in jars.
20. Black Cat Paper Lanterns
Mess level: Medium | Time: 30 minutes
- Materials: black construction paper, scissors, glue, yellow paper for eyes, battery tea lights
- Fold black paper in half lengthwise and cut slits from the fold, stopping an inch from the edge.
- Roll the paper into a cylinder and glue the ends, then add a paper handle strip.
- Cut triangle ears, yellow eyes, and whisker strips, and glue them on for the cat face.
- Set a battery tea light underneath for a glowing black-cat lantern.
21. Spooky Terrarium Jars
Mess level: Medium | Time: 30 minutes
- Materials: large glass jars, potting soil or sand, small plastic skeletons and tombstones, moss, tiny LED lights
- Layer soil or sand in the bottom of the jar.
- Arrange a miniature graveyard scene: tombstones, a skeleton, moss for grass.
- Tuck battery LED fairy lights among the scene.
- Screw on the lid. These make fantastic bedroom night-lights all October.
22. Yarn-Wrapped Pumpkins
Mess level: Low | Time: 40 minutes
- Materials: foam pumpkins, orange and black yarn, glue, cinnamon sticks
- Dab glue at the top of the foam pumpkin and anchor the yarn end.
- Wrap yarn tightly around the pumpkin, working from top to bottom in even rows.
- Trim and glue the yarn end at the bottom center.
- Hot-glue a cinnamon stick on top as the stem. These smell as good as they look.
23. Perler Bead Halloween Magnets
Mess level: Low | Time: 30 minutes plus ironing
- Materials: Perler beads, square pegboards, ironing paper, iron, small magnets, glue
- Arrange beads on the pegboard into pumpkins, ghosts, bats, or candy corn.
- Cover with ironing paper and fuse with an adult’s iron, five seconds per side.
- Let the design cool completely, then peel off the paper.
- Glue a magnet to the back and stick them on the fridge.
24. Cardboard Tombstones
Mess level: Medium | Time: 40 minutes
- Materials: large cardboard boxes, gray paint, black paint or marker, wooden stakes
- Cut tombstone shapes from cardboard: rounded tops, crosses, and crooked rectangles.
- Paint everything gray and let dry.
- Paint funny epitaphs in black: “Here Lies Fred, He Snored in Bed” and similar kid-approved jokes.
- Tape a wooden stake to the back of each and plant them in the yard for a DIY graveyard.
25. Scratch-Art Ghosts
Mess level: Low | Time: 20 minutes
- Materials: black scratch-art paper, wooden stylus, or DIY version (white cardstock, crayons, black paint)
- If making your own, color cardstock heavily with bright crayons, then paint over with black tempera mixed with a drop of dish soap.
- Once dry, scratch ghost shapes, spider webs, and haunted houses with a wooden stylus.
- The bright colors burst through the black coating for a magical effect.
- Frame the best pieces. This one looks like real art.
Craft Supply Cheat Sheet
Planning a shopping trip or raiding the craft closet? This table covers every project above at a glance, so you can batch your supplies and pick crafts by available time.
| Craft | You Will Need | Time |
|---|---|---|
| Sticker Pumpkins | Small pumpkins, Halloween sticker sheets | 10 min |
| Cotton Ball Ghosts | Cotton balls, glue, black paper, googly eyes | 20 min |
| Handprint Spiders | Black washable paint, paper, wet wipes | 15 min |
| Tissue Pumpkin Suncatchers | Orange tissue, contact paper, construction paper | 25 min |
| Foam Bat Sticker Scene | Self-adhesive foam shapes, cardstock | 15 min |
| Fingerprint Candy Corn | Washable finger paint, paper | 15 min |
| Paper Plate Jack-o-Lanterns | Orange paper plates, black paper, glue stick | 15 min |
| Toilet Roll Mummies | Toilet rolls, crepe paper, googly eyes | 10 min |
| Painted Mini Pumpkins | Mini pumpkins, tempera paint, brushes | 30 min |
| Paper Bag Monsters | Paper bags, construction paper, googly eyes | 20 min |
| Leaf Ghosts | Large leaves, white paint, black marker | 15 min |
| Egg Carton Bats | Egg carton, black paint, pipe cleaners | 25 min |
| Washi Tape Pumpkins | Small pumpkins, Halloween washi tape | 20 min |
| Pipe Cleaner Spiders | Pipe cleaners, pom-poms, googly eyes | 15 min |
| Witch’s Brew Slime | Clear glue, baking soda, contact solution, glitter | 20 min |
| Popsicle Stick Haunted Houses | Popsicle sticks, glue, paint, paper | 30 min |
| Decoupage Pumpkins | Pumpkins, napkins, decoupage glue, foam brush | 45 min |
| Origami Bats | Black origami paper, white gel pen | 20 min |
| Mason Jar Mummy Lanterns | Mason jars, gauze, googly eyes, battery tea lights | 25 min |
| Black Cat Paper Lanterns | Black paper, scissors, glue, battery tea lights | 30 min |
| Spooky Terrarium Jars | Glass jars, soil, miniatures, LED lights | 30 min |
| Yarn-Wrapped Pumpkins | Foam pumpkins, yarn, glue, cinnamon sticks | 40 min |
| Perler Bead Magnets | Perler beads, pegboards, iron, magnets | 30 min |
| Cardboard Tombstones | Cardboard, gray paint, markers, stakes | 40 min |
| Scratch-Art Ghosts | Scratch-art paper or crayons and paint, stylus | 20 min |
Safety Notes for Halloween Craft Time
No-carve crafts are inherently safer than carving, but a few ground rules keep the fun intact. Always use non-toxic, washable art supplies for kids under six, and check labels for the AP (Approved Product) seal from the Art and Creative Materials Institute. Hot glue guns and irons are adult-only tools: let kids place the pieces and handle the pressing yourself.
Small parts like googly eyes, beads, and buttons are choking hazards for toddlers, so supervise closely or swap them for drawn-on features with younger kids. When decorating real pumpkins with markers instead of knives, you are already following pediatric safety guidance: Harvard Health notes that having kids decorate pumpkins with permanent markers while adults handle any cutting is one of the simplest ways to keep Halloween injury-free (Harvard Health Halloween safety guide). And remember, any lantern project should use battery-powered tea lights or LED fairy lights, never real flames.
Watch: 5 Simple Halloween Crafts Ideas for Kids
Sometimes it helps to see a craft in action before you start. This quick video walks through five simple Halloween craft ideas for kids, perfect inspiration before you pick your projects from the list above.
Frequently Asked Questions
What are the easiest Halloween crafts for kids?
The easiest projects in this guide are Sticker Pumpkins, Toilet Roll Mummies, Paper Plate Jack-o-Lanterns, and Pipe Cleaner Spiders. Each takes ten to fifteen minutes, needs only a few supplies, and works for kids as young as two with minimal adult help.
How can kids decorate pumpkins without carving?
Kids can decorate pumpkins without carving by painting them, covering them in stickers or washi tape, wrapping them in yarn or gauze, or using decoupage napkins. These no-carve methods are safer than carving, last longer on the porch, and let young children do the work themselves.
What Halloween crafts are good for toddlers?
Toddlers do best with low-precision crafts like sticker pumpkins, cotton ball ghosts, handprint spiders, and foam sticker scenes. Look for projects labeled Low Mess in this guide, keep sessions under twenty minutes, and focus on the sensory fun rather than the finished look.
What supplies do I need for Halloween crafts with kids?
A starter kit covers most projects: washable paint, glue sticks, construction paper, googly eyes, pipe cleaners, mini pumpkins, and Halloween sticker sheets. The supply cheat-sheet table above lists exact materials for all 25 crafts so you can shop once for the whole month.
Are no-carve pumpkins safe for young children?
Yes. No-carve pumpkin decorating is the safest pumpkin activity for children because it eliminates knives entirely. Use non-toxic paint and washable markers, supervise small parts like googly eyes with toddlers, and have adults handle any hot glue.
How long do painted pumpkins last?
Painted and decorated uncarved pumpkins typically last four to eight weeks in cool weather, far longer than carved pumpkins, which start deteriorating within days. Keep them out of direct sun and rain, and bring them in on freezing nights to extend their life through Halloween.
What can kids do with leftover Halloween craft supplies?
Leftover supplies are perfect for Thanksgiving and Christmas crafts: pipe cleaners become turkey feathers and reindeer antlers, construction paper works for any holiday garland, and googly eyes improve nearly everything. Store extras in a labeled Halloween bin so next October starts stocked.
What should we do after craft time?
After the paint dries, cap off your craft session with a cozy family movie night. Our roundup of the best family-friendly Halloween movies for kids has picks for every age, from not-scary-at-all favorites for toddlers to gentle spooky fun for tweens.
Twenty-five crafts is a whole October of weekends, so there is no rush to do them all. Pick one age group, start with a Low Mess project, and let your kids’ enthusiasm set the pace. Happy crafting, and happy Halloween 2026.