Staring at a blank pumpkin is the hardest part of carving. Easy pumpkin carving ideas and templates solve exactly that: this guide gives you 40+ ideas organized by difficulty — from no-carve crafts toddlers can do, through simple faces for first-timers, to intermediate scenes and genuinely advanced showpieces — plus how to transfer any pattern cleanly, techniques that make simple designs look pro, and theme collections (cute, spooky, funny, pop-culture-adjacent) so you can match your pumpkin to your mood. Whether it’s your first jack-o’-lantern or your fiftieth, you’ll find your next design here. Halloween 2026 falls on Saturday, October 31st — pick your design now, carve on the 29th or 30th.
How to Use This Guide
Find your tier below, pick 1–3 ideas that excite you, and read the technique notes for that tier before you cut. Every tier includes what makes it that difficulty, so you can level up with confidence. A note on templates: rather than printable patterns (which are widely available free from craft sites and pumpkin growers’ associations), this guide teaches you the transfer techniques and design principles behind great templates — so any pattern you find, free or purchased, comes out cleanly.
Pattern Transfer Techniques (Read First)
Great carving starts with getting the design onto the pumpkin accurately:
- Pin-poke transfer: tape your printed pattern to the pumpkin, poke along every line with a pin or awl, remove the paper, connect the dots with marker. The gold standard for detailed templates.
- Carbon/graphite transfer: rub pencil graphite on the back of your printed design, tape it graphite-side-down, and trace firmly — the design transfers like carbon paper.
- Freehand grid: draw a light grid on the pumpkin with washable marker and copy your design square by square. Excellent for enlarging small images.
- Projector trace: in a dark room, project the design onto the pumpkin and trace. Overkill for simple faces; perfect for portraits and complex scenes.
- The golden rule: every cut-out “island” needs at least one bridge connecting it to the pumpkin, or it falls inside. When adapting templates, add bridges where needed — or convert isolated details to etched (surface-shaved) areas instead of cut-throughs.
Tier 1: No-Carve Ideas (Toddlers to Any Age, Zero Blades)
No-carve pumpkins last for weeks instead of days, involve zero sharp tools, and honestly look fantastic. Perfect for under-5s, classrooms, and anyone who wants decor that survives the whole month.
- Sticker face: foam sticker shapes (eyes, mouths, hats) on a pumpkin — endlessly rearrangeable, endlessly fun.
- Chalk-marker doodles: liquid chalk markers draw vividly on pumpkin skin and wipe off with a damp cloth. Doodle, photograph, wipe, repeat.
- Painted galaxy: sponge dark blue/purple acrylic over the pumpkin, splatter white “stars” with a toothbrush. Stunning and easy.
- Mummy wrap: wrap in white gauze or medical bandage, glue on googly eyes. Spooky-cute in ten minutes.
- Glitter pumpkin: brush with craft glue, roll in glitter. (Use biodegradable glitter if the pumpkin will be composted.)
- Washi-tape mummy/geometric: strips of washi tape in patterns — clean, modern, removable.
- Thumbprint ghosts: white paint thumbprints all over, tiny faces drawn on each when dry. A keepsake craft for little hands.
- Flower-crown pumpkin: hot-glue (adult) faux flowers around the stem like a crown. Beautiful for harvest-elegant decor.
- Chalkboard pumpkin: coat with chalkboard paint; the message changes daily. Great for countdowns (“3 days to Halloween!”).
- Donut pumpkin: paint pink “frosting” on top half, add sprinkle dots. Kids lose their minds over this one.
Pair no-carve crafting with printable fun — Halloween quotes for kids make perfect table cards for a carving (or painting) party.
Tier 2: Easy Carves (First-Timers, Kids 9+ With Supervision)
Big shapes, few cuts, maximum charm. These teach the fundamentals: lid, gut, draw, saw, light.
- The classic grin: triangle eyes, triangle nose, jagged smile. The original and still undefeated — nail this and you’ve learned 80% of carving.
- Toothy monster: one big eye, a mouthful of square teeth. Friendly-scary.
- Cat silhouette: pointed ears (triangles), almond eyes, whisker dots etched (not cut). Instant Halloween icon.
- Owl: two big round eyes, a beak triangle, etched feather lines. Wise and wonderful.
- Ghost: wavy-bottomed ghost shape with oval eyes — cut the ghost OUT (negative space) so it glows.
- Moon and stars: crescent moon cut-out with etched stars around it. Elegant and nearly un-mess-up-able.
- Polka-dot pumpkin: drill or poke varied-size holes all over — when lit, it’s a starfield. (A hand drill with a large bit makes this trivial for adults.)
- “BOO” letters: big block letters cut through. Simple, bold, readable from the street.
- Spider web: etched web lines (shaved, not cut) with one cut-out spider. Etching practice disguised as a design.
- Vampire fangs grin: classic face plus two long fang triangles. Small twist, big personality.
Tier 3: Intermediate (Confident Beginners Ready to Level Up)
These introduce the techniques that separate good from great: etching (shaving), layering, and multi-element compositions.
- Haunted house scene: cut-out house silhouette with etched glowing windows, etched moon, cut-out bats. Composition practice: foreground (house), background (moon).
- Witch on broomstick: the iconic silhouette — cut the witch, etch the moon behind her. Silhouettes are forgiving: no facial details to get wrong.
- Day of the Dead sugar skull: etched floral patterns all over (no cut-throughs except eyes) — intricate but low-risk since etching can’t collapse.
- Scarecrow face: stitched smile (etched dashes), triangle nose, patch details. Character carving 101.
- Frankenstein’s monster: flat-top head shape, etched bolts and stitches, heavy brow. Geometry-heavy and very satisfying.
- Black cat in window: arched window frame cut out, cat silhouette inside, etched moon. A scene in a frame — teaches depth.
- Zombie hand emerging: combine a real pumpkin with a faux “buried” arm, or carve a mound scene. Mixed-media thinking.
- Punny pumpkin: carve a phrase — “OH MY GOURD,” “GIVE ‘EM PUMPKIN TO TALK ABOUT” — in etched letters with a simple face. Funny Halloween quotes are a goldmine for pun inspiration.
- Two-face pumpkin: happy face on one side, scary on the other. Rotate for mood. (Carve the second face after the first — structural integrity matters.)
- Ombre etch portrait: shave a simple portrait (a witch’s profile, a skull) at varying depths — deeper shaves glow brighter, creating shading. Your first step into artistry.
Tier 4: Advanced (Showpieces)
For carvers with a few pumpkins under their belt. These demand patience, sharp tools and planning — and they stop foot traffic.
- Layered forest scene: three depth layers — etched distant trees, cut mid-ground branches, a fully cut foreground wolf or owl. True depth in a pumpkin.
- Portrait carving: a recognizable face (a classic monster, a witch) done entirely in varied-depth etching. Study the reference in grayscale — you’re carving light values, not lines.
- Diorama pumpkin: cut a large window in the front, build a tiny scene INSIDE (mini haunted house, graveyard) lit from within. The pumpkin becomes a theater.
- Chained/tortured pumpkin: carve a screaming face and wrap real chain around the pumpkin — mixed media drama.
- Multi-pumpkin scene: three graduated pumpkins telling a story (small ghost pumpkin “haunting” a big house pumpkin). Composition across pumpkins.
- Lace-pattern pumpkin: intricate all-over etched lace or mandala — meditative to carve, breathtaking lit. Use a pin-poke transfer for accuracy.
- Word-art wrap: an entire quote or poem etched around the pumpkin in flowing script. Typography as carving.
- Cannibal pumpkin: a big pumpkin “eating” a small pumpkin (small one wedged in the big one’s mouth). The crowd-pleaser — funny, not gory.
- Stained-glass pumpkin: cut large shapes and back them with colored tissue paper or cellophane from inside — glowing color panels.
- Thunderstorm pumpkin: etched clouds, cut lightning bolts, a flickering LED inside for lightning effect. Atmosphere in a gourd.
Techniques That Make Simple Designs Look Pro
- Etching (skin-shaving): shave the outer skin without cutting through; light glows through thinned flesh. Vary depth for shading. The #1 skill upgrade.
- Vary your light: two LEDs instead of one eliminates harsh hotspots; orange fairy lights give even glow.
- Thin the walls: scrape interior walls to 1 inch — thinner walls glow brighter and carve easier.
- Clean edges: run the saw back through each cut to smooth; ragged edges catch light messily.
- Seal the cuts: petroleum jelly on every cut edge — preserves AND gives a subtle sheen.
- Compose in thirds: place the face slightly above center; designs centered dead-middle look static.
Theme Collections: Match Your Pumpkin to Your Halloween
- Matching your costume: witch hat pumpkin for witches, fang grin for vampires, galaxy paint for astronauts. Browse Halloween costume ideas and design the pumpkin as your costume’s mascot.
- For the party table: mini pumpkins as place-card holders (etched names), a punny pumpkin as the centerpiece, glow-dot pumpkins as ambient table light.
- For the porch: the classic trio — one scary, one funny, one beautiful. Odd numbers, varied heights, every third one lit.
- For kids’ parties: all no-carve tier — painted, stickered, glittered. Safe, fast, and kids take them home.
Preservation Quick Reference
Carve October 29th–30th for Halloween night. Seal cuts with petroleum jelly, soak in bleach-water (1 tsp/gallon) for a few hours before display, keep cool during the day, mist when shriveling. Expect 5–10 days with care, 3 without. Full preservation science is in our beginner tutorial — these are the greatest hits.
Design Your Own Template: A 30-Minute Workshop
The best template is the one you design yourself. Here’s the method:
- Pick a subject with a strong silhouette (15 min): animals, monsters, haunted houses, witches — anything recognizable in pure black-and-white. Print or sketch it at the size of your pumpkin’s face.
- Reduce to 3 values (5 min): mark what will be cut-through black (glows brightest), etched gray (glows softly), and untouched (dark). Three values are enough for stunning depth.
- Add bridges (5 min): check every cut-through island — does it connect to the pumpkin body? Add at least one bridge per island, or convert it to etched.
- Simplify ruthlessly (5 min): remove any detail smaller than your saw blade can turn in. What remains is carveable — and usually stronger for the edit.
Do this once and you’ll never depend on store-bought stencils again. Your pumpkins become originals, not copies.
The Lightning Round: 12 More Ideas
Rapid-fire inspiration, mixed tiers:
- Etched constellation map: poke-star Orion or the Big Dipper, etched lightly — astronomy meets Halloween.
- The screaming pumpkin: wide oval mouth, squeezed-shut eyes — pure Edvard Munch energy, surprisingly easy.
- Pumpkin pie slice: carve a wedge “missing” (actually just etched lines) with a dollop of “whipped cream” — meta and funny.
- Day/night pumpkin: sun etched on one side, moon cut on the other — two moods, one gourd.
- The library pumpkin: etched book spines wrapping around — for the reader’s porch.
- Pixel-art ghost: square-grid ghost in 8-bit style — gamers’ favorite, easy with a grid transfer.
- Etched lace doily: press a paper doily as a stencil, etch through the holes — instant intricate pattern.
- The un-carved “carved” pumpkin: draw the face in glow-in-the-dark paint — looks carved at night, pristine by day.
- Stacked mini totem: three mini pumpkins, each with one feature (eyes / nose / mouth) — assemble the face vertically.
- The mirror pumpkin: carve the face, then place a mirror behind it inside — the glow doubles.
- Herb-garden pumpkin: hollow a pumpkin and plant succulents in it — living decor that lasts months.
- The farewell pumpkin: carve “SEE YOU NEXT YEAR” — the perfect November 1st send-off photo.
Carving for Contests: How to Win
Neighborhood and office pumpkin contests reward specific things. Play to win:
- Originality beats skill: judges remember the only pun-pumpkin or the only diorama, not the tenth good witch.
- Light it for the venue: contests are often judged in lit rooms — bring your own LED setup so your pumpkin glows even under fluorescents.
- Name it: a title card (“Sir Reginald P. Gourd, Esq.”) makes judges smile before they even look closely.
- Photograph it right: if judging is by photo, shoot at dusk (not full dark — you want the pumpkin’s surface visible AND the glow), from slightly below, with a clean background.
- Enter the right category: funniest and most creative have fewer entries than scariest — better odds.
- Finish early: a fresh pumpkin on judging day beats a 5-day-old masterpiece. Time your carve for the contest, not for Halloween.
Templates by Occasion
- Office contest: go funny — pun pumpkins and pop-culture riffs win break rooms. Keep it work-appropriate (no gore near the HR department).
- Classroom: all no-carve tier — painted minis kids take home. One pumpkin per kid, zero blades, total joy.
- Wedding (October weddings are a thing): etched monograms and lace patterns in white pumpkins — elegant, romantic, unforgettable table decor.
- Neighborhood block party: the classic trio (scary, funny, beautiful) at the event entrance — sets the tone for the whole street.
- Porch for trick-or-treaters: big bold faces readable from the sidewalk — detail is wasted at 20 feet; go graphic.
- Instagram/social: the galaxy paint, the diorama, the stained-glass — designs that photograph dramatically. Shoot at dusk for the glow-plus-detail sweet spot, and share with your Halloween social media post.
From Mini to Giant: Scaling Designs
- Minis (under 6 inches): one feature only — a single eye, a tiny ghost, polka dots. Fingers can’t do detail at this scale; simplicity wins.
- Medium (the standard): the full range in this guide. The sweet spot for every tier.
- Giants (50+ lbs): think architecture — the design must read from 30 feet away. Enormous simple faces, huge cut-out scenes, or all-over etched texture. Gutting a giant is a workout; recruit help and allow double time. Transport it BEFORE carving — a carved giant is fragile.
- Scaling rule: when enlarging a template, enlarge the bridges too — thin connections that work at 10 inches snap at 30.
Your 5-Year Carving Progression Plan
Carving skill compounds. Here’s the path from first pumpkin to local legend:
- Year 1 — Foundations: master the classic grin and one Tier 2 design. Learn gutting, the pin-poke transfer, and preservation basics. Goal: a pumpkin that lasts to Halloween night.
- Year 2 — Etching: add the skin-shaving technique to everything. Re-carve your Year 1 designs with etched details and watch them transform. Try one intermediate scene.
- Year 3 — Composition: multi-element designs — the haunted house, the witch silhouette, the two-face. Learn depth: foreground cut, background etch. Enter your first contest.
- Year 4 — Originals: design your own templates with the 30-minute workshop above. Carve a multi-pumpkin scene. Teach a friend — teaching cements skill.
- Year 5 — Artistry: portraits, dioramas, layered forest scenes. You’re the person neighbors ask for advice — and your porch is the one on the local news.
Every master carver started with a lopsided triangle grin. The only difference between Year 1 and Year 5 is pumpkins carved — so carve more of them. Host the party, enter the contest, try the scary tier. The pumpkin is temporary; the skill is forever.
Quick-Pick Finder: “Just Tell Me What to Carve”
- “I’ve never carved before”: the classic grin (Tier 2, #1). Twenty minutes, timeless result.
- “I have 10 minutes”: polka-dot drill pumpkin or “BOO” letters. Maximum glow per minute.
- “Kids are helping”: toothy monster or cat silhouette — big shapes, forgiving lines.
- “I want cute, not scary”: owl, ghost, or donut-painted no-carve.
- “I want scary”: vampire fangs grin now; zombie hand or thunderstorm when you’re ready for Tier 4.
- “I want funny”: punny pumpkin or cannibal pumpkin — the party talkers.
- “I want beautiful”: moon-and-stars, lace etch, or white-pumpkin monogram.
- “I want to win the contest”: diorama pumpkin or stained-glass — originals judges remember.
- “No knives at all”: galaxy paint, mummy wrap, or chalkboard pumpkin — zero blades, full charm.
- “I have a giant pumpkin”: enormous simple face or all-over etched texture — design for 30-foot viewing.
Pick one, gather your tools, and carve. The perfect pumpkin is the finished one — and every pumpkin you carve teaches your hands something the last one didn’t. Save this guide, work through a tier per year, and watch your porch become the one the whole street slows down for. Happy carving, and may your jack-o’-lanterns glow bright all Halloween night!
In Pictures: Easy Pumpkin Carving Ideas and Templates
Not every pumpkin needs a knife — stickers, paint, washi tape, and thumbprint ghosts give kids (and carving-shy adults) a seat at the table.
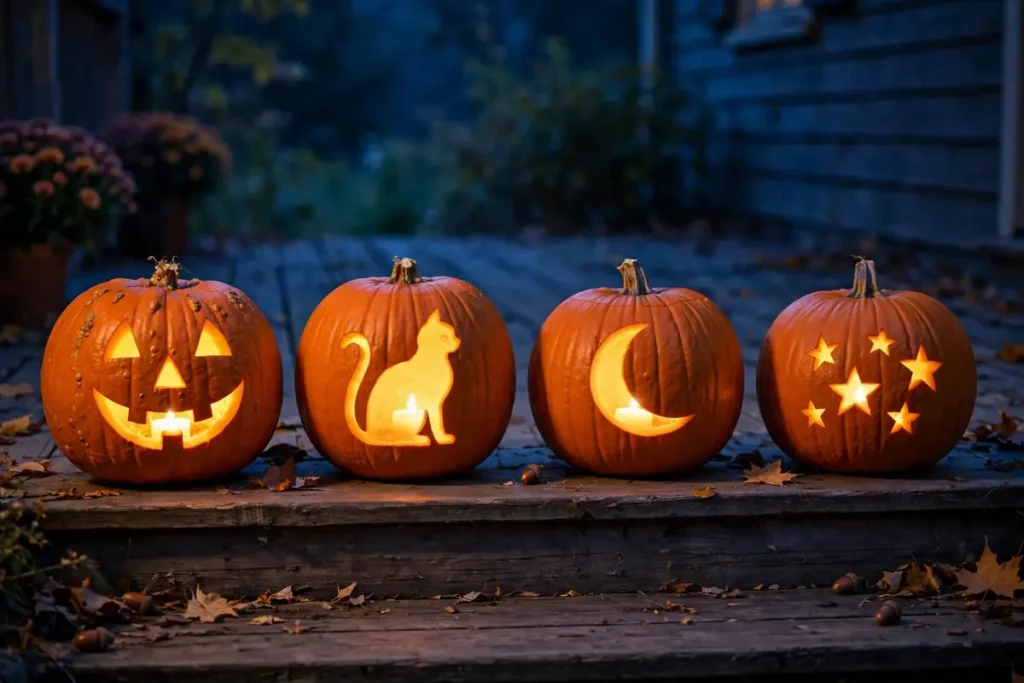
Simple designs, big glow: a porch row of beginner jack-o’-lanterns — smiling faces, a cat silhouette, moons, and stars.
Watch: Easy Pumpkin Carving Ideas and Templates
Easy pumpkin carving designs and template ideas — from classic faces to cute cats — with beginner-friendly techniques anyone can follow.
At a Glance: Easy Pumpkin Carving Ideas and Templates
Beginner and no-carve options from this guide.
| Idea | How it works | Knife needed? |
|---|---|---|
| The classic grin | Triangle eyes, triangle nose, jagged smile | Yes — simplest carve |
| Pin-poke transfer | Tape on a printed pattern, poke along the lines, carve the dots | Yes — easy detail |
| Sticker face | Foam sticker eyes, mouths, and hats on the pumpkin | No |
| Painted galaxy | Sponge blue and purple acrylic, splatter white stars | No |
| Mummy wrap | Wrap in gauze, glue on googly eyes | No |
| Thumbprint ghosts | White paint thumbprints, tiny faces drawn on each | No |
| Washi-tape mummy | Tape strips in geometric patterns | No |
| Chalk-marker doodles | Liquid chalk markers draw vividly and wipe off | No |
Frequently Asked Questions
What are the easiest pumpkin carving ideas for beginners?
The classic triangle-eye grin, a toothy monster face, a cat silhouette, or a moon-and-stars design. All use big simple shapes with few cuts. Start with one of these to learn the fundamentals — lid, gutting, sawing, lighting — before attempting detailed templates.
Where can I find free pumpkin carving templates?
Free printable templates are widely available from craft websites, pumpkin growers’ associations and parenting blogs — search for your theme plus “free pumpkin stencil.” Whatever template you find, use the pin-poke transfer method in this guide for clean results, and check that every cut-out “island” has a bridge connecting it to the pumpkin.
How do I transfer a template onto a pumpkin?
Tape the printed design to the pumpkin and poke along all lines with a pin, then remove the paper and connect the dots with marker — the pin-poke method. For complex designs, graphite transfer (pencil-rubbed back, traced firmly) or projecting the image onto the pumpkin in a dark room also work well.
What can kids do instead of carving pumpkins?
Plenty: sticker faces, chalk-marker doodles, painted designs (galaxy, donut, mummy wrap), glitter, washi tape patterns and thumbprint ghosts — the whole no-carve tier in this guide. No-carve pumpkins also last weeks instead of days. Kids 9+ can graduate to simple carves with direct adult supervision.
How do I make my carved pumpkin last longer?
Carve 2–3 days before Halloween, coat all cut edges with petroleum jelly, soak in cold bleach-water before displaying, and keep the pumpkin cool during the day. These steps extend a carved pumpkin’s life from about 3 days to 7–10 days.
What should I do with leftover pumpkin after carving?
Roast the seeds (rinse, oil, salt, 300°F/150°C, 30–40 minutes), compost the pulp, and use scraped flesh in soups or pies. Carving night pairs perfectly with a family movie — and if you’re planning the full weekend, Halloween events for kids round out the festivities.